Static electricity |
Electrostatic discharge (ESD) can permanently damage your laptop. Ware an ESD wrist strap when you work with the internal components. If it's not available, get rid of the static by touching grounded metal objects (grounded appliance) once in a while. |
| |
Use good quality tools |
Get yourself a set of good quality precision screwdrivers, preferably magnetized. I've been using Wiha's for years and couldn't be happier. |
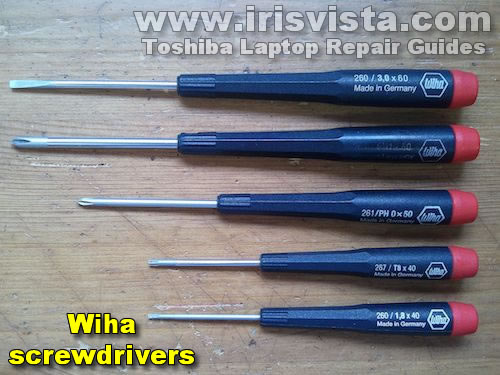 |
A bad screwdriver can easily strip a screw and make it very hard to remove. |
| |
Be organized |
Keep all removed screws organized because they are all different. You can use small paper cups or a simple screw organizer like one shown on the picture. |
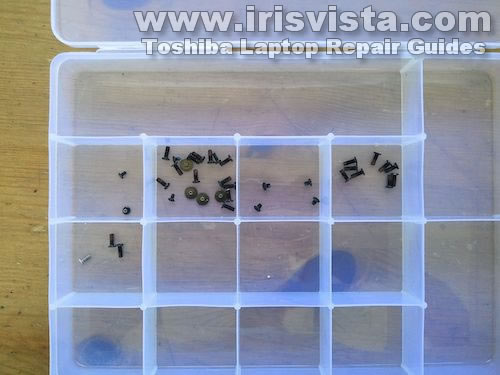 |
Use name tags, for example: hard drive screws, keyboard screws, bottom screws, top cover screws etc...
You can draw a diagram for removed screws. As an example I show a diagram of screws removed from the bottom of a laptop. This will make your life much easier during the reassembly process. |
 |
Using a wrong length screw in a wrong place can damage the laptop case or even short and fry the motherboard. |
| |
Removing memory modules |
The memory module secured inside the slot by latches located on both sides of the slot. |
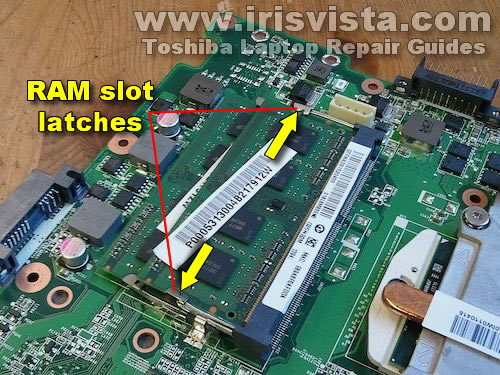 |
In order to unlock the memory module spread both latches with your fingers just enough to release the module. |
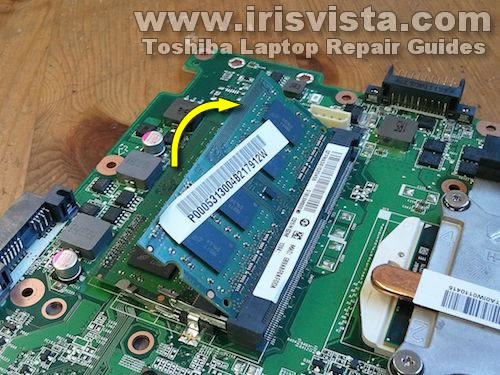 |
When the memory module is unlocked, it will pop up at about 30 degree angle. |
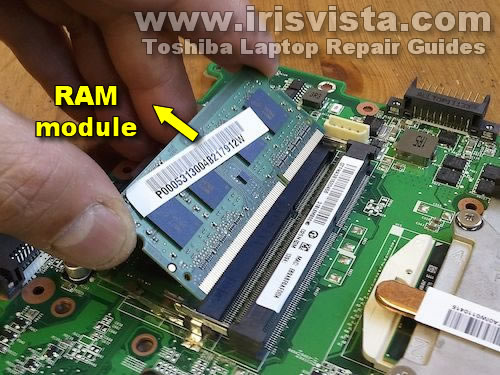 |
Pull the module from the slot by the edges. Do not touch gold contacts. |
| |
Disconnecting cables |
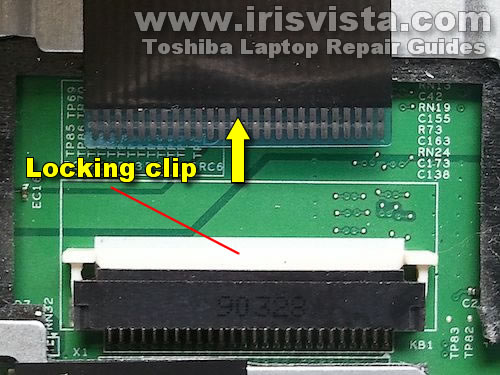
On this picture you see a very typical cable connector. This type of connector frequently used for keyboard cables. |
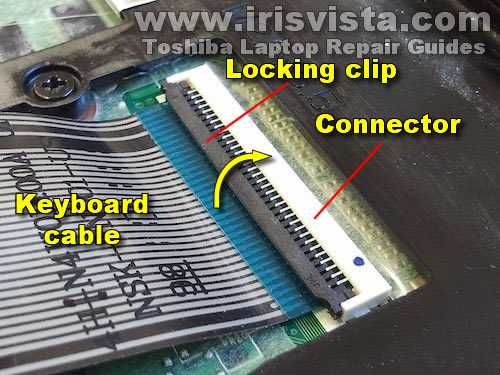 |
The ribbon cable is secured inside the connector by a locking clip. You unlock it by lifting up the locking clip with your fingernail. The clip opens up at about 90 degree angle. After that you can pull the cable out. |
 |
|
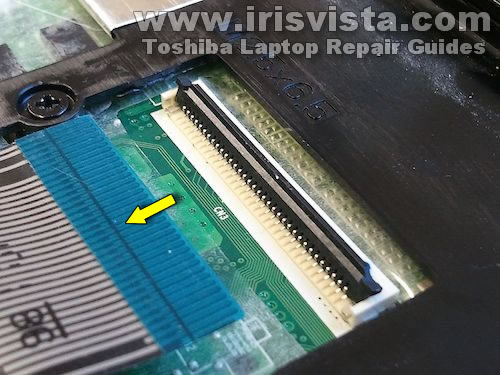
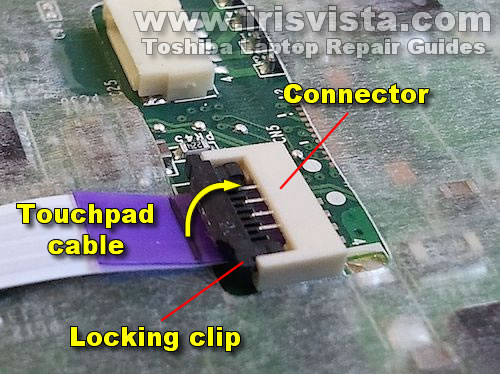
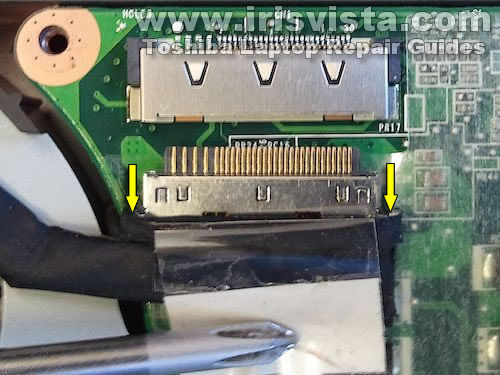
Here's another type of connector commonly used in laptops. In this connector the ribbon cable seated between the base and locking clip. |
 |
Unlock this connector by sliding the locking clip about 1/16 of an inch to the shown direction (2 yellow arrows). After it's unlocked, you can pull the cable out. |
 |
Do not apply too much force or you can separate the locking clip from the base, it must remain attached as shown on the picture above. |
| |
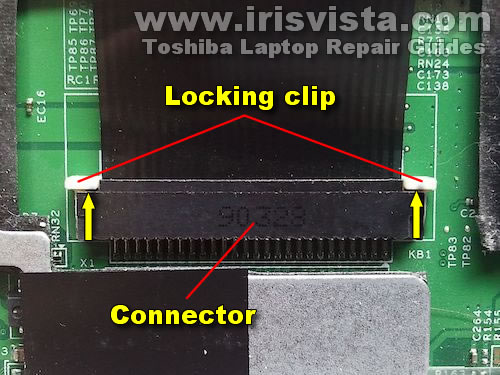
Here's a smaller version of the connector we discussed in the very first example. |
 |
This type frequently used for touchpads, power button boards, audio boards etc... |
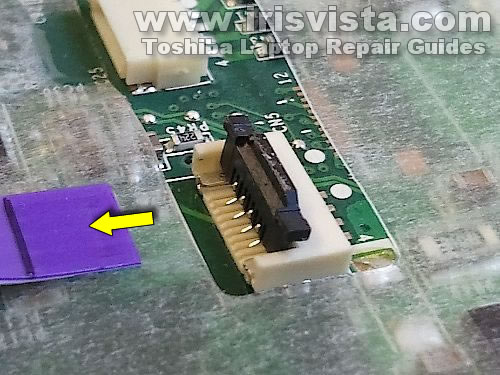 |
Unlock the connector by lifting up the locking clip and remove the cable. |
| |
On the following picture you can see the most common type of the display cable connector. |
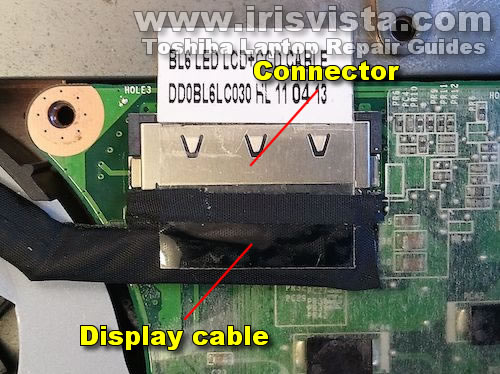 |
Unplug this connector by the edges. |
 |
| |
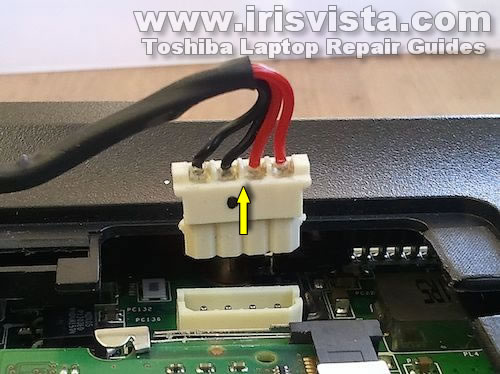
In the next example you can see a very common DC power jack connector. |
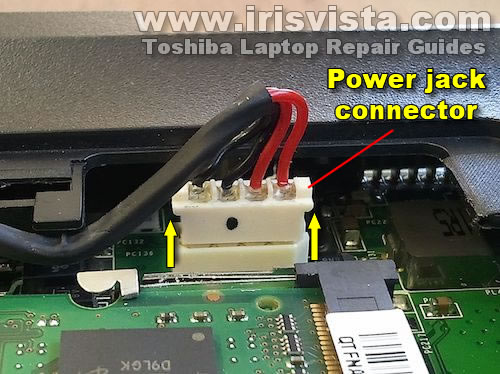 |
Unplug the male part from the female part. |
 |
| |
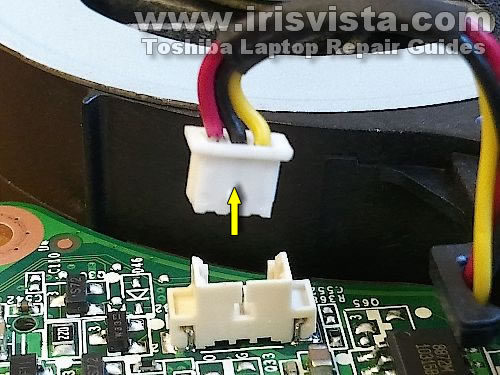
The following connector frequently used for the fan cable. This connector positioned vertically and very similar to the DC power jack connector but smaller. |
| NEVER pull by the wires! Unplug it by the edges. |
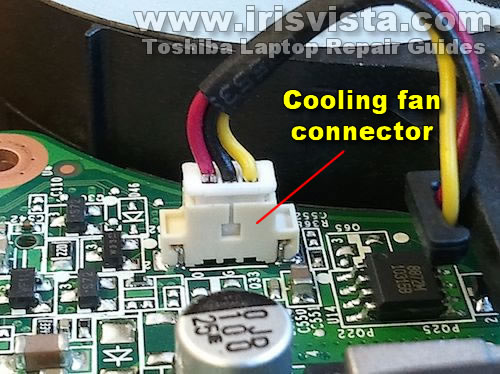 |
Here's how you disconnect it from the motherboard. |
 |
| |
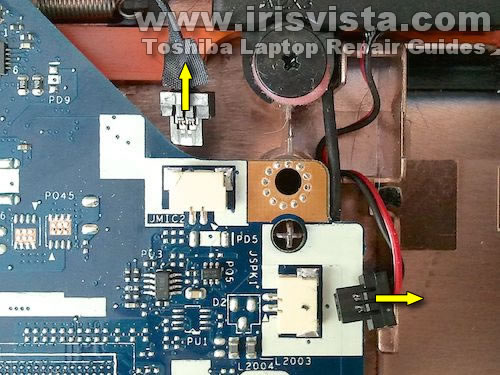
The speakers, media control board use even smaller connectors. Usually they are positioned horizontally. |
 |
| |
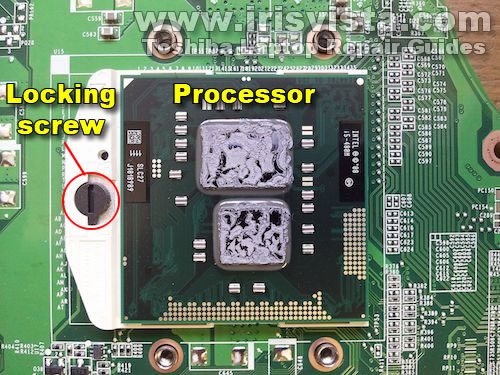
Removing the processor |
In most newer laptops the processor is soldered to the motherboard and cannot be removed or replaced. If it's not soldered, you can remove the processor by unlocking the socket.
Unlock the socket by turning the locking screw 180 degrees from the "Locked" mark to the "Unlocked" mark. It's hard to see on the picture but normally you find these marks stamped on the socket. |
 |
Carefully lift up the processor by the edges and remove it from the socket. |
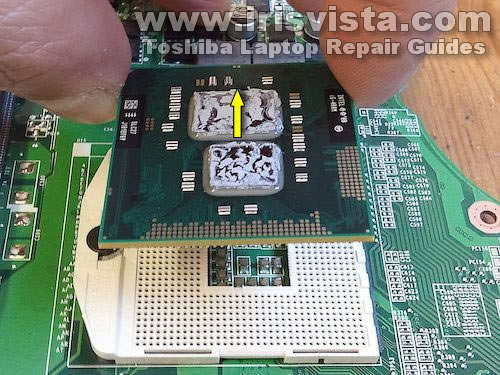 |
Do not leave the processor outside the socket if you don't have to. It has lots of very thin pins that can be easily damaged.
Do not forget the lock the socket after the processor installed back in place. Otherwise your laptop will not work. |
| |
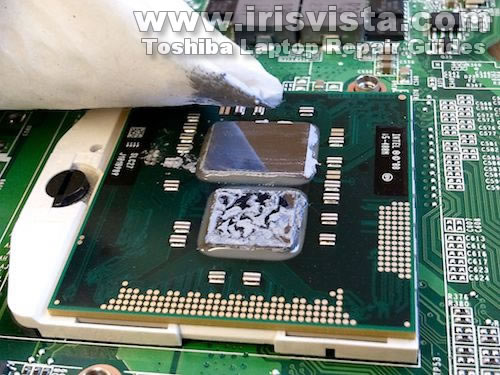
Replacing thermal grease |
If you have to apply new thermal grease on the processor, do it while the processor is secured in the socket.
To remove the old thermal grease you can use a paper towel and 96-99% isopropyl alcohol. Clean up the shiny surface that faces the heat sink. If there is some old grease left on the sides, it's OK. The sides do not have to be perfectly clean. |
 |
Also, remove the old thermal grease from the heat sink. |
 |
Apply a small drop of new thermal grease in the middle of the shiny surface on the processor. It has to be just enough to cover the surface when the heat sink installed back in place. |
 |
| |
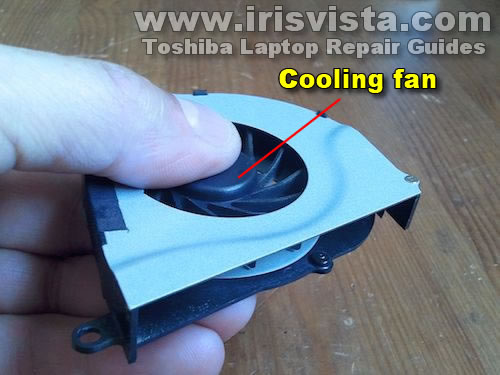
Cleaning the cooling module |
If you removed the cooling fan for cleaning, you can blow off dust using an air compressor or canned air.
Block the fan vents with your finger while cleaning it. Very high RPM can damage the fan bearings. |
 |
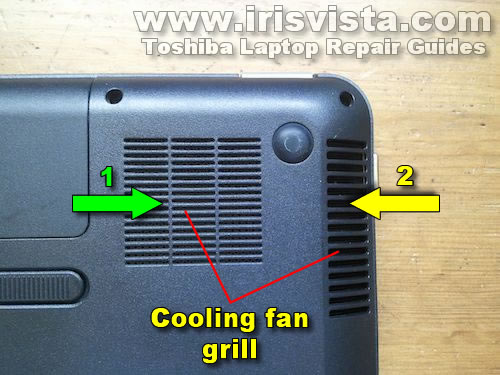
If your laptop runs hot, in most cases you can clean up the cooling module without taking it apart.
On the bottom of the laptop (most models) you will find the cooling fan grills. Blowing air into the grill on the bottom (green arrow) will remove most dust from the cooling module. After that switch the direction and blow air into the grill on the side.
This cleanup should be enough to cure the overheating problem. |
 |
If the cooling module clogged very badly, you'll have to disassemble the laptop and clean up the fan manually. |
|
|
