|
Toshiba Satellite L655, L655D, L650, L650D disassembly. |
|
|
 |
STEP 1
Turn off the laptop, unlock and remove the battery. |
| |
|
 |
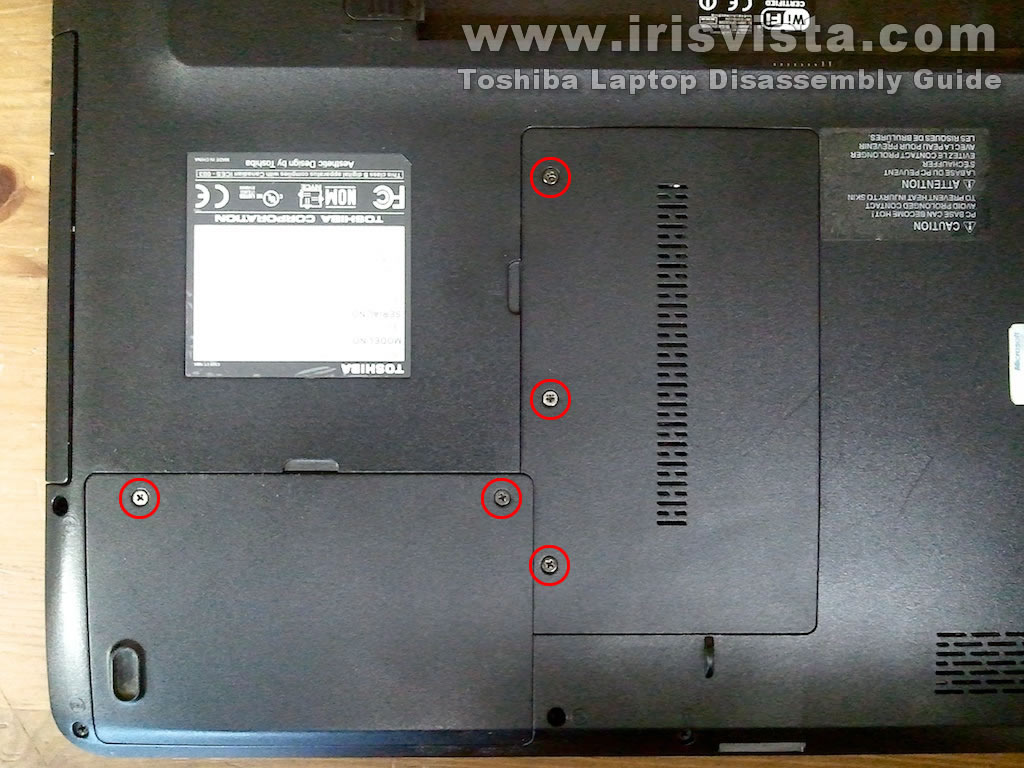
STEP 2
Unscrew five screws securing service covers on the bottom of the laptop.
Remove both service covers.
|
| |
|
 |
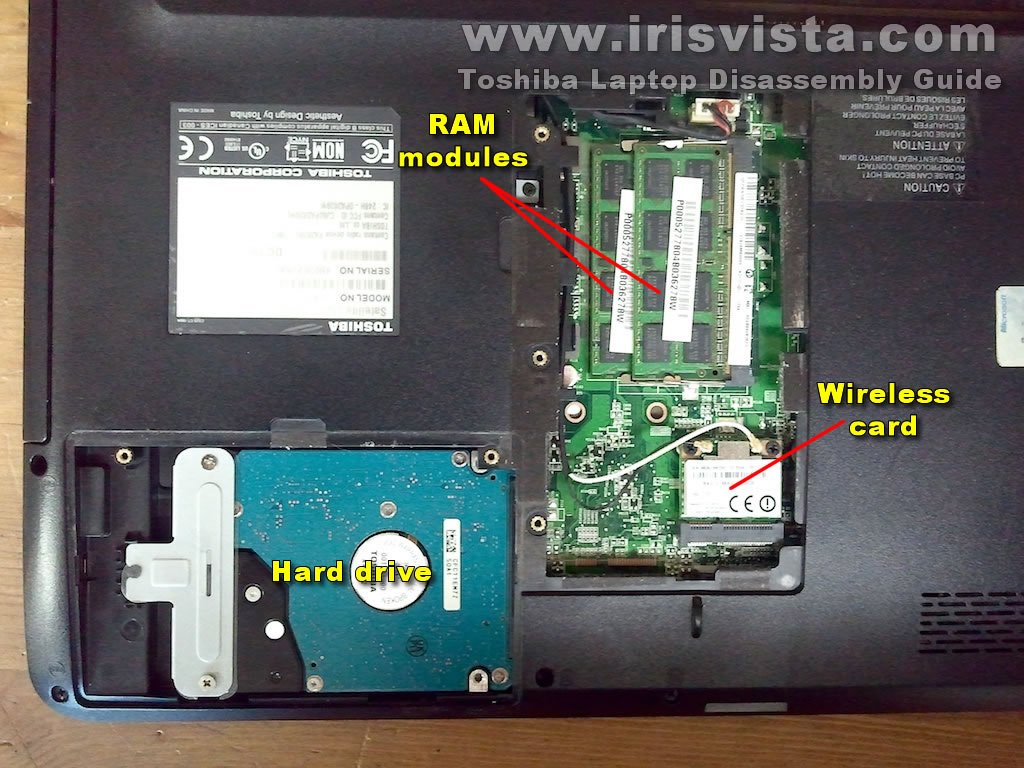
STEP 3
Now you can access both RAM modules, hard drive and wireless card.
I'll leave RAM modules and wireless card connected but remove the hard drive.
|
| |
|
 |
STEP 4
Remove one screw securing the hard drive.
Slide the hard drive to the left to disconnect it from the motherboard.
Lift up and remove the hard drive from the laptop. |
| |
|
 |
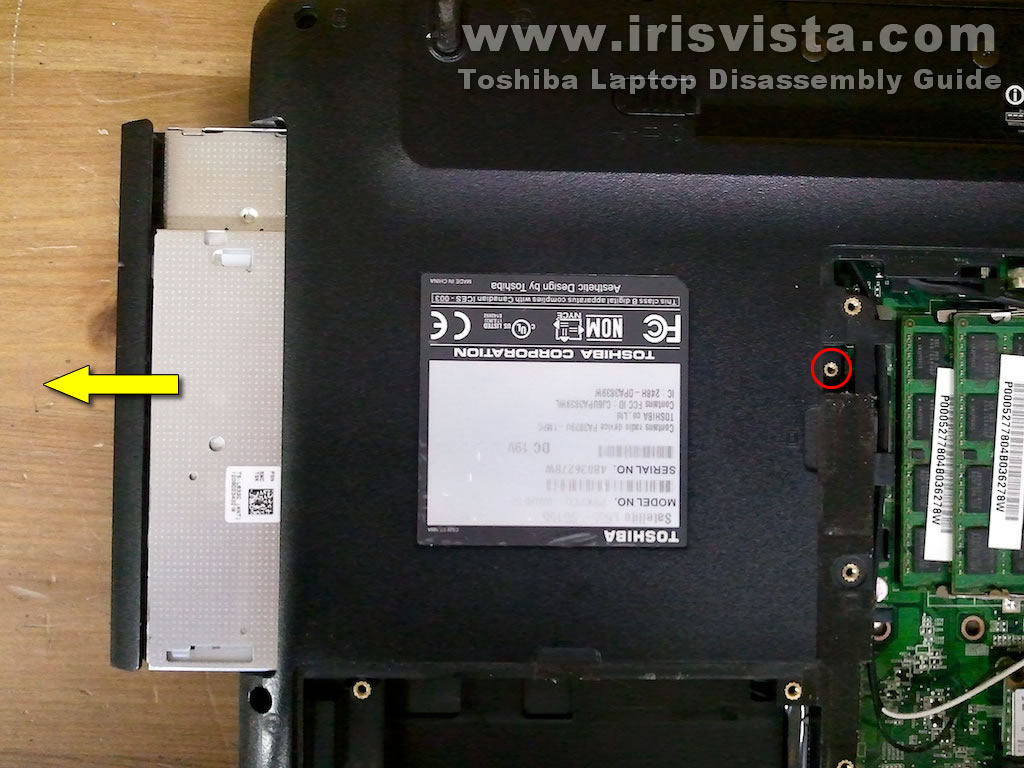
STEP 5
Remove one screw securing the optical drive.
Pull the optical drive to the right and remove it from the laptop. |
| |
|
 |
STEP 6
Remove one screw securing the keyboard bezel.
This screw located in the battery compartment.
|
| |
|
 |
STEP 7
Insert a sharp object under the keyboard bezel and lift up the bezel.
Continue removing the bezel with your fingers. |
| |
|
 |
STEP 8
Remove four screws securing the keyboard. |
| |
|
 |
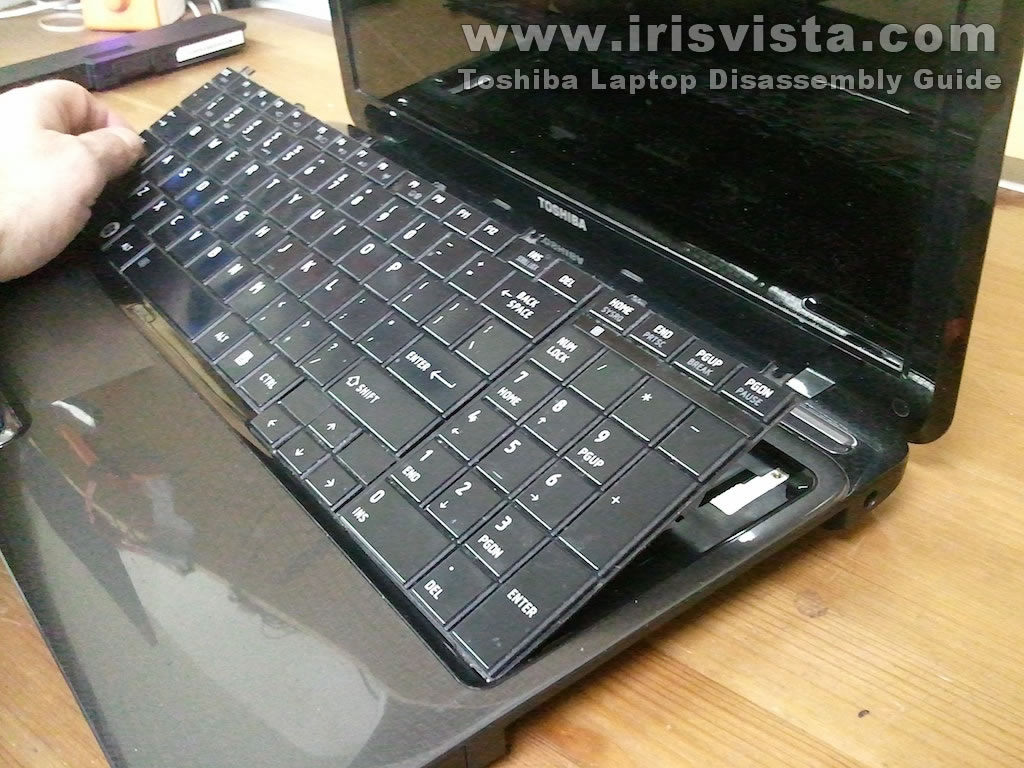
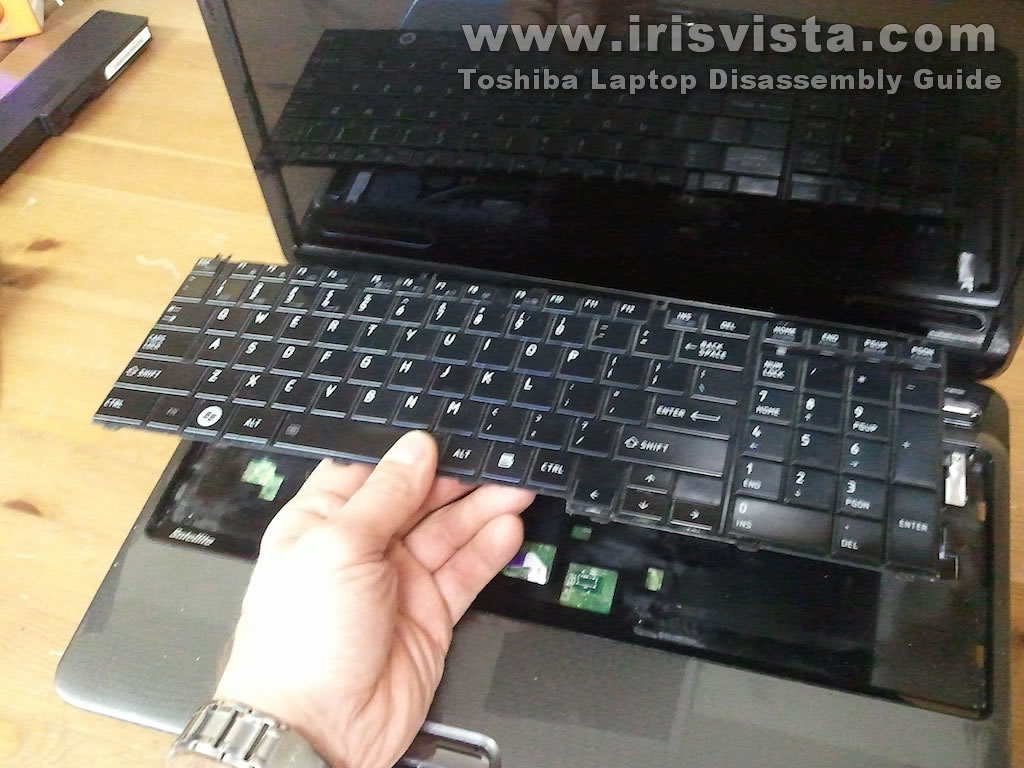
STEP 9
Carefully lift up the keyboard and place it upside down on the palm rest.
|
| |
|
 |
STEP 10
Now you can access the keyboard cable and disconnect it from the motherboard.
In the following two steps I explain how to unlock the connector and release the cable. |
| |
|
 |
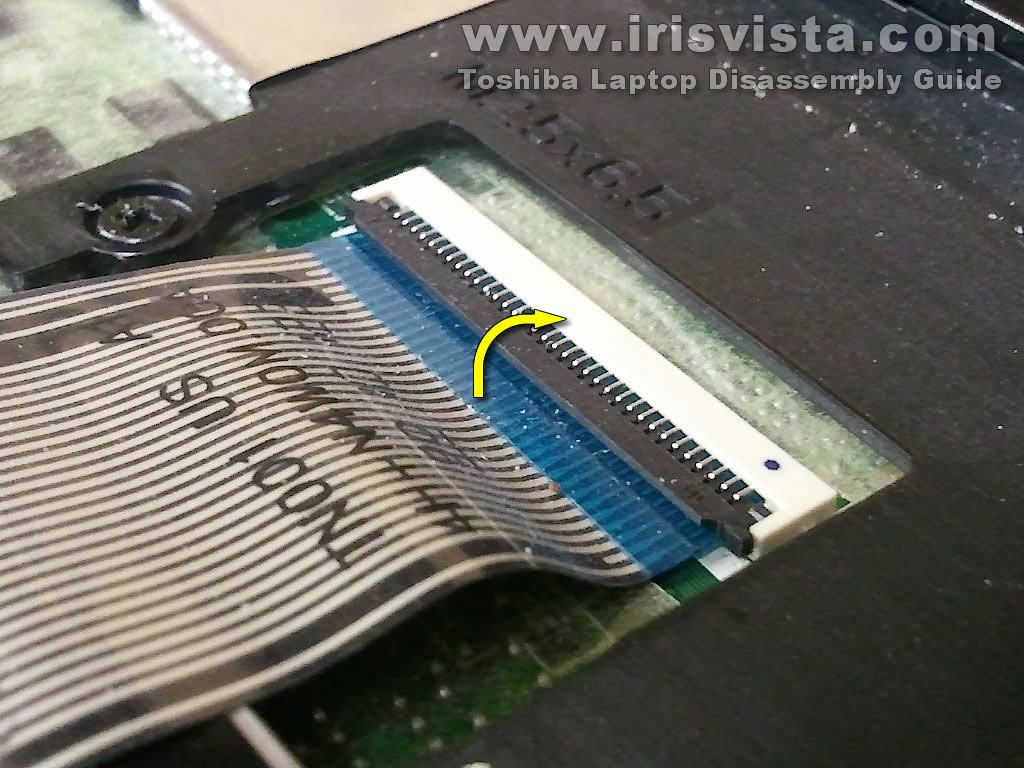
STEP 11
Lift up the left side of the cable retainer with your fingernail.
The retainer will open up at a 90 degree angle. |
| |
|
 |
STEP 12
Pull the keyboard cable from the connector. |
| |
|
 |
STEP 13
Now you can remove the laptop keyboard completely. |
| |
|
 |
STEP 14
Remove all screws from the bottom of the laptop. |
| |
|
 |
STEP 15
Remove two screws located in the optical drive compartment. |
| |
|
 |
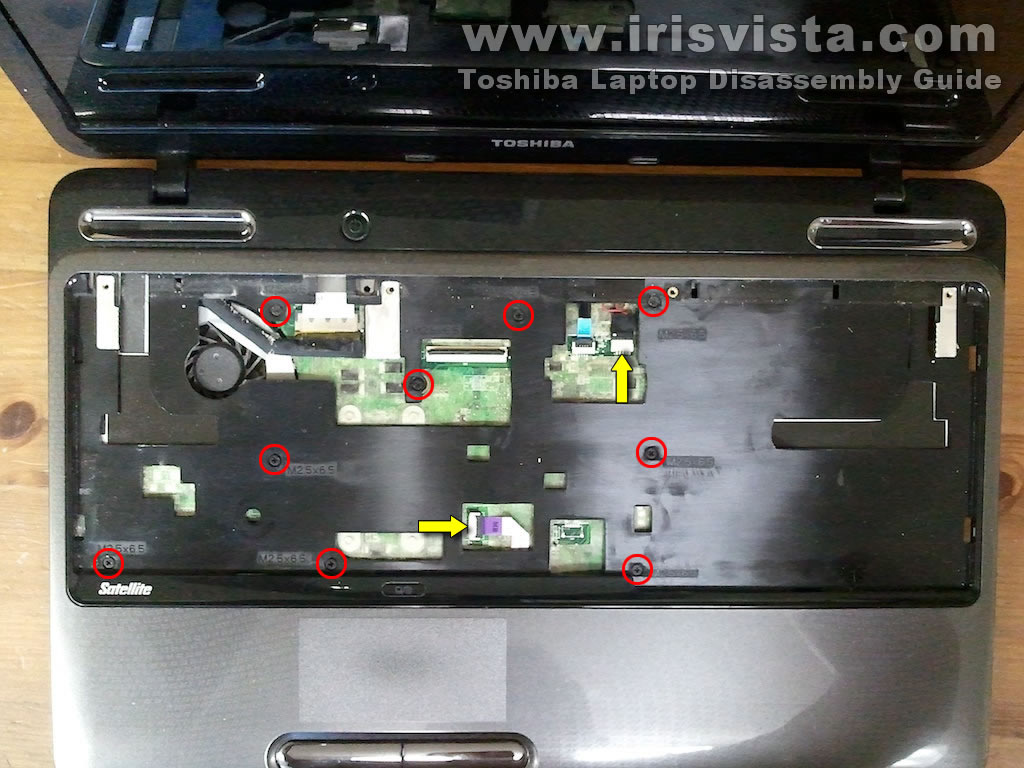
STEP 16
Remove screws securing the top cover assembly.
Disconnect the speaker cable and trackpad cable from the motherboard.
The trackpad cable connector unlocks the same way as the keyboard connector. |
| |
|
 |
STEP 17
Here's how to disconnect the speaker cable.
Simply unplug the connector from the motherboard.
|
| |
|
 |
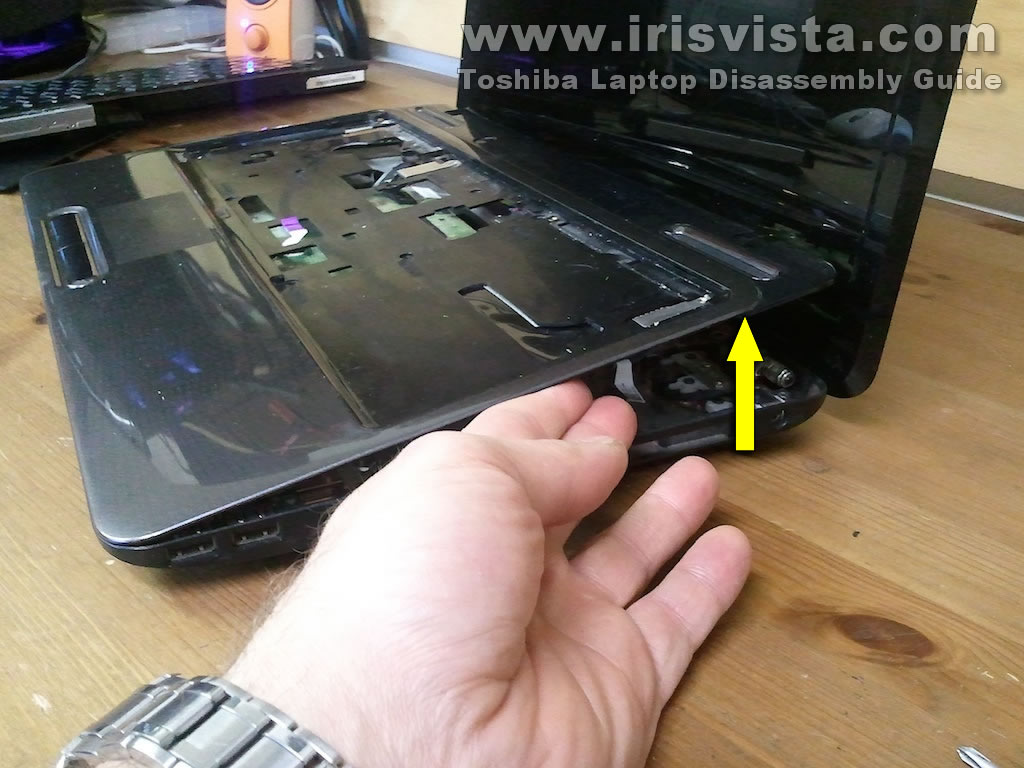
STEP 18
Start separating the top cover assembly from the rest of the laptop. |
| |
|
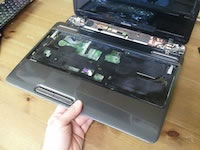 |
STEP 19
Remove the top cover assembly. |
| |
|
 |
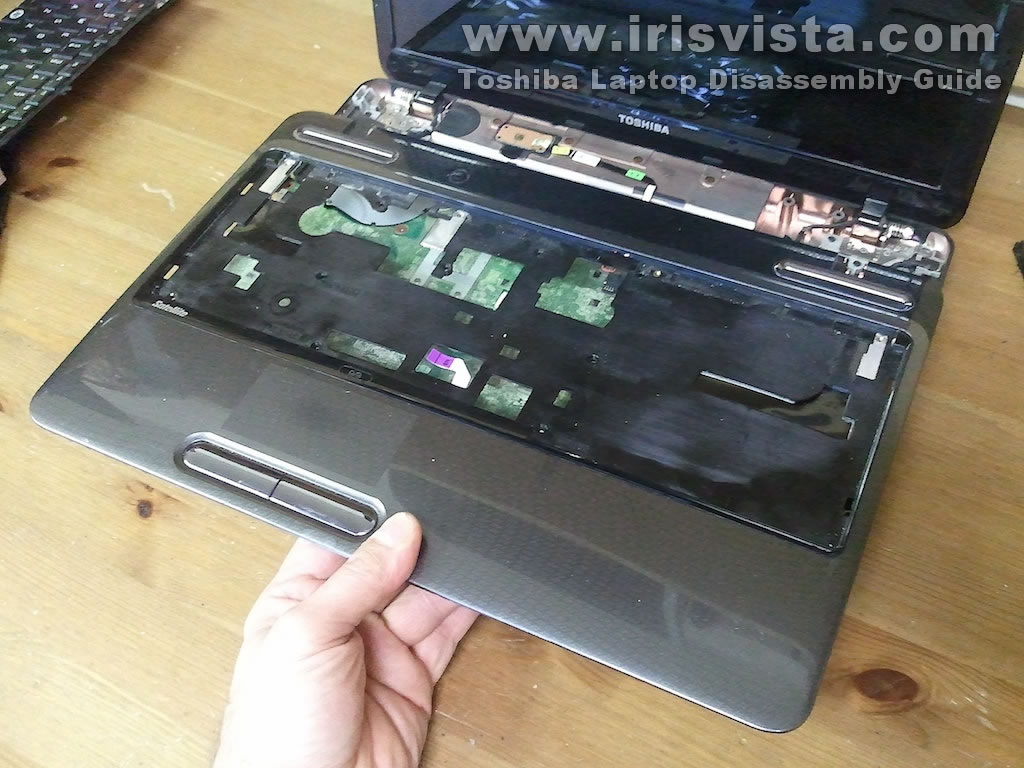
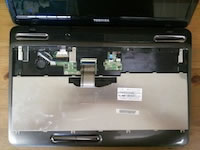
STEP 20
Here's the bottom side of the top cover assembly.
Here you can access both speakers, trackpad and trackpad button board. |
| |
|
 |
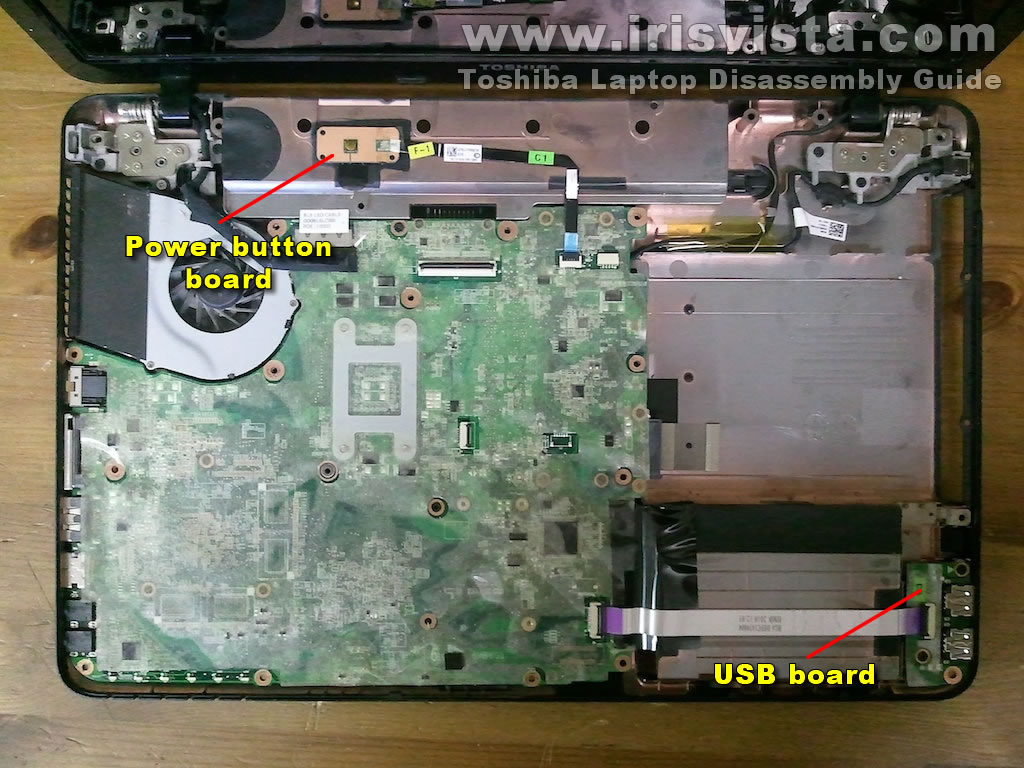
STEP 21
The the top cover assembly removed you can get access the power button board and USB board.
In the following steps I show how to remove the motherboard. |
| |
|
 |
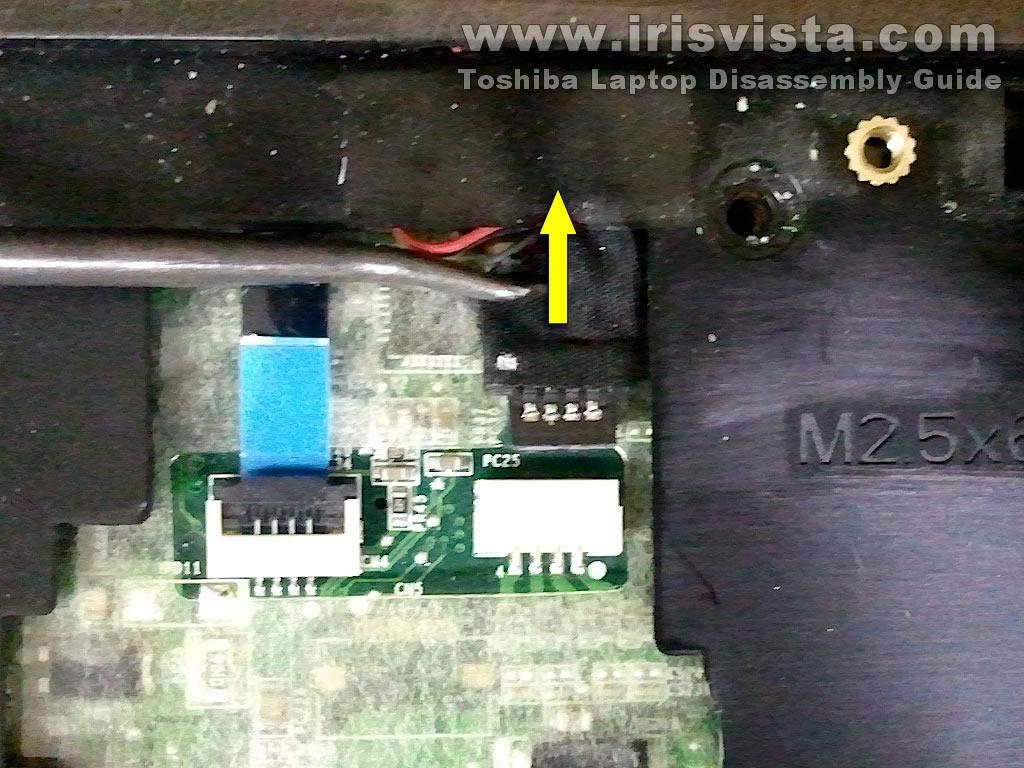
STEP 22
Unplug the DC power jack cable from the motherboard.
This connector located on the bottom of the laptop in the RAM compartment. |
| |
|
 |
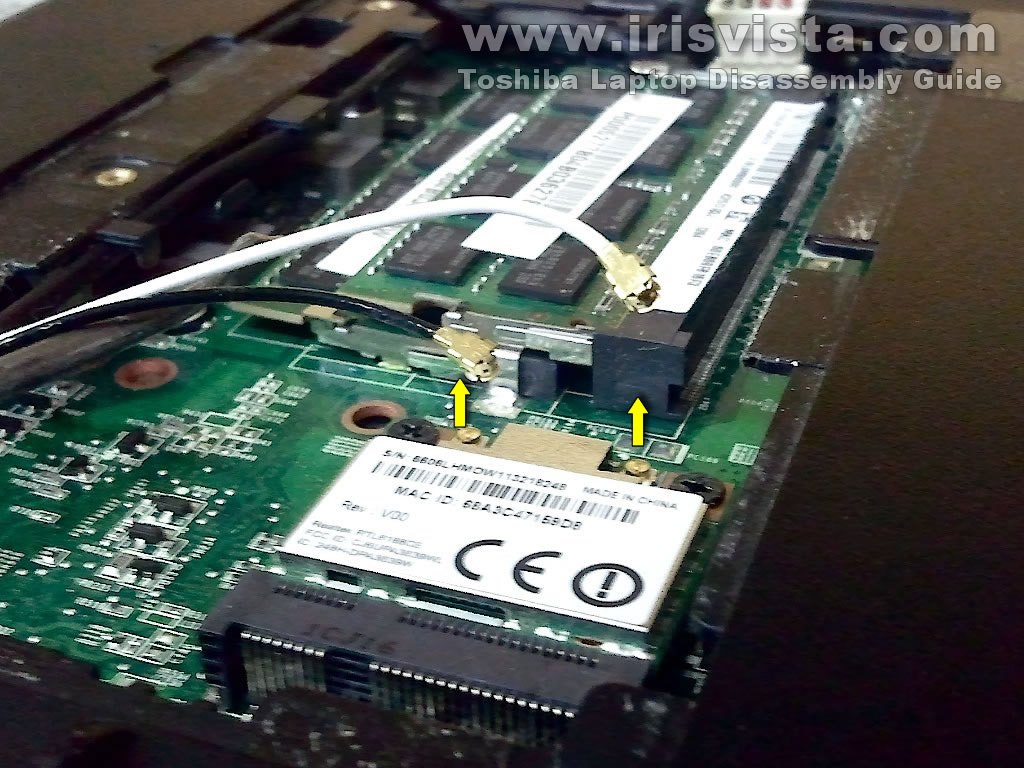
STEP 23
Disconnect both antenna cables from the wireless card. |
| |
|
 |
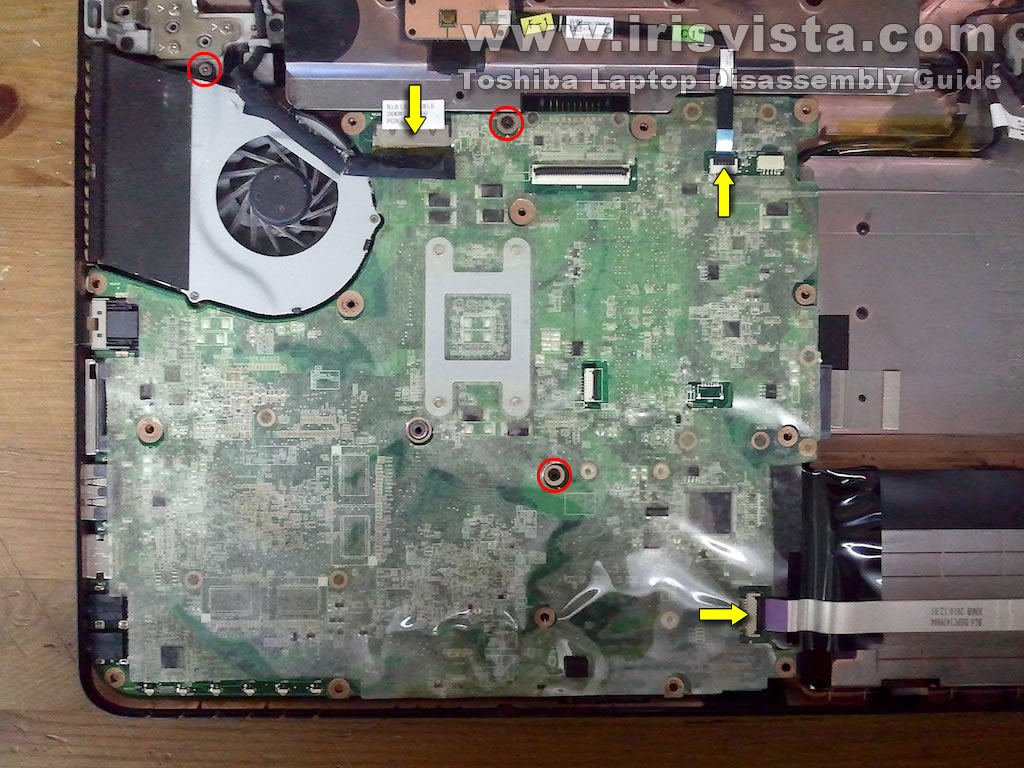
STEP 24
Remove three screws securing the motherboard assembly.
Disconnect the display cable, power button board cable and USB board cable from the motherboard. |
| |
|
 |
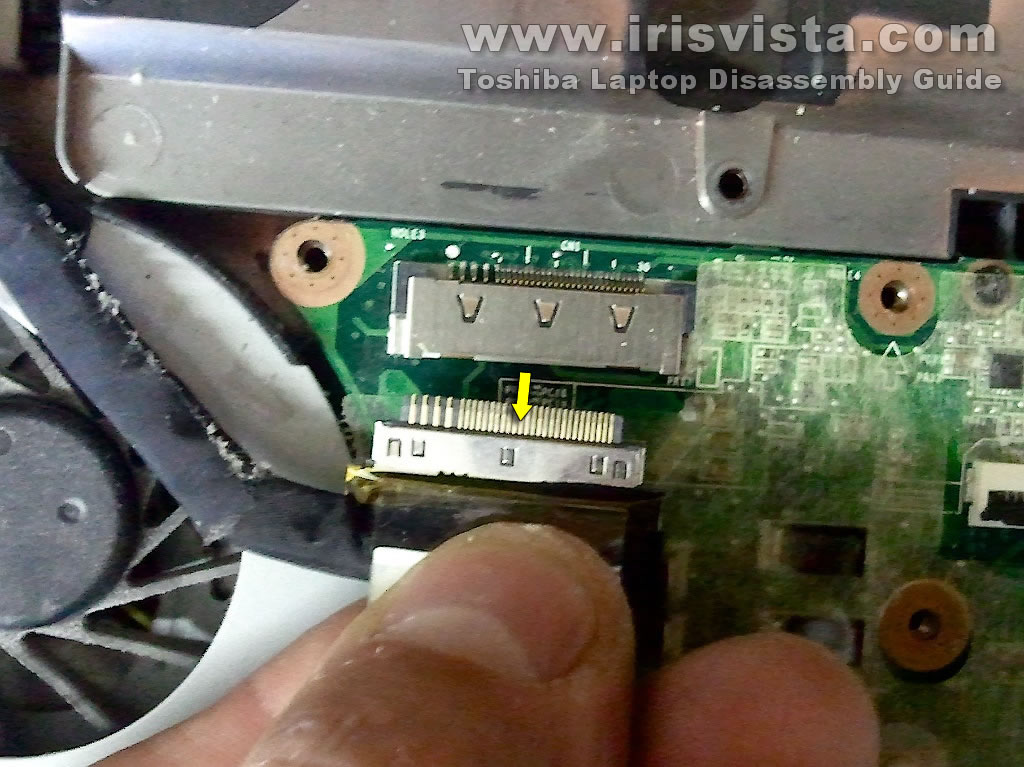
STEP 25
Here's how to disconnect the display cable. |
| |
|
 |
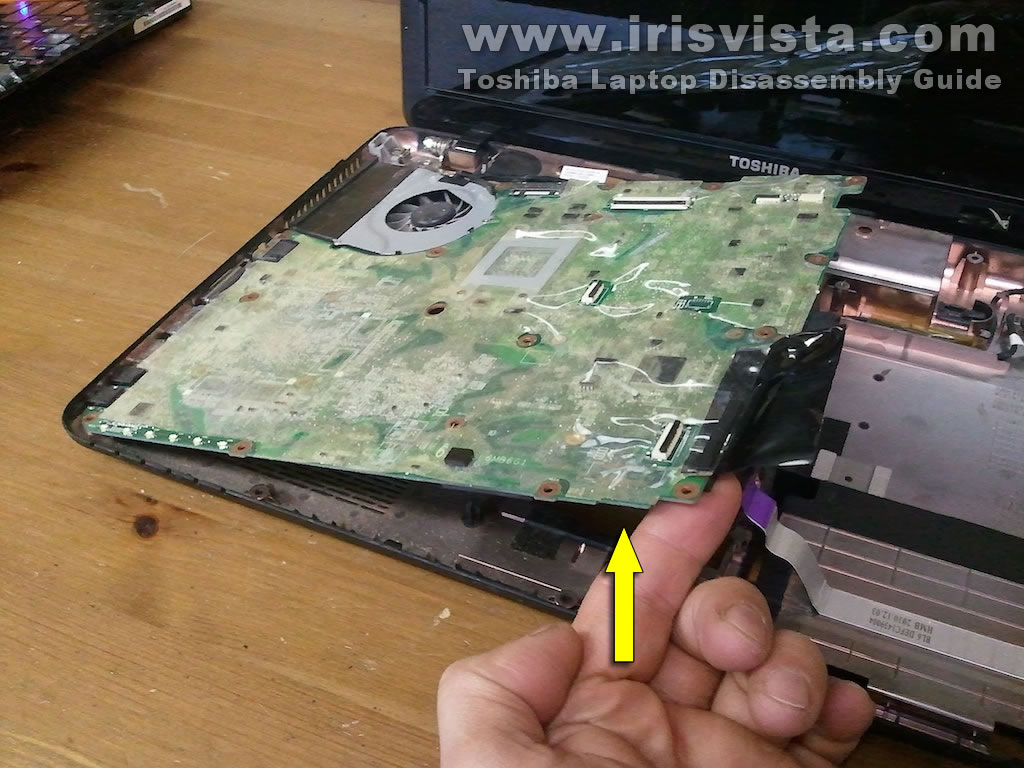
STEP 26
Start removing the motherboard from the laptop case as it shown on the picture.
Lift up the right side of the motherboard and remove it from the case. |
| |
|
 |
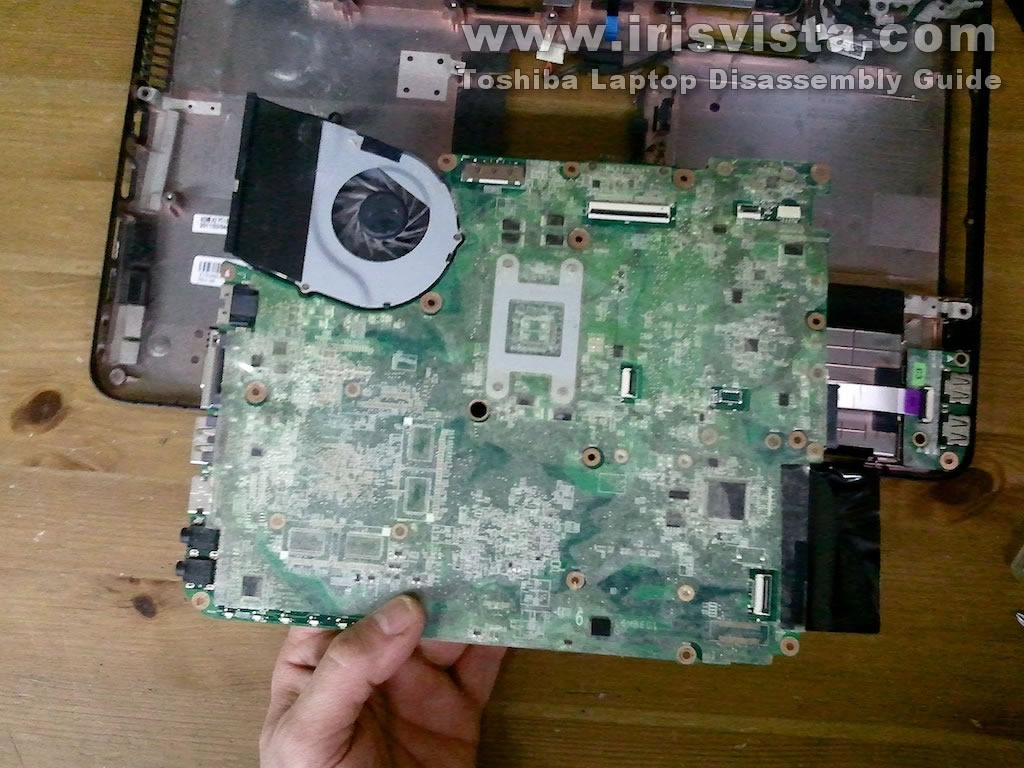
STEP 27
The motherboard has been removed. |
| |
|
 |
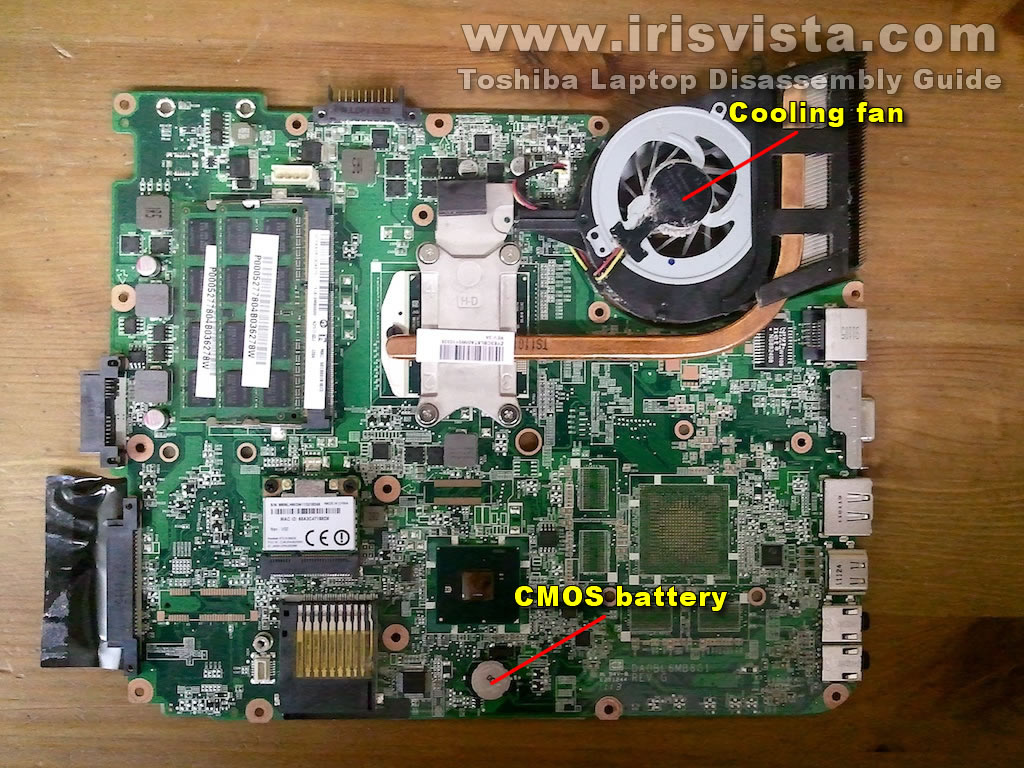
STEP 28
When the motherboard removed from the laptop you can get access to the cooling fan assembly and CMOS battery.
|
| |
|
 |
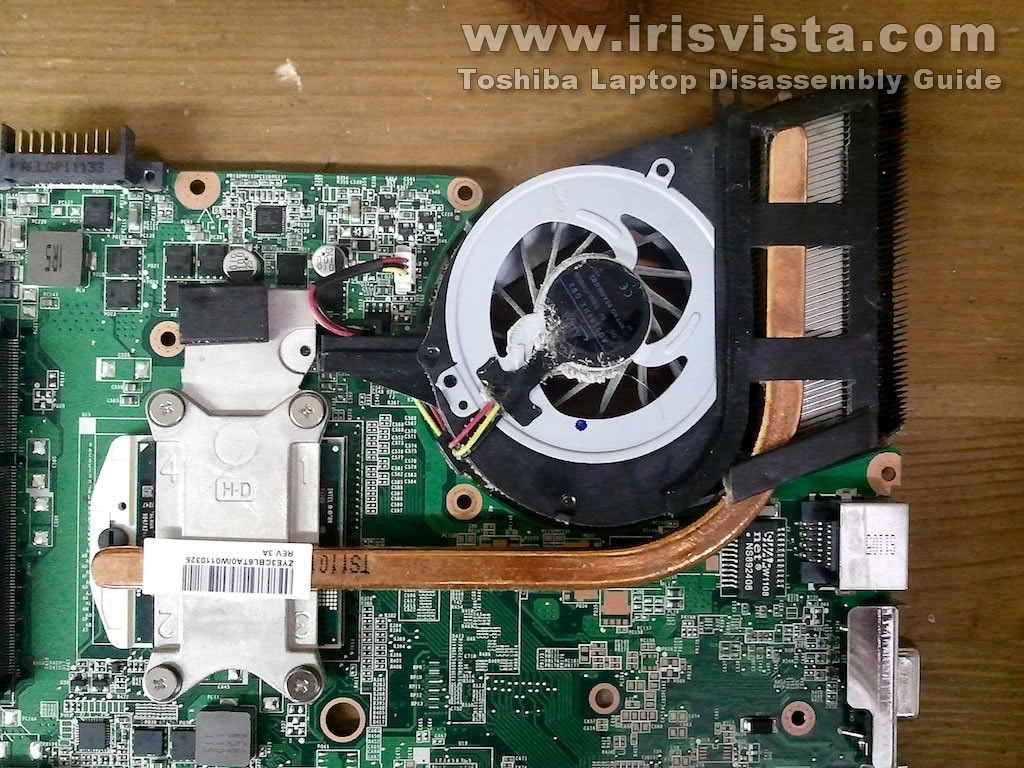
STEP 29
The cooling fan assembly (heatsink and fan) secured to the motherboard by four silver screws.
After you unscrew them and disconnect the fan cable, you should be able to separate the cooling assembly from the motherboard. |
| |
|
|
|