 |
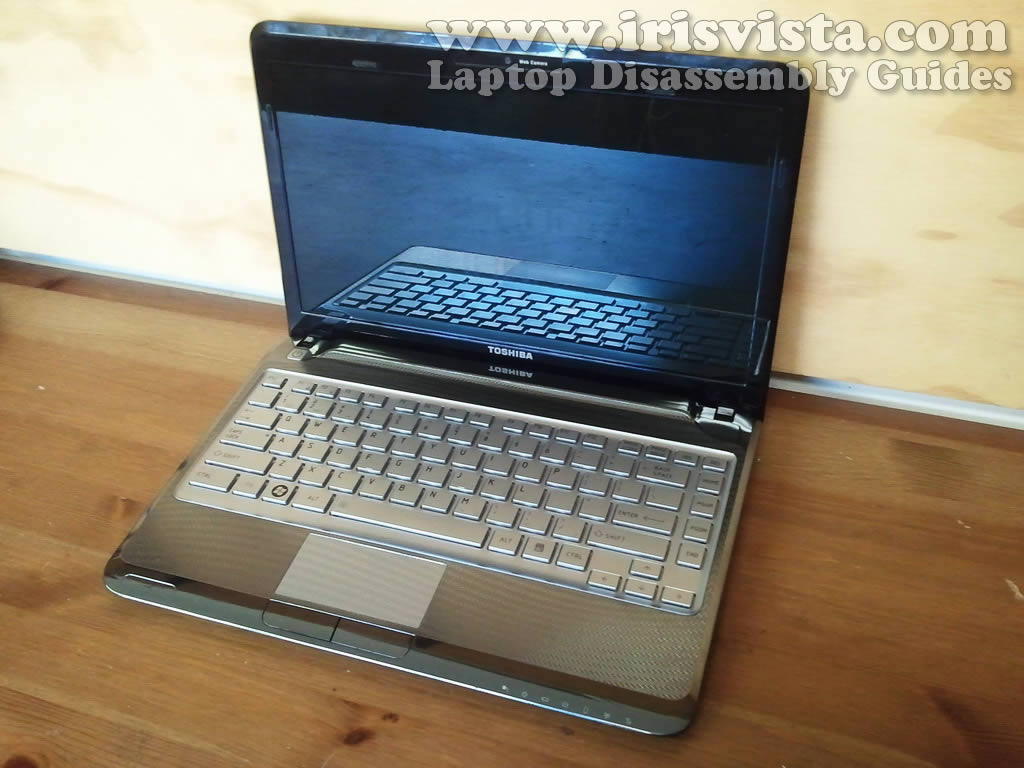
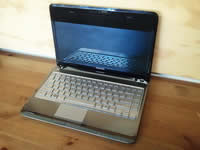
Toshiba Satellite T235, T235D, T230, T230D disassembly.
In the next guide I explain how to remove the screen.
|
|
|
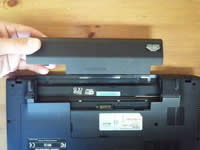 |
STEP 1
Unplug the AC adapter and make sure the laptop is turned off.
Unlock and remove the laptop battery. |
| |
|
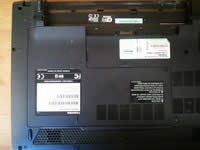 |
STEP 2
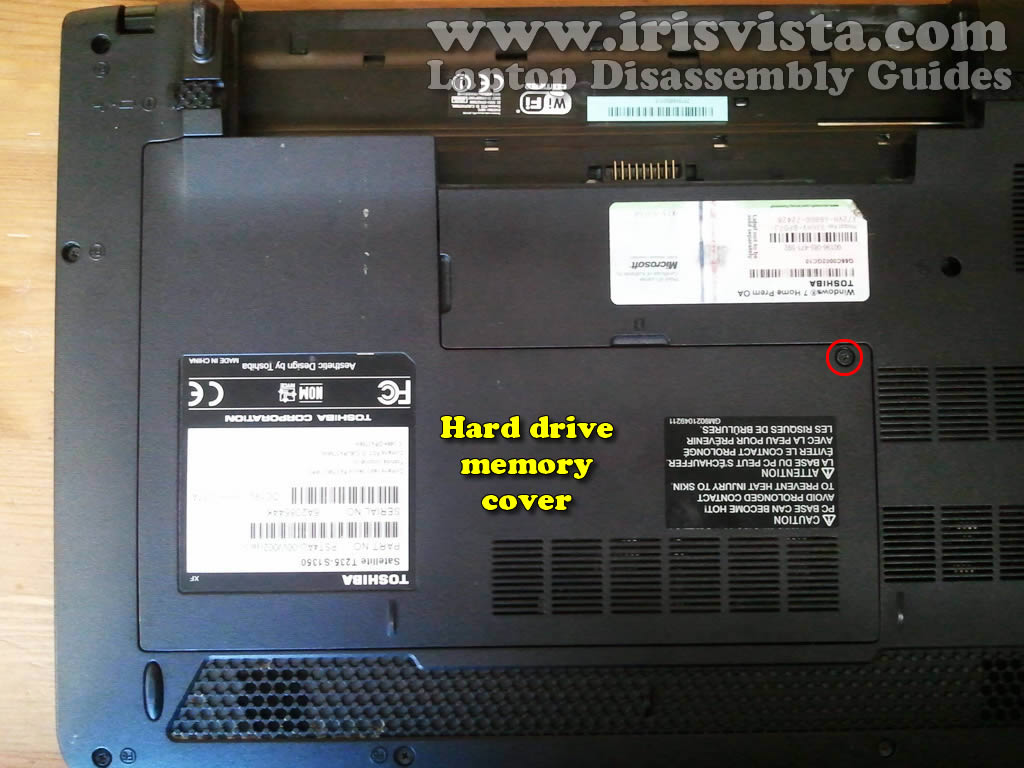
On the bottom of the laptop you'll find the hard drive and memory cover secured by one screw.
Remove the screw and remove the cover.
|
| |
|
 |
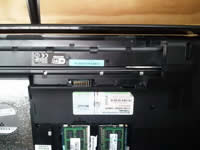
STEP 3
Under the cover you can access both memory modules. You can leave both memory modules connected to the motherboard.
The hard drive is secured by two screws. Remove both screws.
Slide the hard drive to the shown direction to disconnect it from the motherboard.
|
| |
|
 |
STEP 4
Lift up and remove the hard drive.
Toshiba Satellite T235/T235D laptop uses a regular 2.5" SATA hard drive.
The hard drive can be replaced with any other standard 2.5" SATA hard drive or SATA SSD. |
| |
|
 |
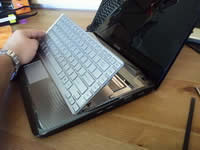
STEP 5
Remove two screws securing the laptop keyboard. |
| |
|
 |
STEP 6
In the battery compartment you can see the keyboard though three openings.
In order to remove the keyboard push the keyboard with a small screwdriver though one of the hole. |
| |
|
 |
STEP 7
At the same time insert your fingers under the keyboard on the other side of the laptop.
Continue removing the keyboard with your fingers. |
| |
|
 |
STEP 8
Lift up the keyboard and move it towards the LCD screen.
Be careful, the keyboard still connected to the motherboard. |
| |
|
 |
STEP 9
The keyboard cable connector located under the keyboard. |
| |
|
 |
STEP 10
Here's how to unlock the keyboard connector.
Very gently slide the connector retainer about 2 millimeters to the shown direction.
NOTE: the retainer must remain attached to the connector. |
| |
|
 |
STEP 11
On this picture the connector shown in the UNLOCKED position.
As you see, the retainer still attached to the connector.
Now you can pull the keyboard cable from the connector. |
| |
|
 |
STEP 12
Remove the keyboard from the laptop. |
| |
|
 |
STEP 13
Remove screws from the bottom of the laptop.
These screws securing the laptop bottom cover to the top cover. |
| |
|
 |
STEP 14
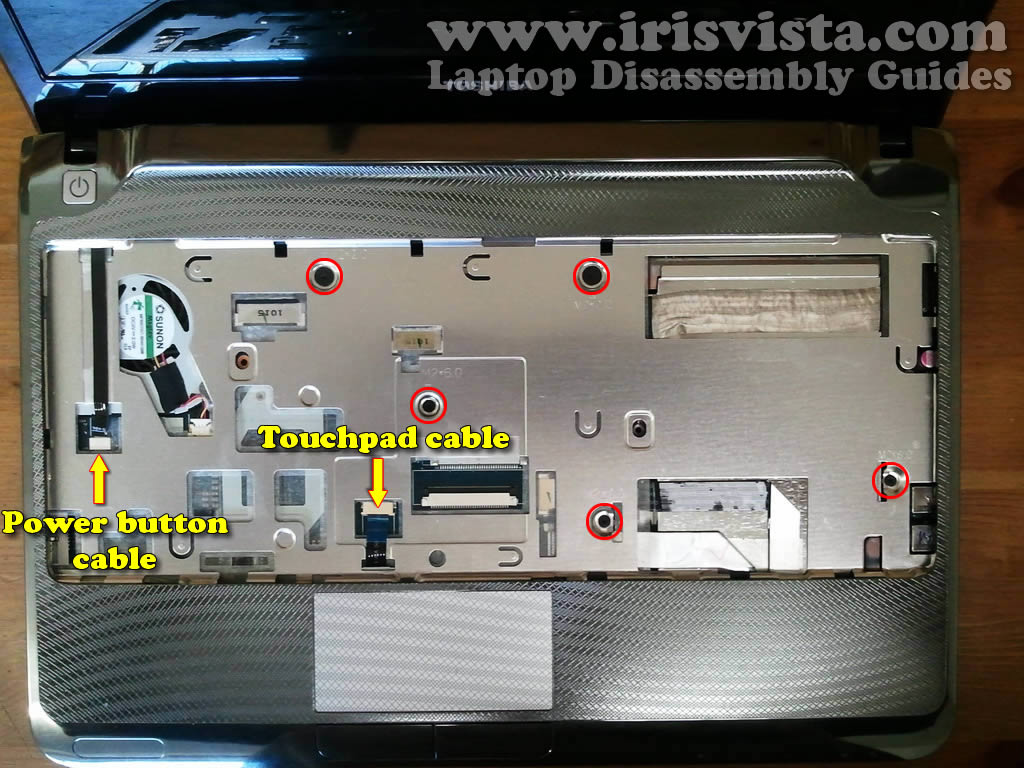
Remove five screws securing the top cover assembly on the top of the laptop.
Disconnect the power button cable and touchpad cable from the motherboard. |
| |
|
 |
STEP 15
The power button cable connector doesn't have a retainer.
Gently pull the cable from the connector. |
| |
|
 |
STEP 16
Gently pull the touchpad cable from the connector.
|
| |
|
 |
STEP 17
Start separating the top cover assembly from the laptop base using a piece of plastic.
I'm using the guitar pick for that. |
| |
|
 |
STEP 18
Continue removing the top cover assembly with your fingers. |
| |
|
 |
STEP 19
The top cover assembly removed. |
| |
|
 |
STEP 20
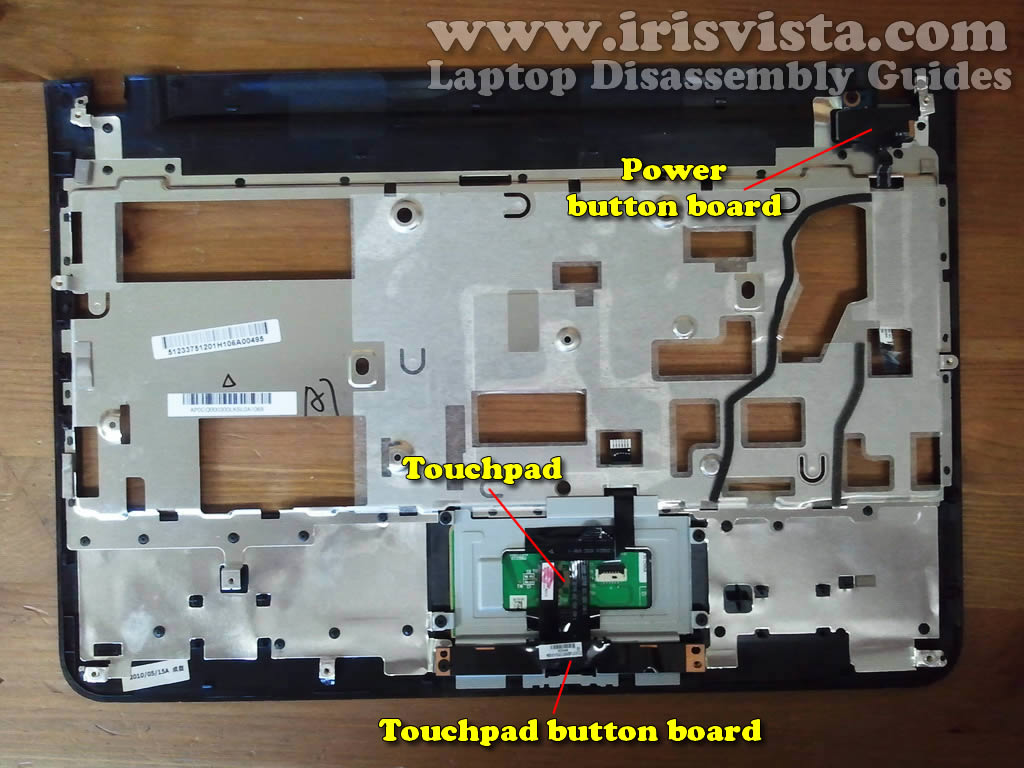
On the opposite side of the top cover assembly you can access the power button board, touchpad and touchpad button board. |
| |
|
 |
STEP 21
On this picture you can see the laptop with the top cover assembly removed.
Now you can access the following internal laptop components:
- Power jack
- Cooling fan
- Speakers
- LAN board
- USB/Audio board
- Motherboard |
| |
|
 |
STEP 22
Remove sticky tape securing the power jack and wireless card cables. |
| |
|
 |
STEP 23
In order to remove the cooling fan you'll have to remove screws securing the power jack and left hinge. |
| |
|
 |
STEP 24
Carefully lift up the DC power jack and left hinge and move it further from the cooling fan.
Without doing that you will not be able to remove the cooling fan. |
| |
|
 |
STEP 25
Remove one screw securing the cooling fan and unplug the fan cable from the motherboard. |
| |
|
 |
STEP 26
Lift up and remove the fan. |
| |
|
|
|