|
How to take apart a Toshiba Portege M700. |
|
|
 |
STEP 1
I'll start taking apart the laptop with removing the keyboard.
Using a sharp object lift up the right side of the plastic bezel located under the keyboard.
|
| |
|
 |
STEP 2
Continue removing the bezel with your fingers.
|
| |
|
 |
STEP 3
Now you can access two screws securing the keyboard.
Remove both screws. |
| |
|
 |
STEP 4
Lift up the keyboard as is shown on the picture and place it upside down on the palm rest.
Be careful, the keyboard is still attached to the motherboard.
|
| |
|
 |
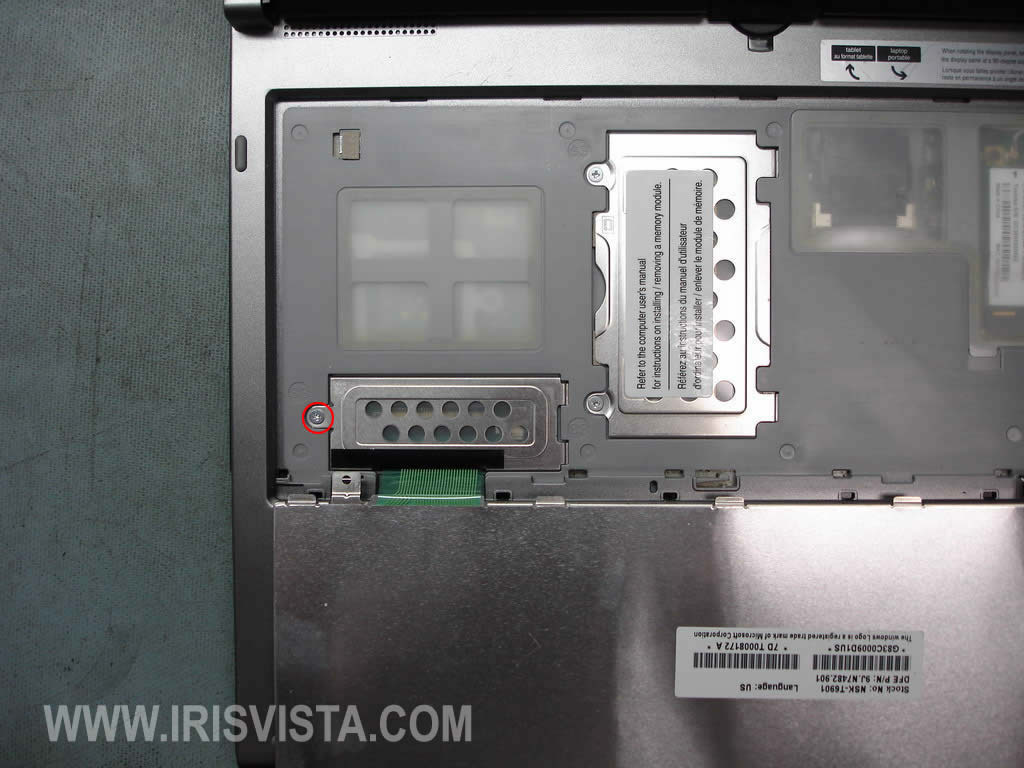
STEP 5
The keyboard connector is protected by a metal cover.
Remove one screw securing the cover and remove the cover.
|
| |
|
 |
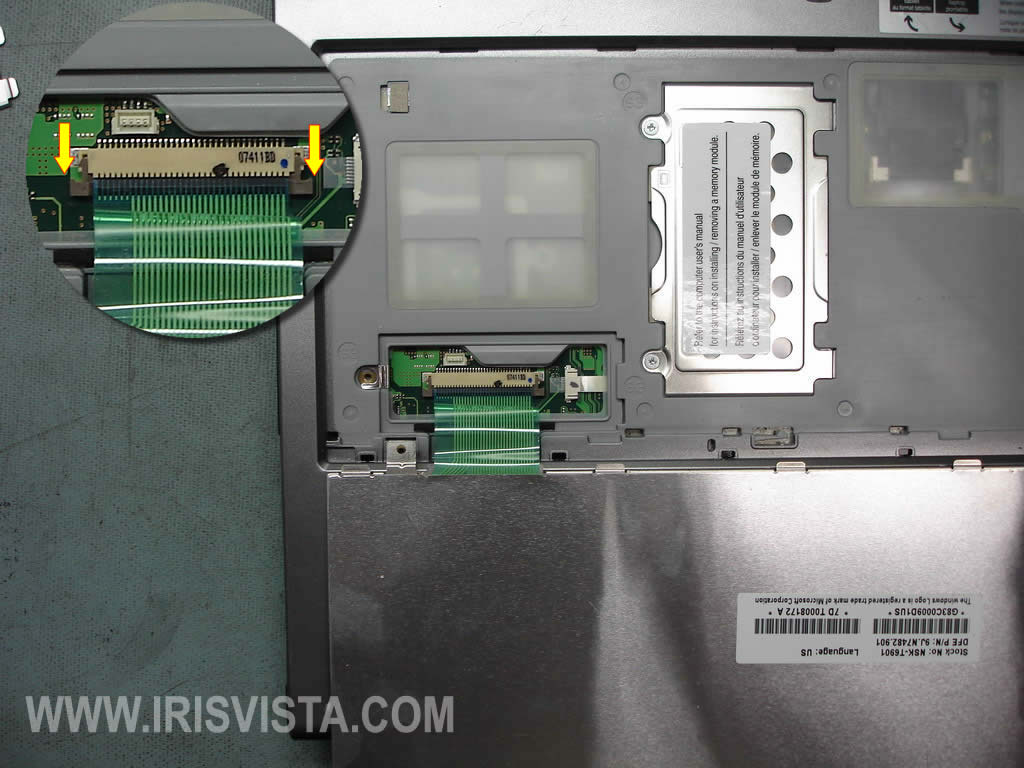
STEP 6
Now you can access the keyboard cable connector.
You'll have to unlock the connector before removing the cable.
Move the brown clip to the direction shown by two arrows. Move it only 1 or 2 millimeters, just enough to release the cable.
The brown clip must stay attached to the connector base.
Remove and replace the keyboard with a new keyboard if needed. |
| |
|
 |
STEP 7
Remove two screws from the internal memory slot cover.
Remove protective film.
|
| |
|
 |
STEP 8
Now you can access memory module installed in the internal memory slot.
Replace or upgrade the memory module if needed.
Disconnect three antenna cable from the wireless card.
Remove two screw securing the wireless card and remove card from the slot. |
| |
|
 |
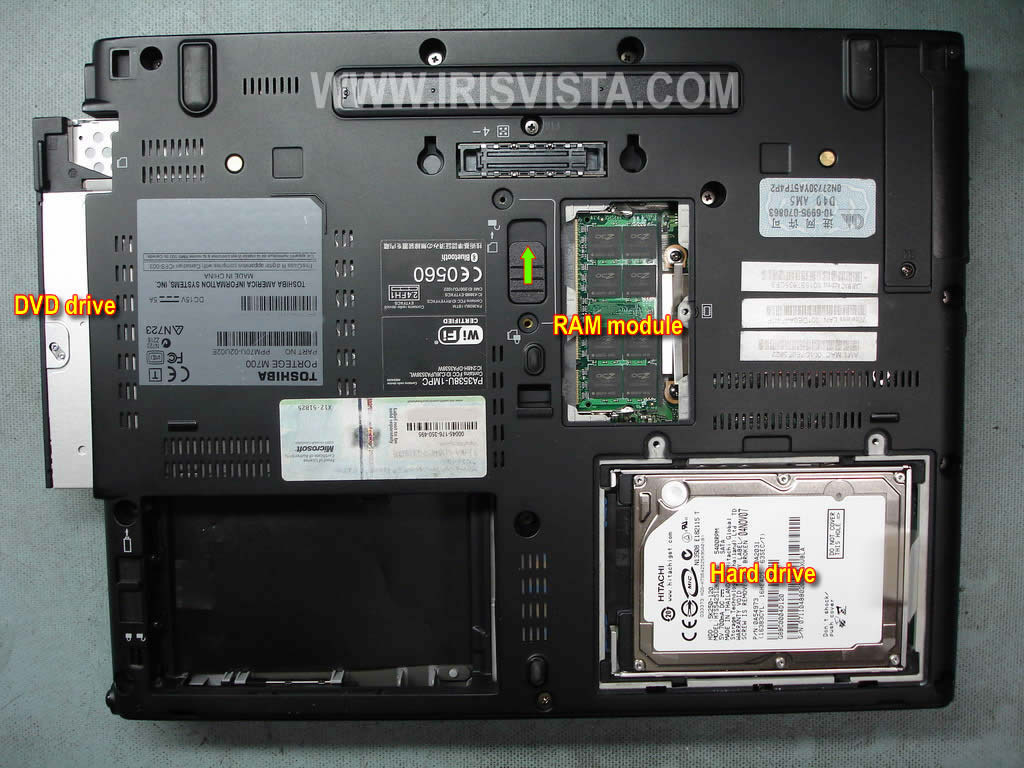
STEP 9
Remove one screw (yellow) securing the CD/DVD drive.
Remove memory (RAM) and hard drive covers. |
| |
|
 |
STEP 10
Remove the CD/DVD drive.
Remove the memory module.
Remove the hard drive assembly. Lift it up and disconnect from the cable. |
| |
|
 |
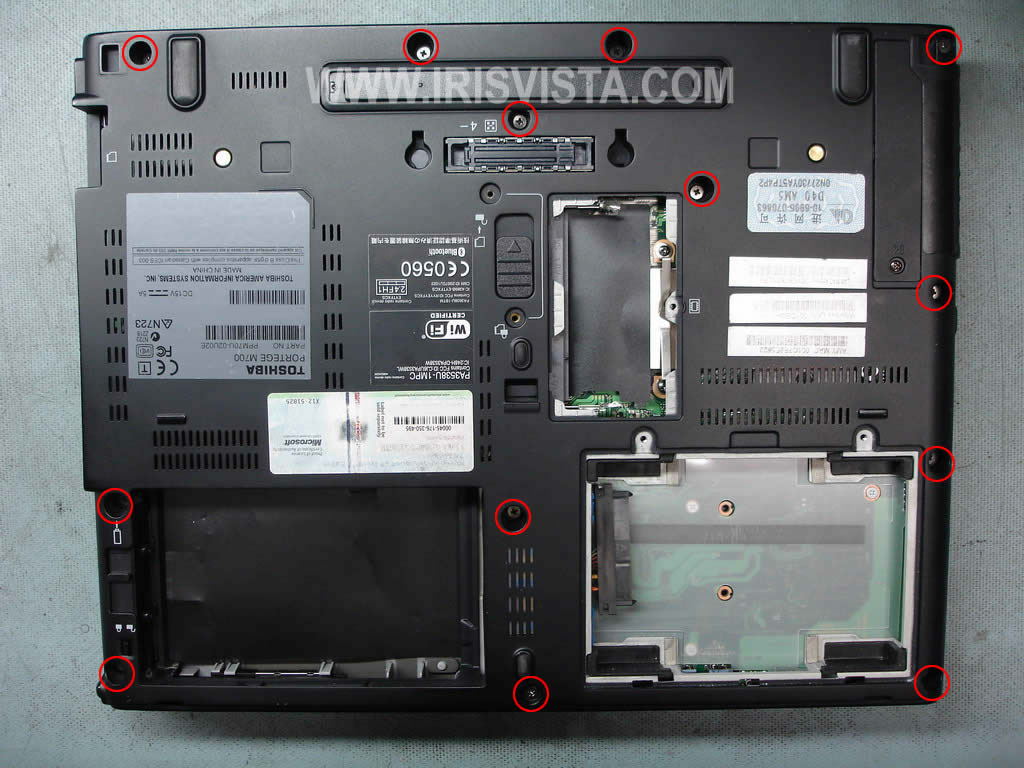
STEP 11
Remove all screws from the bottom of the laptop.
|
| |
|
 |
STEP 12
Turn the display panel so you can remove the cover protecting the hinge.
Remove two screws securing the hinge. |
| |
|
 |
STEP 13
Disconnect the video cable from the motherboard (yellow and green arrows). There are to connectors.
Disconnect the touch pad cable (orange arrow) from the motherboard. |
| |
|
 |
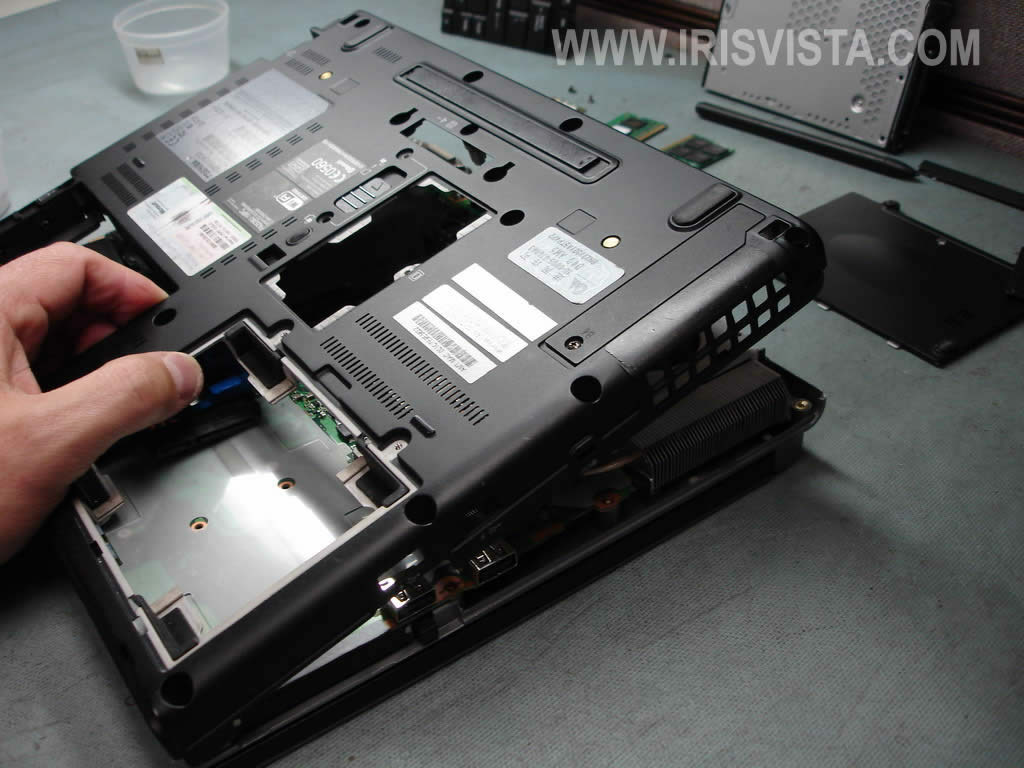
STEP 14
Turn the laptop upside down and start removing the base cover. |
| |
|
 |
STEP 15
Remove the base cover. |
| |
|
 |
STEP 16
The CMOS (RTC) battery can be removed and replace in this step.
Also, in this step you can clean the cooling fan and heat sink. Blow off the cooling module using compressed air. |
| |
|
 |
STEP 17
Remove two screws securing the cooling fan.
Disconnect fan cable from the motherboard.
Remove five screws securing the heat sink. |
| |
|
 |
STEP 18
Remove the cooling module assembly and replace it with a new one.
|
| |
|
 |
STEP 19
Remove cover from the from of the laptop. |
| |
|
 |
STEP 20
Remove two screws securing the motherboard.
Disconnect two cables pointed with yellow arrows. |
| |
|
 |
STEP 21
Release the Bluetooth module. |
| |
|
 |
STEP 22
Start removing the motherboard from the laptop case.
|
| |
|
 |
STEP 23
The motherboard has been removed. |
| |
|
 |
STEP 24
On this side of the motherboard you can access and remove the processor (CPU). |
| |
|
 |
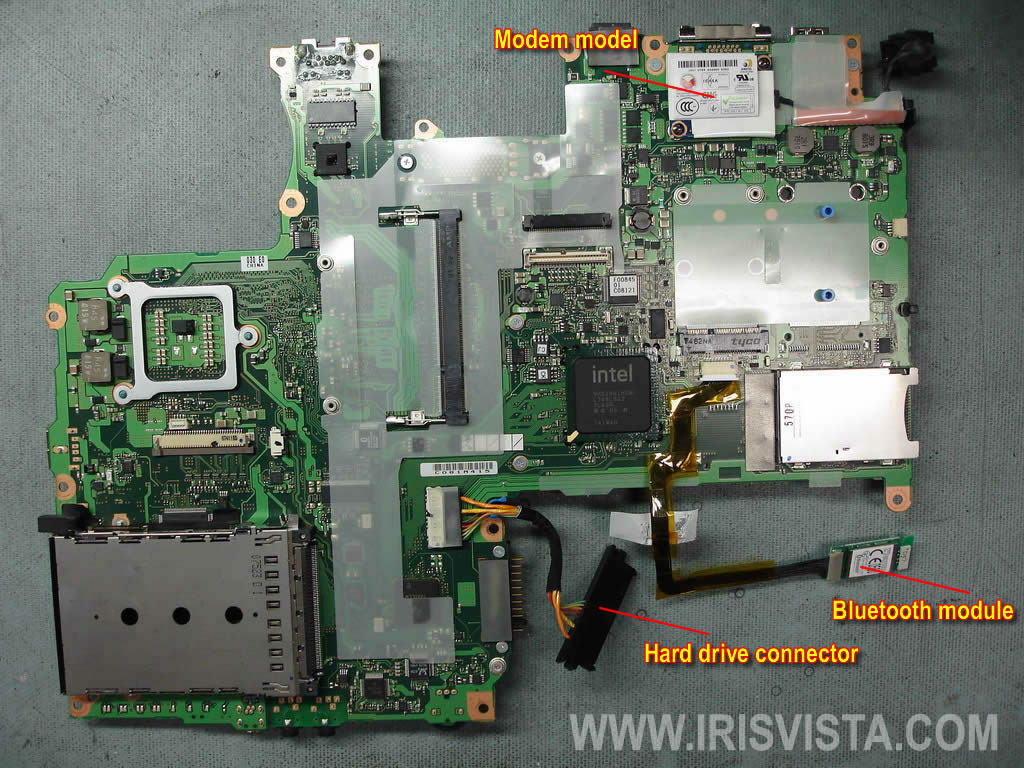
STEP 25
On the other side of the motherboard you can access the dial-up modem module, Bluetooth cable and hard drive cable. |
| |
|
|
|