|
How to take apart Toshiba Portege S100.
|
|
|
 |
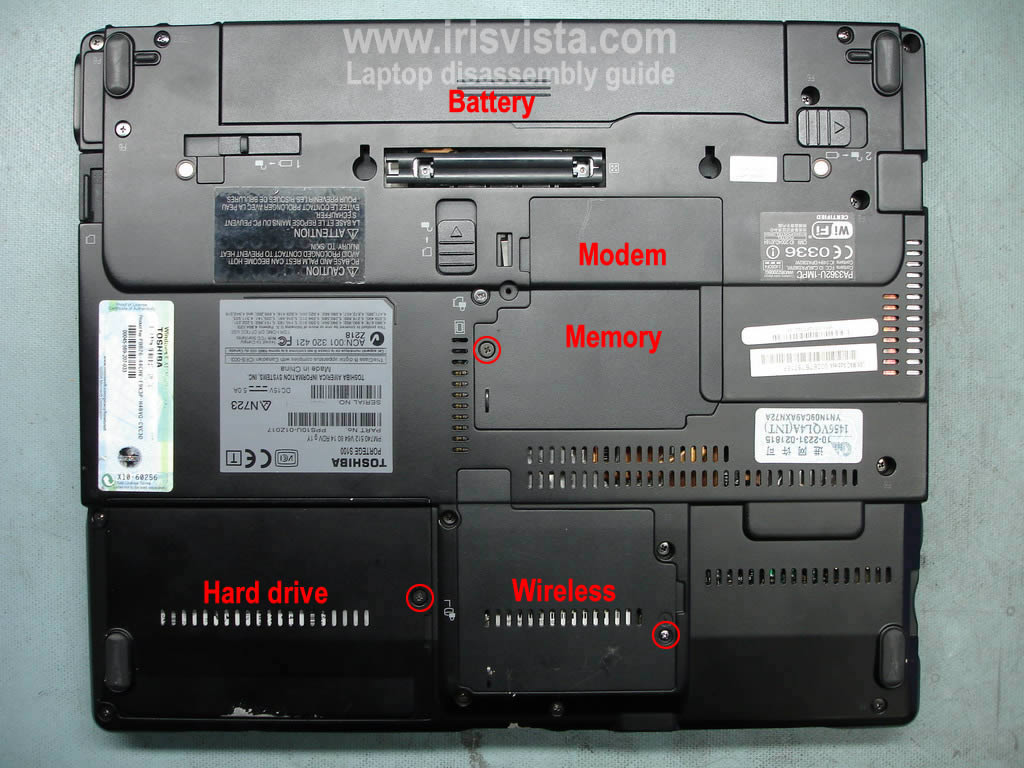
STEP 1
Remove the battery.
Remove one screw securing modem and memory cover. Remove the memory/modem cover.
Remove one screw securing wireless card. Remove the wireless card cover.
Remove one screw securing hard drive cover. Remove the hard drive cover.
|
| |
|
 |
STEP 2
Lift up the hard drive and to pull it to the right. Disconnect hard drive from the connector. Remove hard drive.
Disconnect antenna cables from the wireless card. Remove wireless card.
Remove two screws securing the modem. Lift up modem and disconnect cable from the right side. Remove modem card.
|
| |
|
 |
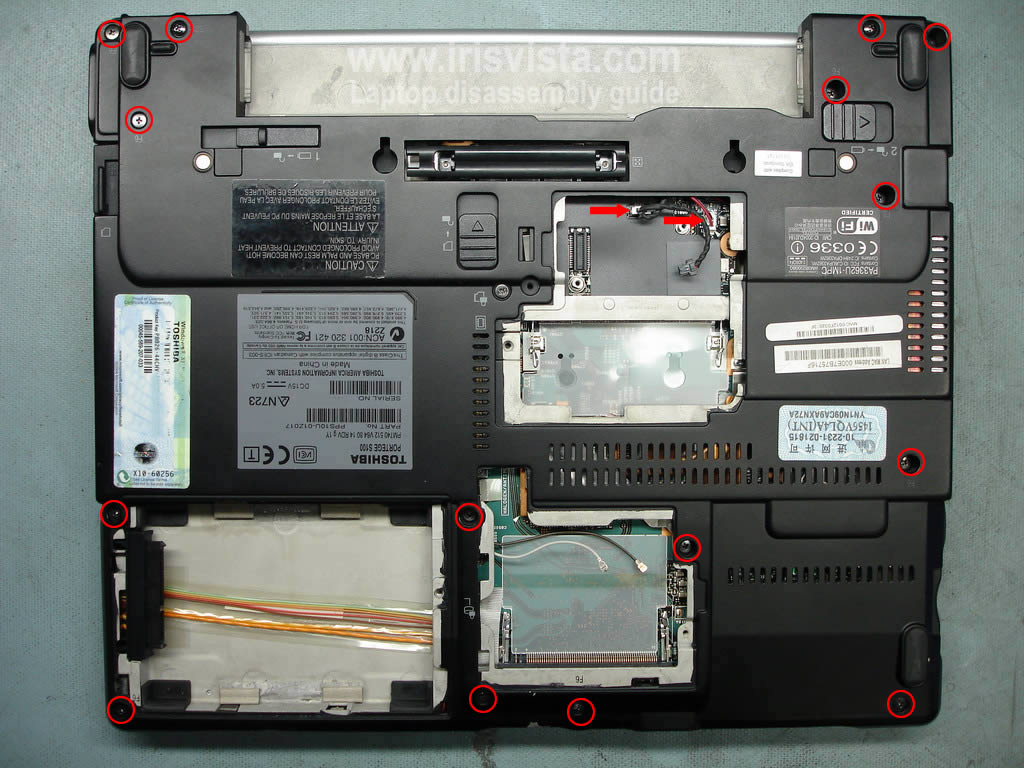
STEP 3
Remove all screws from the laptop bottom.
Disconnect two cables in the modem bay.
|
| |
|
 |
STEP 4
You can do this step before all other steps.
Remove one screw securing the DVD drive. Remove DVD drive.
|
| |
|
 |
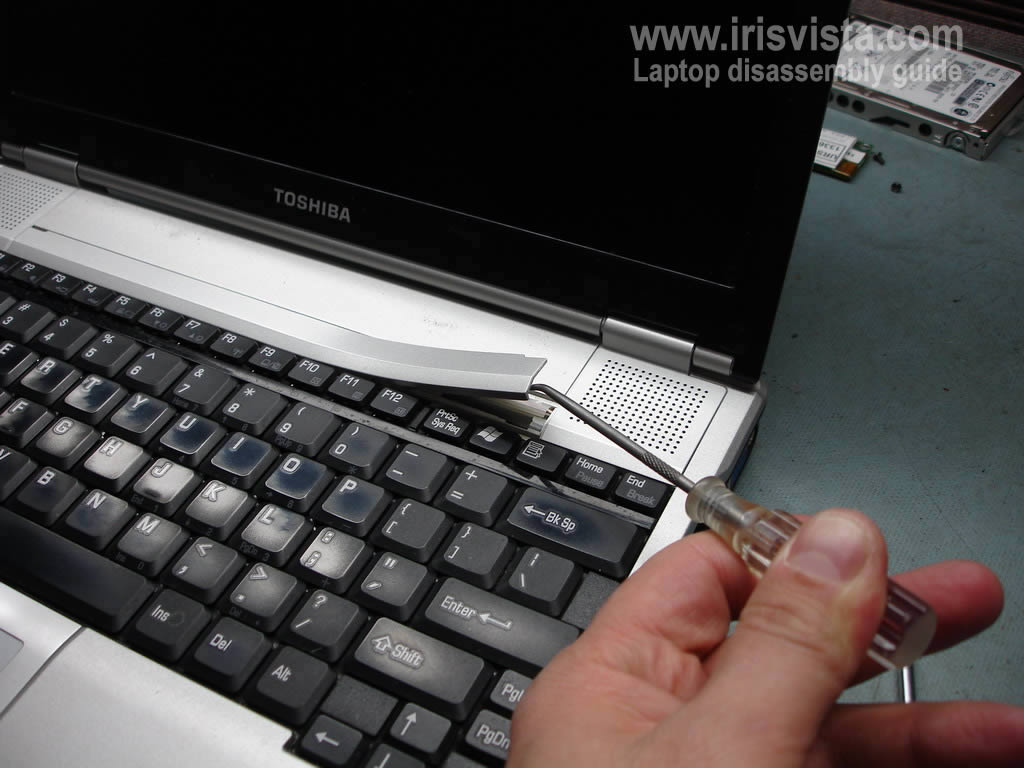
STEP 5
Remove the keyboard bezel with a flathead screwdriver.
|
| |
|
 |
STEP 6
Remove both speaker covers. |
| |
|
 |
STEP 7
Remove three screws securing the keyboard.
Remove the keyboard mounting bracket.
|
| |
|
 |
STEP 8
Lift up the keyboard and turn it over.
Carefully unlock the keyboard connector on the motherboard and disconnect keyboard cable.
Remove the keyboard.
|
| |
|
|
STEP 9
Remove one screw the securing power button board cover.
Remove the power button cover. |
| |
|
 |
STEP 10
Remove clear film.
|
| |
|
 |
STEP 11
Remove three screws securing the memory module cover.
|
| |
|
 |
STEP 12
Remove two screws securing the notebook display.
Disconnect video cable from the motherboard.
Pull the wireless card antenna cables through the opening.
Now you can remove the second memory module. I'll remove it later. |
| |
|
 |
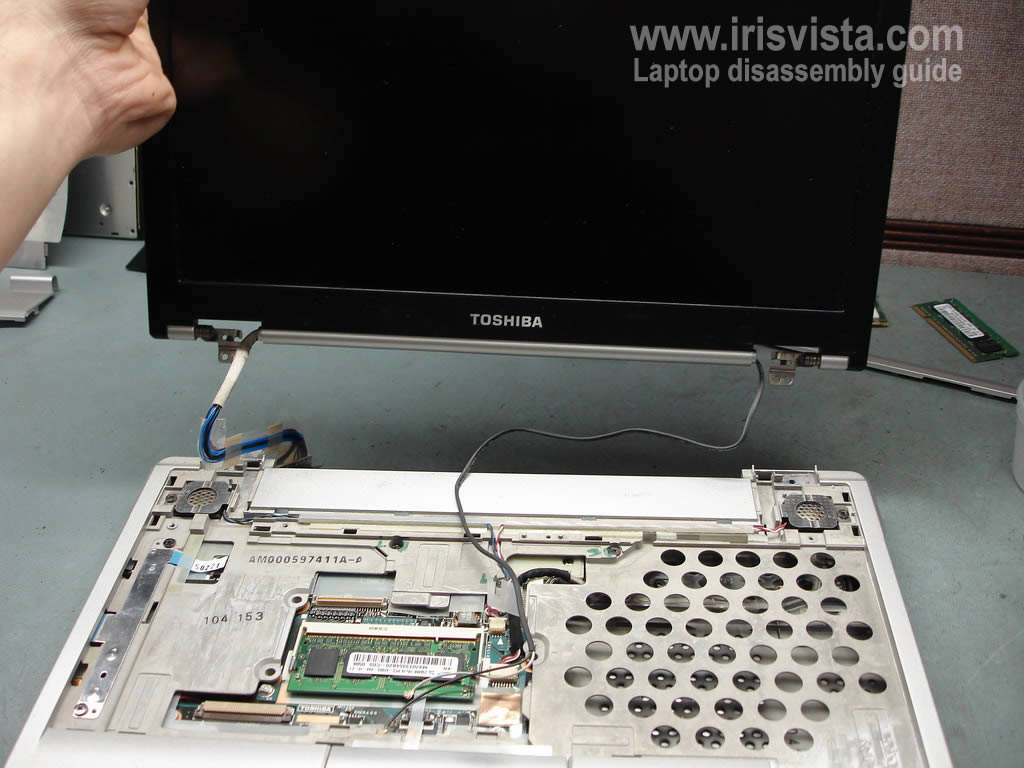
STEP 13
Carefully lift up and remove notebook display panel. |
| |
|
 |
STEP 14
Remove two screws securing both speakers.
Unplug the speaker cable from the motherboard.
Remove both covers and speakers. |
| |
|
 |
STEP 15
Remove two screws securing the power button board.
Disconnec the power button board from the motherboard and remove the board.
Disconnect the touch pad cable from the motherboard.
Remove the memory module.
|
| |
|
 |
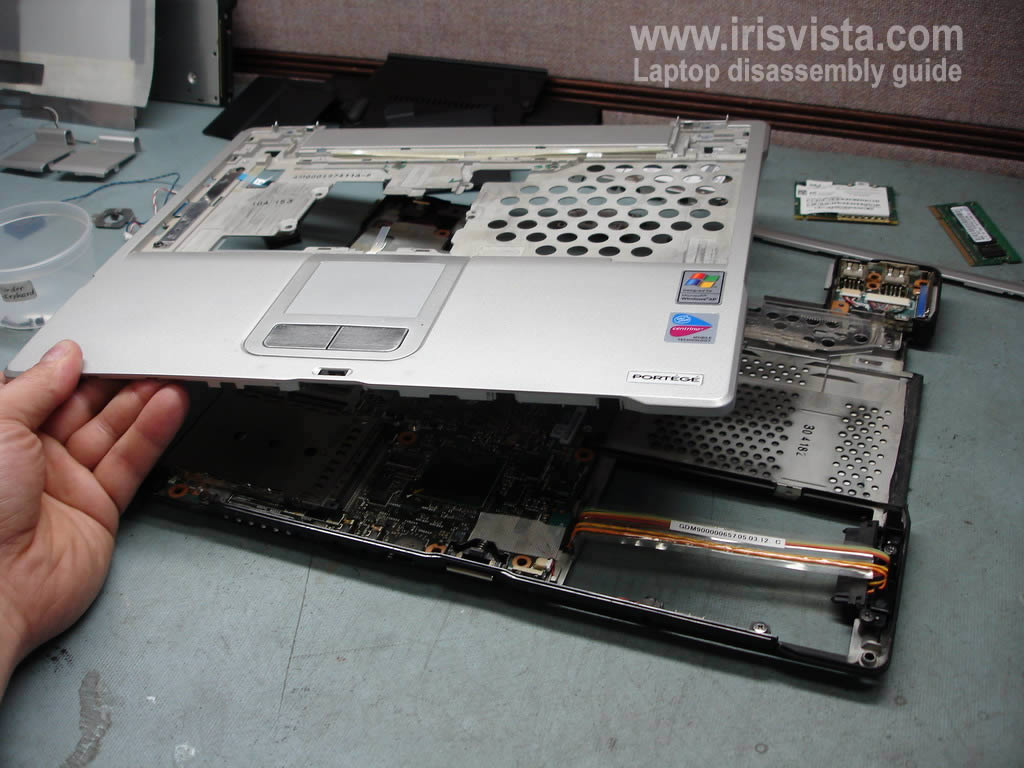
STEP 16
Lift up and remove the top cover assembly. |
| |
|
 |
STEP 17
Remove two screws securing notebook front cover.
Disconnect microphone cable and remove the microphone. |
| |
|
|
STEP 18
Remove notebook front cover. |
| |
|
 |
STEP 19
Remove two screws securing the cooling fan.
Unplug fan cable from the motherboard.
Remove cooling fan. |
| |
|
 |
STEP 20
Disconnect two cables connecting the VGA board to the motherboard.
Remove one screw securing motherboard. |
| |
|
 |
STEP 21
Carefully lift up the motherboard and turn it over.
Be careful, the hard drive cable is still connected to the motherboard. |
| |
|
 |
STEP 22
Disconnect the hard drive cable. |
| |
|
 |
STEP 23
Remove five screws securing the CPU and GPU heat sinks.
Lift up and remove both heat sinks. |
| |
|
 |
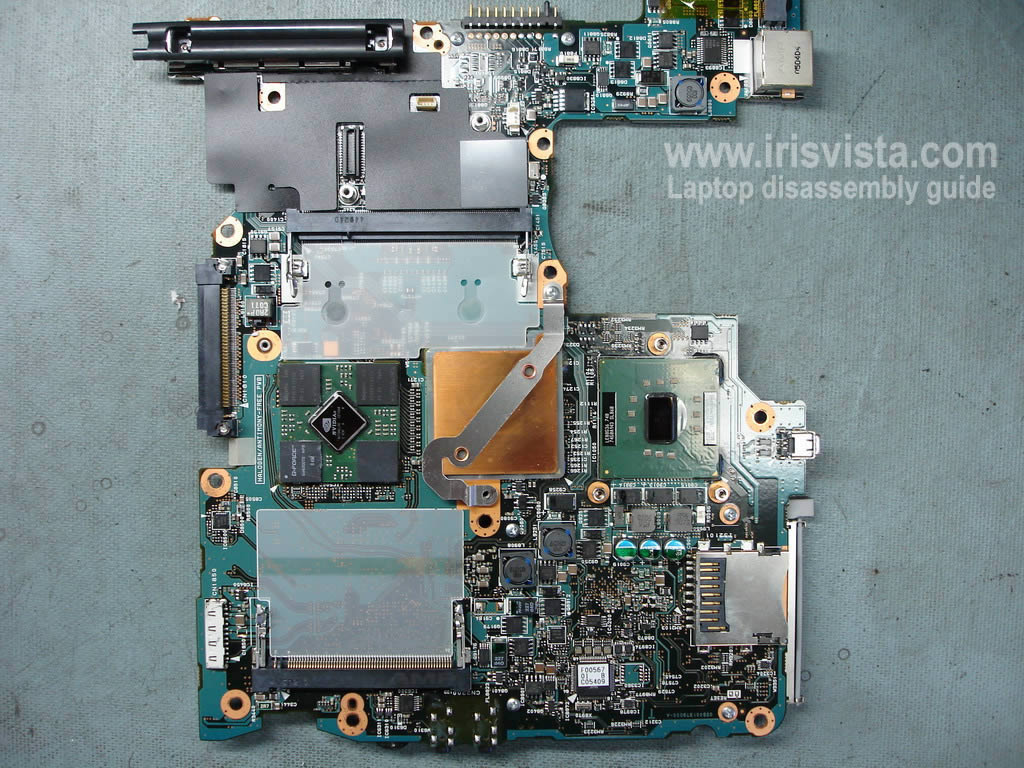
STEP 24
In this model the CPU is permanently attached to the motherboard. You cannot remove or replace the CPU. |
| |
|
|
|