|
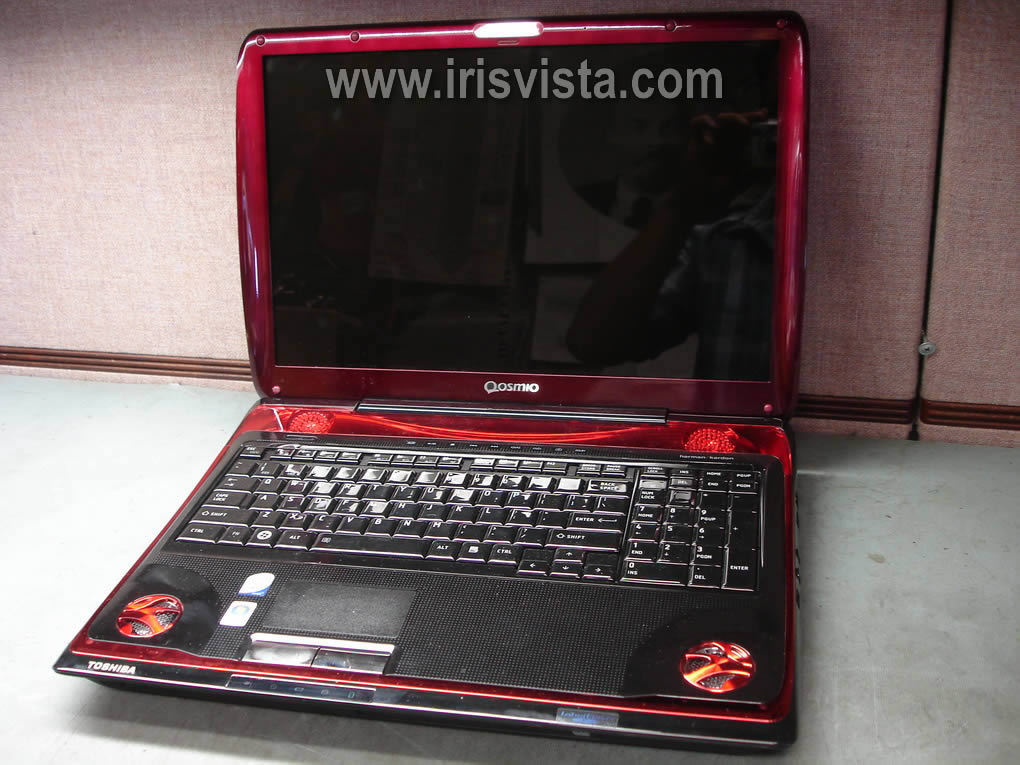
Toshiba Qosmio X305 or X300 disassembly. |
|
|
 |
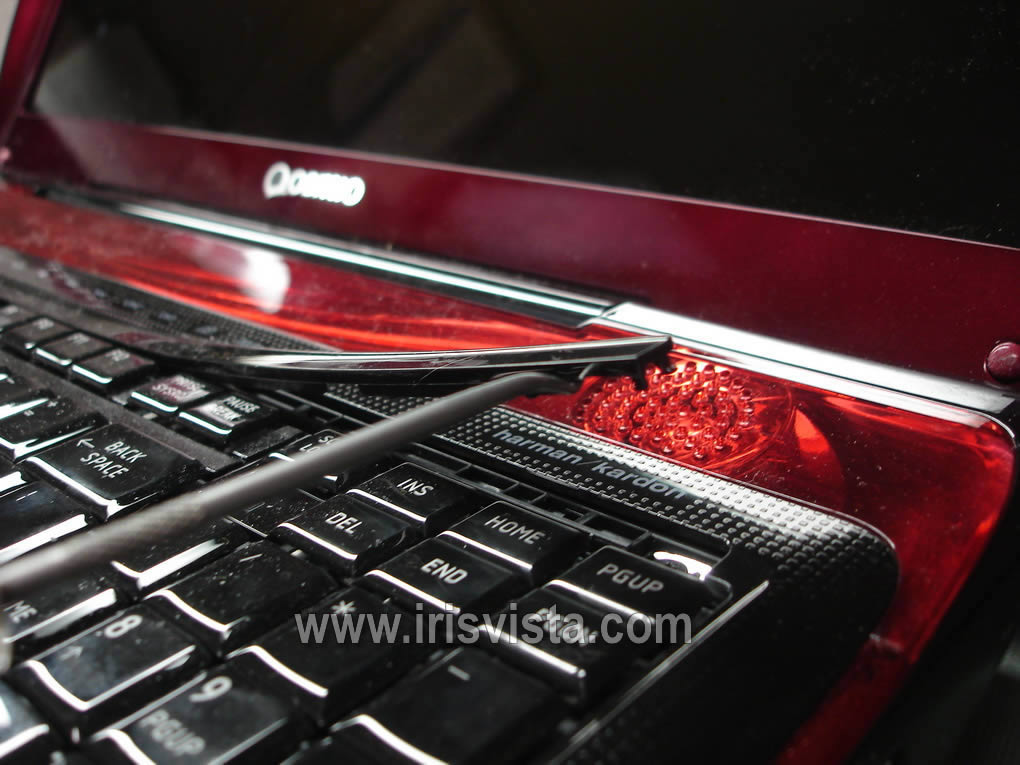
STEP 1
I'll stat laptop disassembly with removing the keyboard.
Using a small flat head screwdriver carefully lift up the right side of the keyboard bezel.
Continue removing the bezel with your fingers.
|
| |
|
 |
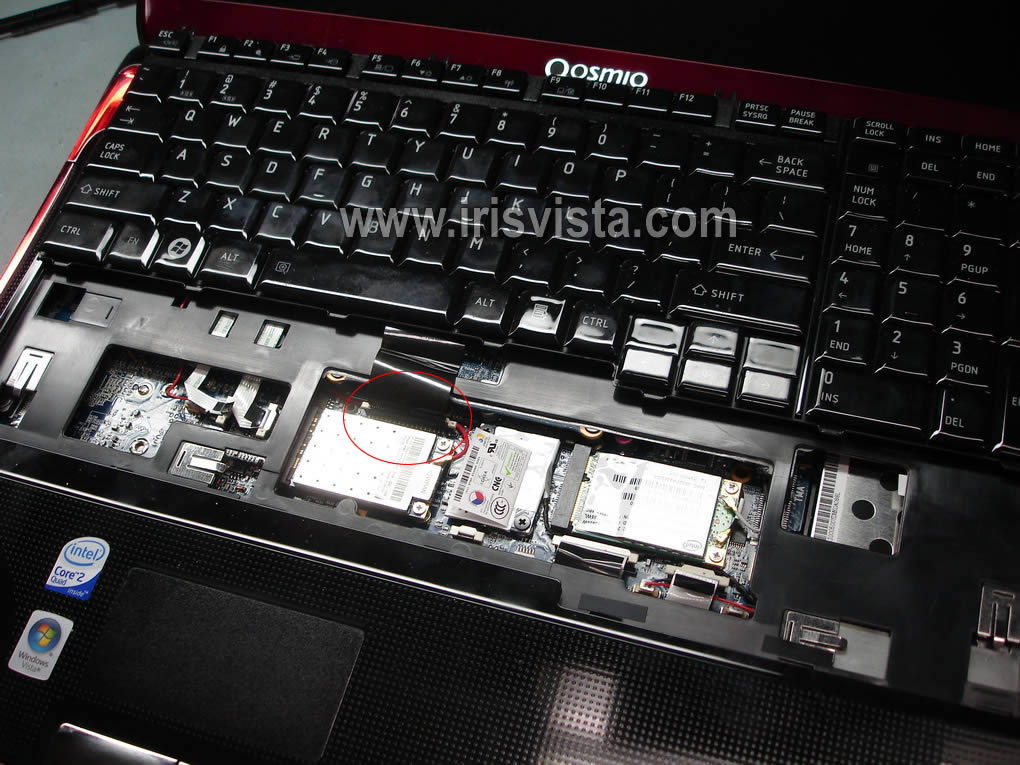
STEP 2
After the bezel is removed you can access four screws securing the keyboard.
Remove all four screws.
|
| |
|
 |
STEP 3
Lift up the keyboard so you can access the cable connector underneath. |
| |
|
 |
STEP 4
Unlock the connector by moving the white clip about 1-2 millimeters up.
DO NOT SEPARATE the white clip from the connector base. It must stay attached to the base.
|
| |
|
 |
STEP 5
Release the cable and remove the keyboard.
Now you can replace the keyboard with a new keyboard if needed. |
| |
|
 |
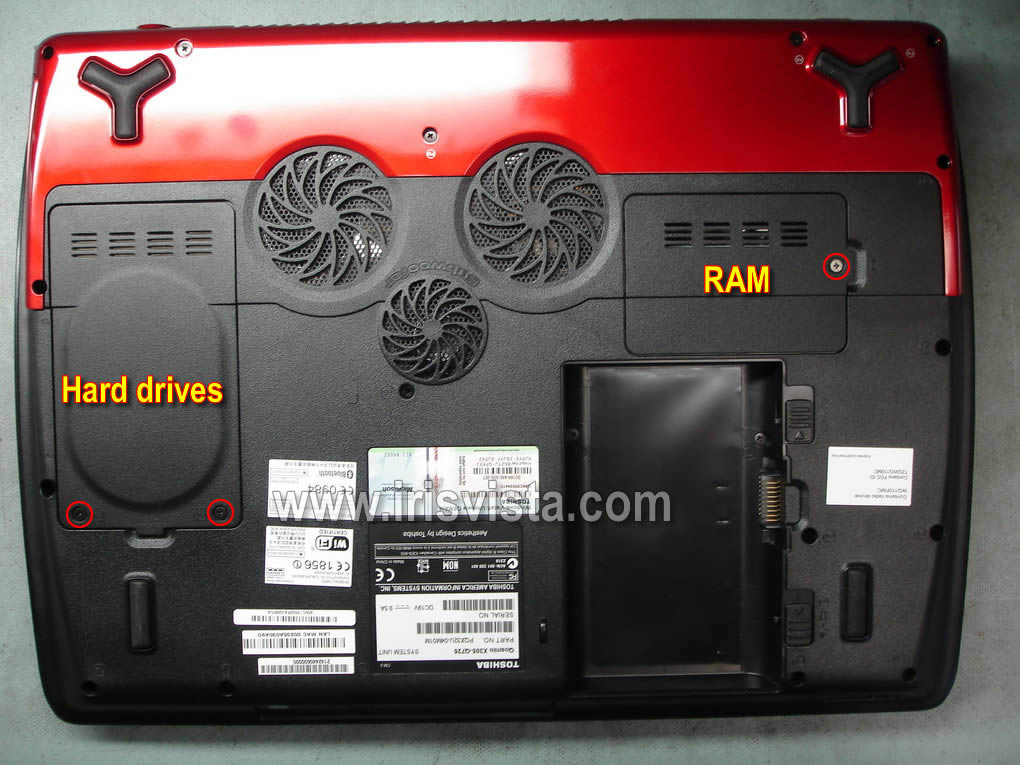
STEP 6
Turn the laptop upside down and remove the hard drive and memory (RAM) covers.
|
| |
|
 |
STEP 7
Remove both memory modules.
|
| |
|
 |
STEP 8
There are two hard drives installed into my Qosmio X305 laptop.
Disconnect and remove the first hard drive. |
| |
|
 |
STEP 9
Disconnect and remove the second hard drive. |
| |
|
 |
STEP 10
Steps 10-12 explain how to remove the CD/DVD drive.
Remove one screw securing the CD/DVD drive. |
| |
|
 |
STEP 11
Open the drive with a straightened paper clip. |
| |
|
 |
STEP 12
Carefully pull the CD/DVD drive from the laptop.
|
| |
|
 |
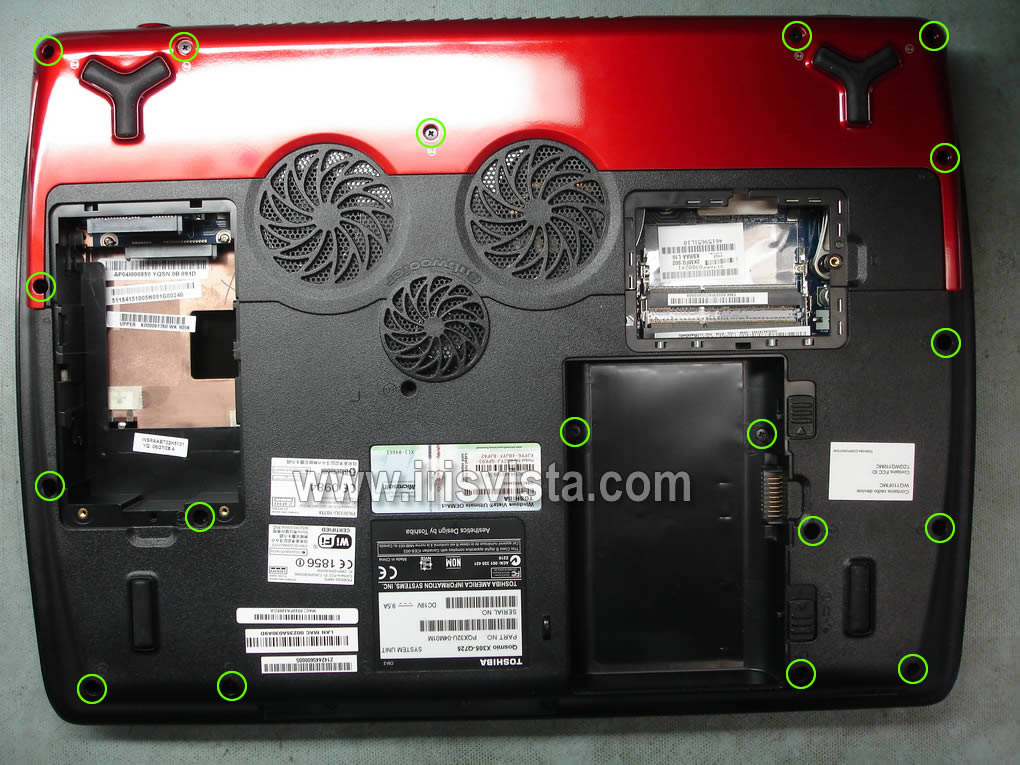
STEP 13
In steps 13-17 I explain how to remove the top cover assembly.
Place the laptop upside down and remove all screws from the bottom. |
| |
|
 |
STEP 14
Remove two screws securing display hinges on the back side of the laptop. |
| |
|
 |
STEP 15
Remove three screws securing the top cover.
Disconnect all cables pointed with arrows. |
| |
|
 |
STEP 16
Start separating the top cover assembly from the laptop base. |
| |
|
 |
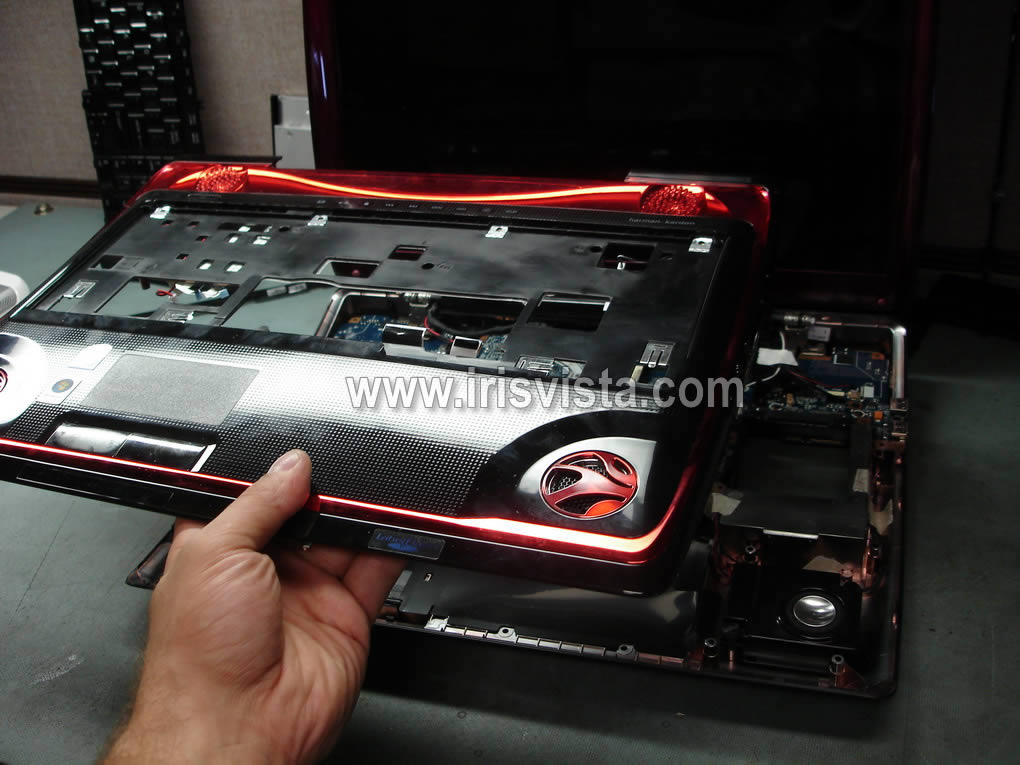
STEP 17
Remove top cover assembly. |
| |
|
 |
STEP 18
In steps 18-21 I'm removing the display panel.
Disconnect video cable from the video card.
Disconnect two other cables pointed with arrows.
Disconnect red antenna cable from the WPAN card.
Disconnect white and black antenna cables from the Wi-Fi (wireless) card. |
| |
|
 |
STEP 19
Remove two screws securing the right hinge. |
| |
|
 |
STEP 20
Remove two screws securing the left hinge.
|
| |
|
 |
STEP 21
Lift up and remove the display panel assembly. |
| |
|
 |
STEP 22
In steps 22-26 I'll be removing the video card.
Remove one screw securing the black cover above the video card. |
| |
|
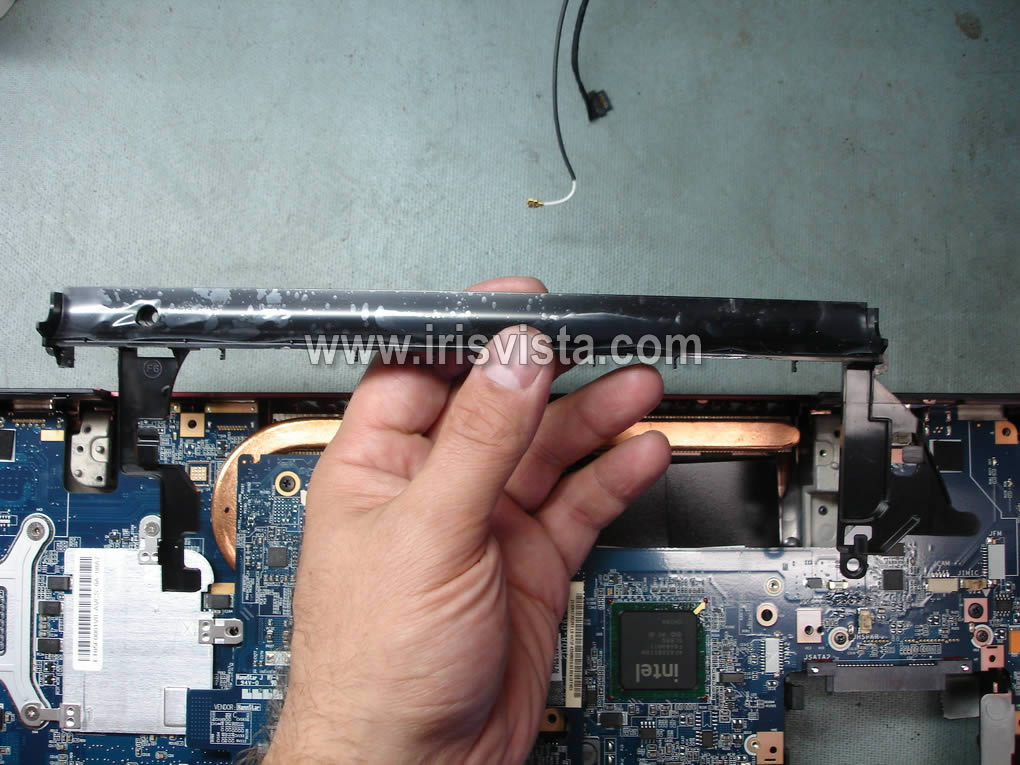
 |
STEP 23
Remove the cover. |
| |
|
 |
STEP 24
The four screws securing the video card (VGA board).
|
| |
|
 |
STEP 25
Carefully lift up and disconnect the video card from the motherboard. |
| |
|
 |
STEP 26
On this picture you can see the bottom side of the video card.
If you are replacing the video card, you'll have to transfer the heat sink. Simply loosen three screws and separate the heat sink from the card. |
| |
|
 |
STEP 27
In steps 27-33 I will remove the motherboard from the laptop base.
Remove screws securing the WPAN card, modem card, wireless card. Remove all three cards. |
| |
|
 |
STEP 28
Remove three screws securing the motherboard.
Disconnect cables pointed with arrows. |
| |
|
 |
STEP 29
Lift up one side of the motherboard as it shown on the picture.
Remove the motherboard from the laptop base. |
| |
|
 |
STEP 30
Release the DC-IN power jack secured in the laptop base. |
| |
|
 |
STEP 31
Laptop base assembly without motherboard. |
| |
|
 |
STEP 32
The motherboard has been removed. |
| |
|
 |
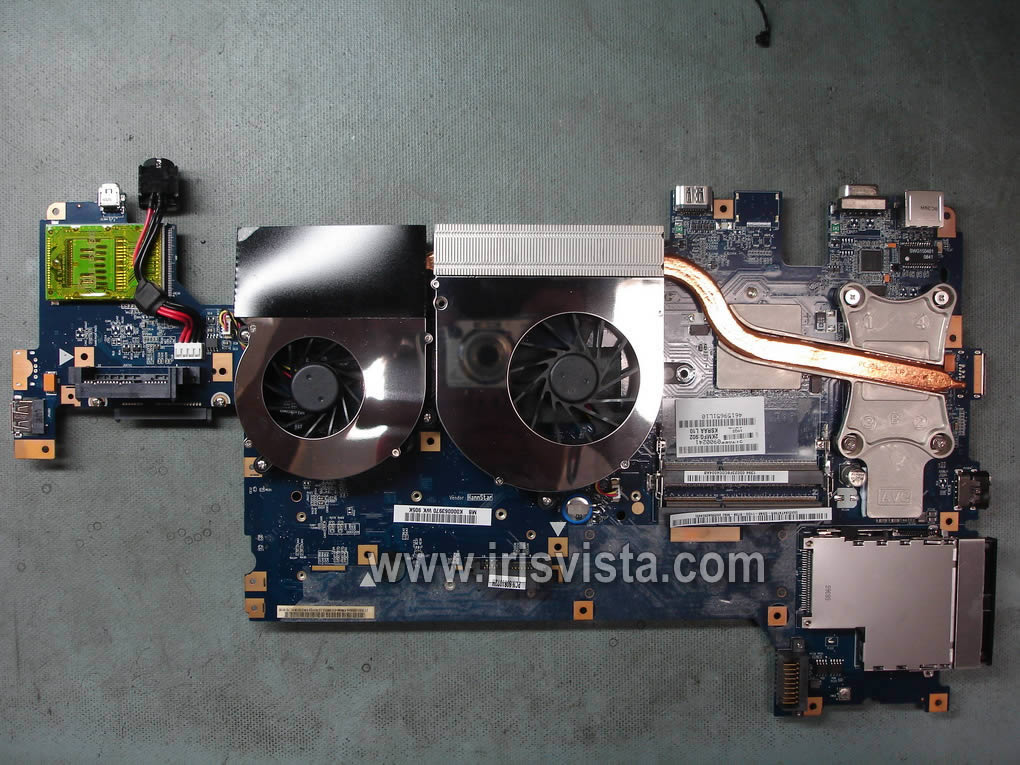
STEP 33
On this picture you can see the bottom side of the motherboard.
|
| |
|
 |
STEP 34
In steps 34-38 I'll be removing both cooling fans, heat sink and processor (CPU).
Remove three screws securing the left fan.
Disconnect fan cable from the motherboard.
Remove the left fan. |
| |
|
 |
STEP 35
Remove one screw securing the right fan.
Disconnect the fan cable from the motherboard.
Remove the right fan. |
| |
|
 |
STEP 36
Remove four screws securing the heat sink assembly.
Remove heat sink assembly. |
| |
|
 |
STEP 37
Unlock the socket and remove the processor. |
| |
|
 |
STEP 38
The motherboard has been removed and disassembled.
It's ready to be replaced with a new motherboard. |
| |
|
|
|