|
Toshiba Satellite A305, A305D, A300, A300D screen removal.
If you want to remove or replace the LCD screen and inverter board, you'll have to remove the top cover first. This guide will have two parts. In the first part (Steps 1-8) I'll be removing the top cover. In the second part (steps 9-23) I'll take apart the display panel.
It's possible to disassemble the display panel without removing the top cover, but you can damage the screen bezel while removing it from the display assembly.
By the way, I have another guide which explains how to remove internal parts.
|
|
|
 |
STEP 1
Before you start, turn off the laptop, unplug the AC power adapter and remove the battery.
Remove the hard drive, memory and blank covers. |
| |
|
 |
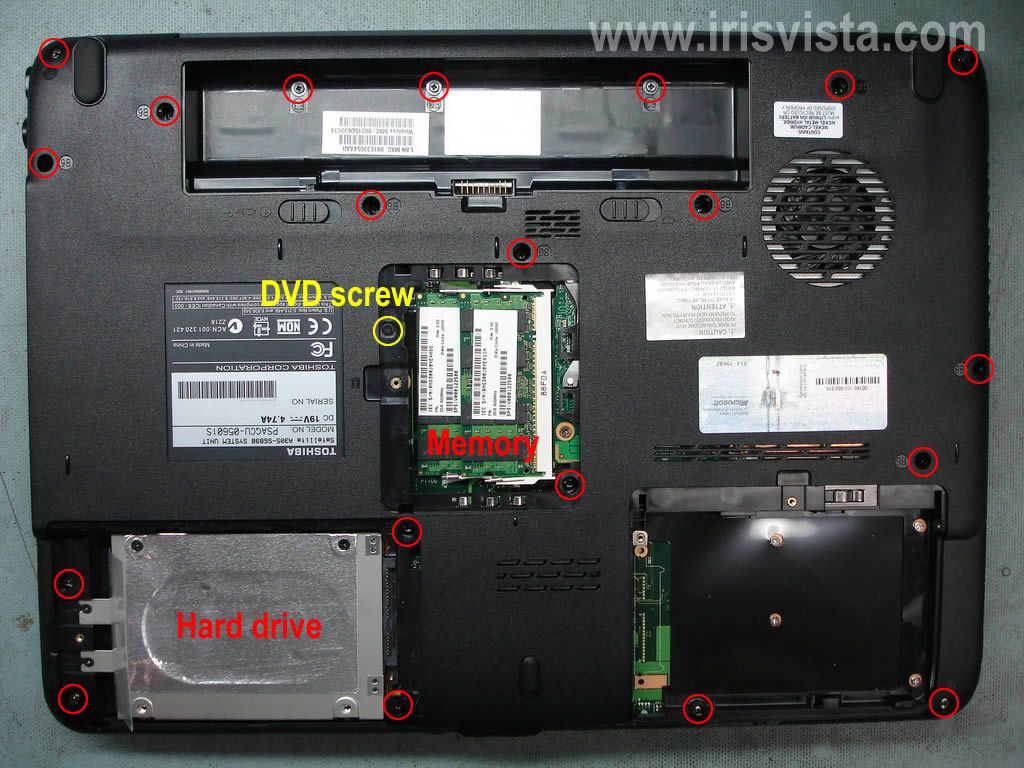
STEP 2
Remove all screws I marked with red circles.
I marked one screw with a yellow circle. This screw secures the CD/DVD drive. Do not remove that screw unless you want to remove the CD/DVD drive.
|
| |
|
 |
STEP 3
Turn the laptop over.
Start removing the keyboard bezel with a sharp object. You can use a small screwdriver.
When one side of the bezel is lifted, you can continue removing the bezel with your fingers. |
| |
|
 |
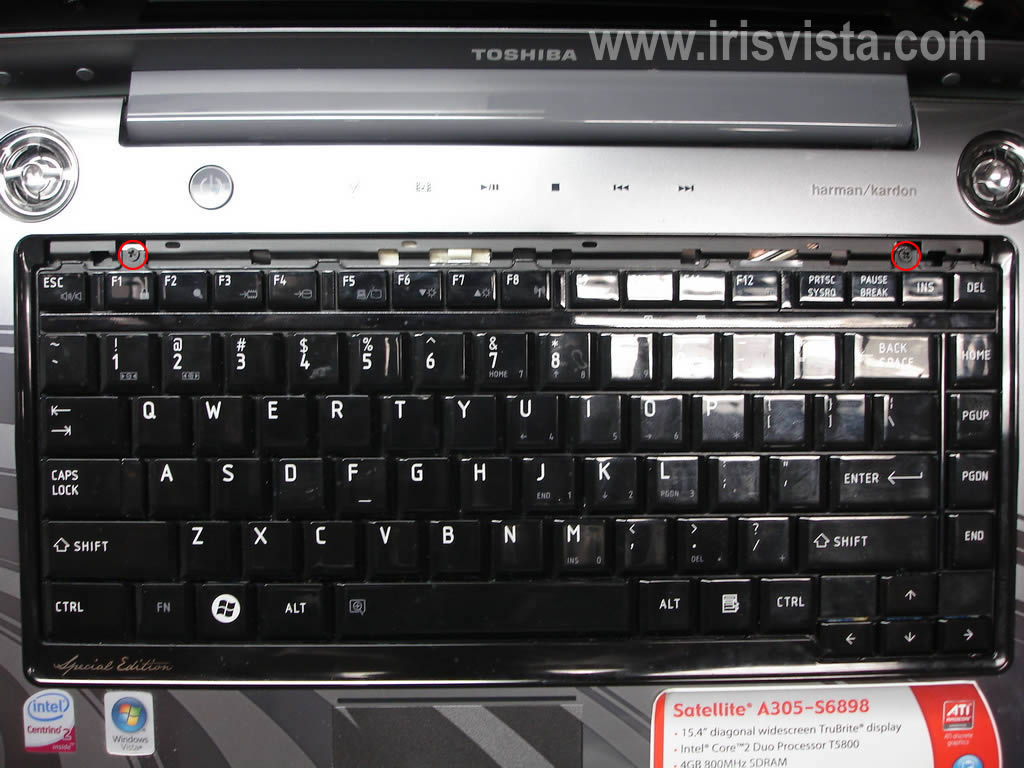
STEP 4
Under the bezel you'll find two screws securing the keyboard.
Remove both screws. |
| |
|
 |
STEP 5
Carefully lift up the keyboard so you can access the cable.
Disconnect the keyboard cable from the motherboard.
First - unlock the connector.
Second - pull the cable and remove the keyboard.
|
| |
|
 |
STEP 6
Remove one screw securing the top cover.
Unplug three cables pointed with red arrows.
|
| |
|
 |
STEP 7
Now you can start removing the top cover. |
| |
|
|
|
| |
|
|
STEP 8
The top cover has been removed. |
| |
|
 |
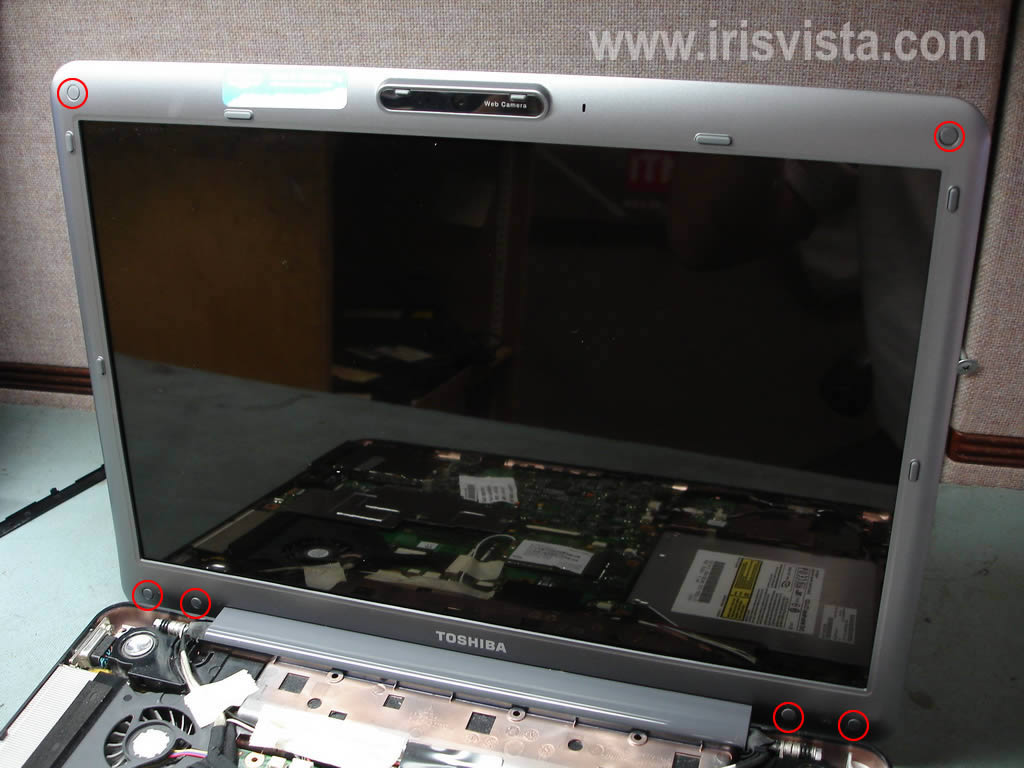
STEP 9
In the next steps I'll be taking apart the display panel.
You'll find six rubber screw seals on the screen bezel.
|
| |
|
 |
STEP 10
Remove all six seals with a sharp object.
Glue them somewhere on the bezel, so they don't get lost.
Remove all six screws found under rubber seals.
|
| |
|
 |
STEP 11
Start separating the screen bezel from the display cover.
You can use a piece of soft plastic. In my guide I'm using a guitar pick. |
| |
|
 |
STEP 12
Continue removing the screen bezel on the top. |
| |
|
 |
STEP 13
Finally, proceed to the lower part of the display. |
| |
|
 |
STEP 14
The screen bezel has been removed.
|
| |
|
 |
STEP 15
The screen inverter board is located on the bottom.
Remove one screw securing the inverter and unplug cables from both sides.
Remove the inverter board. |
| |
|
|
STEP 16
Remove four screws securing display hinges to the screen back cover. |
| |
|
 |
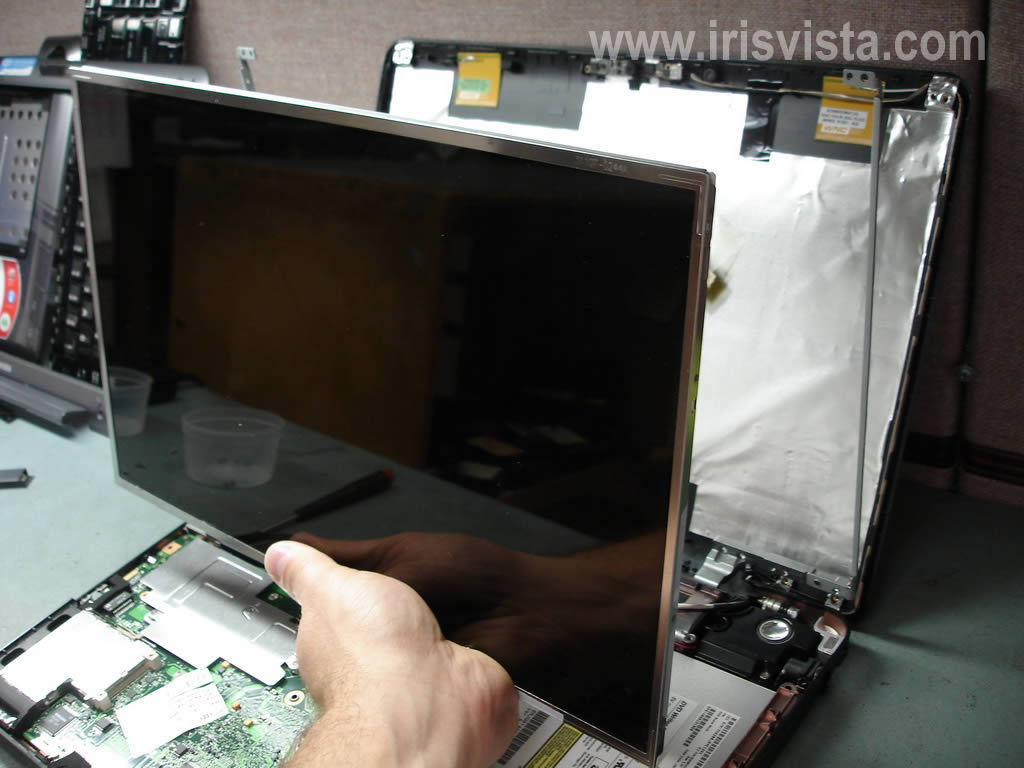
STEP 17
Now you can separate the back cover from the screen and access the back side of the screen.
Unplug the video cable from the screen. |
| |
|
 |
STEP 18
Remove four screws securing the LCD screen to the mounting bracket.
Do the same on the other side of the screen. |
| |
|
 |
STEP 19
Carefully remove the LCD screen. Now you can replace it with a new one. |
| |
|
 |
STEP 20
The LCD screen has been removed. |
| |
|
 |
STEP 21
When you assembling the display, pay attention to the wireless card antenna cables. Make sure they are routed correctly or you can damage them while installing the screen bezel back in place. |
| |
|
 |
STEP 22
The cable is routed correctly on the left side of the display... |
| |
|
 |
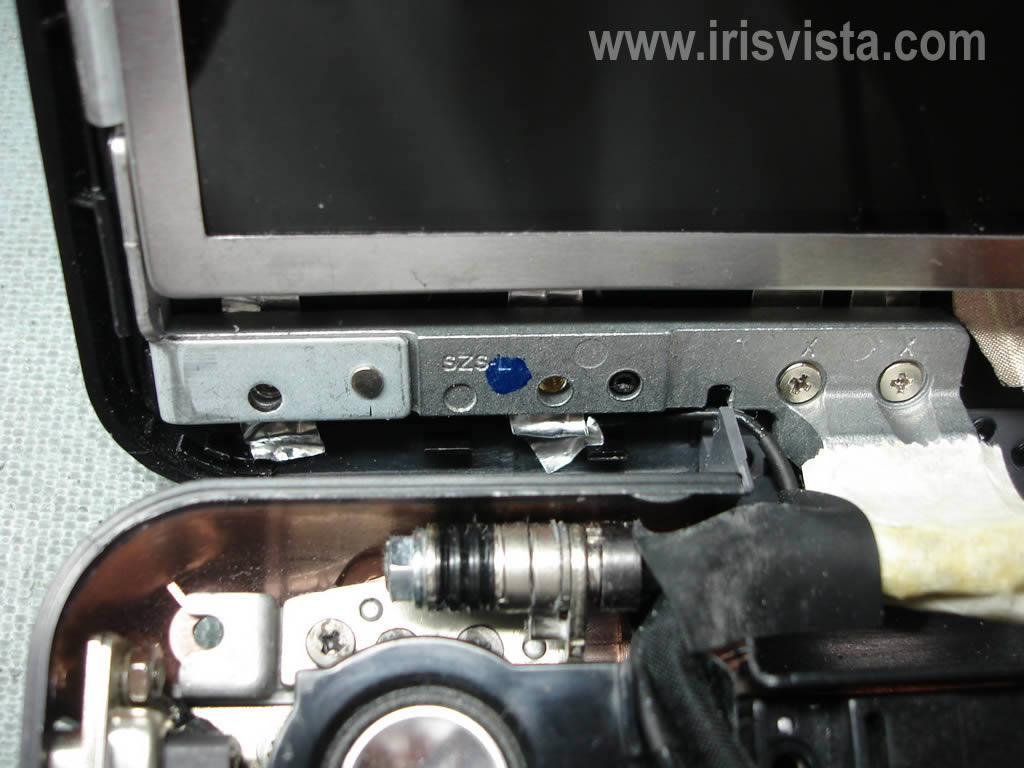
STEP 23
..and on the right side of the display. |
| |
|
|
|