|
Toshiba Satellite A505, A505D, A500, A500D disassembly. |
|
|
 |
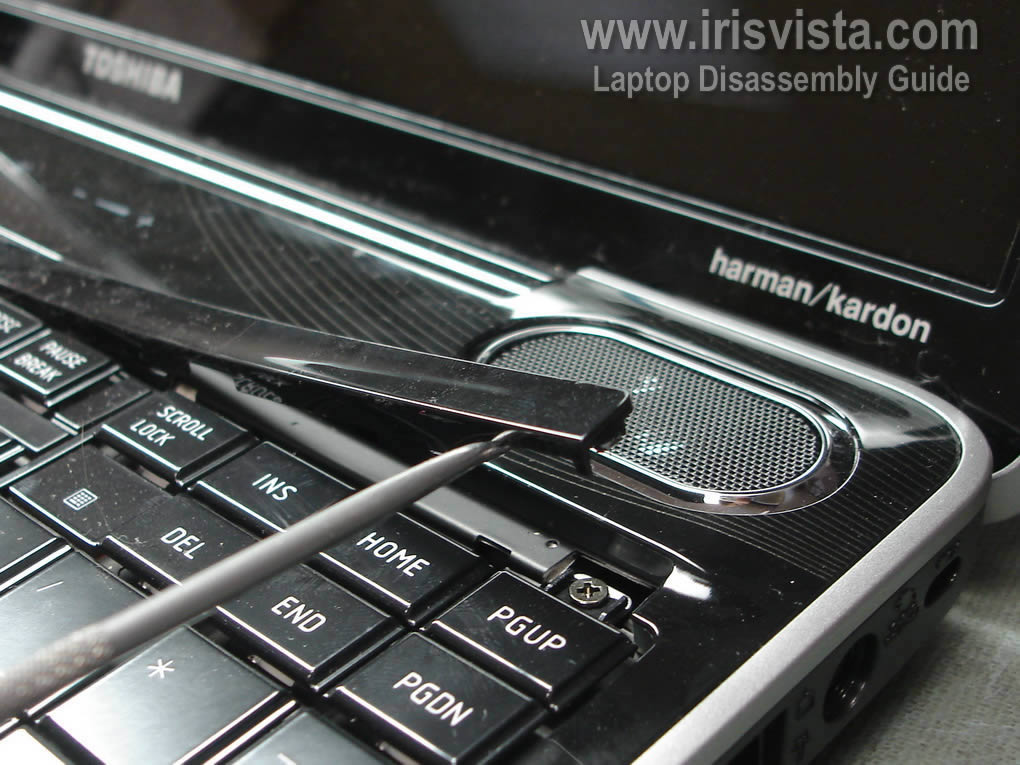
STEP 1
Turn off the laptop and remove the battery. I start laptop disassembly with removing the keyboard.
Using a sharp object carefully lift up the keyboard bezel.
Continue removing bezel with your fingers. |
| |
|
 |
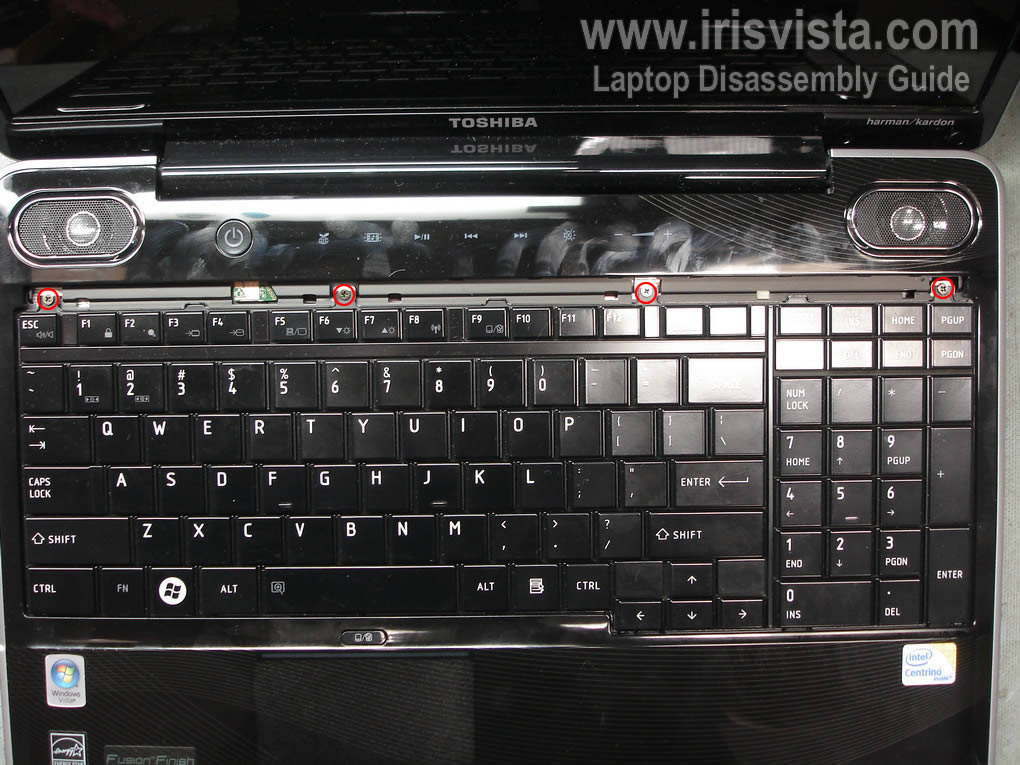
STEP 2
Under the bezel you'll find four screws securing the keyboard.
Remove all four screws.
|
| |
|
 |
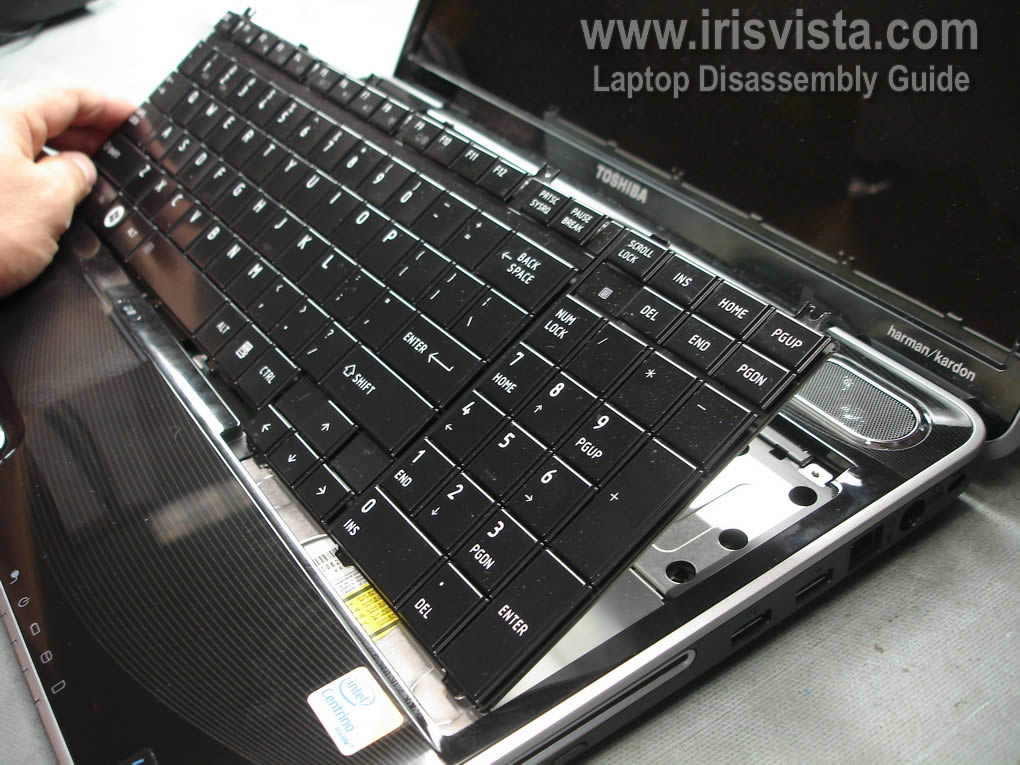
STEP 3
Carefully lift up the keyboard. |
| |
|
 |
STEP 4
Now you can access the keyboard cable connector underneath the keyboard.
You have to unlock the connector and release the cable before removing the keyboard. |
| |
|
 |
STEP 5
In order to unlock the connector move the locking clip about 2 millimeters towards the LCD screen.
The clip must stay attached to the connector base. If you break the connector, you'll have to replace the whole motherboard.
Now you can pull the cable and remove the keyboard.
|
| |
|
 |
STEP 6
Remove hard drive and memory covers from the laptop bottom.
|
| |
|
 |
STEP 7
Remove one screw securing the hard drive.
It's not necessary to remove the hard drive in order to replace the optical drive.
I'm doing that only for your convenience, so you know how to access and remove the hard drive. |
| |
|
 |
STEP 8
Slide the hard drive to the left and disconnect it from the motherboard.
Lift up and remove the hard drive. |
| |
|
 |
STEP 9
Remove both memory modules.
Again, it's not necessary to remove memory modules when you are replacing the optical drive. |
| |
|
 |
STEP 10
Remove all screws from the bottom of the laptop.
These screws securing the top cover.
|
| |
|
 |
STEP 11
Remove one screw securing the top cover.
Disconnect three cables. |
| |
|
 |
STEP 12
Start separating the top cover assembly from the laptop base. |
| |
|
 |
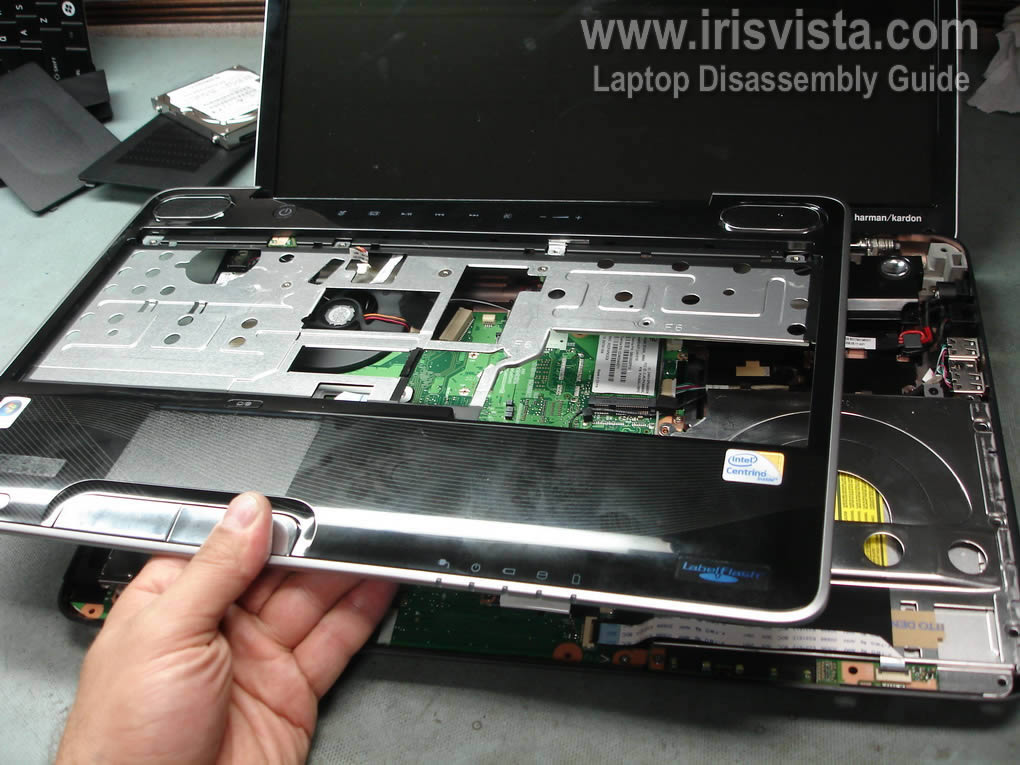
STEP 13
Remove the top cover assembly. |
| |
|
 |
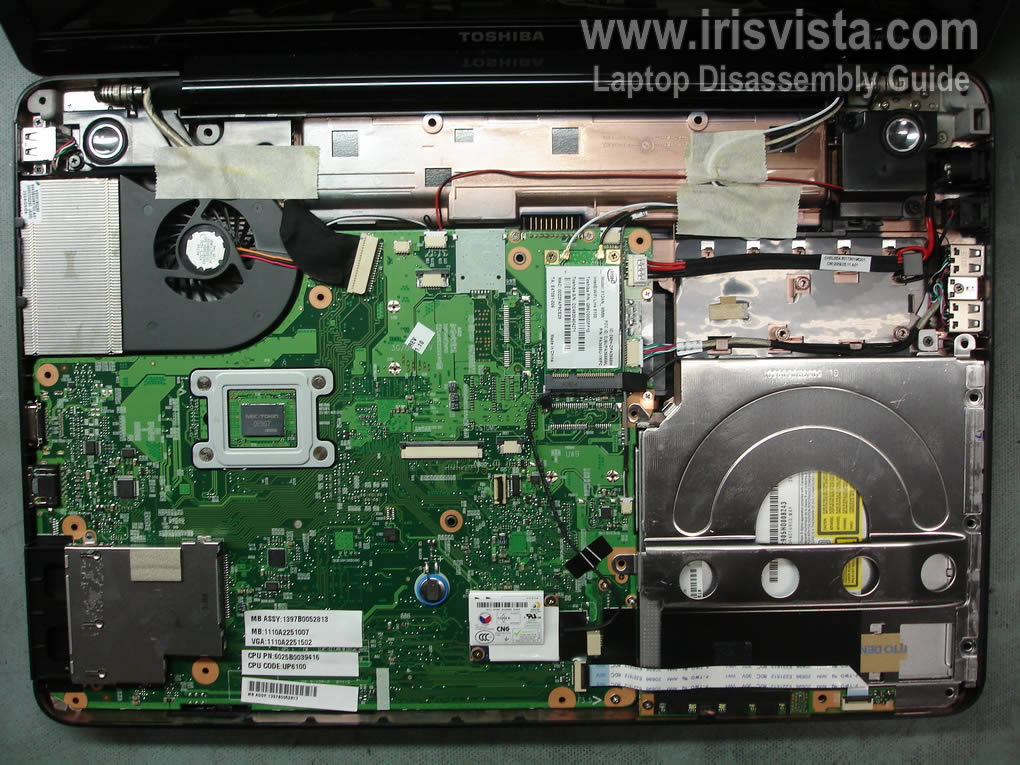
STEP 14
The top cover assembly has been removed.
By the way, if the cooling module is clogged with dust and your laptop overheats, you can clean the cooling module now.
Blow compressed air into the fan until all dust is gone and the cooling module is clean. |
| |
|
 |
STEP 15
Disconnect the LED board cable on both ends.
Remove one screw securing the LED board. |
| |
|
 |
STEP 16
Remove the LED board from the laptop.
|
| |
|
 |
STEP 17
Unplug the power jack cable and USB board cable from the motherboard.
Remove one screw securing the optical drive cover. |
| |
|
 |
STEP 18
Unroute the power jack cable.
Unroute the USB board cable. |
| |
|
 |
STEP 19
Slide the optical drive cover towards the LCD screen.
|
| |
|
 |
STEP 20
Lift up and remove the optical drive cover.
|
| |
|
 |
STEP 21
Remove two screws securing the optical drive. |
| |
|
 |
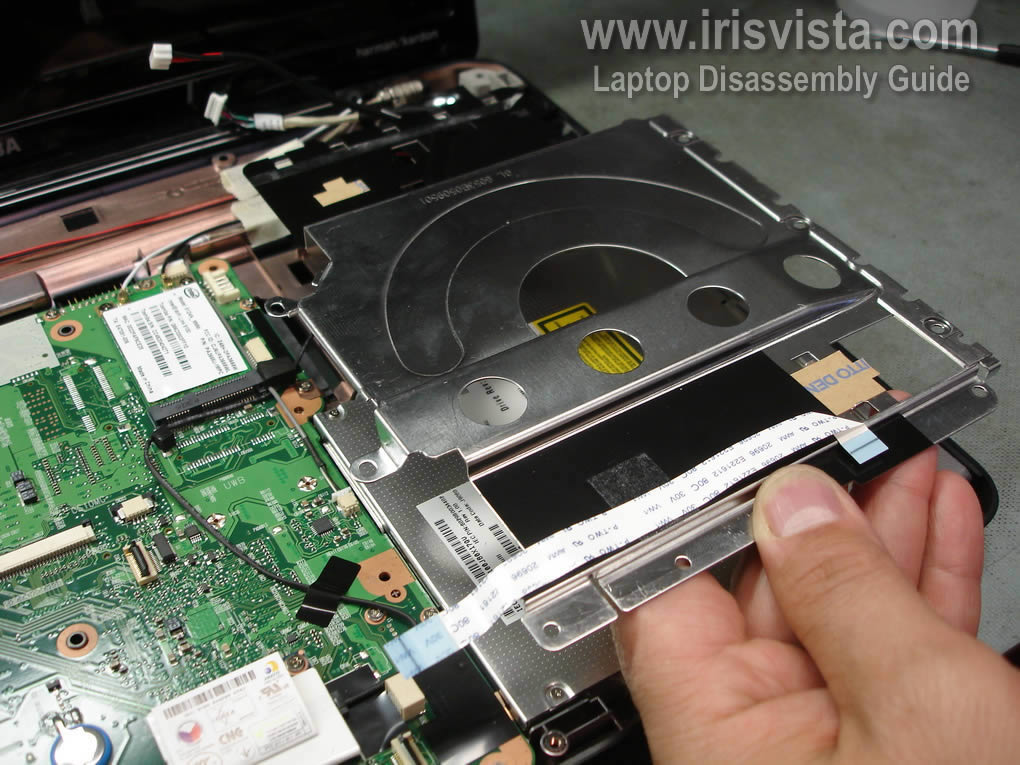
STEP 22
Here's the tricky part.
Even after you slide the optical drive to the right, you still will not be able to remove it from the laptop base.
The mounting bracket on the drive is too long and it hits the motherboard when you lift up the drive.
Bad design? Probably. |
| |
|
 |
STEP 23
If you lift up the optical drive a little bit, you can remove both screws securing the mounting bracket to the drive.
I really didn't want to remove the motherboard because of this stupid bracket on the drive. |
| |
|
 |
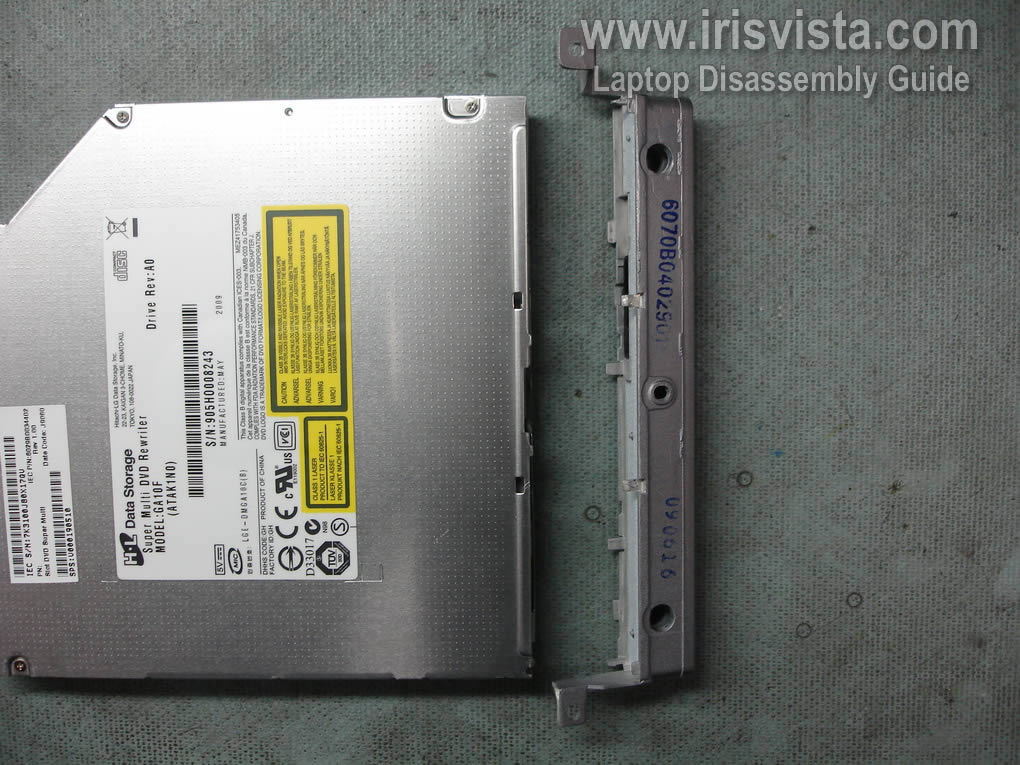
STEP 24
After both screws are removed, you can separate the mounting bracket from the drive. |
| |
|
 |
STEP 25
Lift up the optical drive and slide it to the left. |
| |
|
 |
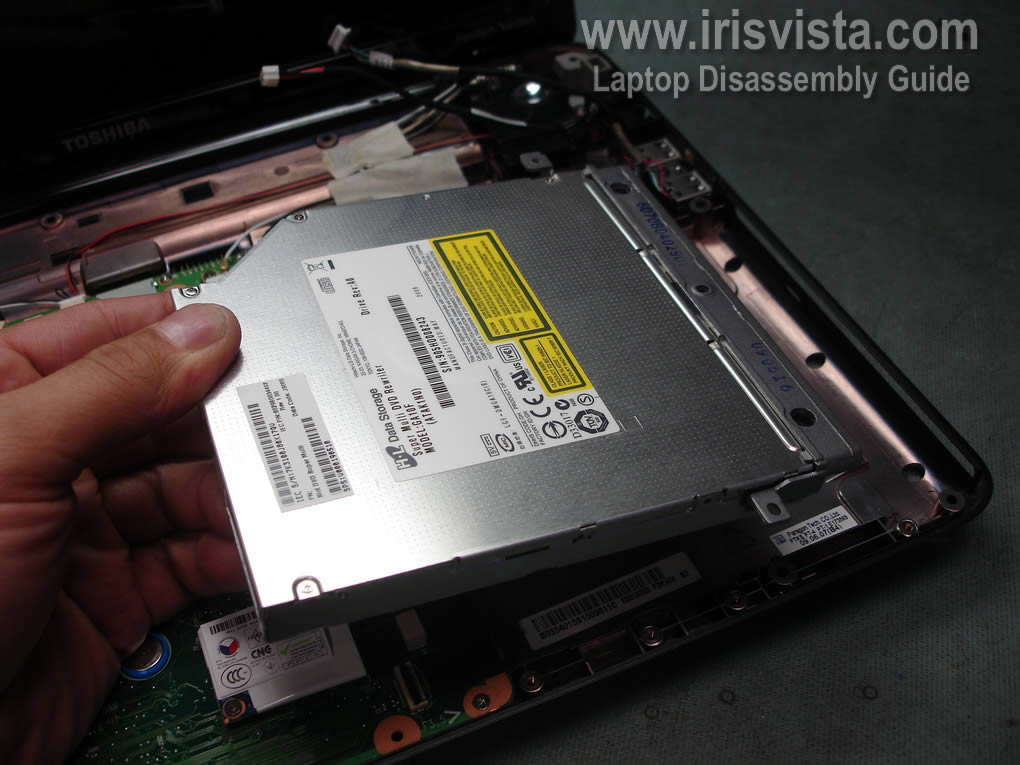
STEP 26
Remove optical drive from the laptop. |
| |
|
 |
STEP 27
You'll have to transfer the front bezel to the new drive.
|
| |
|
 |
STEP 28
Remove the front bezel.
|
| |
|
 |
STEP 29
You can search for a new CD/DVD drive using part number from the old drive.
In my case the part number is: V000190510 |
| |
|
 |
STEP 30
The optical drive has been removed. |
| |
|
|
|