|
Toshiba Satellite C855, C855D, C850, C850D disassembly.
The screen removal procedure should be similar to Satellite C875.
|
|
|
 |
STEP 1
Make sure the laptop is turned off.
Unlock and remove the battery. |
| |
|
 |
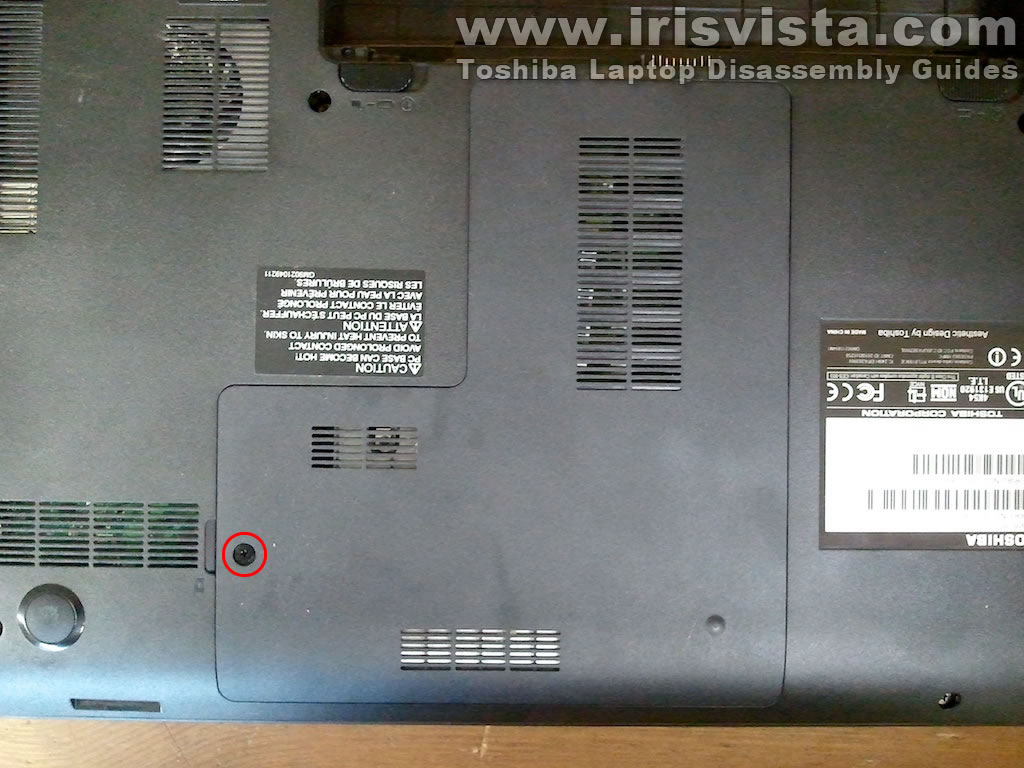
STEP 2
Remove one screw securing the service cover on the bottom of the laptop.
Lift up and remove the service cover.
|
| |
|
 |
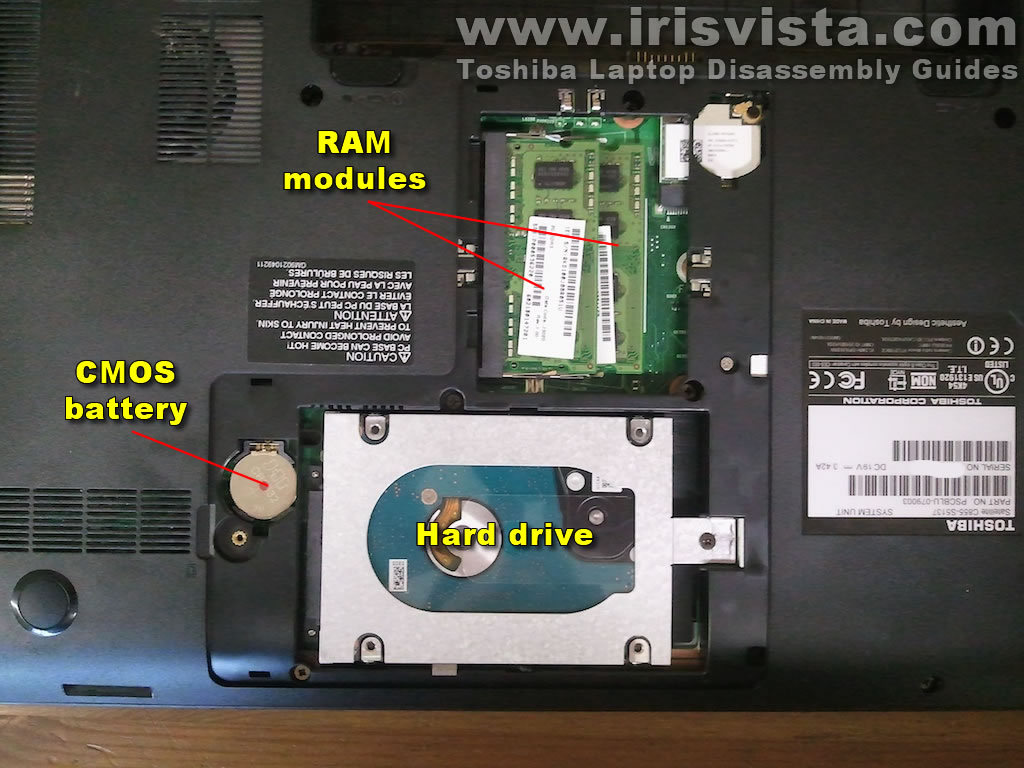
STEP 3
Under the service cover you can access both RAM modules, CMOS battery and hard drive.
I will leave RAM modules and CMOS battery connected to the motherboard but remove the hard drive.
|
| |
|
 |
STEP 4
Remove one screw securing the hard drive caddy to the laptop case.
Slide the hard drive assembly to the right to disconnect it from the motherboard. |
| |
|
 |
STEP 5
Lift up and remove the hard drive assembly.
This laptop has a regular SATA hard drive installed. |
| |
|
 |
STEP 6
Remove one screw securing the optical drive.
Slide the optical drive to the right and pull it from the laptop.
|
| |
|
 |
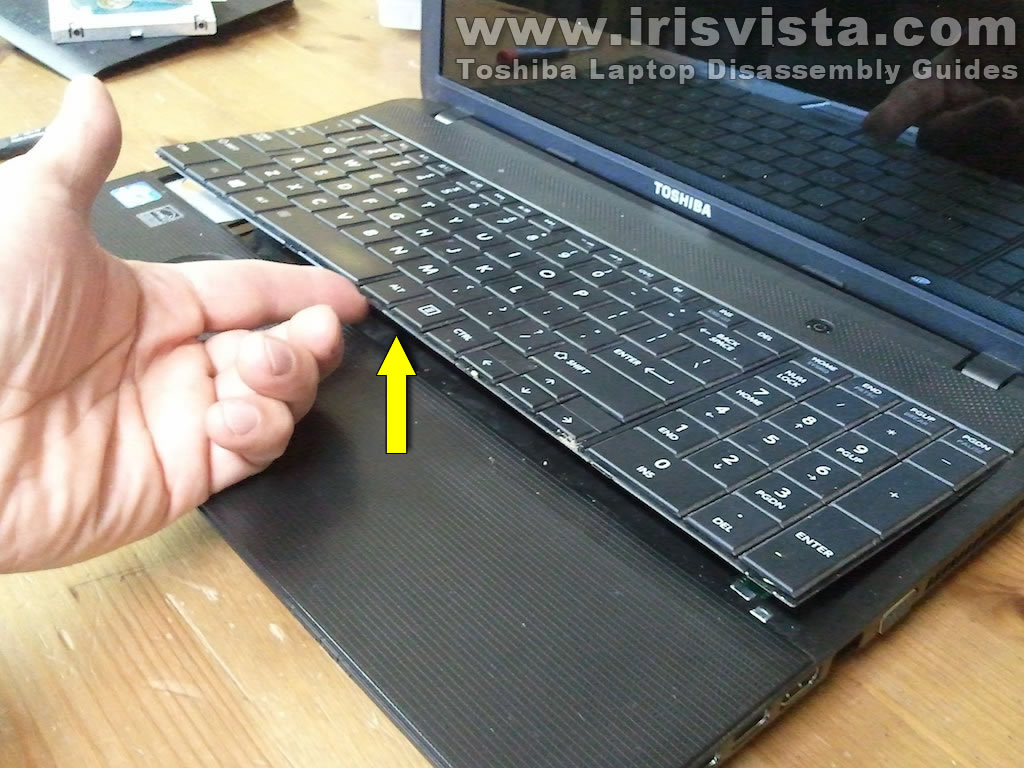
STEP 7
Removing the keyboard is a little bit tricky.
There are a few plastic tabs between the lower part of the keyboard and palm rest. On this picture I show only two of them but you'll find more. |
| |
|
 |
STEP 8
Start removing the keyboard using a knife blade.
Push on the plastic tab and at the same time insert the blade under the keyboard. |
| |
|
 |
STEP 9
Lift up the left side of the keyboard.
|
| |
|
 |
STEP 10
While lifting it up push on all other tabs and separate the keyboard from the palm rest. |
| |
|
 |
STEP 11
When you lift up the keyboard you'll feel that something holding it in the middle.
There is a small metal pin securing the keyboard to the top cover.
Just apply some reasonable force and the pin will disconnect from the top cover. |
| |
|
 |
STEP 12
Now you can move the keyboard towards the display assembly and access the cable connector.
In the following two steps I shown how to unlock the keyboard connector and release the cable. |
| |
|
 |
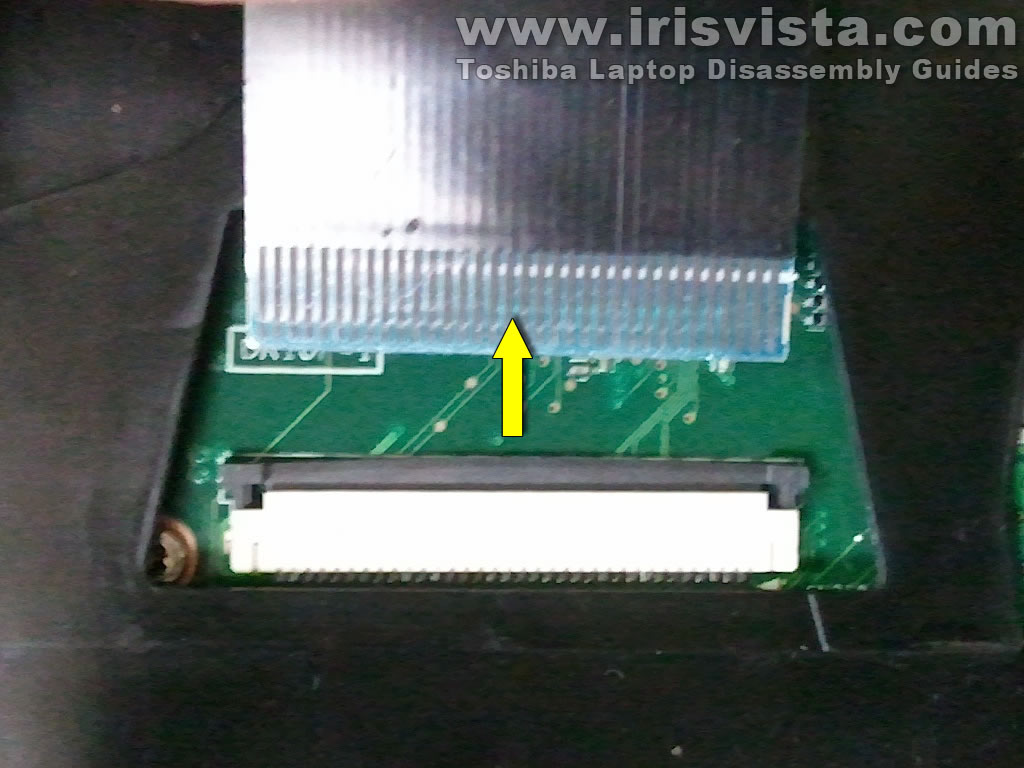
STEP 13
The cable secured to the connector by a retainer (brown piece).
Very carefully slide the retainer about 2-3 millimeters to the shown direction. Use your fingernails for that.
Do not separate the retainer from the connector. |
| |
|
 |
STEP 14
Now you can pull the cable from the connector. |
| |
|
 |
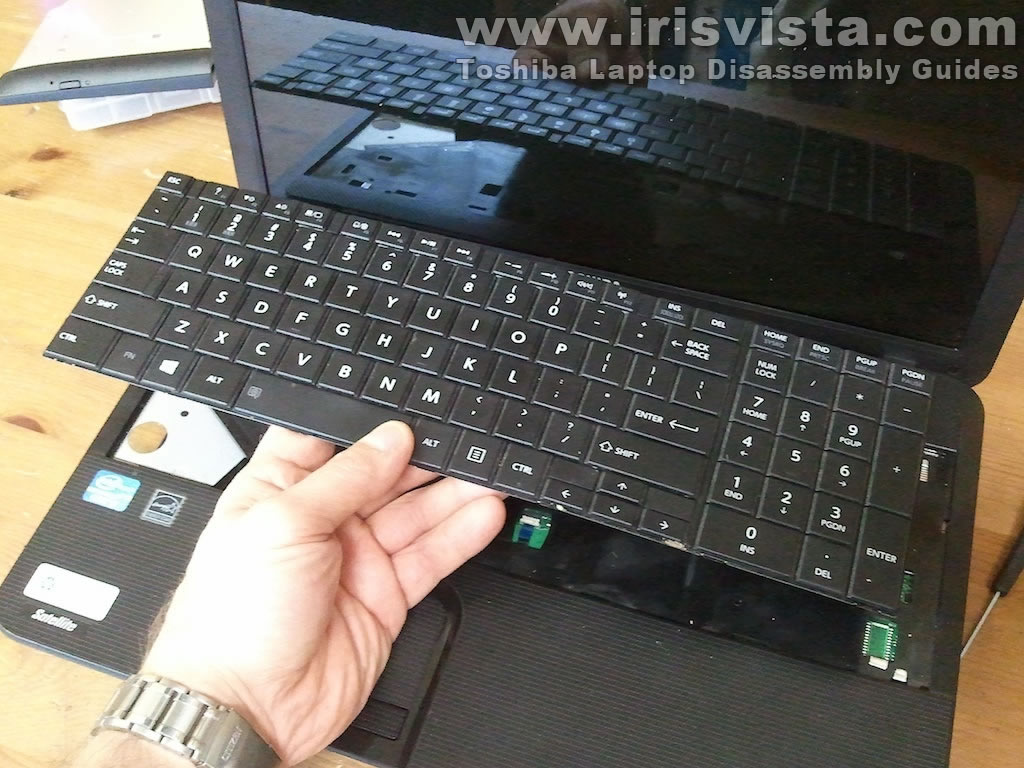
STEP 15
Remove the keyboard. |
| |
|
 |
STEP 16
Remove all screws from the bottom of the laptop.
|
| |
|
 |
STEP 17
There are no screws securing the palm rest. |
| |
|
 |
STEP 18
Turn the laptop upside down and start removing the bottom cover. |
| |
|
 |
STEP 19
I'm using a guitar pick to separate the bottom cover from the rest of the laptop. |
| |
|
 |
STEP 20
While removing the bottom cover I noticed that something holding it in place in the battery area.
There is a small plastic tab securing the top cover assembly and it's located right above the battery connector. |
| |
|
 |
STEP 21
Lift up the top cover a little bit and move it over the tab. |
| |
|
 |
STEP 22
Now you can remove the bottom cover completely. |
| |
|
 |
STEP 23
When the bottom cover remove you can get access to the following internal components:
- Cooling fan.
- Wireless module.
- DC power jack.
- USB board.
- Trackpad.
- Motherboard. |
| |
|
 |
STEP 24
In Toshiba Satellite C855 laptop the DC jack attached to the power harness.
If the jack fails, you can unplug the DC jack harness from the motherboard and replace it with a new one. |
| |
|
 |
STEP 25
In order to remove the cooling fan you'll have to remove two screws securing the fan. |
| |
|
 |
STEP 26
Lift up the fan and disconnect the cable from the motherboard.
Now the fan can be removed completely. |
| |
|
 |
STEP 27
While the fan is removed you can clean up the heatsink. In my case it was full of dust.
|
| |
|
|
|