|
Toshiba Satellite C875, C875D, C870, C870D screen replacement.
By the way, in one of the previous guides I explained how to take apart the case and access internal components.
As always, make sure the laptop is turned off and battery removed before you start taking it apart. |
|
|
 |
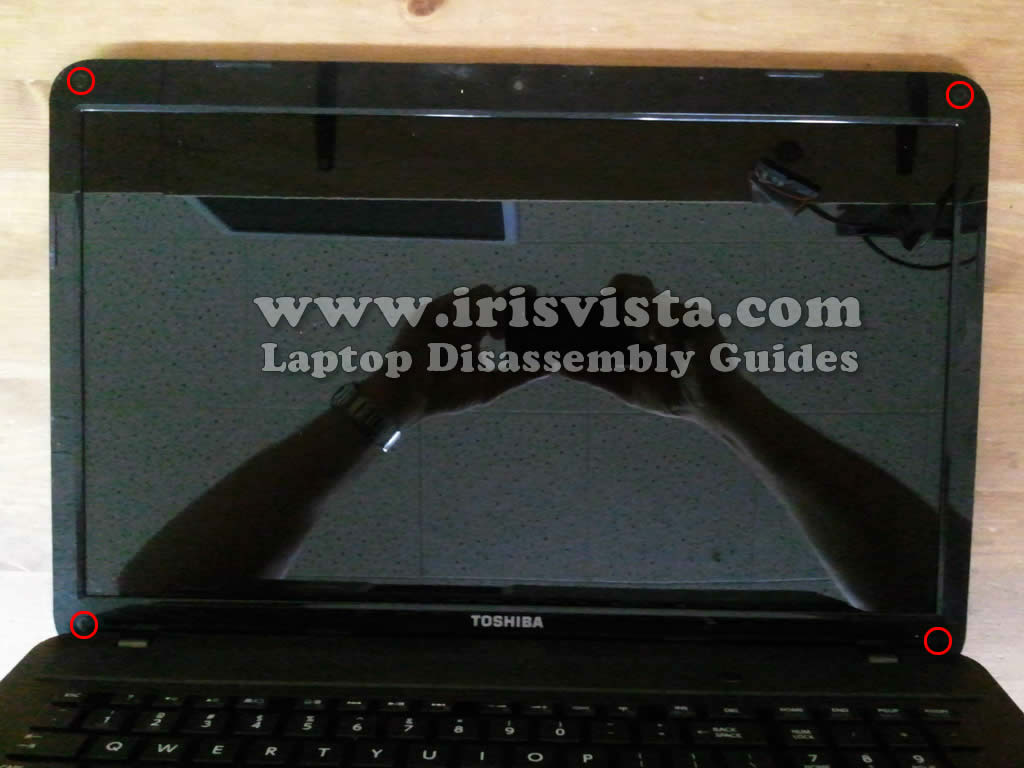
STEP 1
If you look on the screen bezel, you'll find a screw cover in each corner of the bezel.
|
| |
|
 |
STEP 2
Remove all four screw covers with a sharp object.
Remove four screws found under those covers.
|
| |
|
 |
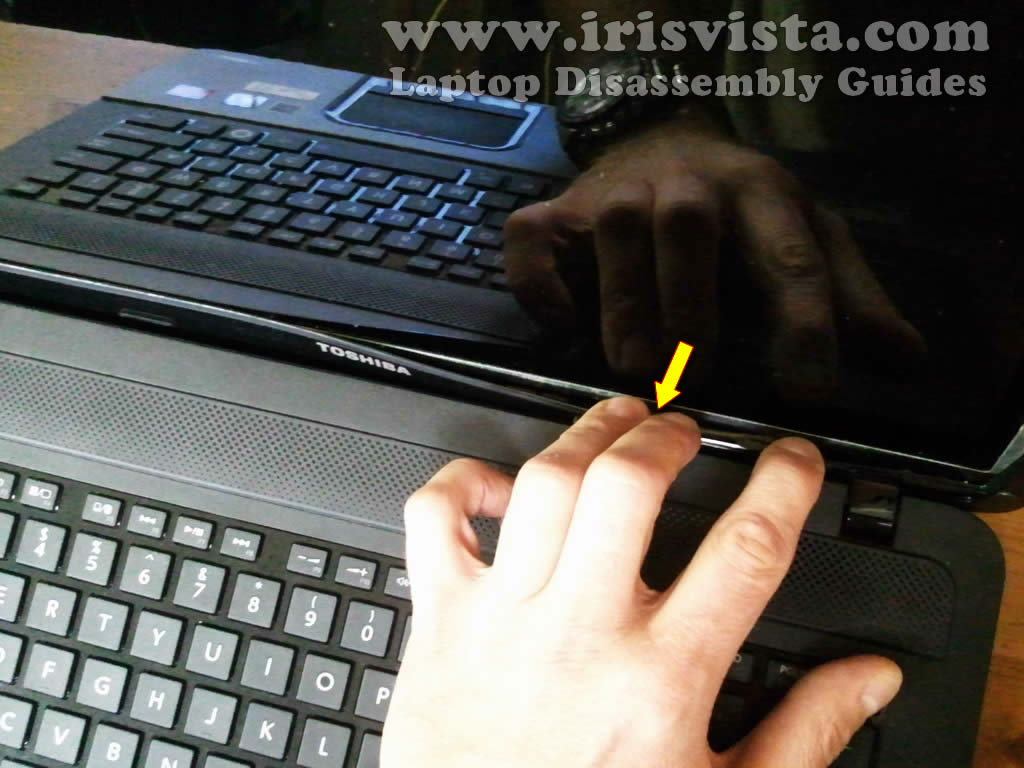
STEP 3
I'm using the guitar pick to separate the screen bezel from the display back cover. Any thin piece of plastic should work too.
Insert the guitar pick between the bezel and display back cover and separate the bezel. Continue removing the bezel with your gingers.
You'll have to wiggle the bezel in order to unlock hidden latches securing it to the display back cover. |
| |
|
 |
STEP 4
After you separated the bezel on the upper side of the display assembly move to the lower part. |
| |
|
 |
STEP 5
Continue separating the screen bezel from the display cover.
There are many hidden latches securing the bezel. You'll have to unlock them. |
| |
|
 |
STEP 6
Remove the screen bezel from the laptop. |
| |
|
 |
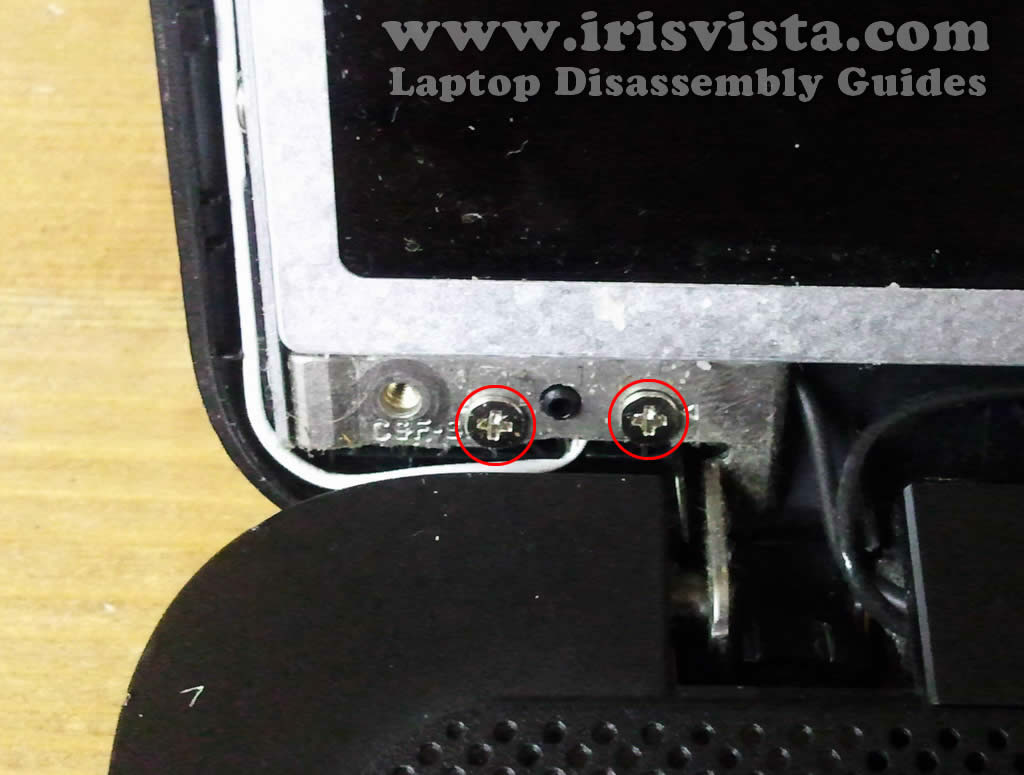
STEP 7
Loosen (do not remove completely) two screws securing the display back cover to the left hinge assembly. |
| |
|
 |
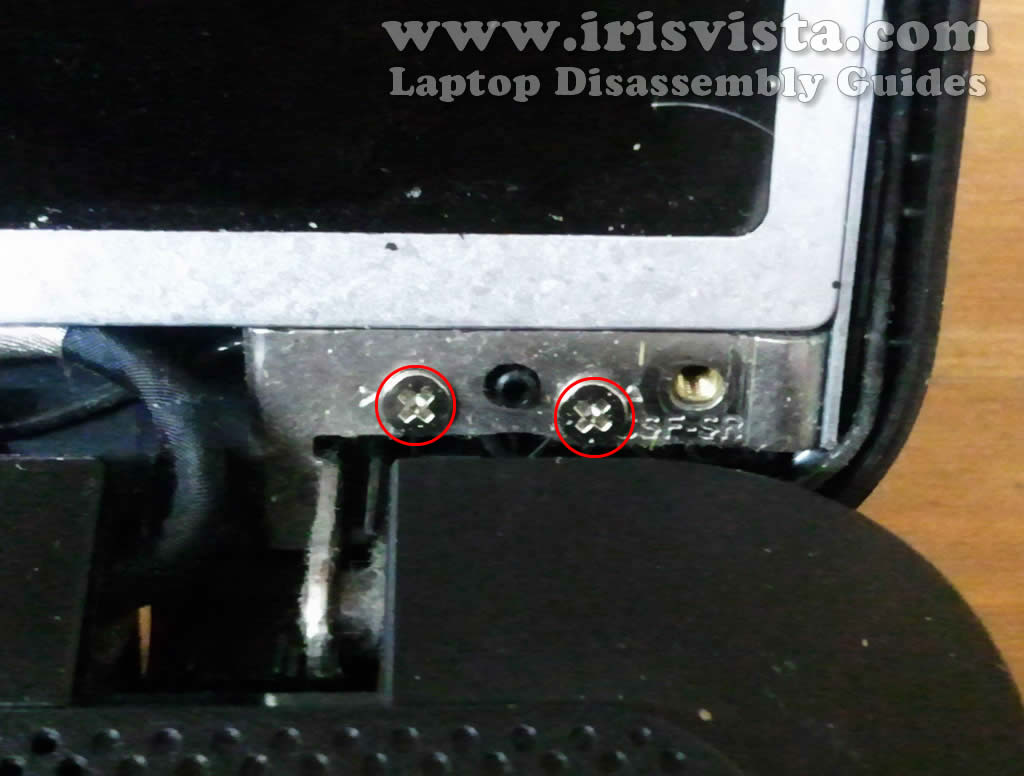
STEP 8
Loosen two more screws securing the display cover to the right hinge assembly. |
| |
|
 |
STEP 9
Carefully separate the LCD screen from the display back cover and unplug one cable from the web camera module. |
| |
|
 |
STEP 10
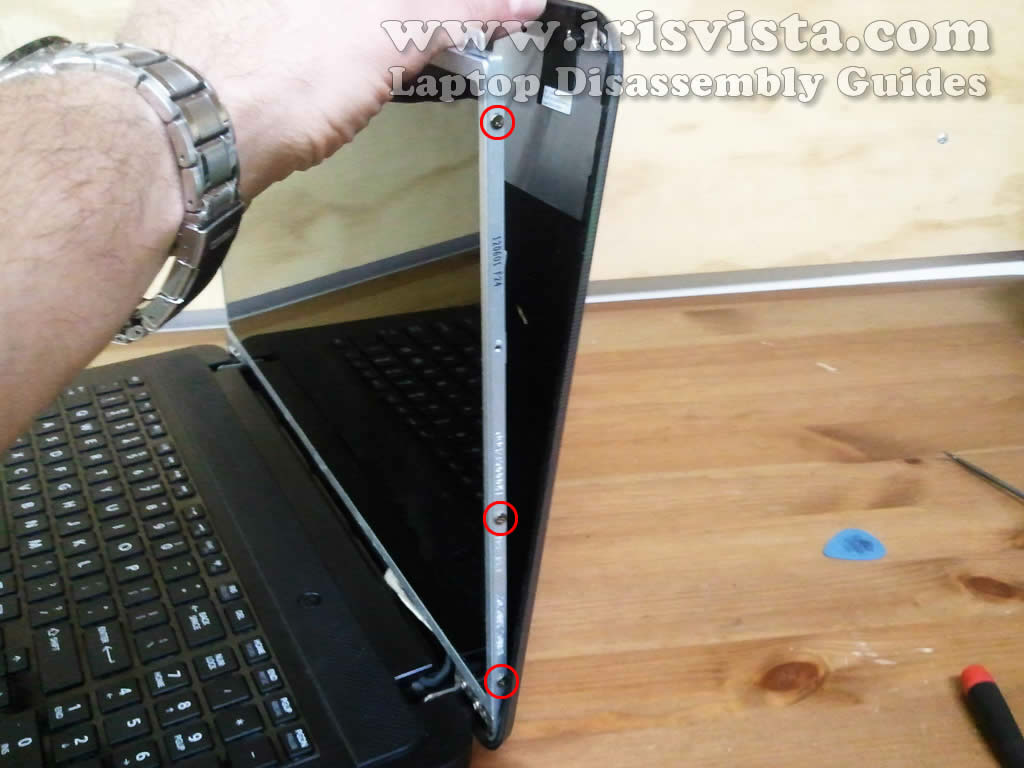
Remove three screws securing the LCD screen to the right mounting bracket. |
| |
|
 |
STEP 11
Remove three screws securing the LCD screen to the left mounting bracket.
|
| |
|
 |
STEP 12
Now you can separate the screen from the display cover and place it the front side down on the palmrest/keyboard assembly.
|
| |
|
 |
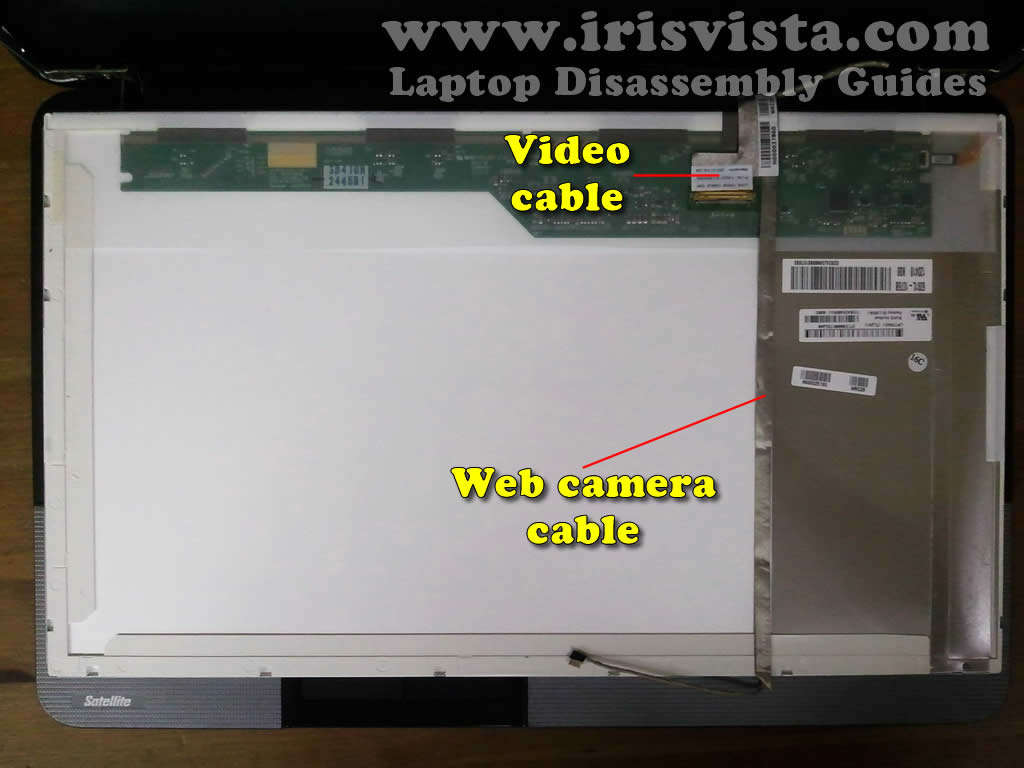
STEP 13
On the back side of the screen you can access the video cable and web camera cable (which is part of the video harness).
Carefully unglue the web camera cable from the screen.
|
| |
|
 |
STEP 14
Remove sticky tape securing the video cable connector and unplug the video cable from the screen.
|
| |
|
 |
STEP 15
Remove the failed/damaged/cracked LCD screen from the laptop.
Replace it with a new one and assemble the laptop following all disassembly steps in the reverse direction.
|
| |
|
 |
STEP 16
You can find a new replacement screen if you search by the model number printed on the original screen.
My Toshiba Satellite C875D laptop had the following screen installed: LP173WD1 (TL)(N1).
|
| |
|
|
|