|
Toshiba Satellite L35 and L30 screen replacement. |
|
|
 |
STEP 1
Before you start taking the notebook apart do not forget remove the battery and unplug the AC adapter.
The screen mask is secured by six screws and these screws are hidden under the sticky seals. Remove seals and glue them on the screen mask as it shown on the picture. These way you will not loose the seals. Remove six screws.
|
| |
|
 |
STEP 2
Insert your fingers between the LCD mask and the screen and start separating the mask from the display assembly. |
| |
|
 |
STEP 3
Continue removing the LCD mask. Work with your fingers to disengage the latches. |
| |
|
 |
STEP 4
After all latches are disengaged remove the screen mask. |
| |
|
 |
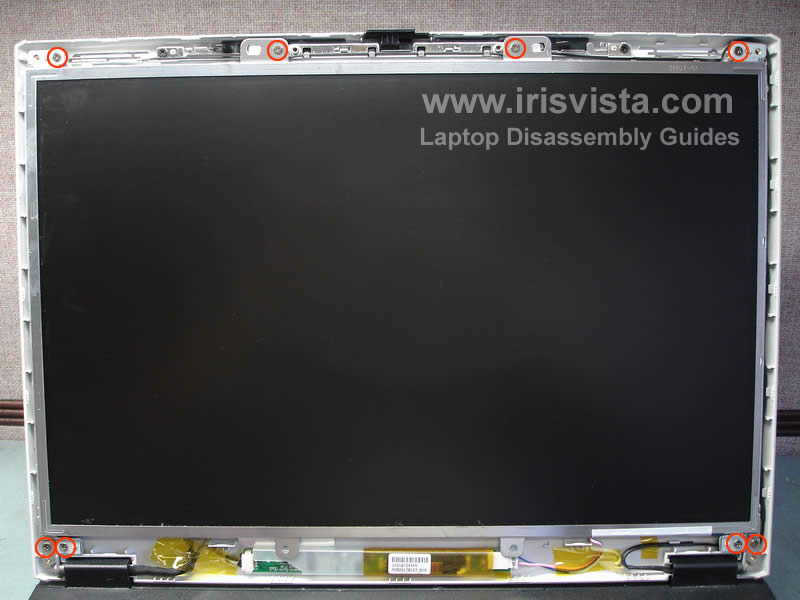
STEP 5
In this model the screen is secured to the LCD cover by eight screws (on some models six screws). Remove these screws.
If you are taking your notebook apart in order to replace the screen inverter, you don't have to take it apart any further. Unplug cables from both sides of the inverter board, unglue the inverter from the LCD cover and replace it. |
| |
|
 |
STEP 6
After all screws are removed, you can separate the LCD screen from the cover. |
| |
|
 |
STEP 7
Now you'll have to unplug some cables on the back of the screen.
1. Remove the orange (might be different color in your case) tape from the video cable connector and unplug the cable from the screen. Just pull the cable from the connector.
2. Remove the sticky tape securing the video cable to the screen.
3. Unplug the LCD backlight lamp cable from the inverter board. |
| |
|
 |
STEP 8
Remove two screws from each side of the screen. |
| |
|
 |
STEP 9
Carefully remove the LCD screen and replace it if needed. |
| |
|
|
|