|
How to change screen in Toshiba Satellite L645, L645D, L640, L640D.
In order to access and replace LCD screen it will be necessary to separate the display panel from the laptop base as I explained in this disassembly guide. It's very hard to remove the screen bezel (and install it back in place) when the display panel still attached.
After the display panel separated from the base, you can start taking it apart. |
|
|
 |
STEP 1
There are four screws securing the screen bezel. Those screws hidden under sticky covers.
|
| |
|
 |
STEP 2
Remove all four sticky covers with a sharp object and remove four screws.
|
| |
|
 |
STEP 3
Insert fingers under the screen bezel and start separating it from the cover.
You'll have to wiggle the bezel to release hidden latches.
|
| |
|
 |
STEP 4
Continue removing the screen bezel. |
| |
|
 |
STEP 5
The bezel has been removed. |
| |
|
 |
STEP 6
Remove four screws securing display hinges to the cover. |
| |
|
 |
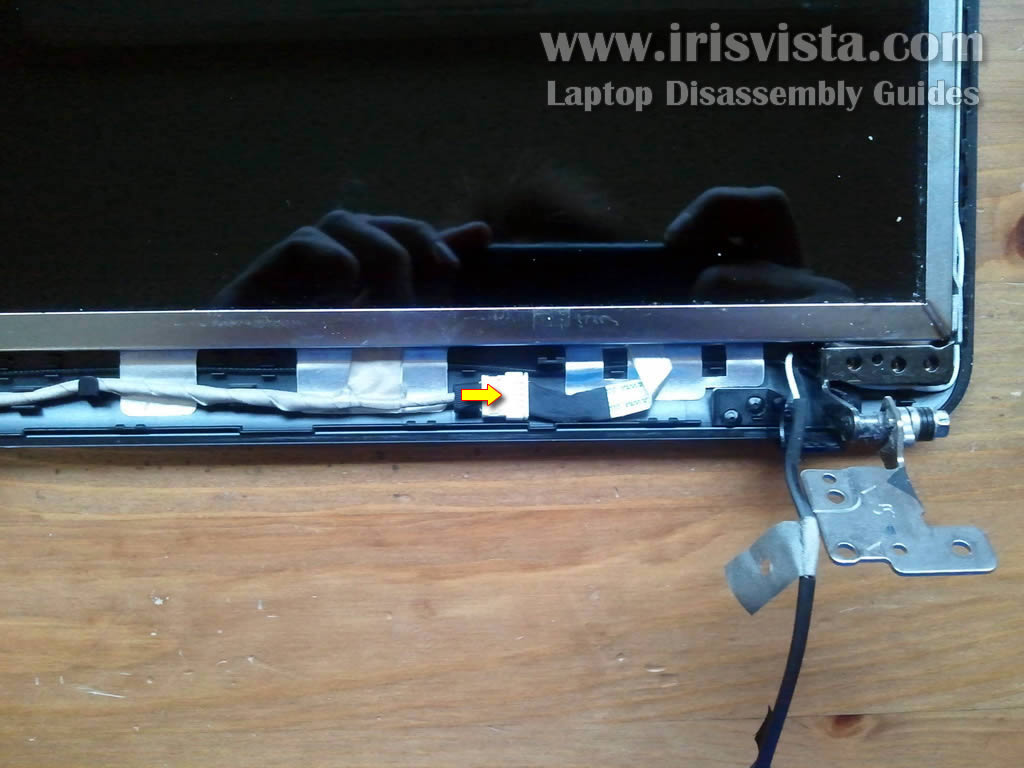
STEP 7
Carefully disconnect cable located below the screen. |
| |
|
 |
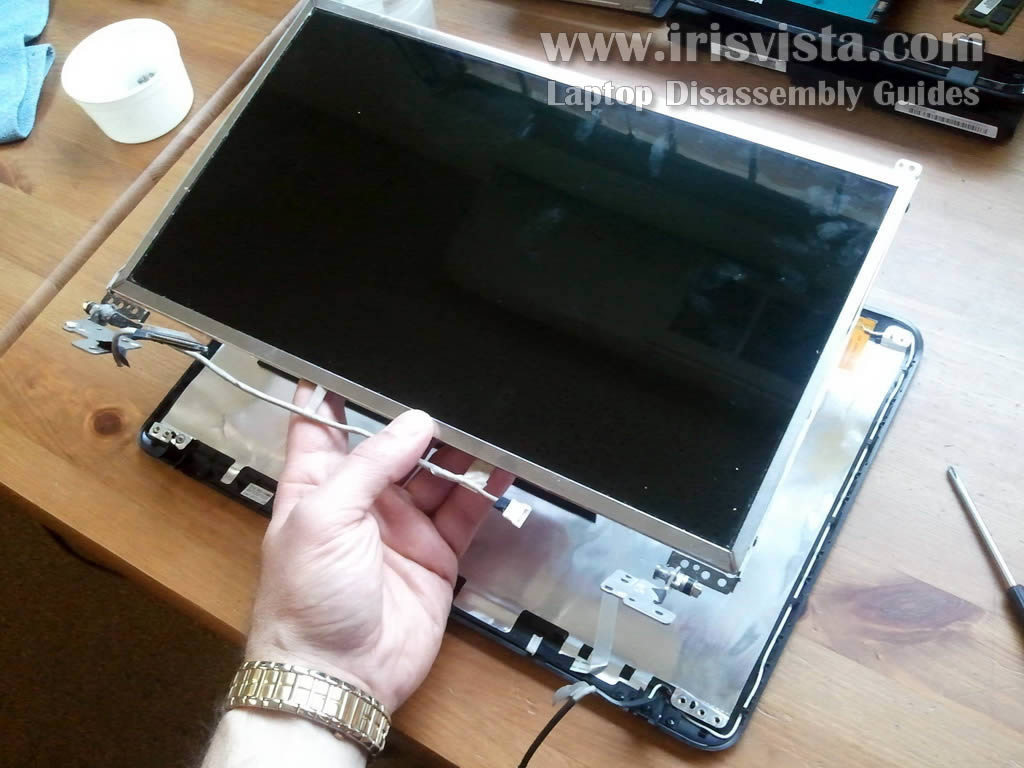
STEP 8
Now you can lift up and remove the LCD screen assembly. |
| |
|
 |
STEP 9
Turn the LCD screen over.
Disconnect video cable from the screen.
|
| |
|
 |
STEP 10
Finally, remove mounting brackets/hinges from the defective LCD screen and transfer them to the new screen. |
| |
|
 |
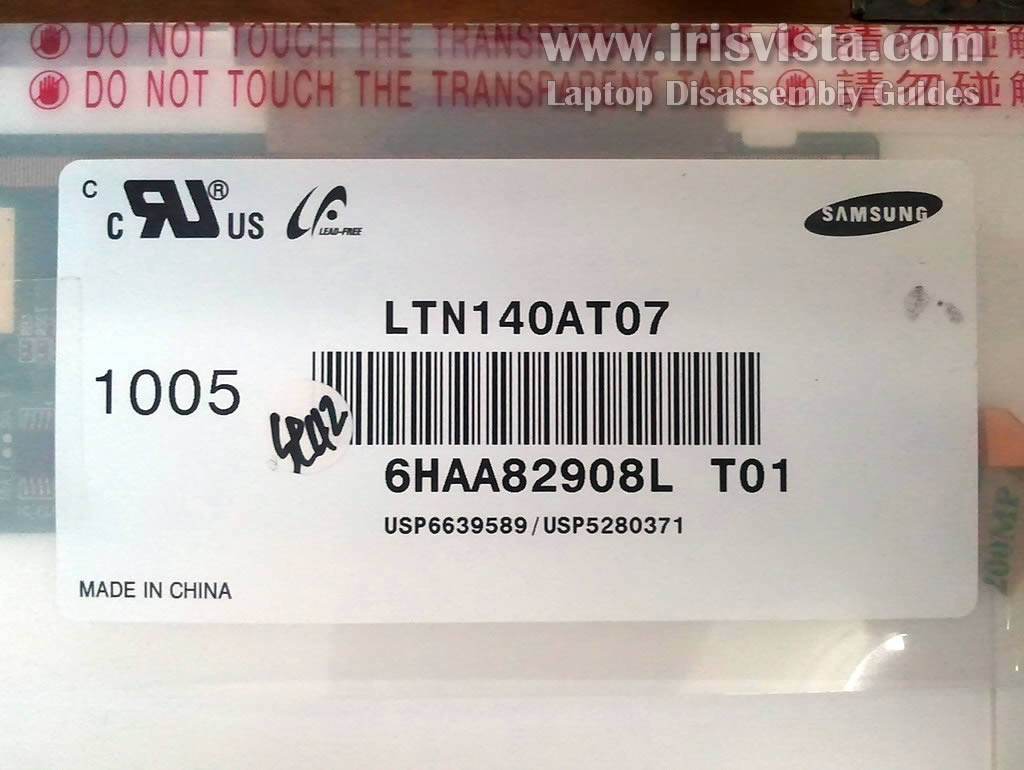
STEP 11
You can search for a new replacement screen using model number from the original screen.
In my case I had the following screen installed: LTN140AT07.
If your original screen has a different model number, just search for it.
|
| |
|
|
|