|
Toshiba Satellite L775, L775D, L770, L770D screen replacement. |
|
|
 |
STEP 1
As you see, the display panel already separated from the laptop. I explained how to remove the display panel in my previous guide where I disassemble the base on a Satellite L775.
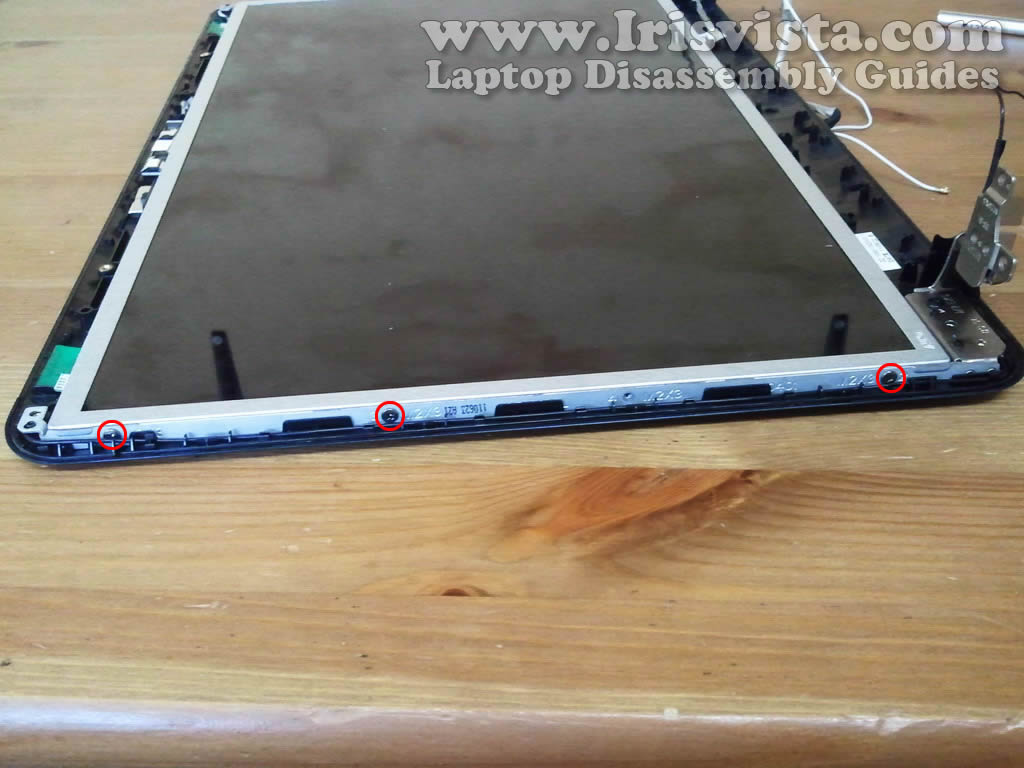
If you can figure out how to remove two screws located on lower part of the display bezel without separating the display panel from the laptop base, it will be not necessary to remove the display panel. In this case the LCD screen replacement can be done while the display panel still attached to the laptop base.
There are four screw covers on the display bezel. Four on the top and two on the bottom.
|
| |
|
 |
STEP 2
Remove all six covers from the screen bezel with a sharp object.
On this picture I'm removing the cover from the screw located in the lower right corner.
Again, if you can remove lower left and right screws without removing the display panel you'll save lots of time on the laptop disassembly.
After all six covers removed, remove six screws found under those covers.
|
| |
|
 |
STEP 3
Start separating the screen bezel from the display back cover.
I'm helping myself with the guitar pick. You can use a piece of soft plastic. Insert it between the bezel and back cover and carefully move along the side. This will help you to unlock hidden plastic latches inside the display panel. |
| |
|
 |
STEP 4
Continue separating the screen bezel from display back cover with your fingers. |
| |
|
 |
STEP 5
Remove the screen bezel. |
| |
|
 |
STEP 6
Remove three screws securing the LCD screen to the right hinge bracket. |
| |
|
 |
STEP 7
Remove three more screws securing the LCD screen to the left hinge bracket. |
| |
|
 |
STEP 8
The web camera module mounted above the LCD screen.
NOTE: the web camera is not a part of the screen.
Before you can separate the screen from the display back cover, it's necessary to disconnect the web camera cable. |
| |
|
 |
STEP 9
Unplug the cable from the web camera. |
| |
|
 |
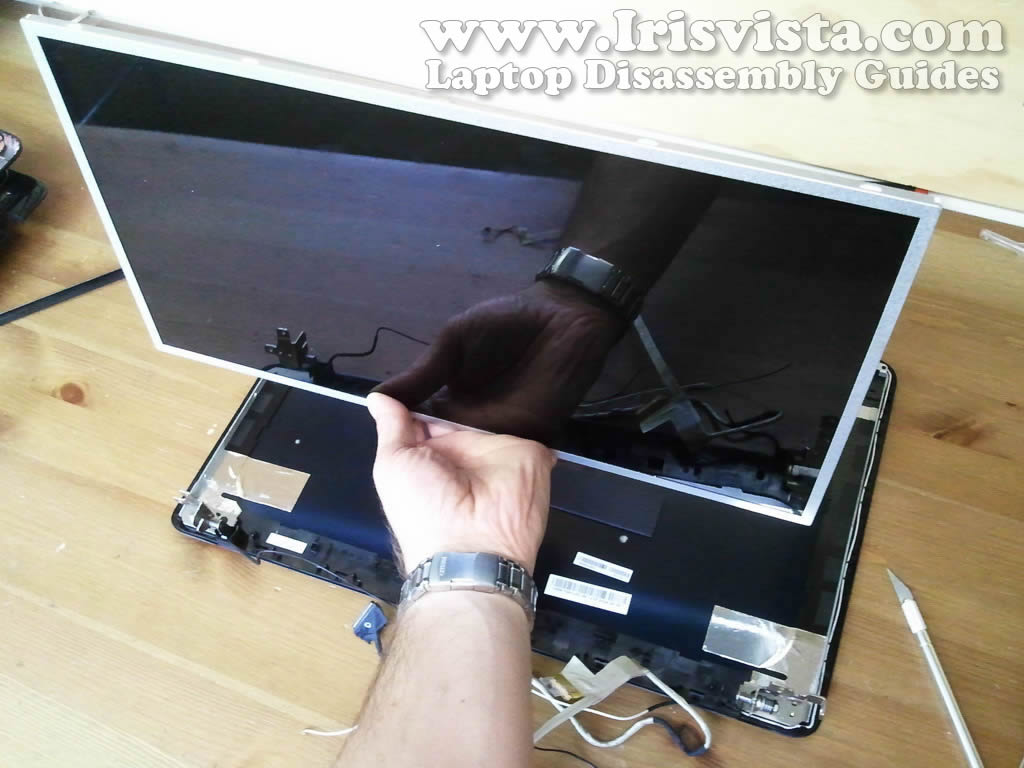
STEP 10
Now you can separate the LCD screen from the display back cover. |
| |
|
 |
STEP 11
Turn the LCD screen upside down and place it on the table.
Now you can access the video cable connection on the back of the LCD screen.
|
| |
|
 |
STEP 12
Remove the yellow tape securing the connection.
|
| |
|
 |
STEP 13
Carefully unglue the sticky clear tape from the screen and unplug the video cable connector from the screen.
|
| |
|
 |
STEP 14
Remove the LCD screen. It's ready for the replacement.
|
| |
|
 |
STEP 15
The best way to find a compatible replacement screen is searching by the model number from the original screen.
In my Toshiba Satellite L775 laptop I had a screen with the following model number: B173RW01 v.3
If you need a screen with a different model number just search for it.
|
| |
|
|
|