|
Toshiba Satellite M645, M645D, M640, M640D screen removal.
This laptop has a LED-backlit LCD screen installed. I explain how to find a new compatible screen at the end of the guide.
Also, check out my previous guide explaining how to disassemble the base.
|
|
|
 |
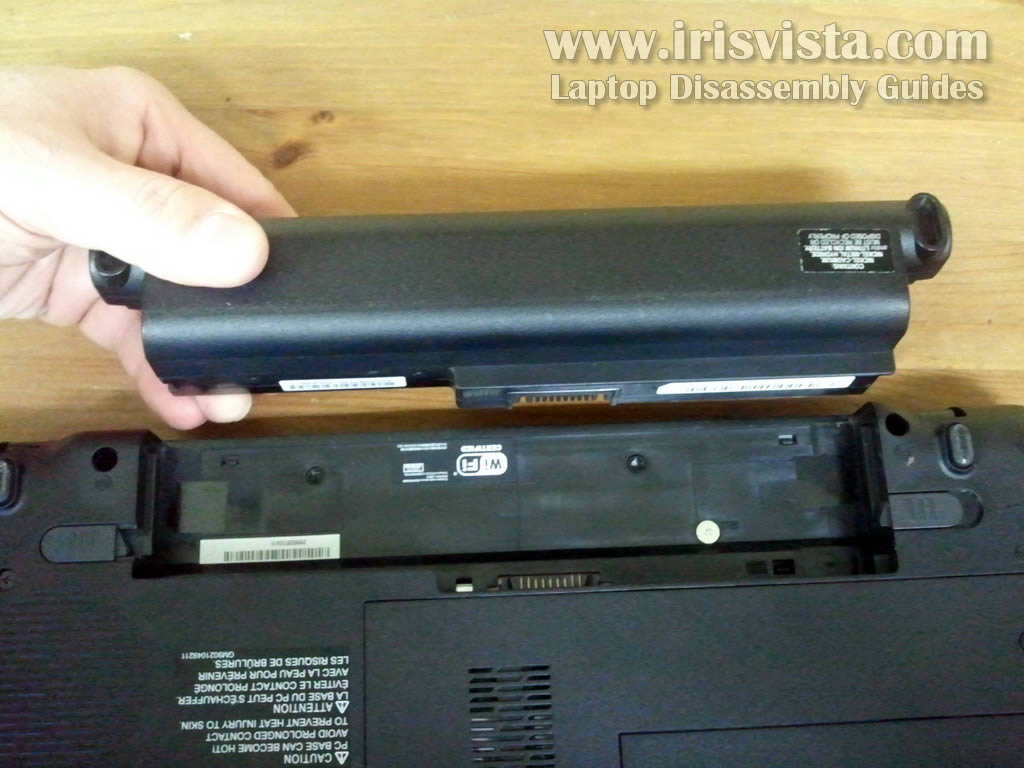
STEP 1
Make sure the laptop is turned off.
First of all remove the battery.
|
| |
|
 |
STEP 2
On the screen bezel you will find four rubber screw seals located in four corners of the bezel.
|
| |
|
 |
STEP 3
Remove all four covers with a sharp object. Glue covers somewhere on the bezel so they don't get lost.
Remove all four screws securing the screen bezel to the display back cover. |
| |
|
 |
STEP 4
Insert your fingers between the bezel and screen and start separating the bezel from the back cover.
There are hidden plastic latches securing the bezel. Wiggle the bezel a little bit to disengage those latches. |
| |
|
 |
STEP 5
On my Toshiba Satellite M645 the bezel came off very easily. |
| |
|
 |
STEP 6
Loosen (do not remove completely) for screws securing LCD mounting brackets to the display cover.
It's done in order to separate the back cover from the screen a little bit and access screws on the side of the screen. |
| |
|
 |
STEP 7
Don't forget to disconnect one cable from the web camera module.
By the way, the web camera is not part of the screen. It's a separate module. |
| |
|
 |
STEP 8
Carefully separate the LCD screen from the display back cover.
Remove three screws securing the LCD screen to the right hinge bracket. |
| |
|
 |
STEP 9
Remove three more screws securing the LCD screen to the left hinge bracket. |
| |
|
 |
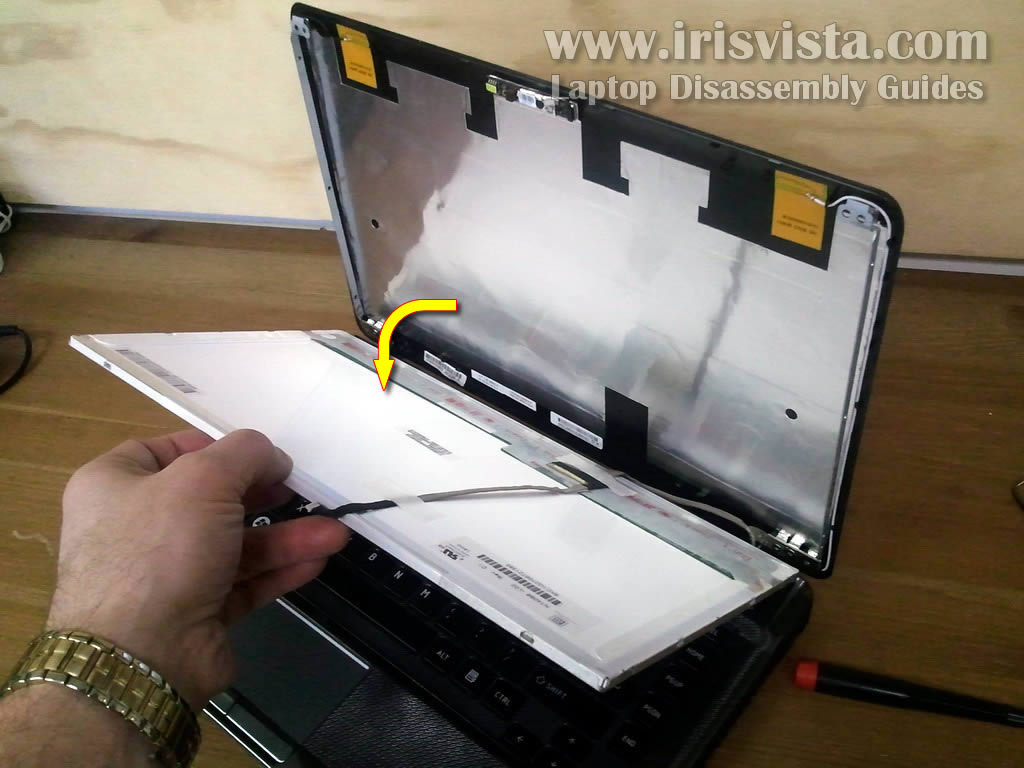
STEP 10
After all screws are removed you can separate the LCD screen from the display back cover and place it face down on the keyboard. |
| |
|
 |
STEP 11
Now you can access the LCD harness on the back of the screen.
The LCD harness has two connectors. The web camera connector (which we unplugged in the step 7) and video connector (which we'll unplug in the next step).
|
| |
|
 |
STEP 12
Remove clear tape securing the video cable connector.
Carefully disconnect the video connector from the screen.
|
| |
|
 |
STEP 13
Now you should be able to remove and replace the failed LCD screen.
Install your new screen and assemble the laptop following all steps in the opposite direction.
|
| |
|
 |
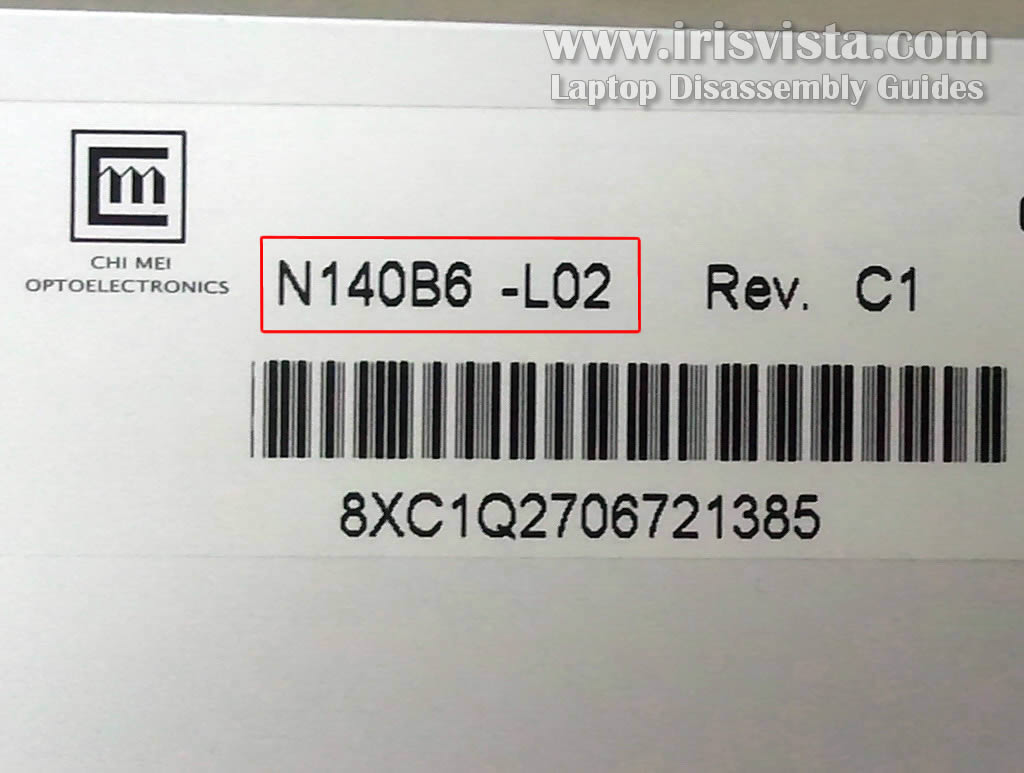
STEP 14
As I mentioned at the beginning of the guide, Toshiba Satellite M645/M640 laptop has a LED-backlit LCD screen installed.
The best way to find a new compatible screen is searching by the model number from the back of the original screen.
You'll find this number on the back sticker. My laptop had the following screen: N140B6-L02. |
| |
|
|
|