|
Toshiba Satellite P305, P300 disassembly. |
|
|
 |
STEP 1
Turn off the laptop, unplug the power adapter and remove the battery.
In the battery compartment remove three screws securing the keyboard bezel. |
| |
|
 |
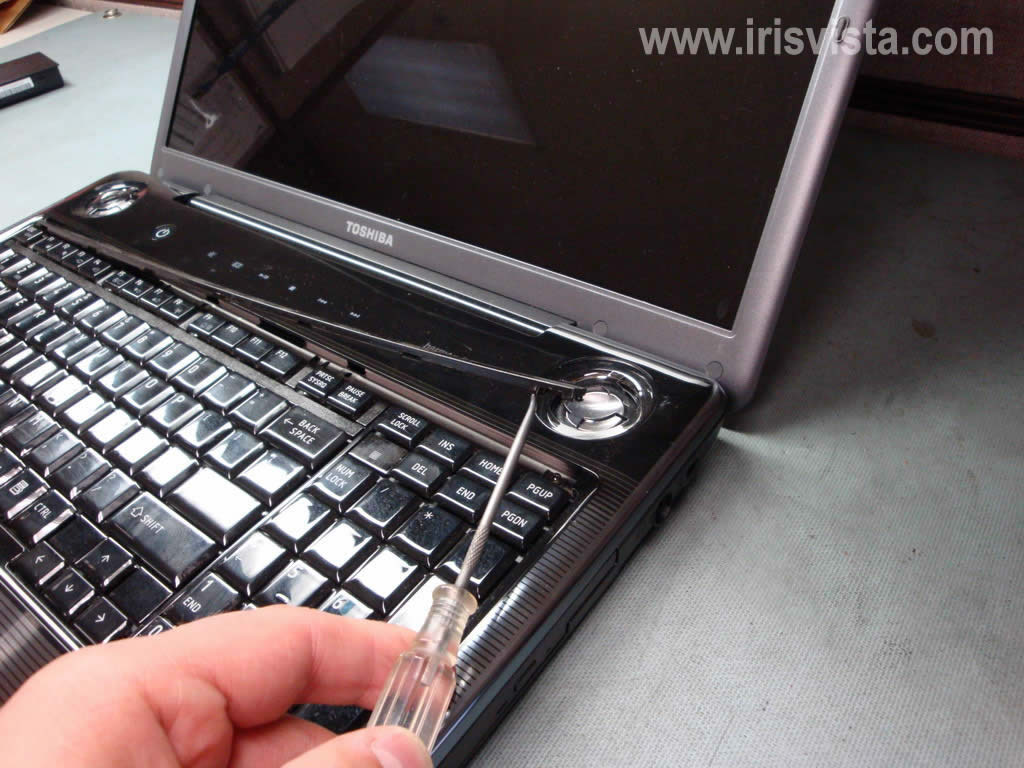
STEP 2
Remove the keyboard bezel with a small flathead screwdriver.
|
| |
|
 |
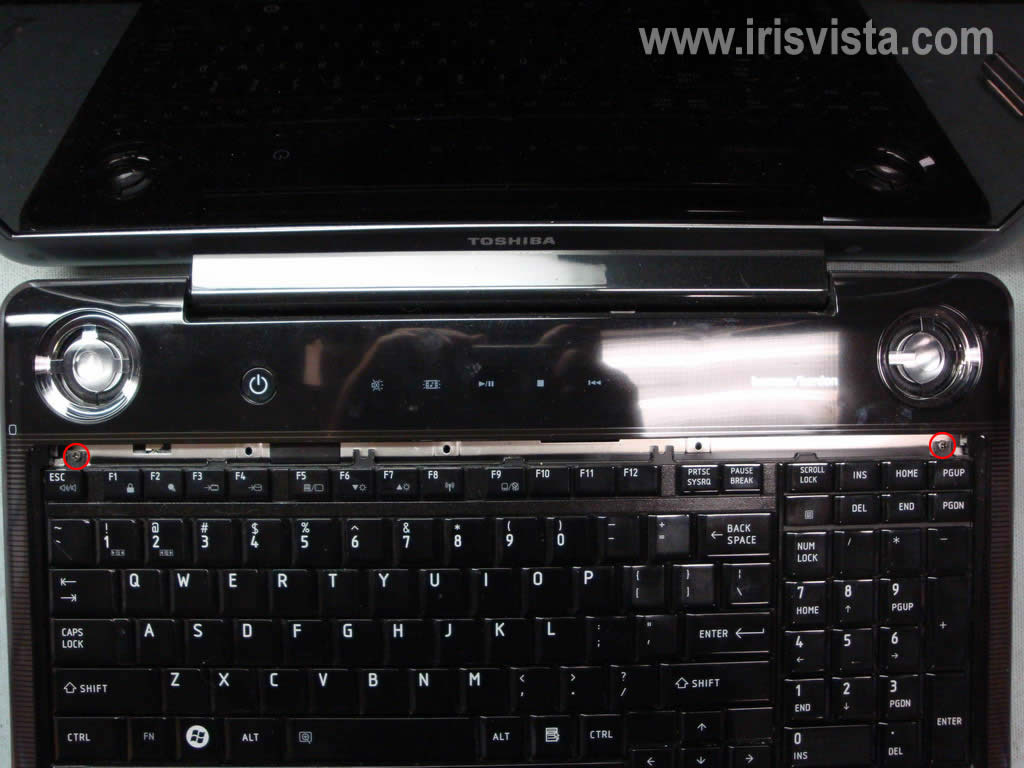
STEP 3
Remove two screws from the keyboard. |
| |
|
 |
STEP 4
Lift up the keyboard as it shown on the picture and place it upside down on the palm rest. |
| |
|
 |
STEP 5
Unlock the connector on the motherboard and release the keyboard cable.
Remove the keyboard.
|
| |
|
 |
STEP 6
Remove one screw securing the CD/DVD drive. |
| |
|
 |
STEP 7
Push the CD/DVD drive from the laptop and remove it.
|
| |
|
 |
STEP 8
Remove hard drive 1, hard drive 2 and memory covers. |
| |
|
 |
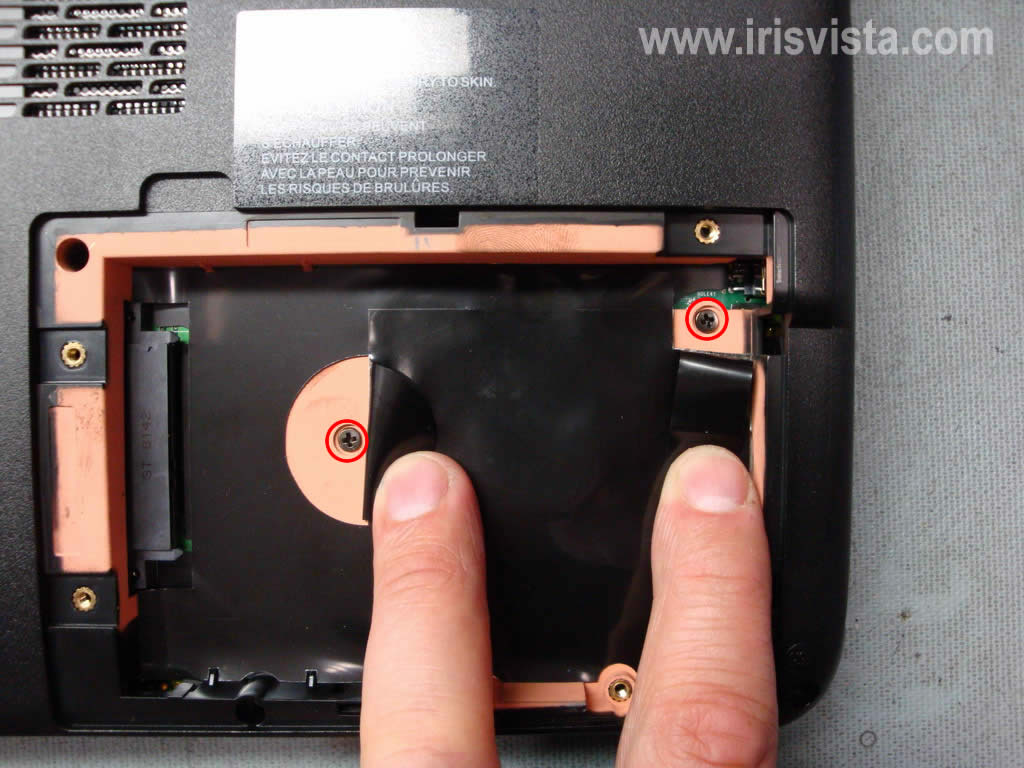
STEP 9
Remove two screws securing the hard drive 1. |
| |
|
 |
STEP 10
Slide the hard drive to the left until it's disconnected from the motherboard.
Remove the hard drive.
There is no hard drive 2 in my laptop. |
| |
|
 |
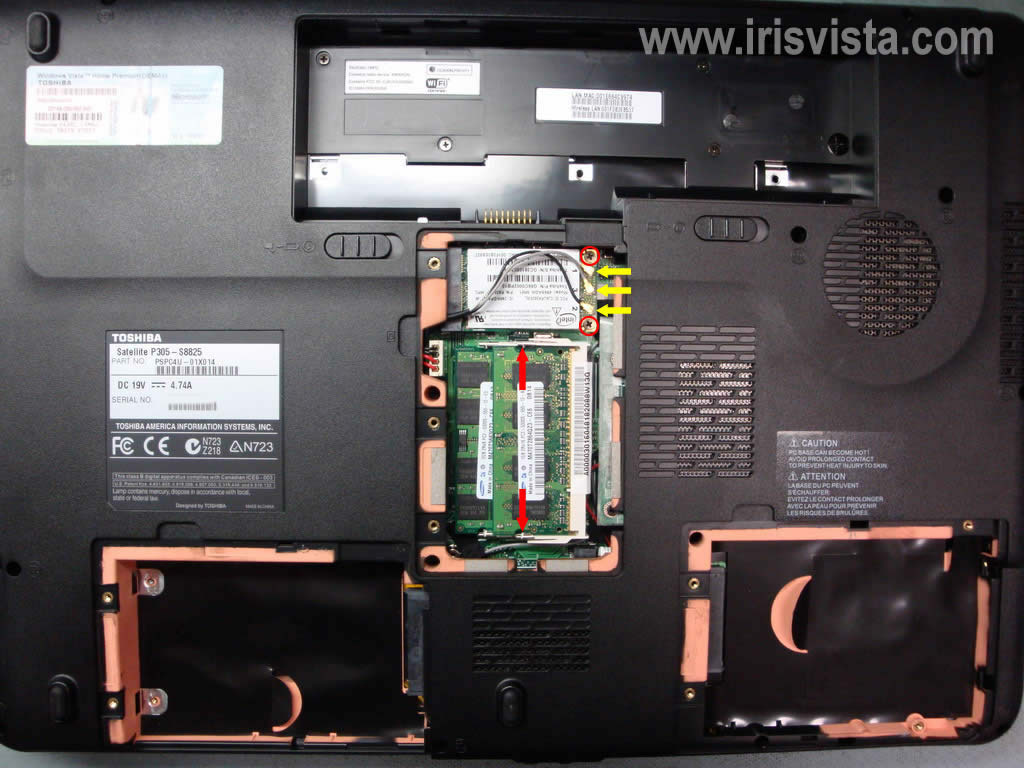
STEP 11
Disconnect three antenna cables from the wireless card (yellow arrows).
Remove two screws securing the wireless card and remove the card.
Remove both memory modules. Spread latches on both sides from the memory module. Pull the memory module from the slot. |
| |
|
 |
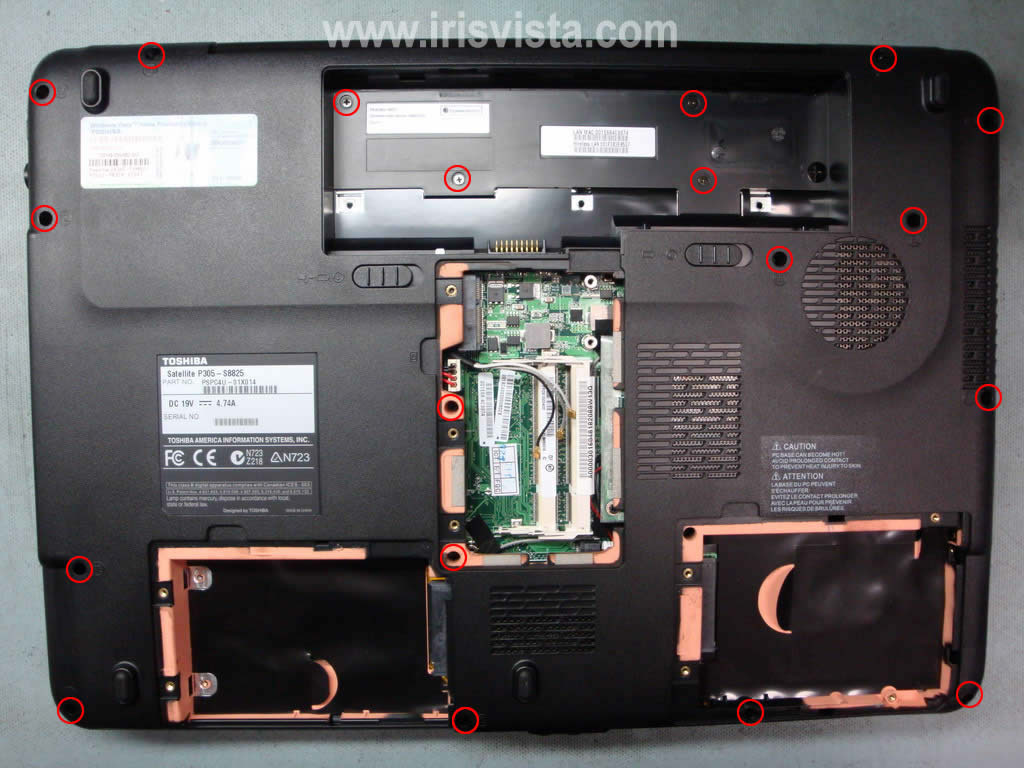
STEP 12
Remove all screws from the bottom of the notebook. |
| |
|
 |
STEP 13
There is one screw hidden under the black mylar in the hard drive 1 compartment. Remove the screw. |
| |
|
 |
STEP 14
There are two more screws hidden under the black mylar in the hard drive 2 compartment. Remove both screws. |
| |
|
 |
STEP 15
Remove two screws securing the display hinges. |
| |
|
 |
STEP 16
Remove three screws securing the top cover assembly.
Disconnect three ribbon cables from the motherboard (simply pull each cable from the connector). |
| |
|
 |
STEP 17
Lift up and remove the top cover assembly. |
| |
|
 |
STEP 18
View on the notebook with the top cover removed.
If in your laptop the power jack is broken, you can replace it with a new generic jack. |
| |
|
 |
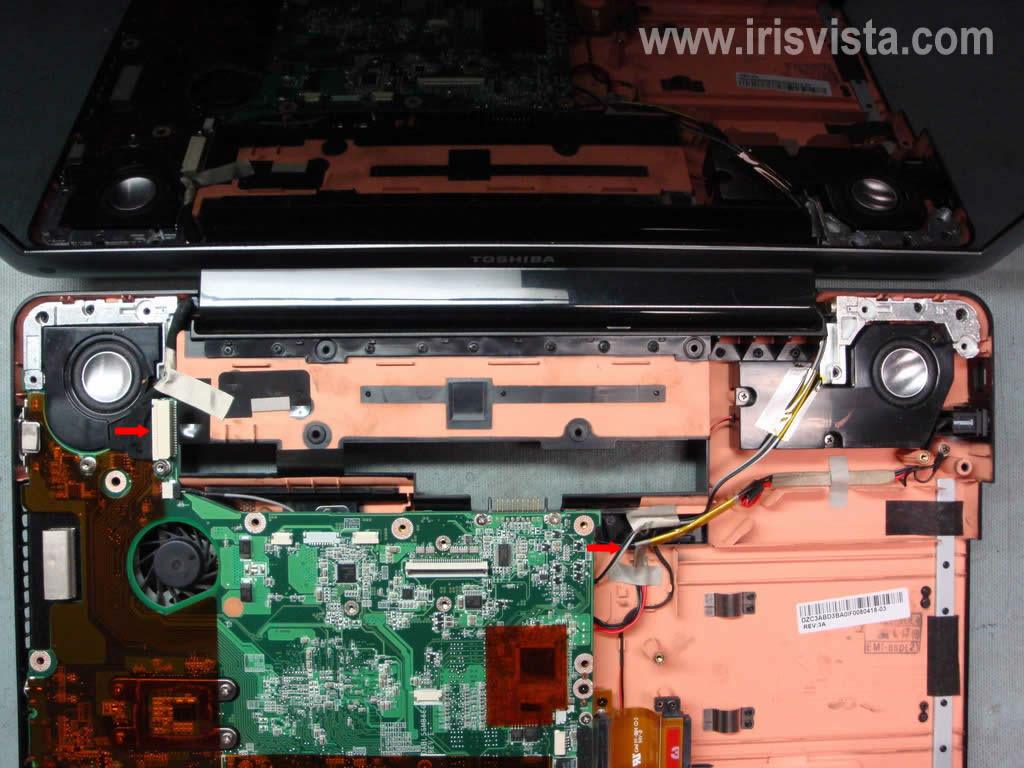
STEP 19
Disconnect the LCD cable from the motherboard (left arrow).
Pull the wireless card antenna cables (right arrow). |
| |
|
 |
STEP 20
Remove six screw securing the notebook display assembly.
Three screws from each hinge. |
| |
|
 |
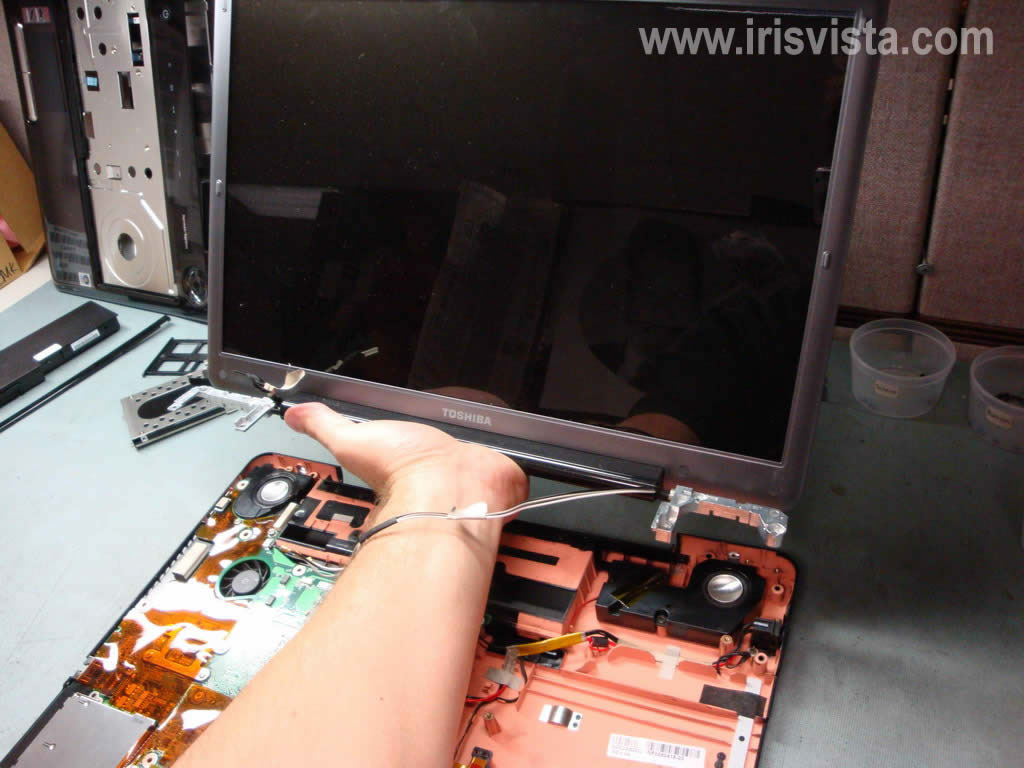
STEP 21
Lift up and remove the display panel assembly. |
| |
|
 |
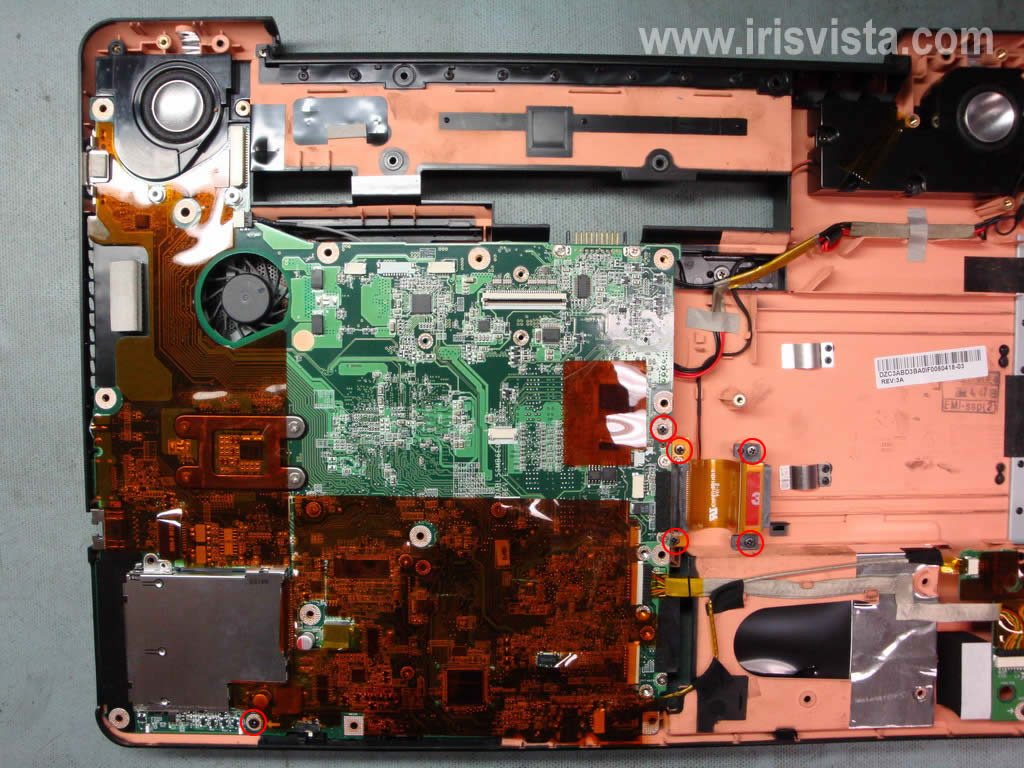
STEP 22
Remove two screws securing the motherboard.
Remove four screws secruing the CD/DVD drive cable. |
| |
|
 |
STEP 23
Start removing the motherboard as it shown on the picture. |
| |
|
 |
STEP 24
Before you can remove the motherboard, you'll have to unplug two more cables pointed with red arrows. |
| |
|
 |
STEP 25
The motherboard has been removed. |
| |
|
 |
STEP 26
Unplug the CD/DVD drive cable. |
| |
|
 |
STEP 27
Remove three screws securing the video card (VGA board). |
| |
|
 |
STEP 28
Carefully lift up the video card and disconnect it from the motherboard. |
| |
|
 |
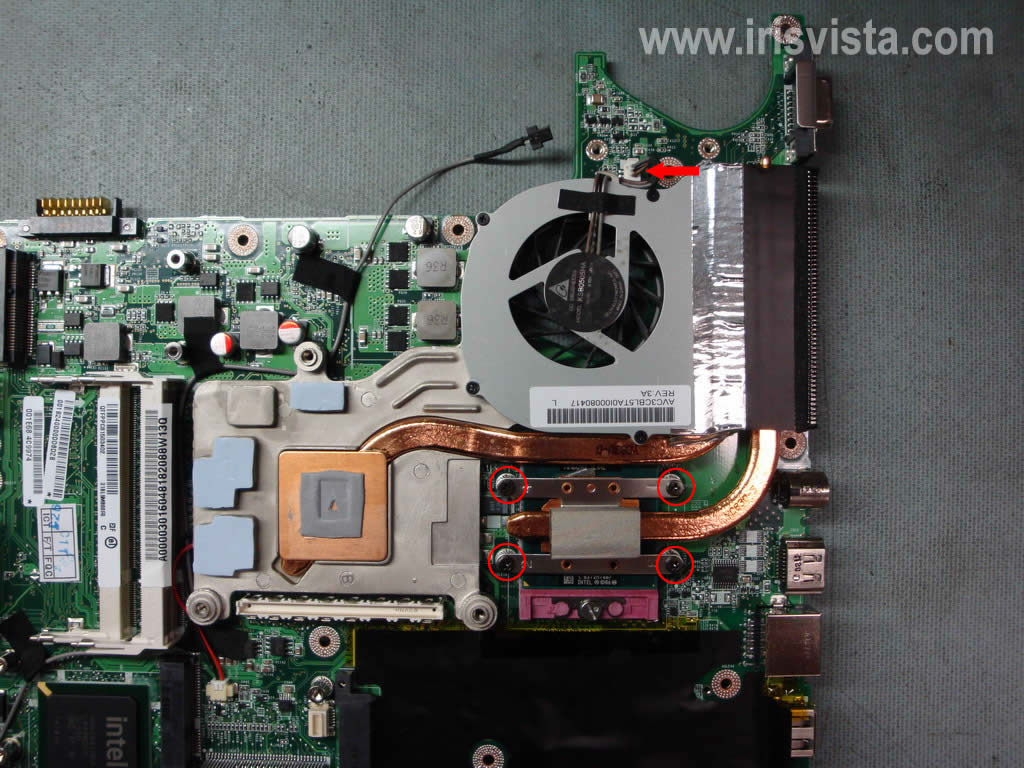
STEP 29
Remove four screws securing the CPU heat sink assembly.
Unplug the cooling fan cable from the motherboard. |
| |
|
 |
STEP 30
Lift up and remove the CPU heat sink assembly with the cooling fan.
|
| |
|
 |
STEP 31
Finally, unlock the CPU socket and remove the CPU.
|
| |
|
|
|