|
Toshiba Satellite Pro L450, L455, L450D, L455D disassembly.
|
|
|
 |
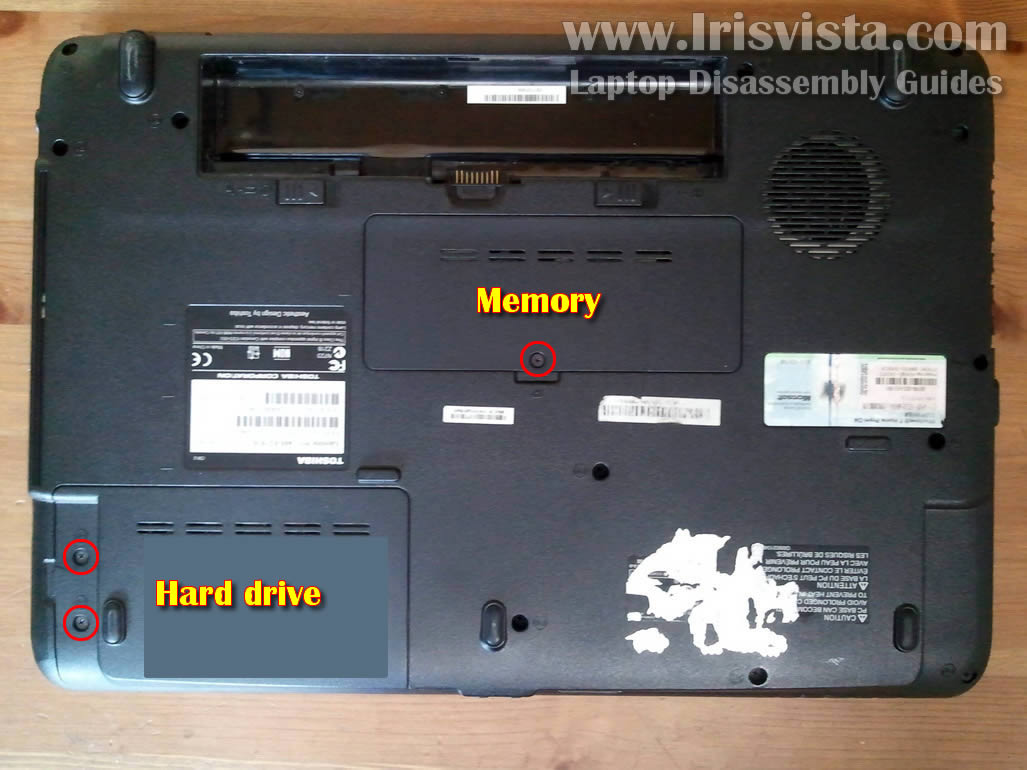
STEP 1
First of all, make sure the laptop is turned off and battery removed.
Remove/loosen screws securing the hard drive cover and memory cover.
Lift up and remove both covers.
|
| |
|
 |
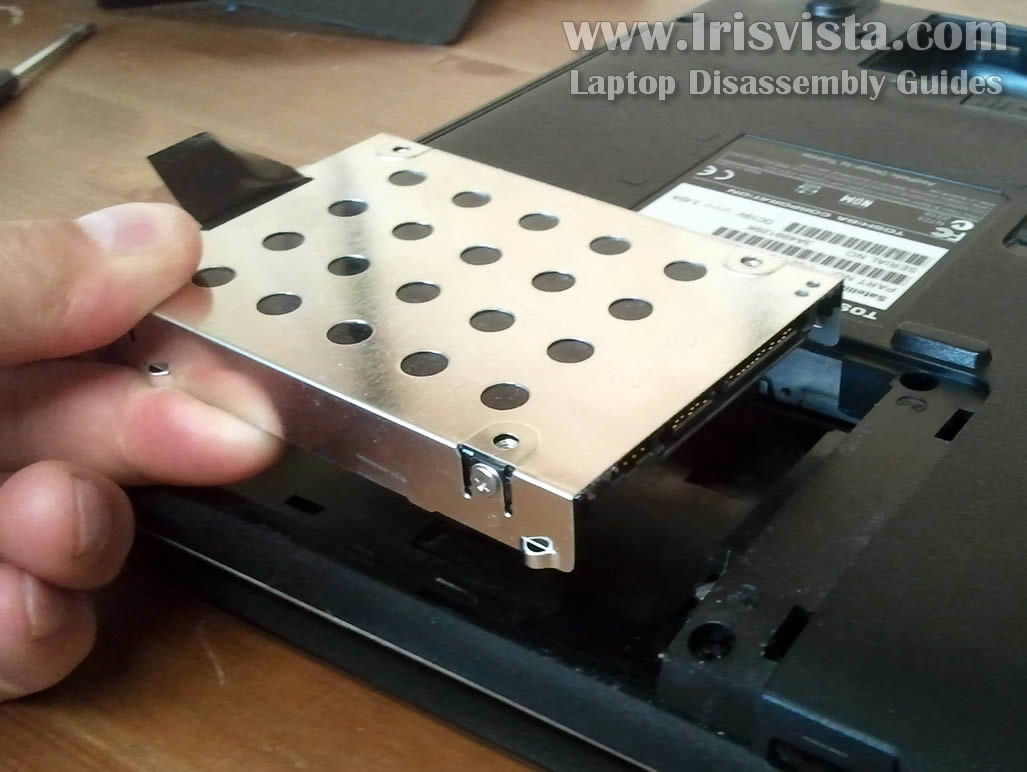
STEP 2
In order to disconnect the hard drive from the motherboard, slide it to the left.
Lift up and remove the hard drive assembly.
|
| |
|
 |
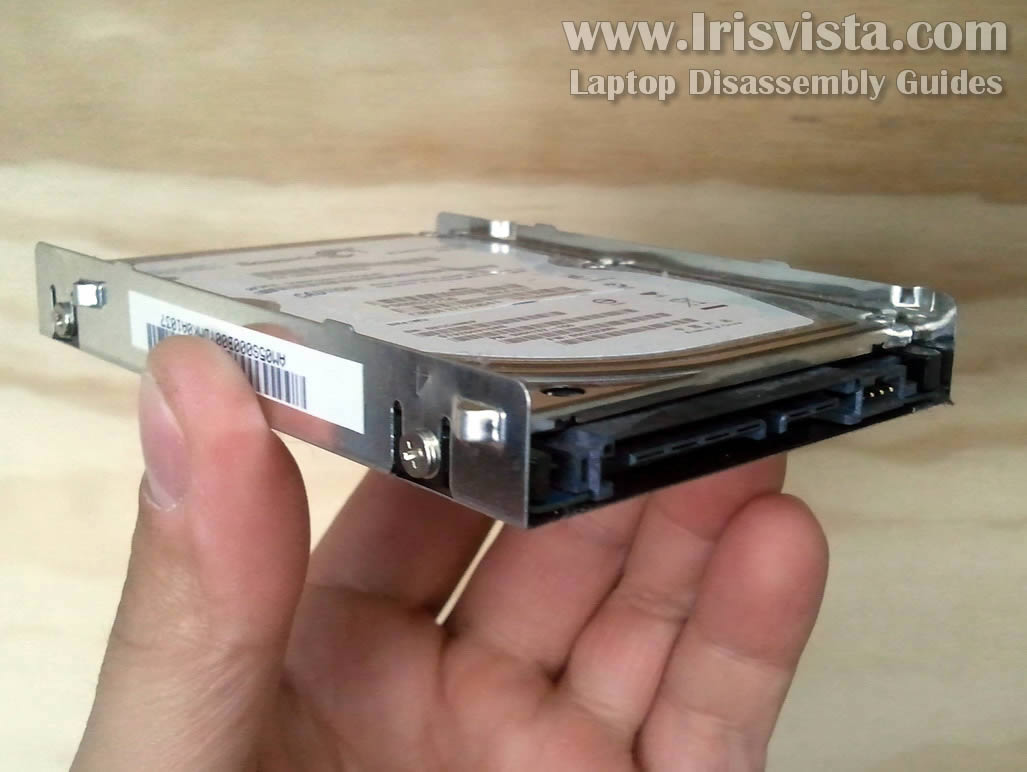
STEP 3
The hard drive secured inside the mounting bracket.
If you are replacing the hard drive you'll have to remove two screws on each side and transfer the bracket to the new drive.
As you see, I had a regular 2.5" SATA hard drive installed into my Satellite Pro L450 laptop.
You can upgrade it with any other large capacity 2.5" SATA hard drive or SSD drive.
|
| |
|
 |
STEP 4
Both memory slots can be accessed on the bottom of the laptop.
This is very convenient for upgrading memory.
In my laptop I had only one 2GB memory module installed (it was installed in the outer slot).
This laptop uses PC3-8500 memory modules.
Do not disconnect antenna cables from the wireless card unless you going to remove the display panel. |
| |
|
 |
STEP 5
In order to remove the memory module it's necessary to spread latches on both sides of the memory slot.
After the memory module pops up at a 30 degree angle, you can pull it from the slot.
|
| |
|
 |
STEP 6
Remove one screw securing the DVD drive (screw located close to the wireless card).
Pull the DVD drive from the laptop and remove it. |
| |
|
 |
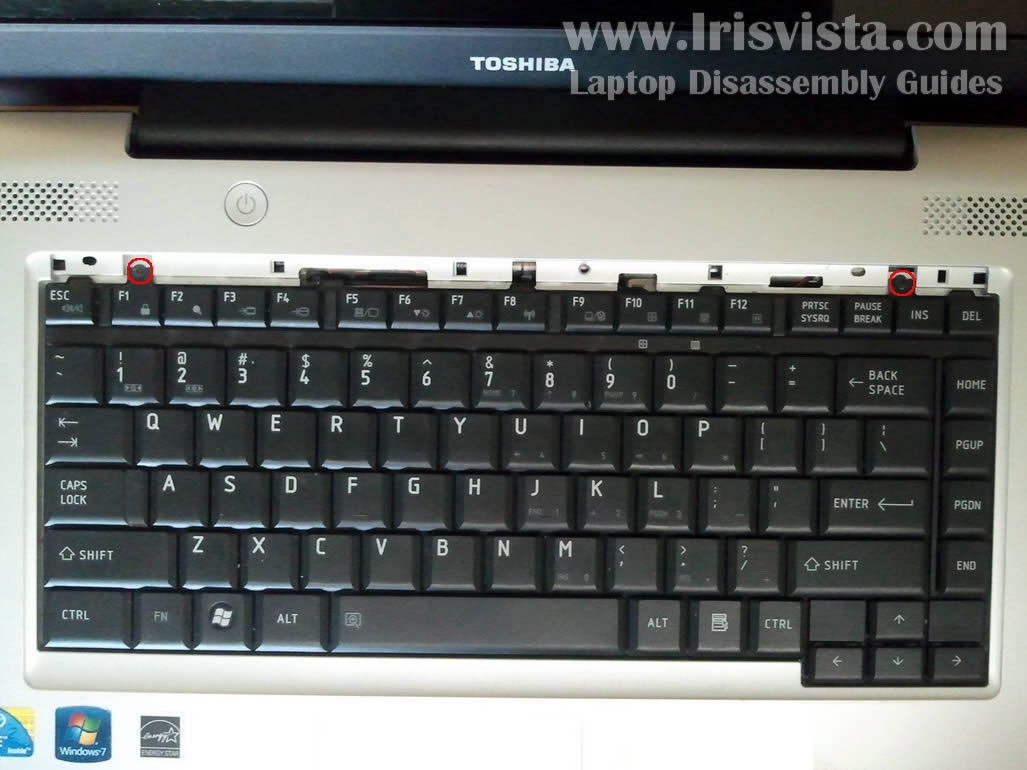
STEP 7
In the following few steps I explain how to remove the keyboard. It's not necessary to follow steps 1-6 in order to remove the keyboard.
Using a sharp object lift up one side of the keyboard bezel. Continue removing the bezel with your fingers. |
| |
|
 |
STEP 8
Remove two screws securing the keyboard on the top. |
| |
|
 |
STEP 9
Lift up the keyboard.
Be careful, the keyboard still attached to the motherboard. |
| |
|
 |
STEP 10
Slide the keyboard towards the display panel so you can access the cable connector underneath.
Before removing the keyboard you'll have to unlock the connector and release the cable.
|
| |
|
 |
STEP 11
On this picture the keyboard connector shown in the locked position.
Carefully slide the brown locking tab about 1 millimeter towards the display. Use your fingernails.
The brown locking tab must stay attached to the connector base. |
| |
|
 |
STEP 12
On this picture the connector shown in the unlocked position.
Now you can pull the keyboard cable from the connector. |
| |
|
 |
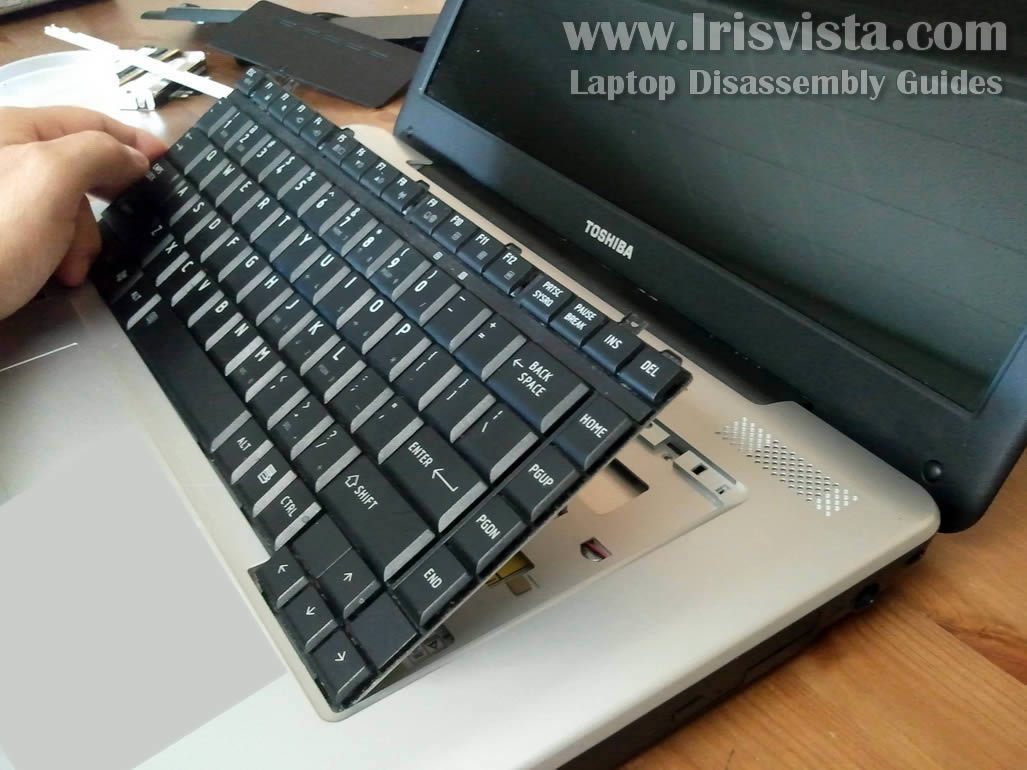
STEP 13
Remove the keyboard and replace it with a new keyboard if needed. |
| |
|
 |
STEP 14
In the following few steps I explain how to remove the top cover and get access inside the laptop.
Remove all screws from the bottom of the laptop. |
| |
|
 |
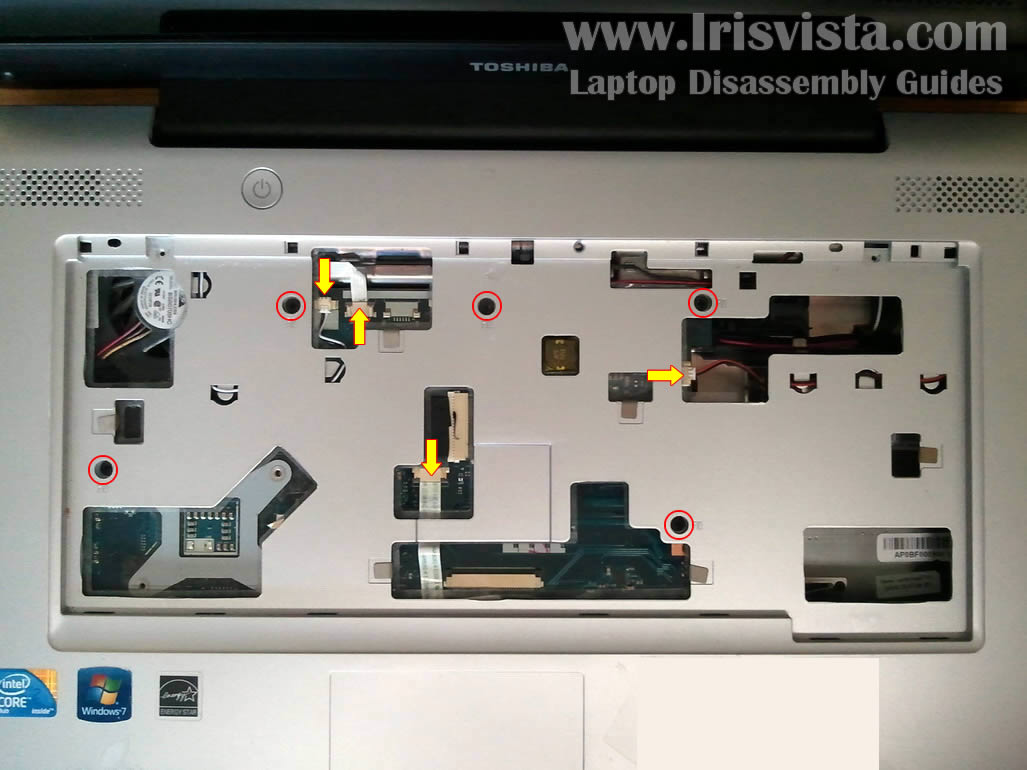
STEP 15
Remove five screws securing the top cover assembly.
Disconnect the power button cable, touchpad cable, speaker cables from the motherboard.
Other Toshiba Satellite models might have some additional cables. |
| |
|
 |
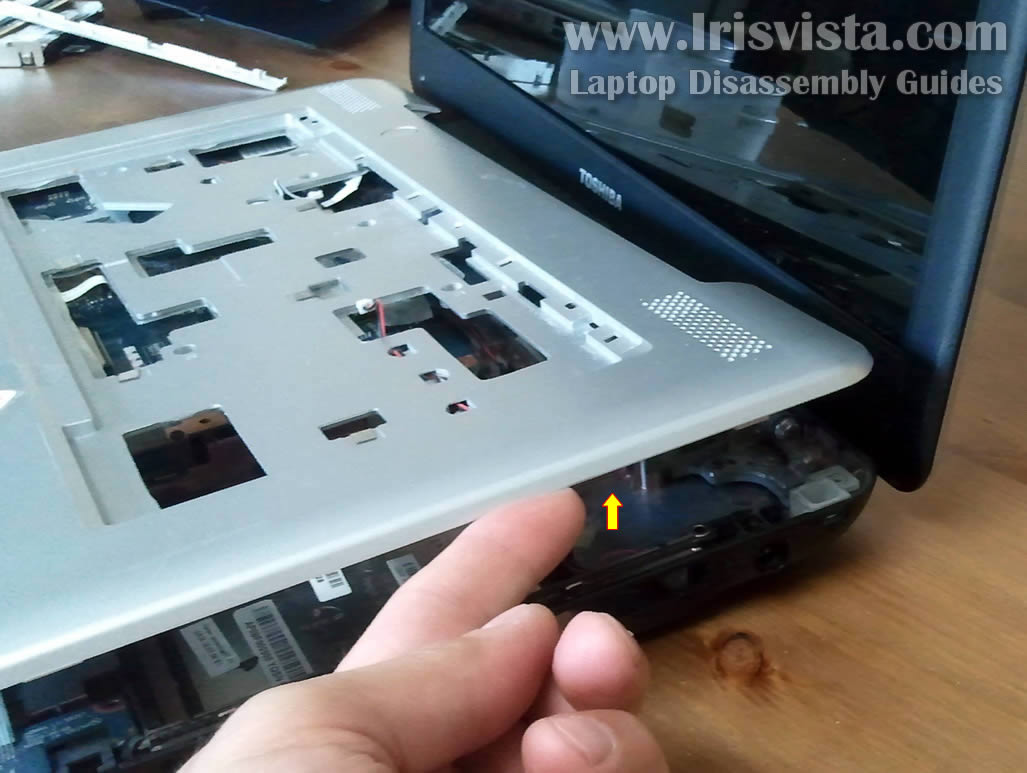
STEP 16
Lift up one side of the top cover assembly and continue removing it with your fingers.
|
| |
|
 |
STEP 17
Remove the top cover assembly. |
| |
|
 |
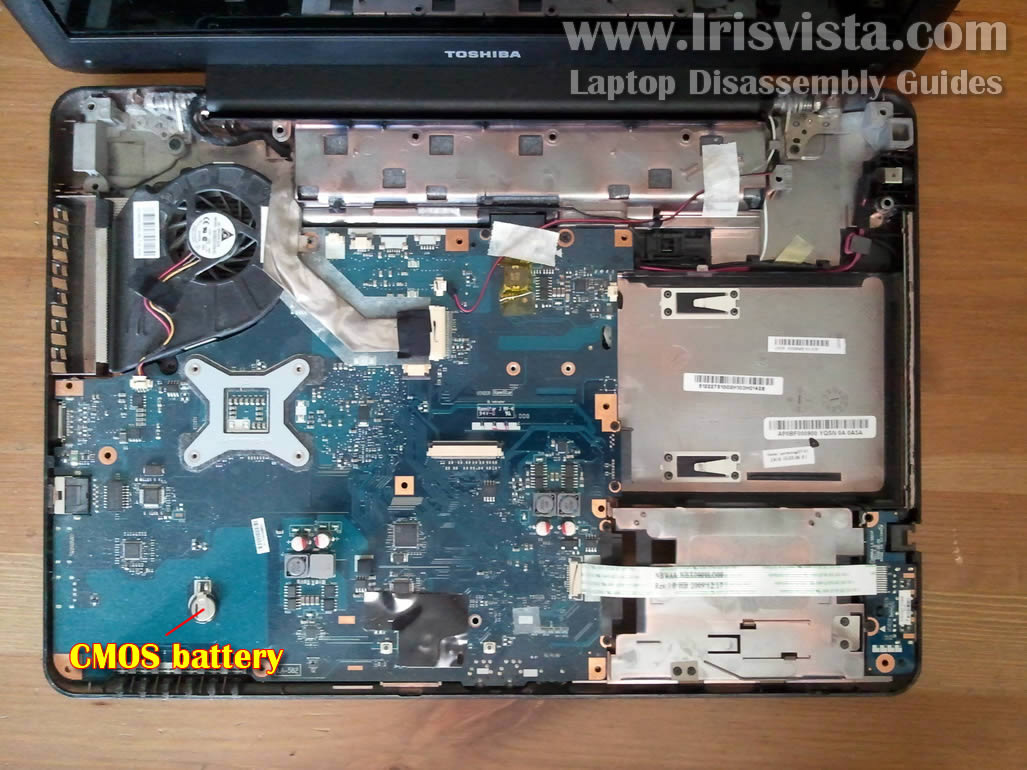
STEP 18
On this picture you see the laptop with top cover assembly removed.
By the way, the CMOS battery is soldered to the motherboard and cannot be easily removed and replaced. It has to be desoldered. |
| |
|
 |
STEP 19
The cooling fan located in the upper left corner of the laptop.
Remove one screws securing the cooling fan.
Disconnect cooling fan cable from the motherboard.
|
| |
|
 |
STEP 20
Lift up and remove the cooling fan.
Now you can clean up the heat sink or replace the cooling fan with a new fan if needed.
|
| |
|
 |
STEP 21
I'm not going to remove the display assembly but I explain how to do it.
There are two screws securing display assembly on the back of the laptop. Those screws hidden under rubber covers.
Remove both covers and remove screws. |
| |
|
 |
STEP 22
Disconnect two cables from the motherboard.
Pull wireless card antenna cables though the openings.
Don't forget to disconnect antenna cables from the wireless card as I mentioned in the step 4).
Remove four screws securing the display hinges.
Now you should be able to lift up and remove the display assembly.
|
| |
|
 |
STEP 23
In Toshiba Satellite Pro 450 the DC jack is not soldered to the mot hero bard.
The DC jack attached to the wire harness.
Also, check out this screen removal guide. |
| |
|
|
|