|
Toshiba Satellite S955, S955D, S950, S950D disassembly.
This guide explains only how to take apart the body. If you would like to take apart the display assembly check out my screen removal guide. |
|
|
 |
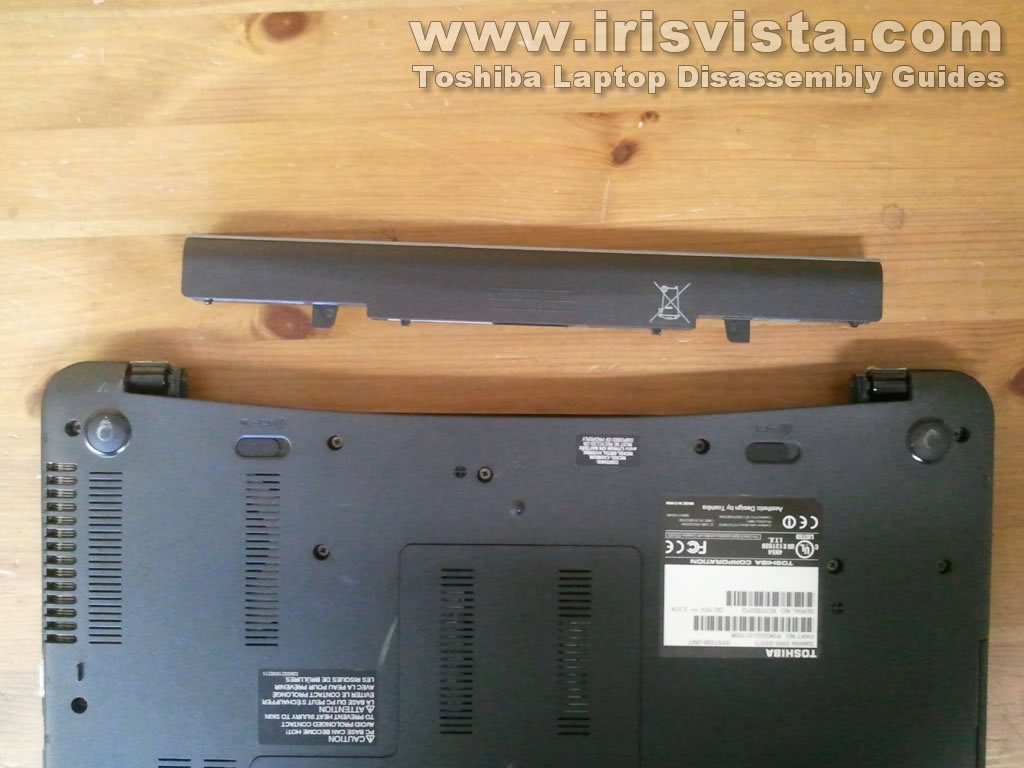
STEP 1
Turn off the laptop and unplug the AC adapter.
Unlock and remove laptop battery.
|
| |
|
 |
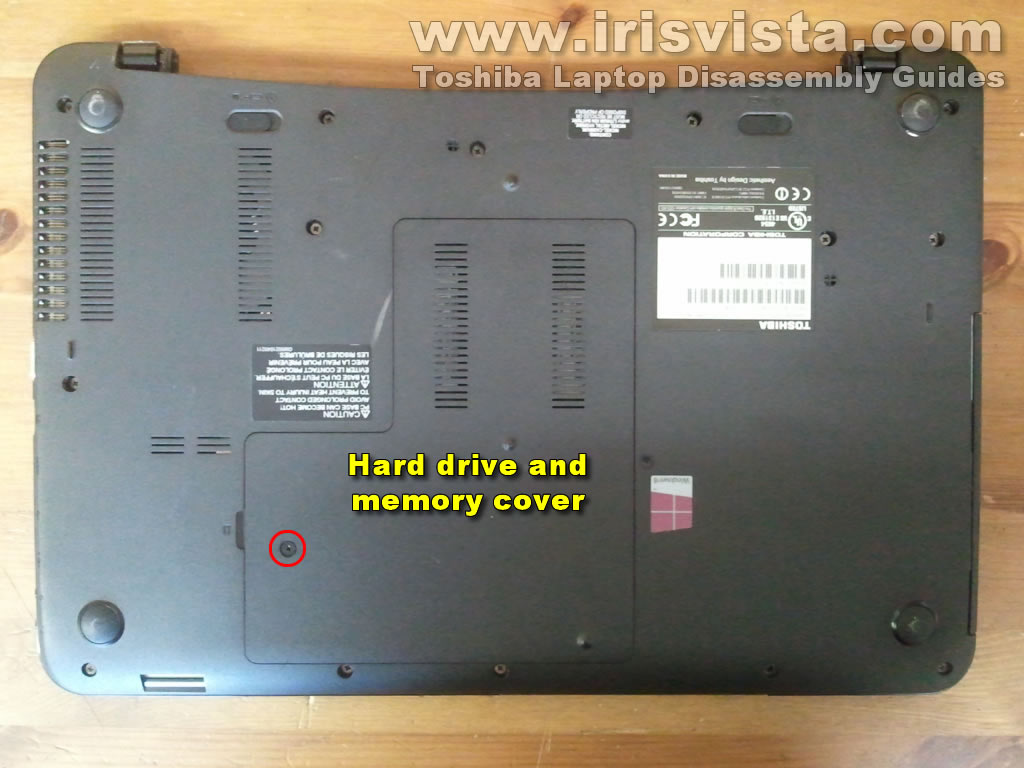
STEP 2
Unscrew one screw securing the hard drive/memory cover on the bottom of the laptop.
Lift up and remove the hard drive/memory cover.
|
| |
|
 |
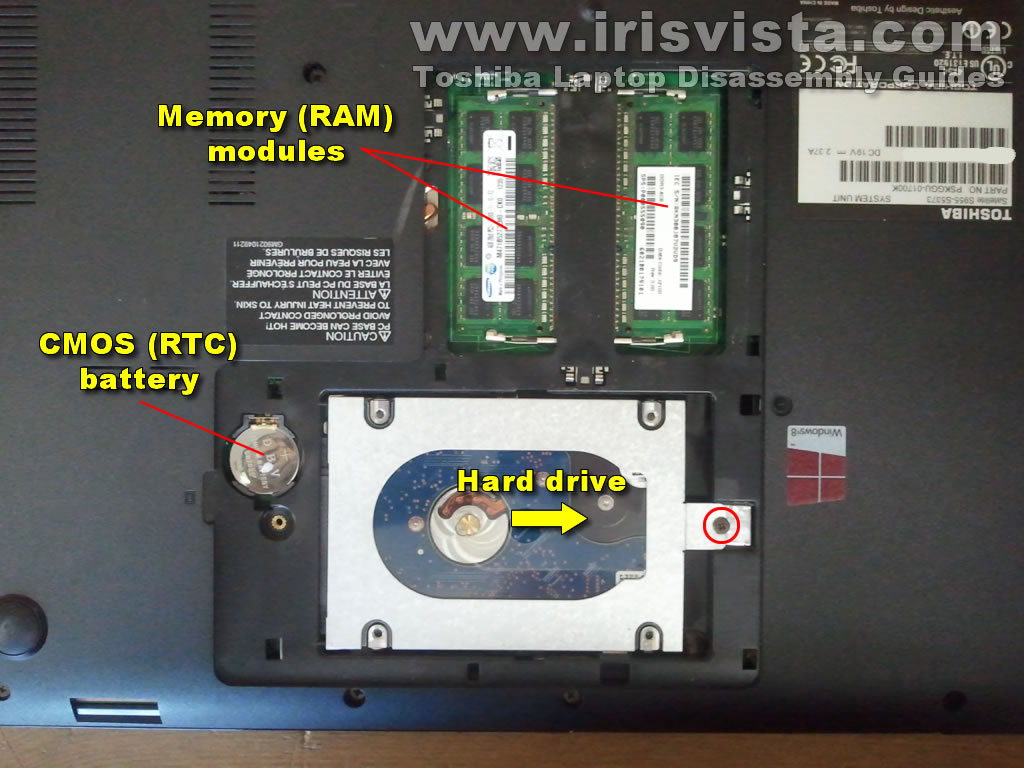
STEP 3
Under the cover you will find both memory (RAM) modules, hard drive and CMOS (RTC) battery.
I will leave the memory modules and CMOS battery connected to the motherboard but show how to remove the hard drive.
Remove one screw securing the hard drive mounting bracket to the laptop case.
Slide the hard drive assembly to the right to disconnect it from the motherboard. |
| |
|
 |
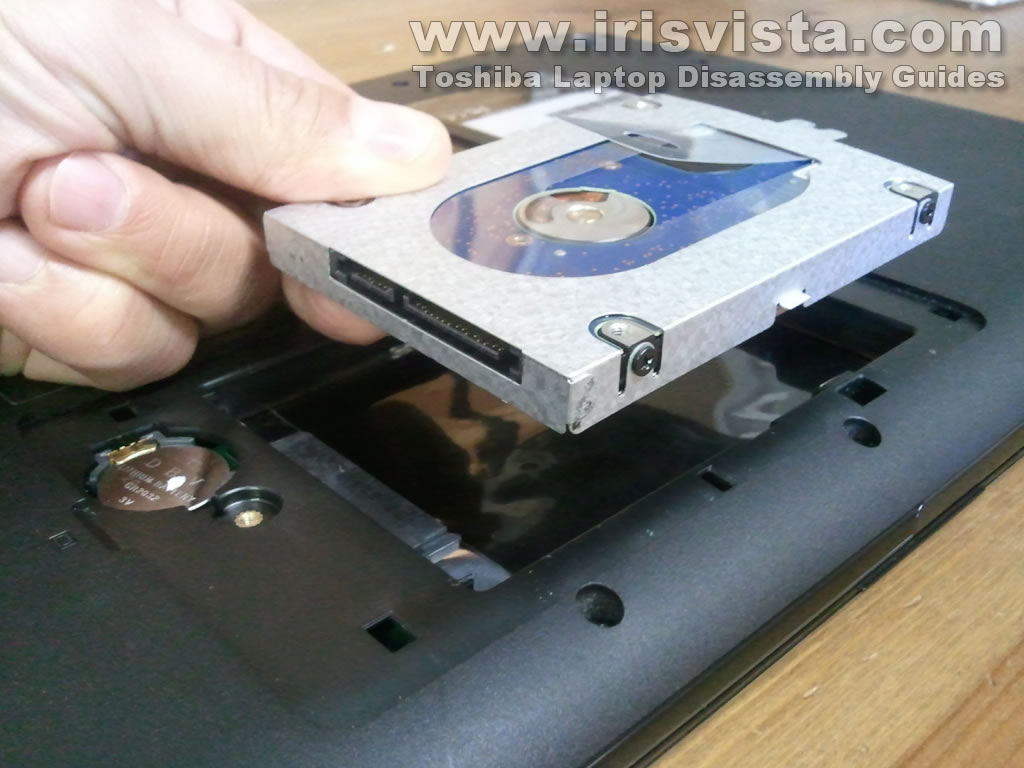
STEP 4
Lift up and remove the hard drive. |
| |
|
 |
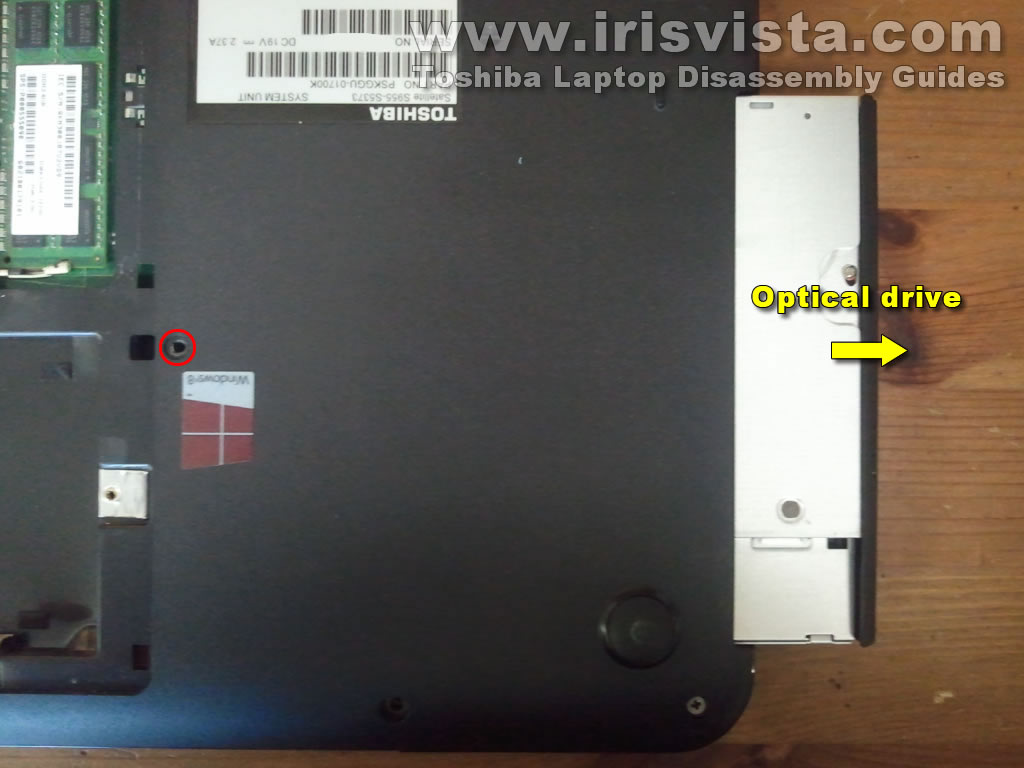
STEP 5
Remove one screw securing the optical drive.
Pull the optical drive to the right and remove it from the laptop. |
| |
|
 |
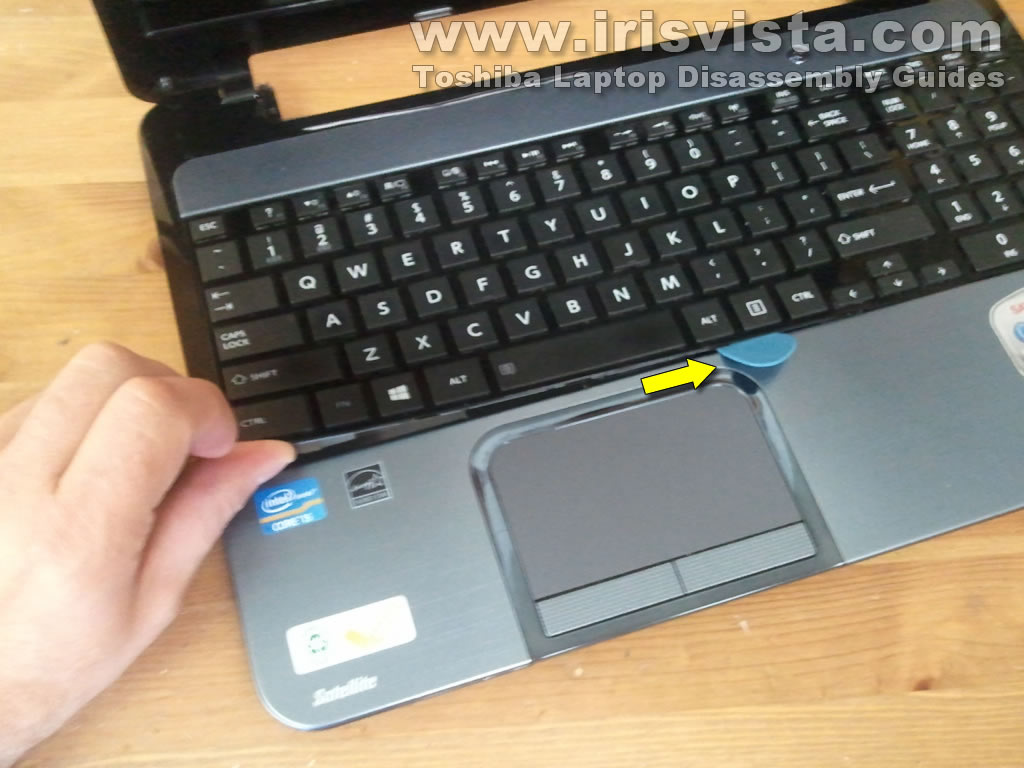
STEP 6
It's a little bit tricky to remove the keyboard on this Toshiba laptop.
If you look inside the optical drive bay you will see an opening in the laptop case. |
| |
|
 |
STEP 7
You will have to push on the keyboard though that opening in order to separate it from the top cover. |
| |
|
 |
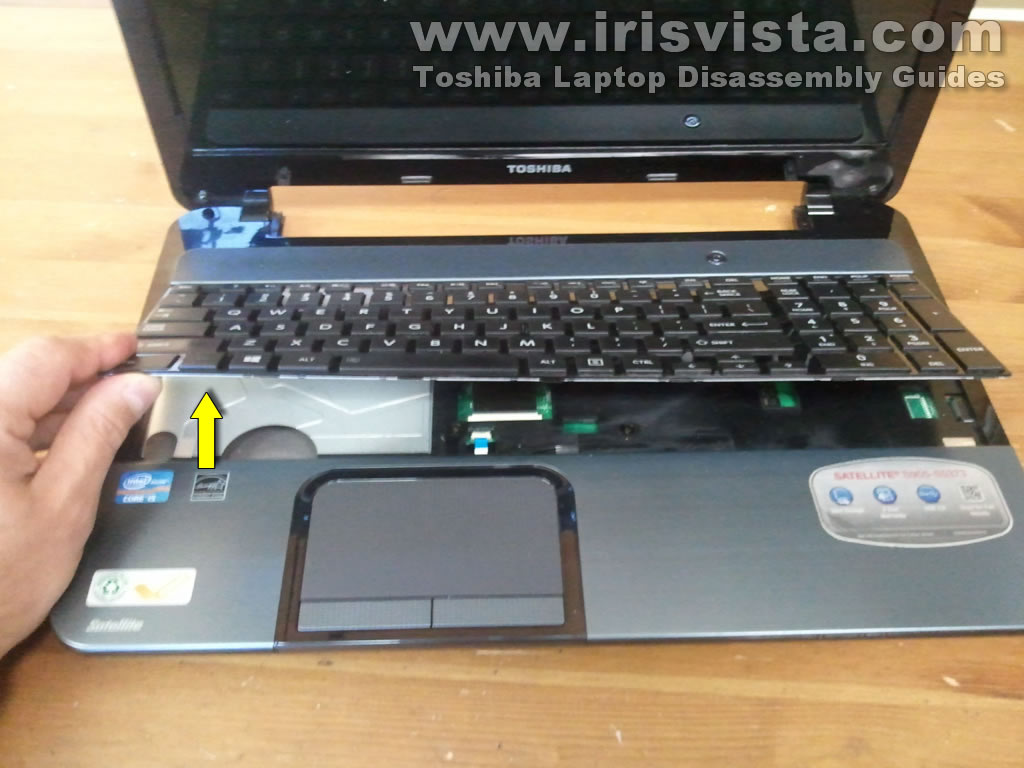
STEP 8
Now you can insert your fingers under the keyboard and continue separating it from the top cover with a guitar pick (or any other piece of plastic). |
| |
|
 |
STEP 9
When you lift up the keyboard, you will fill that it still connected to something. |
| |
|
 |
STEP 10
There is a metal pin securing the keyboard to the top cover.
Just apply some reasonable pressure on the bottom side of the keyboard and this pin will separate from the top cover. |
| |
|
 |
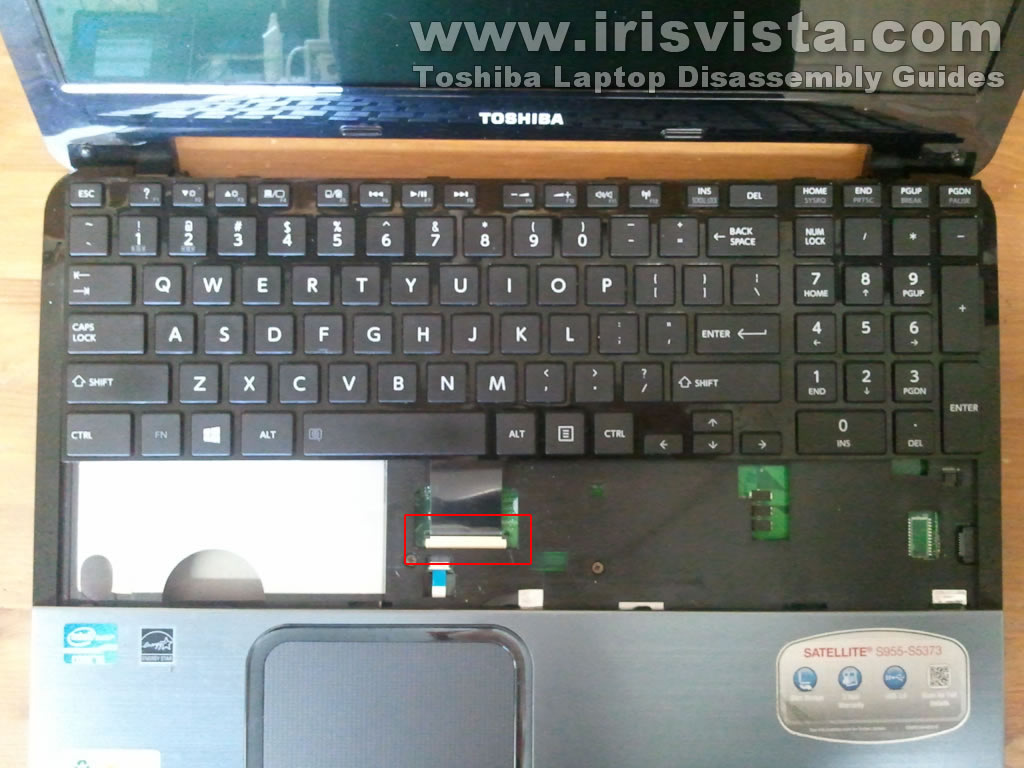
STEP 11
Before you remove the keyboard completely, you have to unlock the cable connector and release the cable. |
| |
|
 |
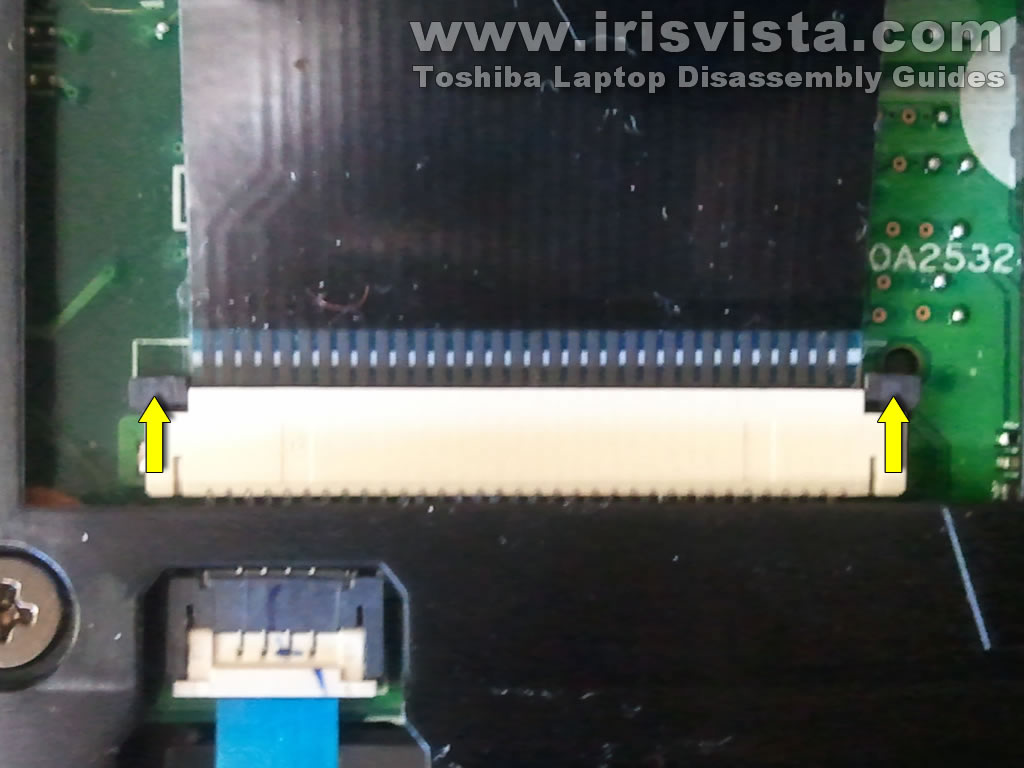
STEP 12
Here's how to unlock the connector.
Slide the retainer about 1-2 millimeters towards the screen.
Be very careful, the retainer must remain connected to the connector base. |
| |
|
 |
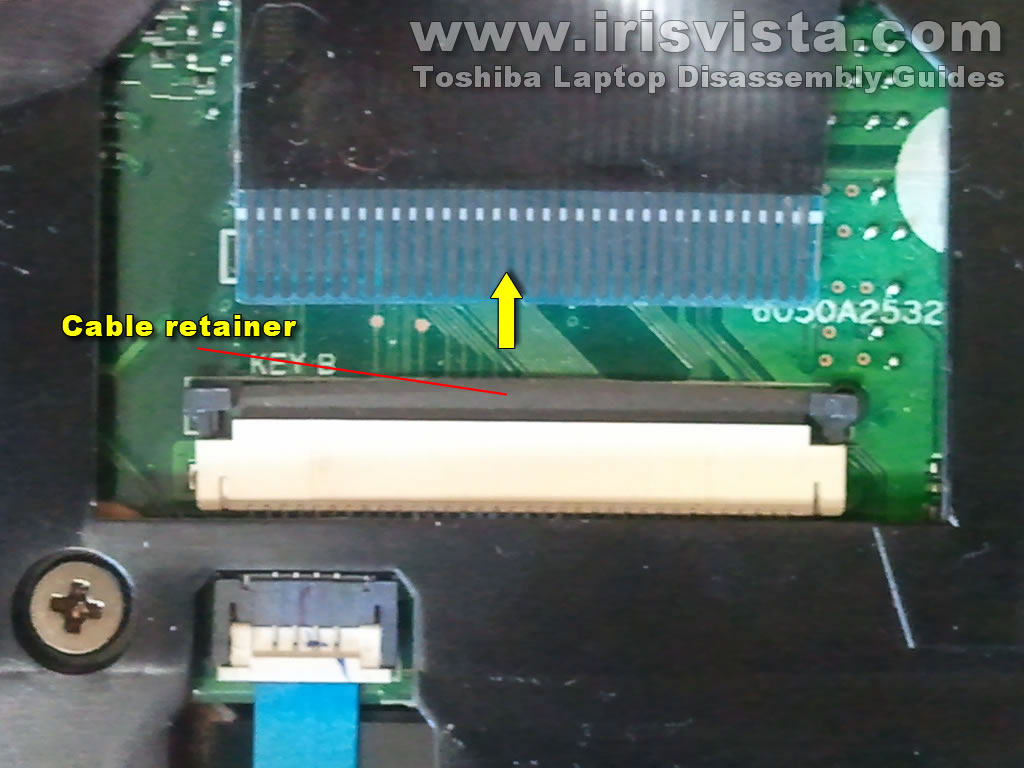
STEP 13
On this picture the same connector shown in the unlocked position.
As you see, the retainer still connected to the base.
After the cable is released, you can pull it from the connector. |
| |
|
 |
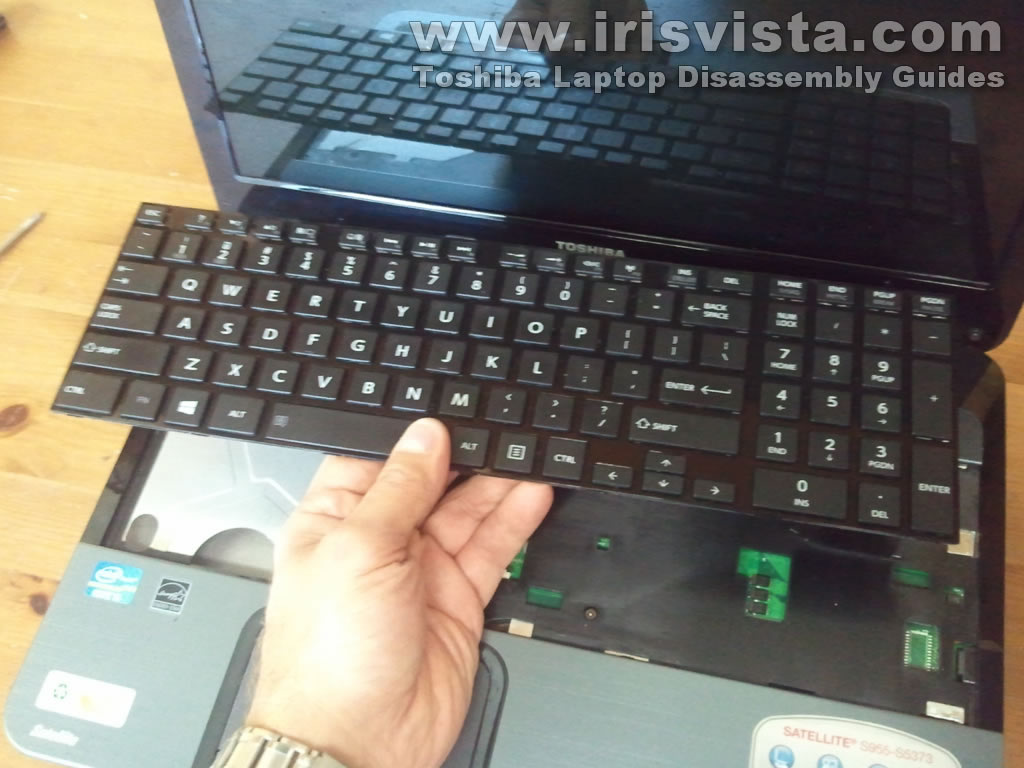
STEP 14
Now you can remove the keyboard from the laptop.
|
| |
|
 |
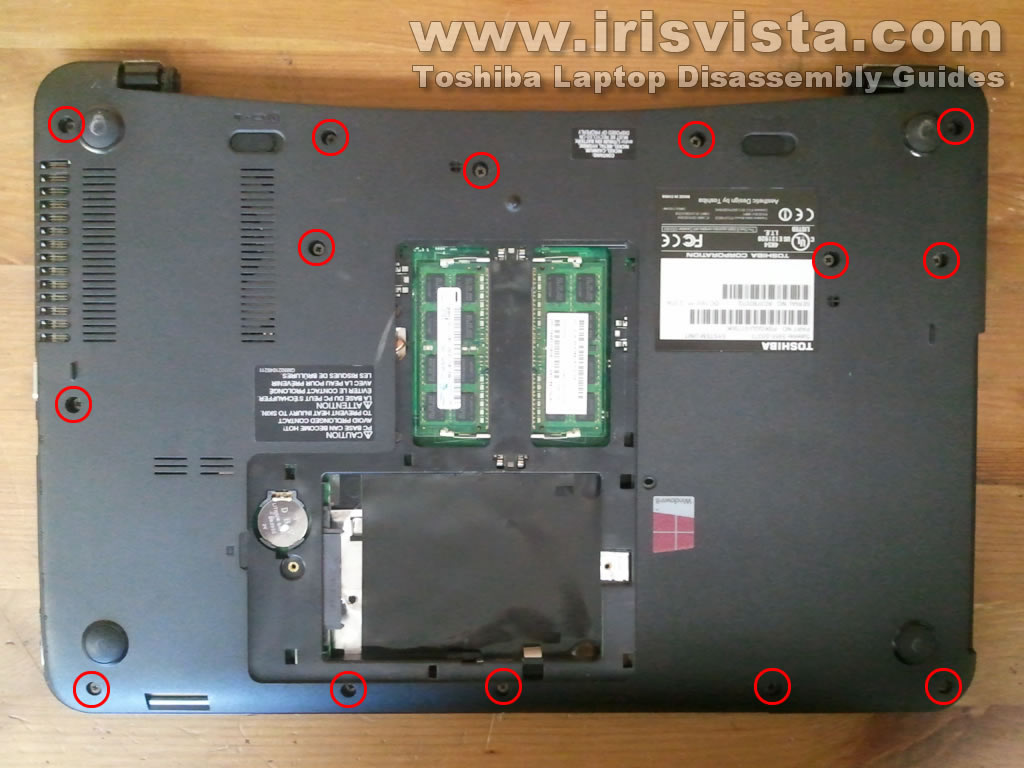
STEP 15
Remove all screws from the bottom of the laptop.
|
| |
|
 |
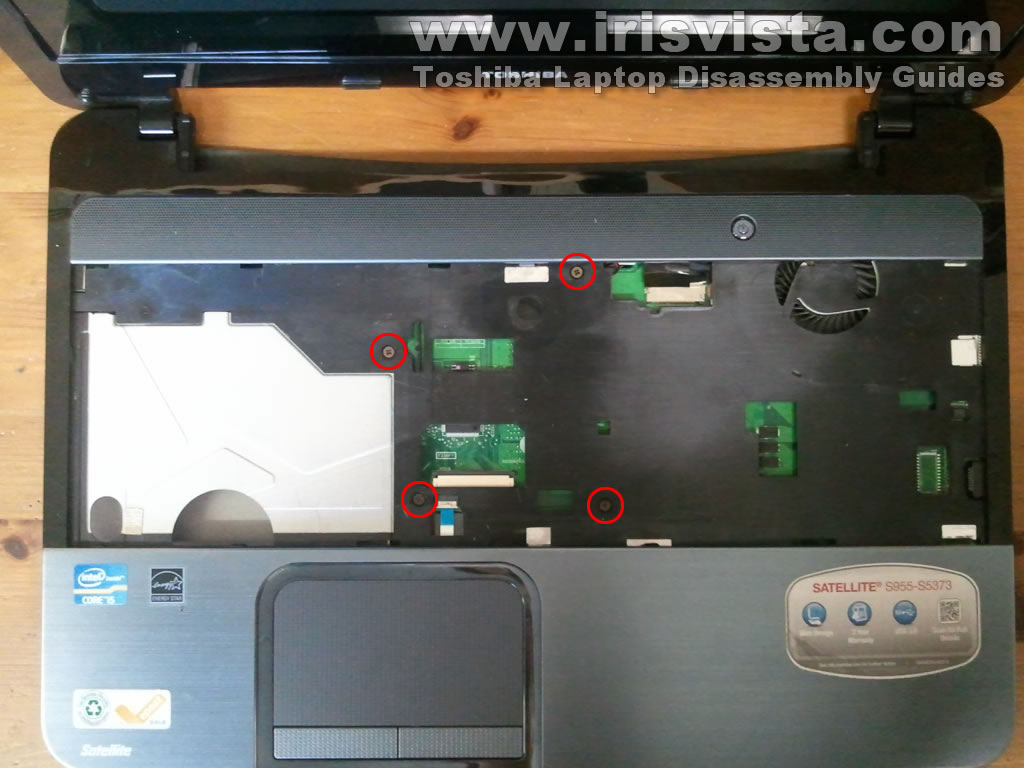
STEP 16
Remove all screws securing the top cover assembly. |
| |
|
 |
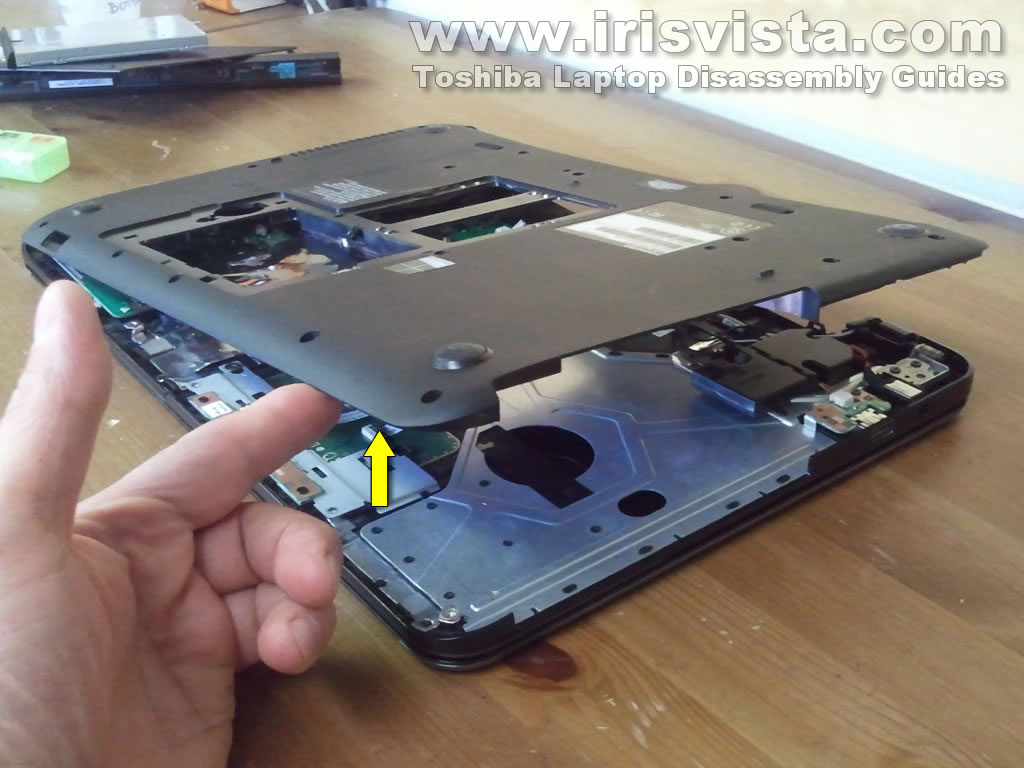
STEP 17
Turn the laptop upside down and start separating the bottom cover from the rest of the laptop. |
| |
|
 |
STEP 18
Continue removing the bottom cover. |
| |
|
 |
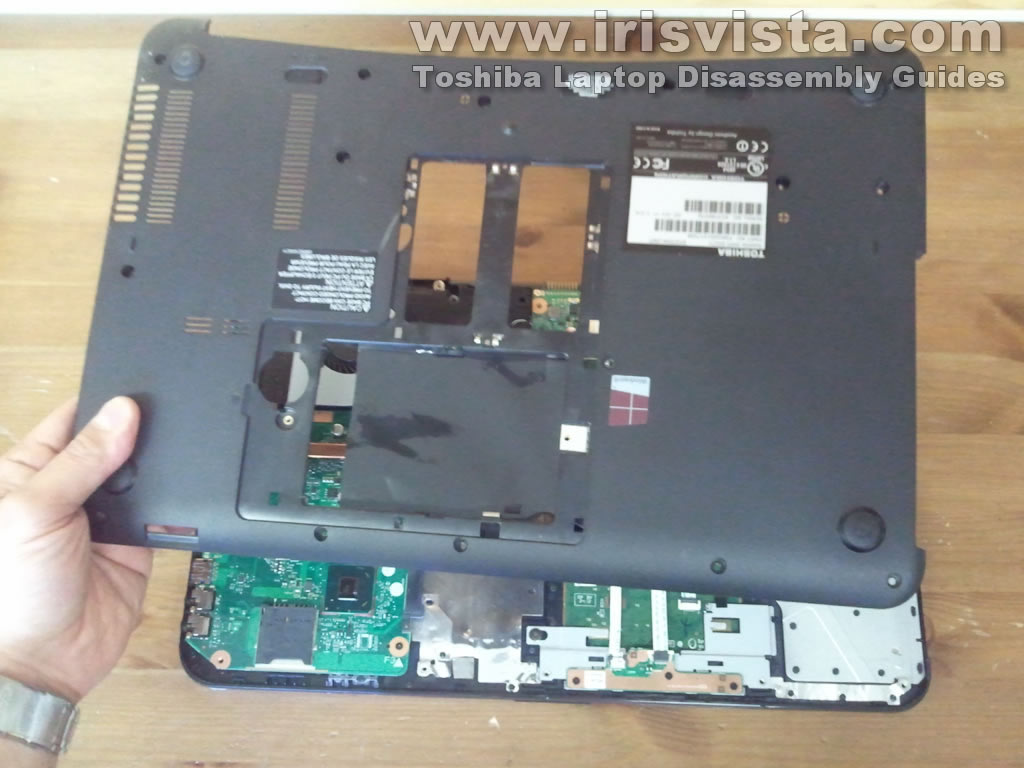
STEP 19
The bottom cover removed. |
| |
|
 |
STEP 20
Under the bottom cover you can access the following internal laptop components:
- Cooling fan assembly (fan and heatsink).
- Wireless card.
- Both speakers.
- DC power jack.
- USB board.
- Trackpad and trackpad button board.
- Motherboard. |
| |
|
 |
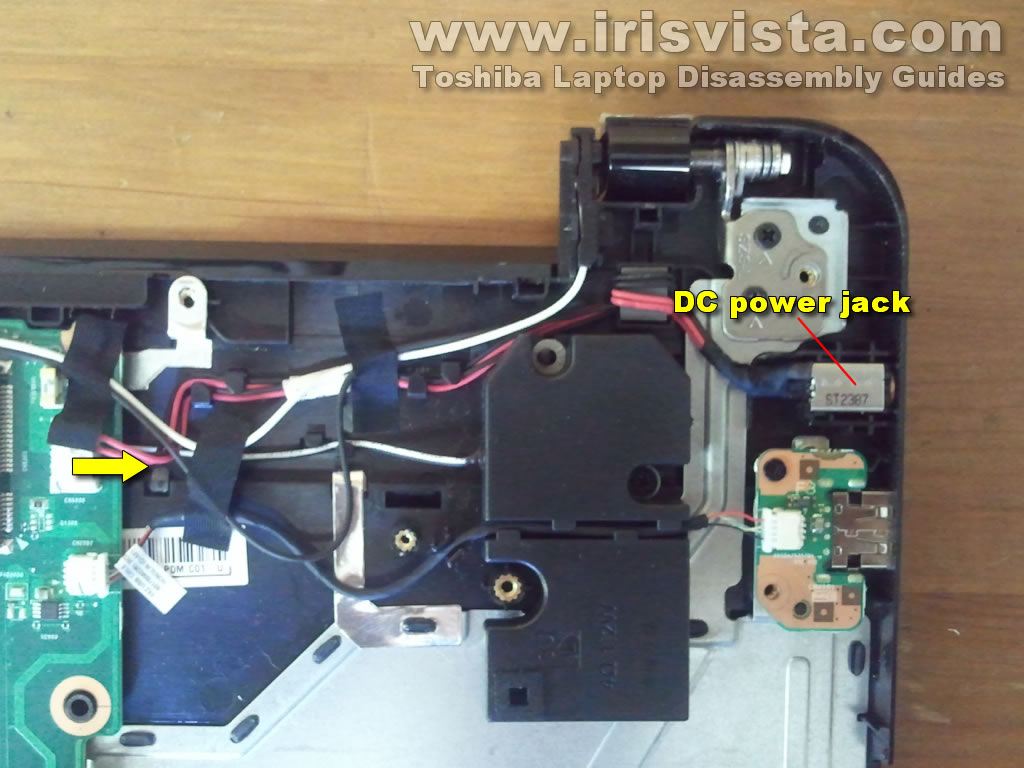
STEP 21
The DC power jack connected to the motherboard via cables.
If the DC jack failed, you can unplugged it from the motherboard and replace with a new one. |
| |
|
 |
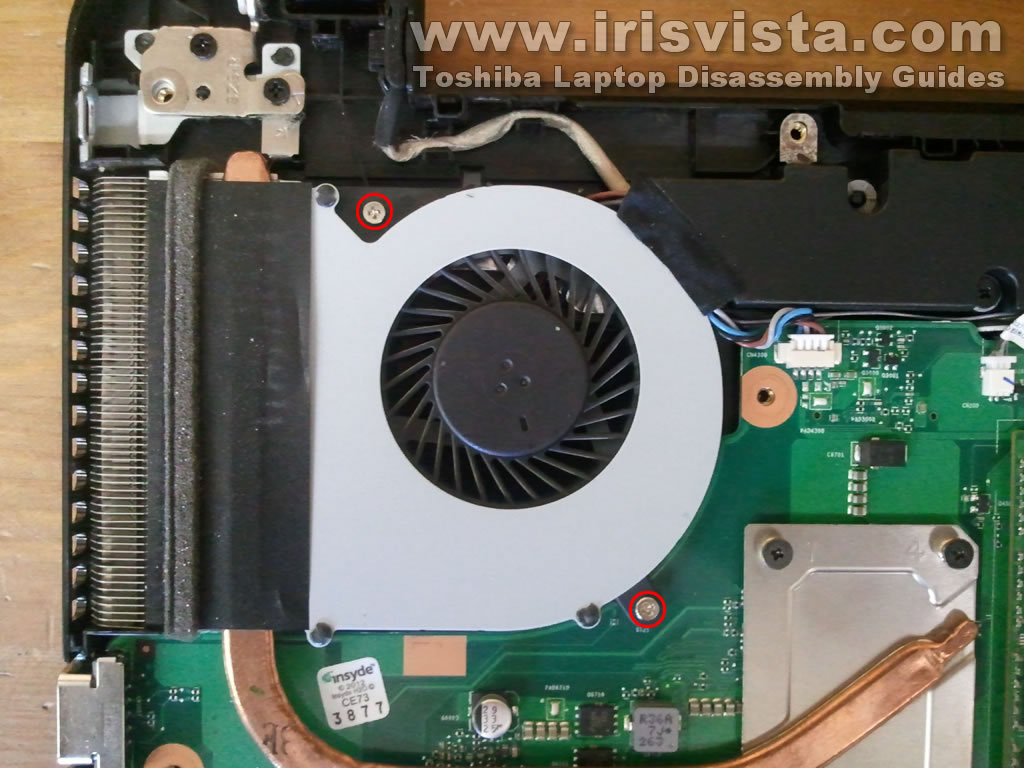
STEP 22
Remove two screws securing the cooling fan to the motherboard.
Lift up the cooling fan from the laptop. |
| |
|
 |
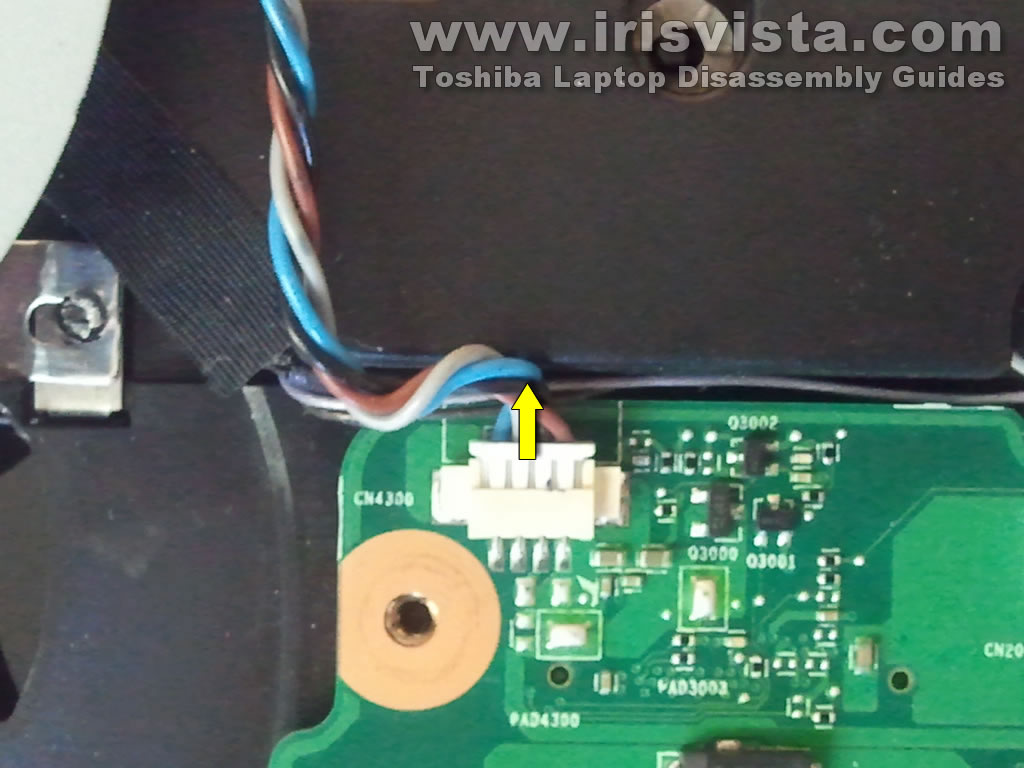
STEP 23
Disconnect the cooling fan cable from the motherboard. |
| |
|
 |
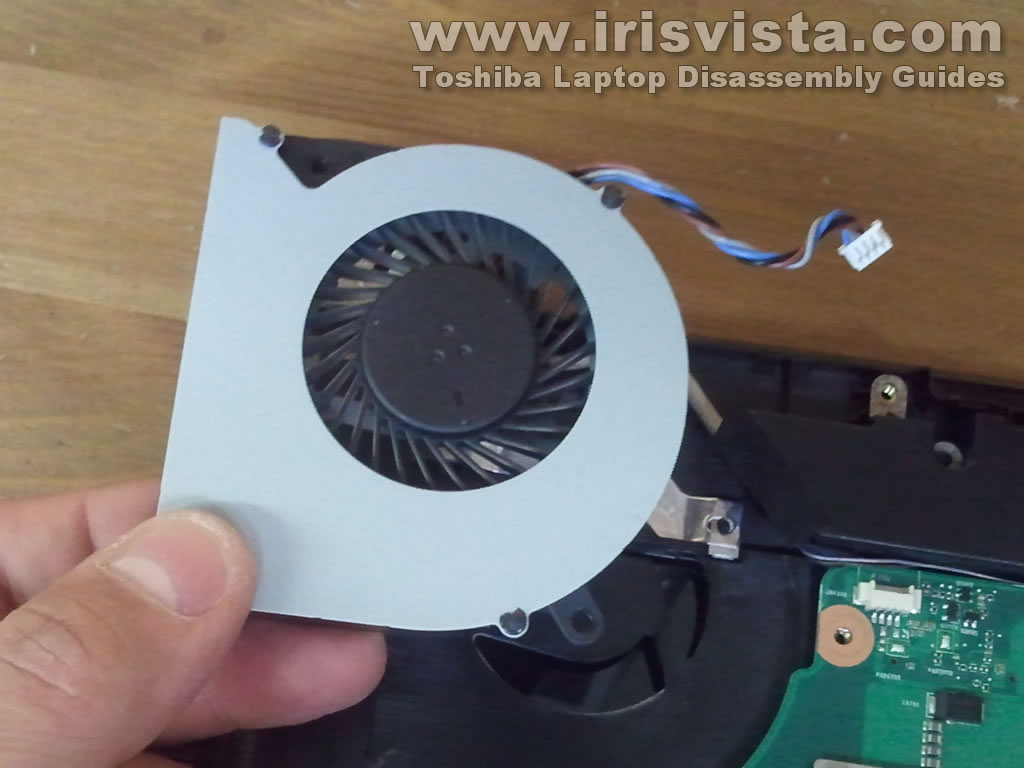
STEP 24
Now you can remove the cooling fan completely and replace it with a new one if needed.
Also, do not forget to clean up the heatsink from dust.
A dust buildup can cause laptop overheating. |
| |
|
|
|