|
Toshiba Satellite T110, T115, T110D, T115D disassembly. |
|
|
 |
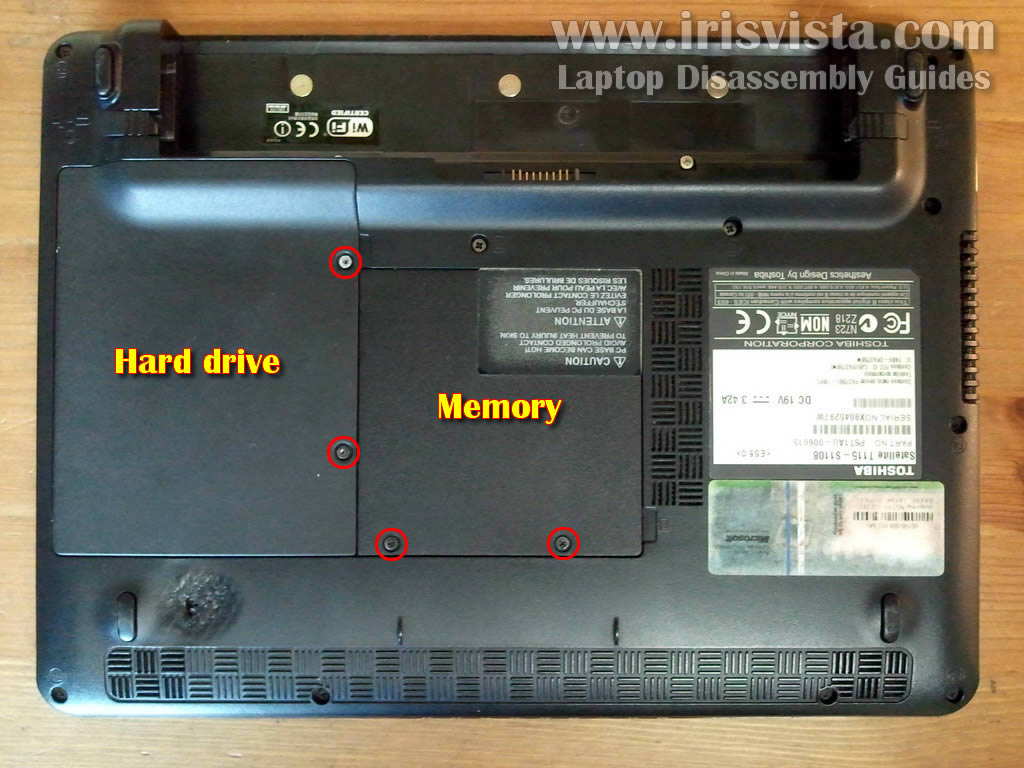
STEP 1
First of all, make sure the laptop is turned off (not hibernated or in sleep mode).
Remove laptop battery.
Remove four screws securing the hard drive and memory covers.
Lift up and remove both covers.
|
| |
|
 |
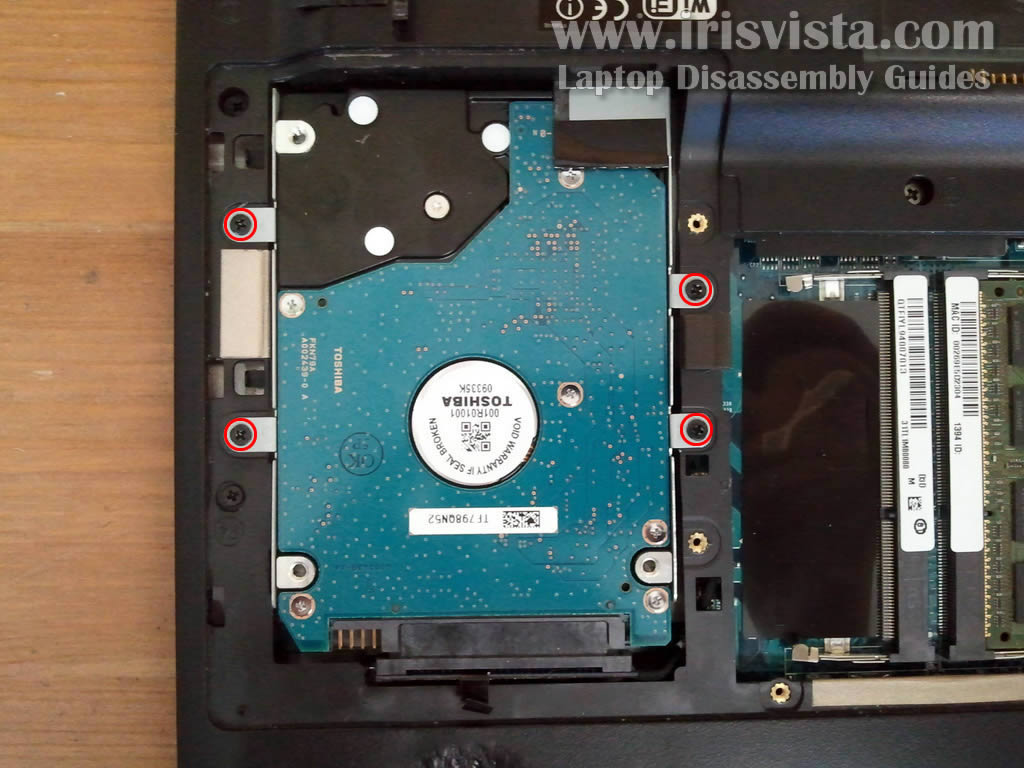
STEP 2
Remove four screws securing the hard drive mounting bracket to the laptop base.
|
| |
|
 |
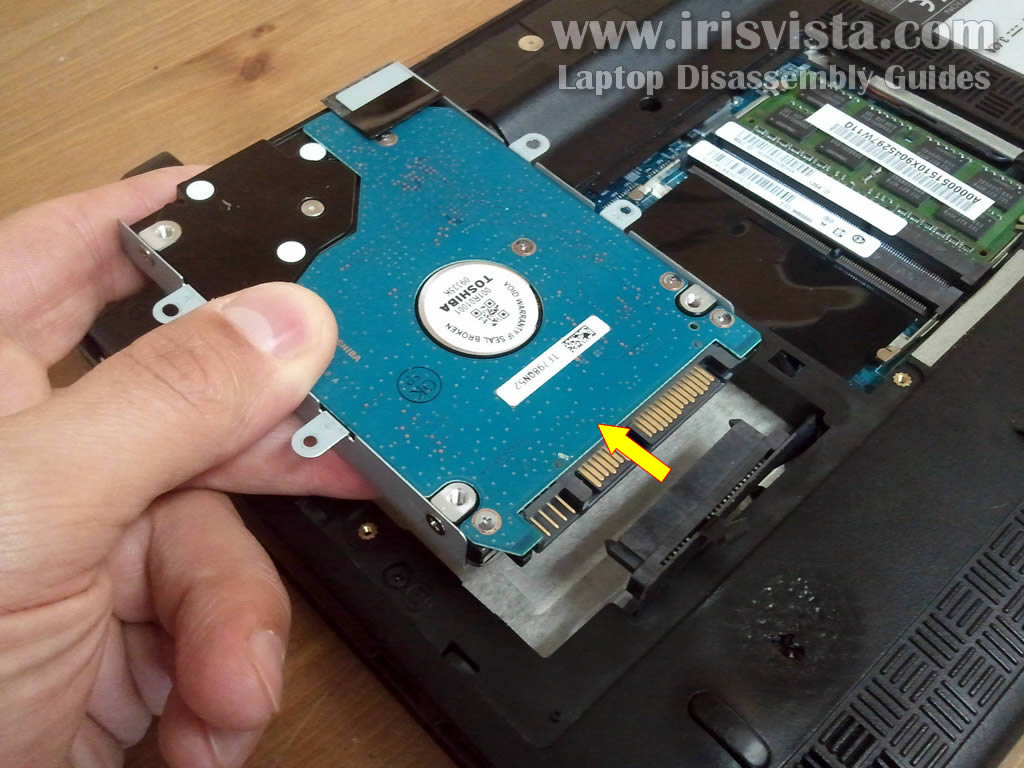
STEP 3
Carefully lift up the hard drive assembly and disconnect hard drive from the connector.
If you are replacing the hard drive you'll have to transfer the mounting bracket to the new drive.
By the way, Toshiba Satellite T110/T115 laptop uses regular 2.5" SATA hard drive.
You can upgrade it to any other larger hard drive or replace with SSD (which is faster and absolutely quiet but more expensive).
|
| |
|
 |
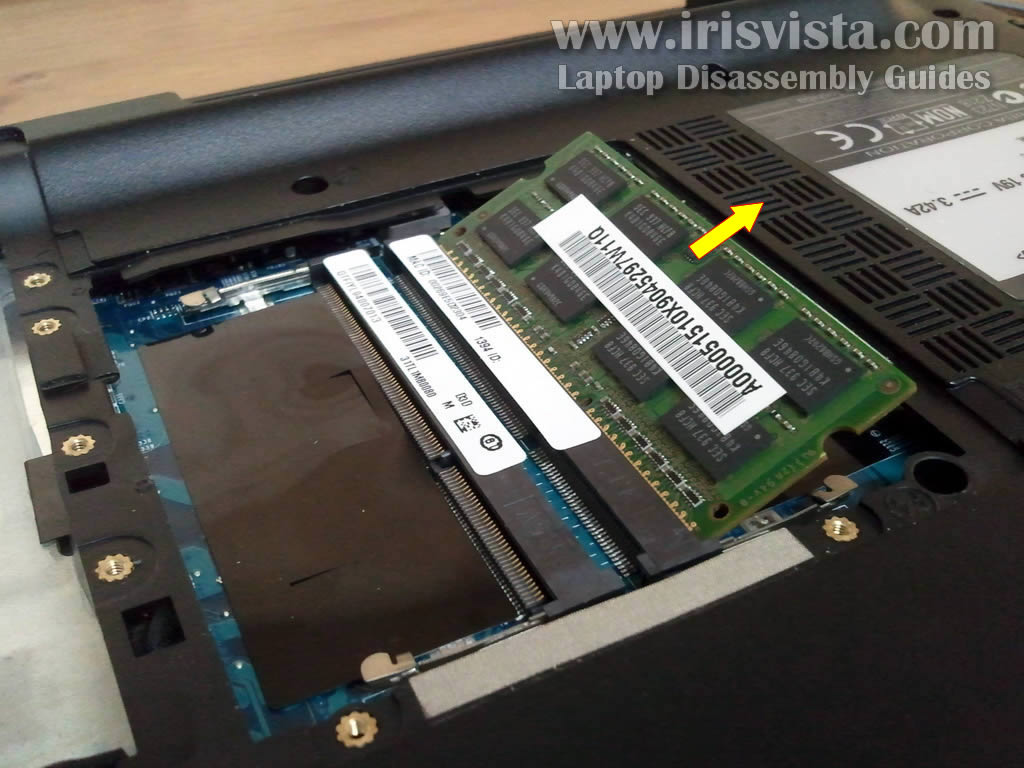
STEP 4
Both memory slots located on the bottom of the laptop.
In order to remove the memory module, you'll have to spread latches on both sides of the slot.
After that the memory module will pop up and you can pull it from the slot.
Toshiba Satellite T110/T115 uses DDR3 type memory. |
| |
|
 |
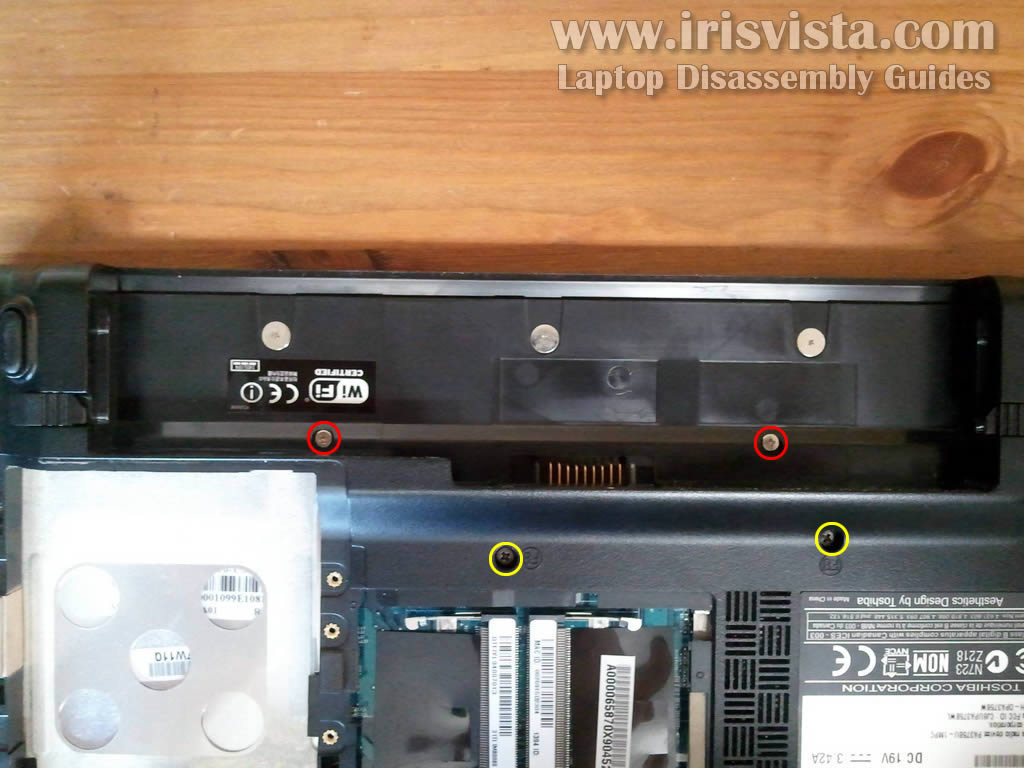
STEP 5
In the following seven steps I explain how to remove laptop keyboard.
If your goal is just replacing the keyboard, you don't have to go though all previous steps. Start here.
Remove two (red) screws securing the keyboard bezel.
Remove two (yellow) screws securing the keyboard.
|
| |
|
 |
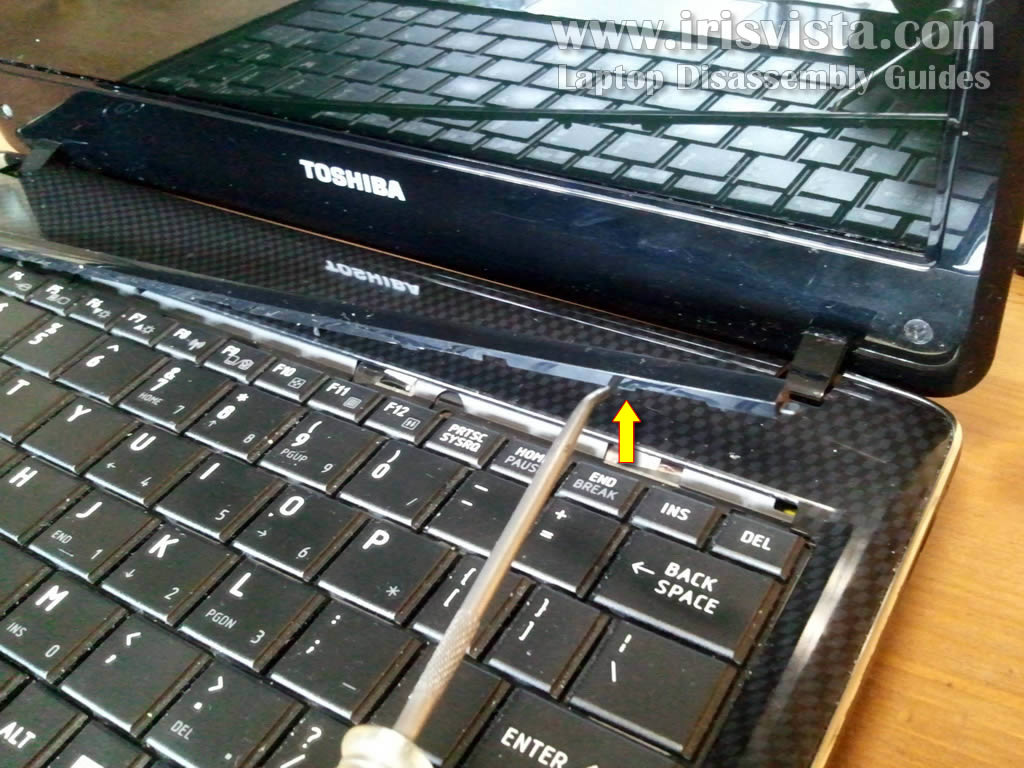
STEP 6
Turn the laptop over and lift up keyboard bezel with a small screwdriver.
Continue removing bezel with your fingers.
|
| |
|
 |
STEP 7
Now you can lift up the keyboard and place it upside down on the palm rest. |
| |
|
 |
STEP 8
The keyboard still connected to the motherboard.
Before removing the keyboard you'll have to unlock the connector and release the cable.
|
| |
|
 |
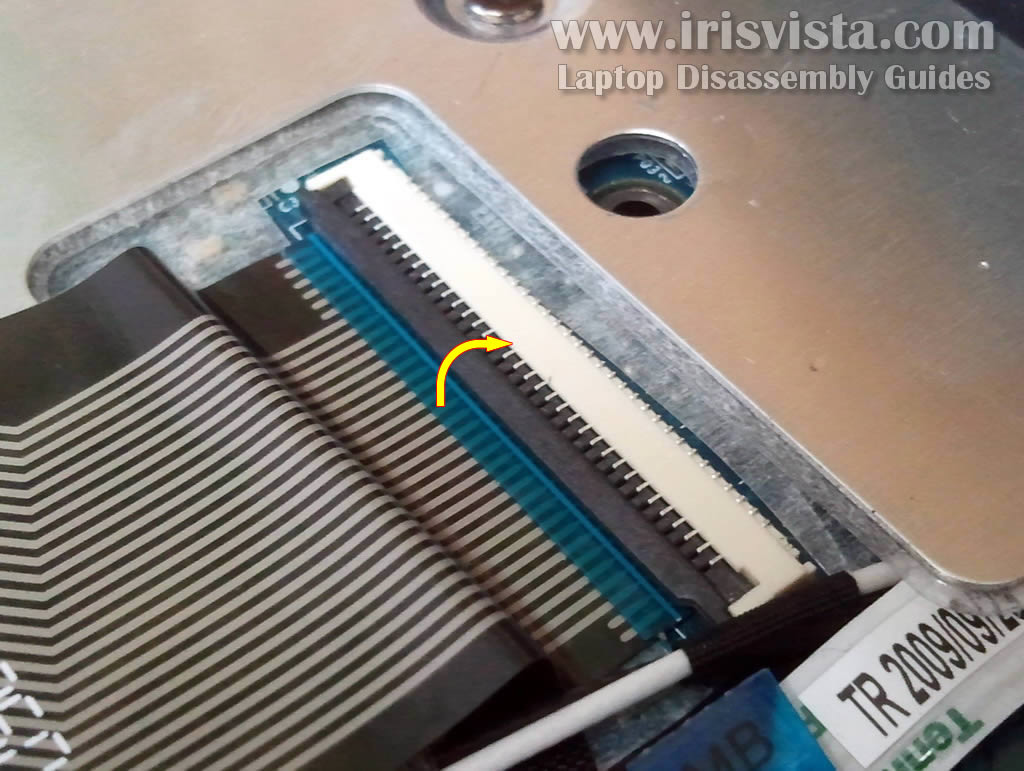
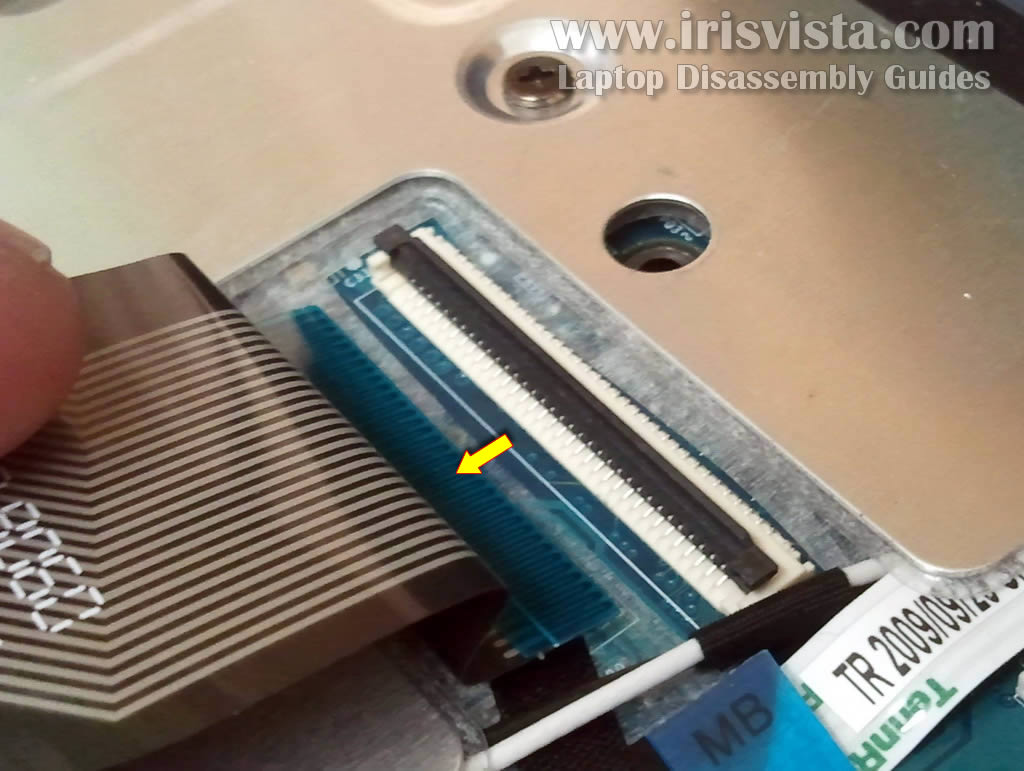
STEP 9
On this picture the keyboard connector shown in the locked position and here's how to unlock it.
Carefully lift up the left side of the brown locking tab with your fingernail.
The locking tab will open up at a 90 degree angle. |
| |
|
 |
STEP 10
On this picture the same connector shown in the unlocked position.
Now you can remove keyboard cable from the connector. |
| |
|
 |
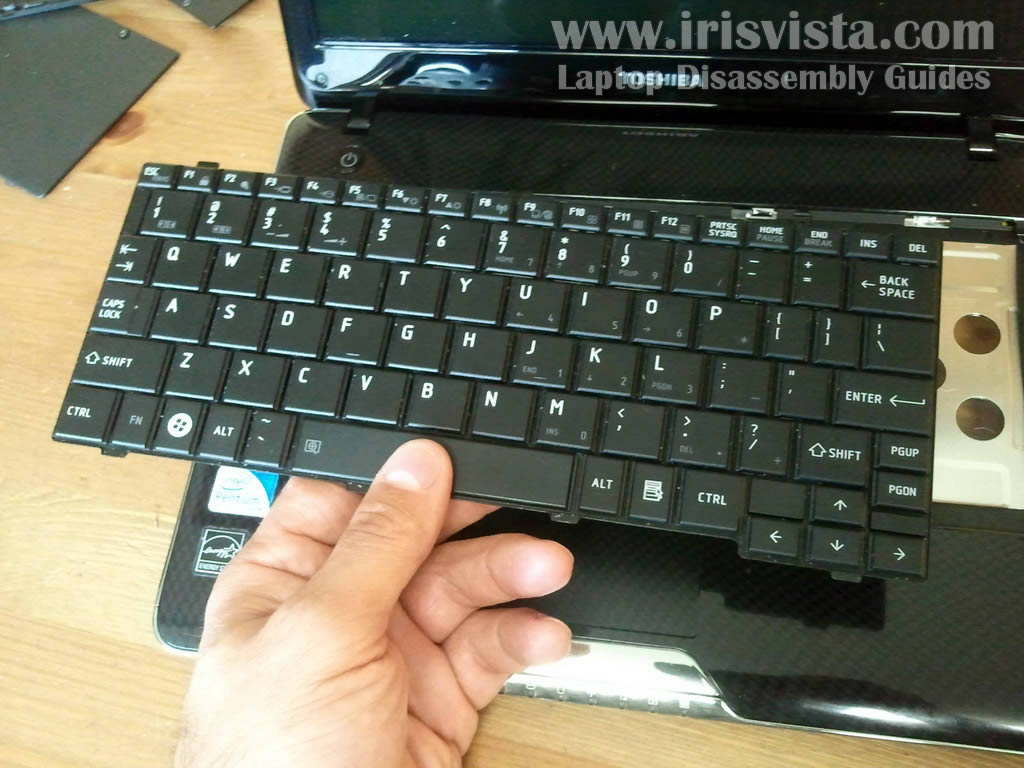
STEP 11
Remove keyboard from the laptop.
|
| |
|
 |
STEP 12
In the following five steps I explain how to remove laptop top cover and access internal parts.
Remove all screws from the bottom of the laptop. |
| |
|
 |
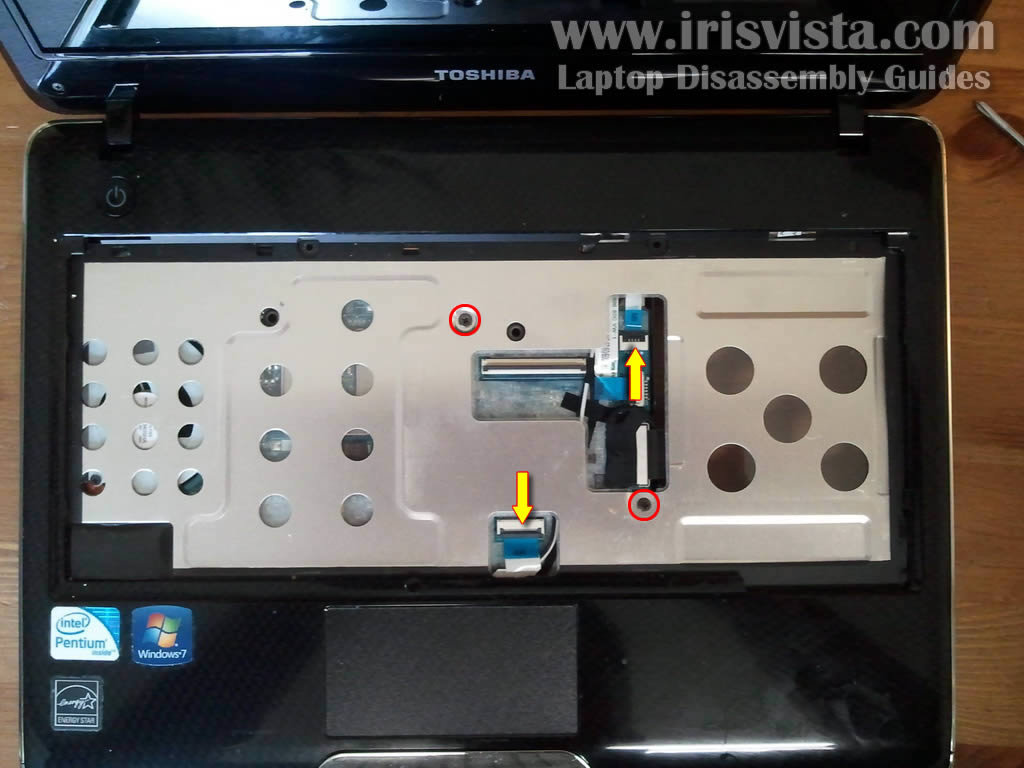
STEP 13
Remove two screws securing the top cover assembly.
Disconnect the power button cable and touch pad cable from the motherboard. Both connectors are similar to the keyboard connector. |
| |
|
 |
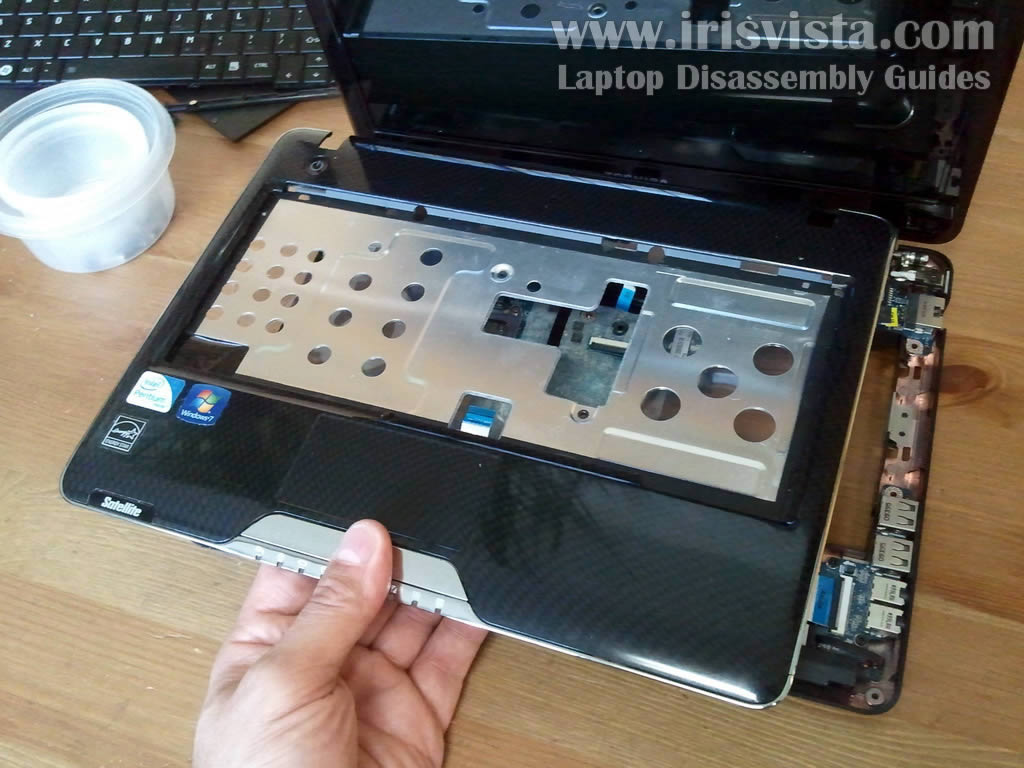
STEP 14
Lift up one side of the top cover and separate it from the laptop base.
Continue removing top cover with your fingers. |
| |
|
 |
STEP 15
Remove the top cover assembly. |
| |
|
 |
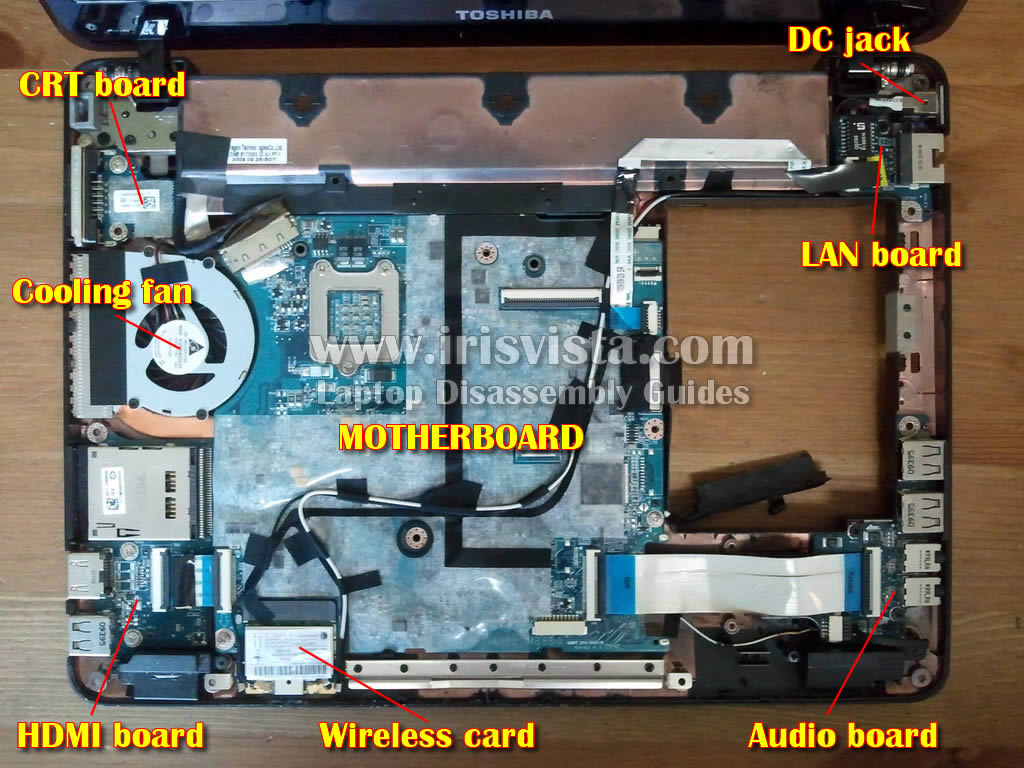
STEP 16
When the top cover is remove you can get access to the following internal parts:
-
CRT board
- Cooling fan
- HDMI board
- Wireless card
- Audio board
- LAN board
- DC jack harness
- Motherboard |
| |
|
|
|