|
Toshiba Satellite T135, T135D, T130, T130D disassembly. |
|
|
 |
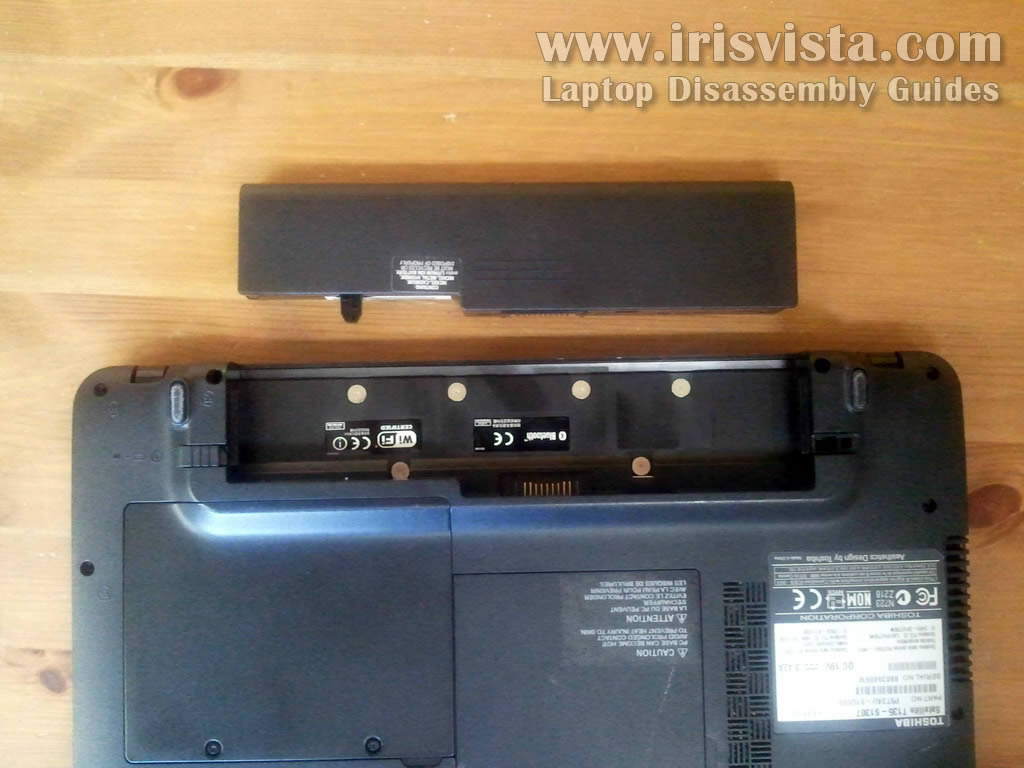
STEP 1
Turn off the laptop and unplug the AC adapter.
Remove the battery.
|
| |
|
 |
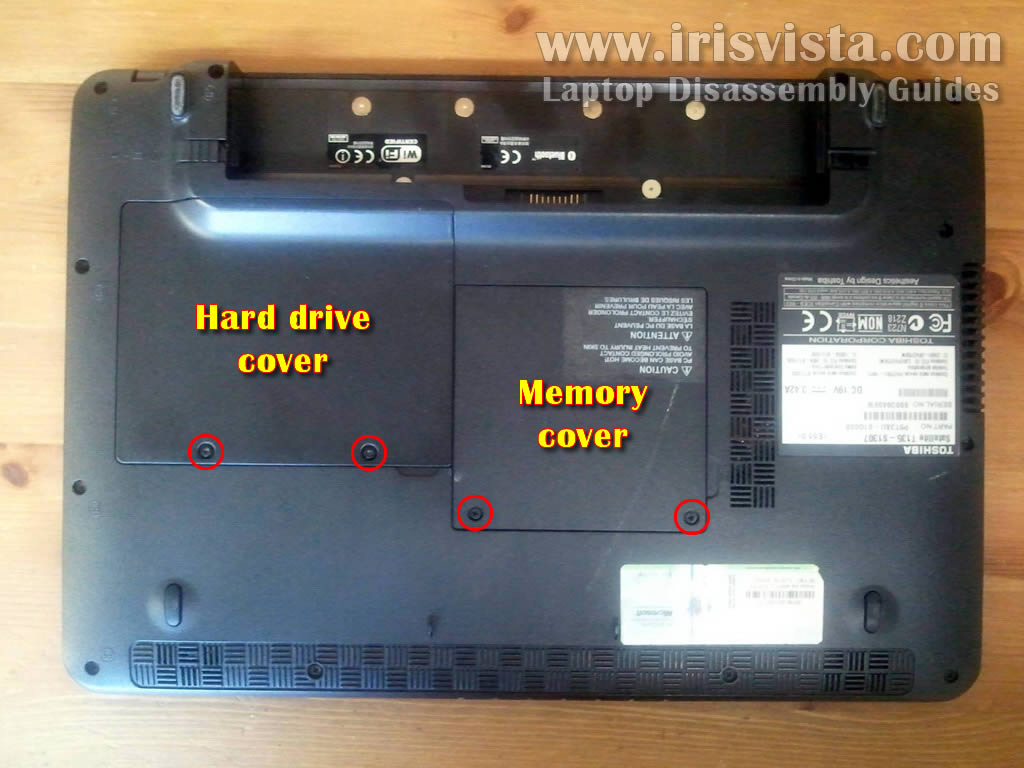
STEP 2
Loosen/remove four screws securing the hard drive and memory covers.
Lift up and remove both covers.
|
| |
|
 |
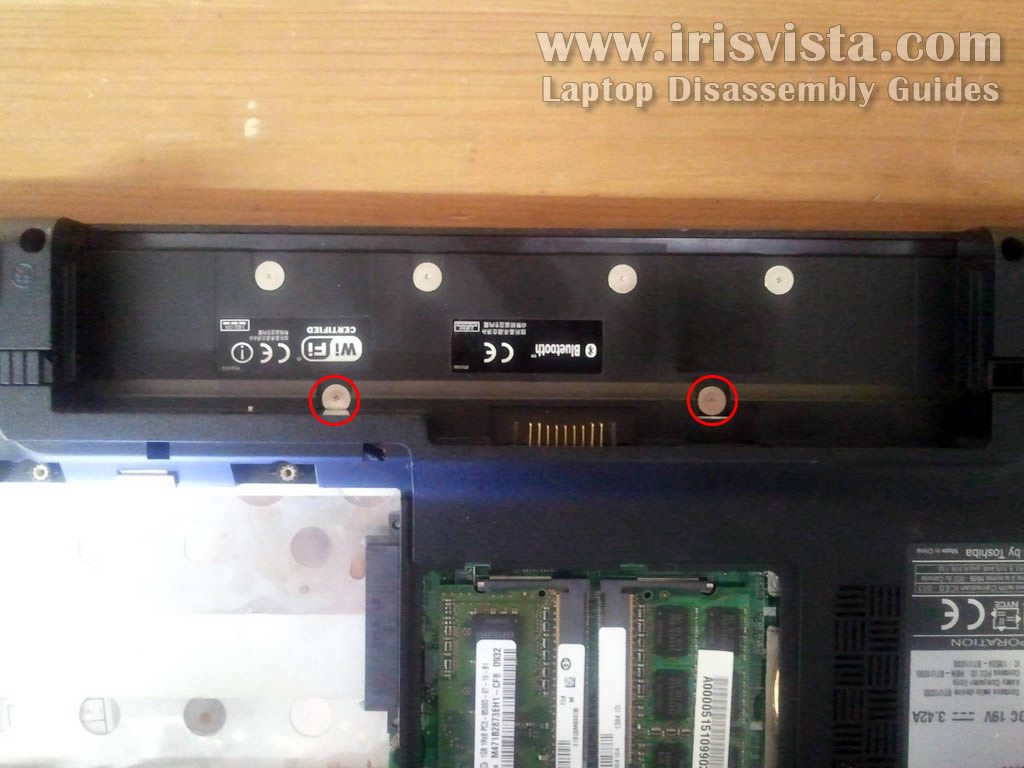
STEP 3
Both memory modules can be accessed on the bottom of the laptop. I will not be removing memory modules because it's not necessary for the purpose of my guide.
Remove two screws securing the hard drive mounting bracket to the laptop base.
Slide hard drive assembly to the left to disconnect it from the motherboard.
|
| |
|
 |
STEP 4
Lift up and remove the hard drive assembly.
As you see, Toshiba Satellite T135/T130 laptop has a regular 2.5" SATA hard drive installed. |
| |
|
 |
STEP 5
Remove two screws located in the battery compartment.
These screws securing the keyboard bezel. |
| |
|
 |
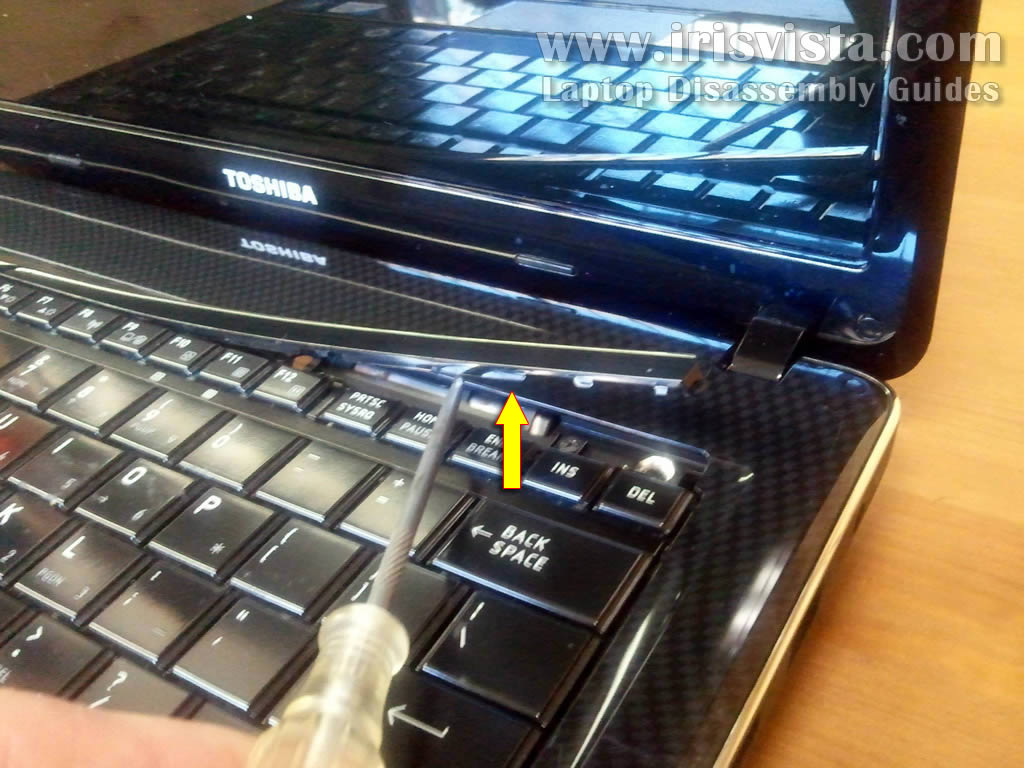
STEP 6
Carefully lift up the right side of the keyboard bezel with a sharp object.
Continue removing the bezel with your fingers. |
| |
|
 |
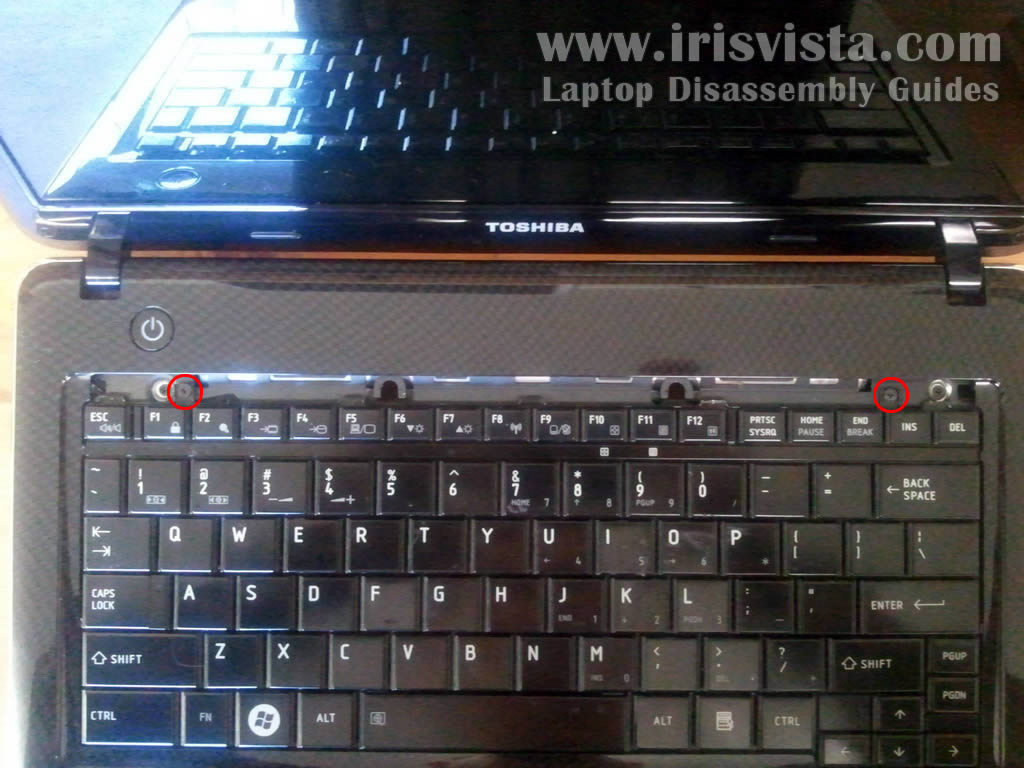
STEP 7
Remove two screws securing the keyboard. |
| |
|
 |
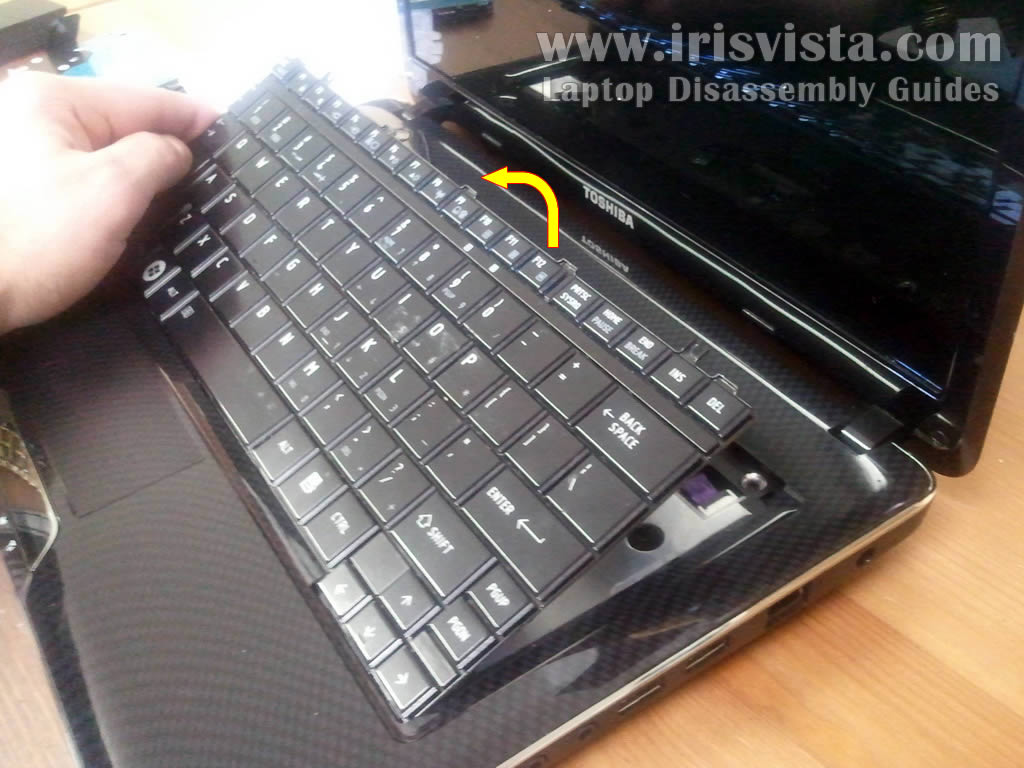
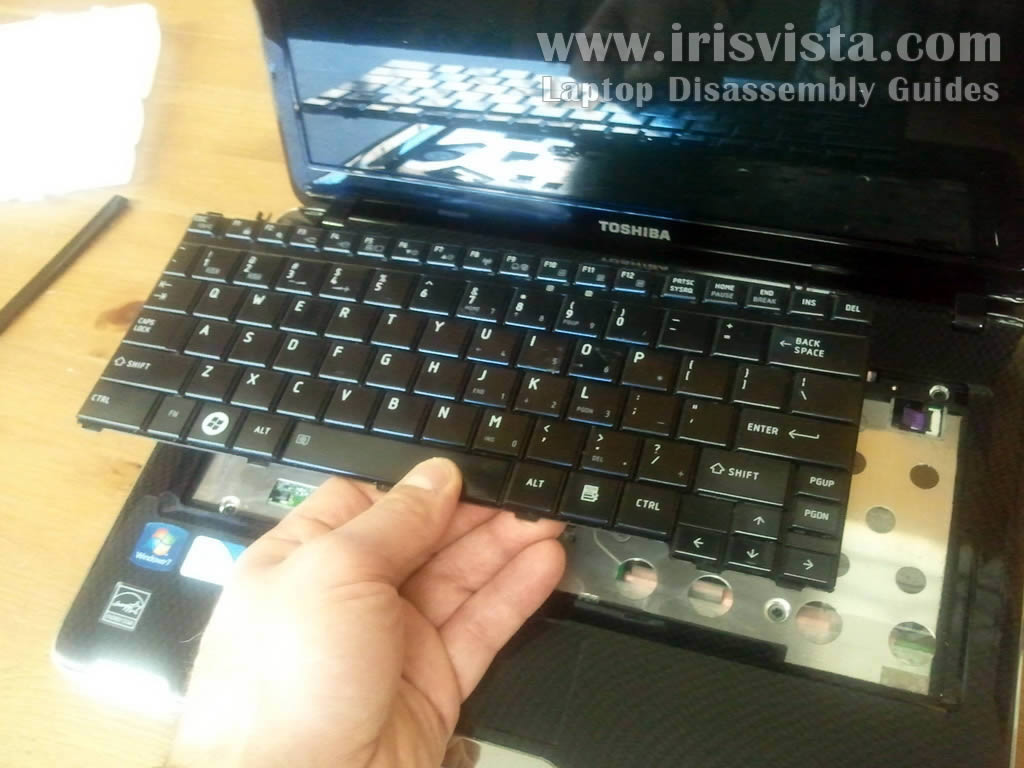
STEP 8
Now you should be able to lift up the top side of the keyboard and turn the keyboard upside down.
Be careful, the keyboard still connected to the motherboard. |
| |
|
 |
STEP 9
The keyboard cable connected to the motherboard.
In the following two steps I explain how to unlock the connector and release the cable. |
| |
|
 |
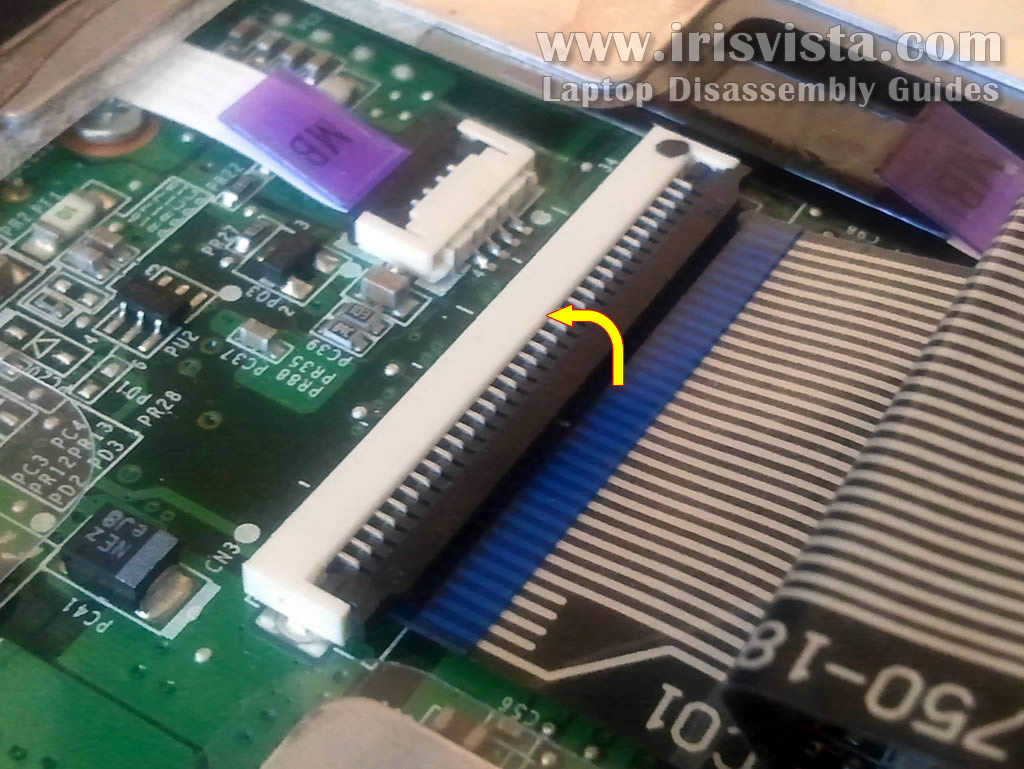
STEP 10
On this picture the keyboard connector shown in the locked position.
Carefully lift up the brown locking tab with your fingernail. The tab will open up at a 90 degree angle.
WARNING: Do not apply much force! The locking tab must stay connected to the connector base.
|
| |
|
 |
STEP 11
On this picture the same connector shown in the unlocked position.
Now you can pull keyboard cable from the connector.
|
| |
|
 |
STEP 12
Remove the keyboard. |
| |
|
 |
STEP 13
Remove all screws from the bottom of the laptop. |
| |
|
 |
STEP 14
Remove seven screws securing the top cover assembly.
Disconnect the touchpad cable (connector 1) and power button cable (connector 2) using same technique as for disconnecting the keyboard cable. |
| |
|
 |
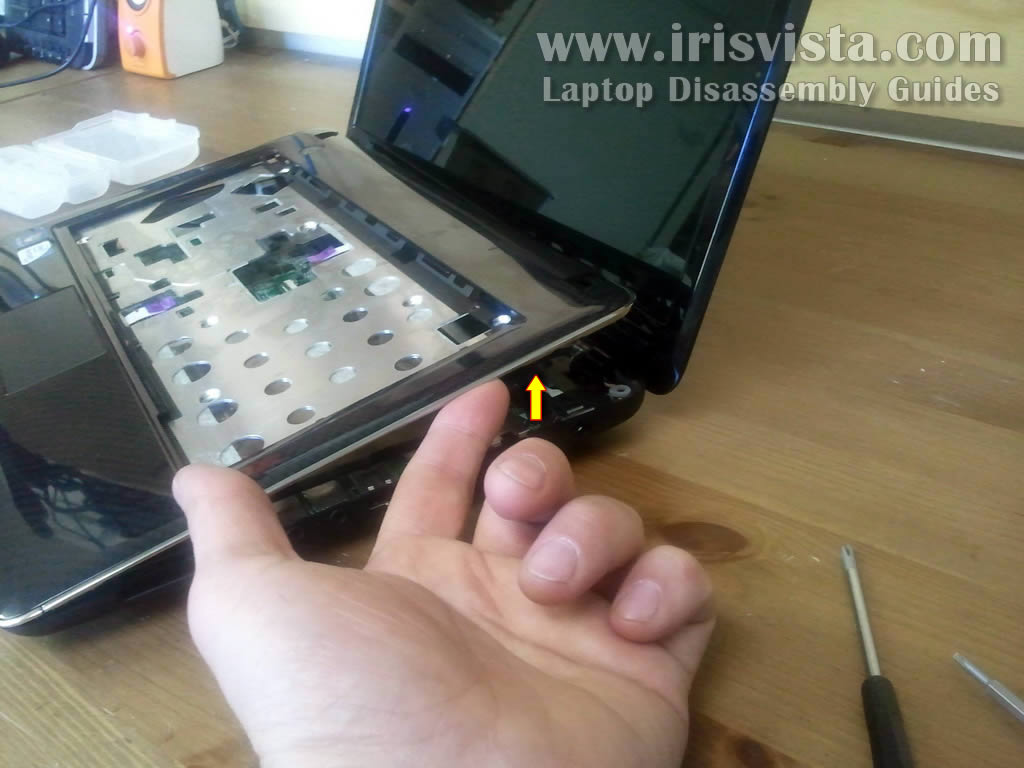
STEP 15
Start separating the top cover assembly from the laptop base. |
| |
|
 |
STEP 16
Remove the top cover assembly. |
| |
|
 |
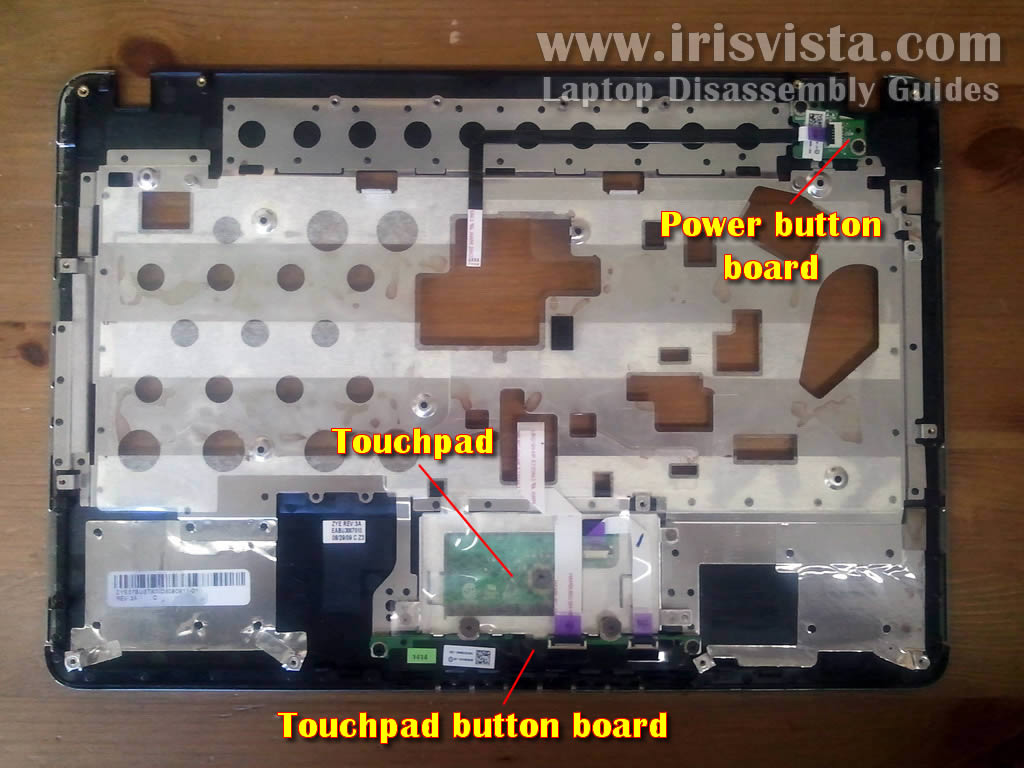
STEP 17
On the back side of the top cover assembly you can access the following laptop components:
- Power button board.
- Touchpad.
- Touchpad button board. |
| |
|
 |
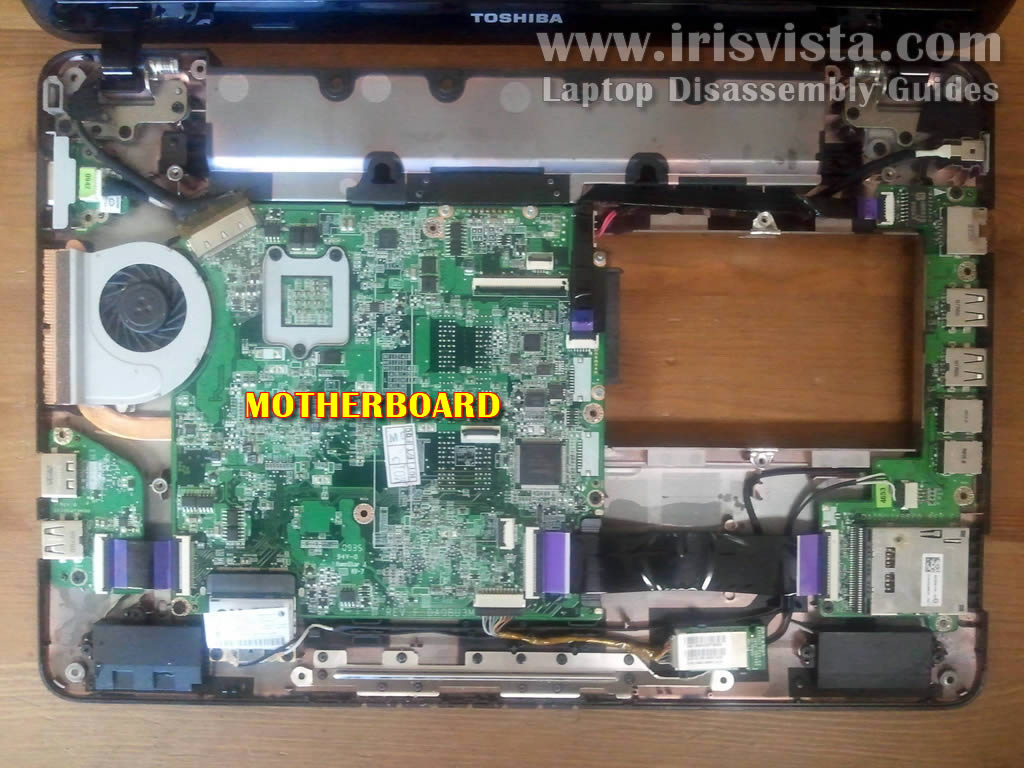
STEP 18
In the following steps I'll show how to remove laptop motherboard. |
| |
|
 |
STEP 19
Remove two screws securing the motherboard.
Disconnect the following cables:
1. Video cable.
2.
USB board cable.
3.
Bluetooth module cable.
4. Card reader cable.
5.
LAN/USB board cable. |
| |
|
 |
STEP 20
Disconnect both antenna cables from the wireless card.
Remove two screws securing the wireless card.
Remove wireless card.
|
| |
|
 |
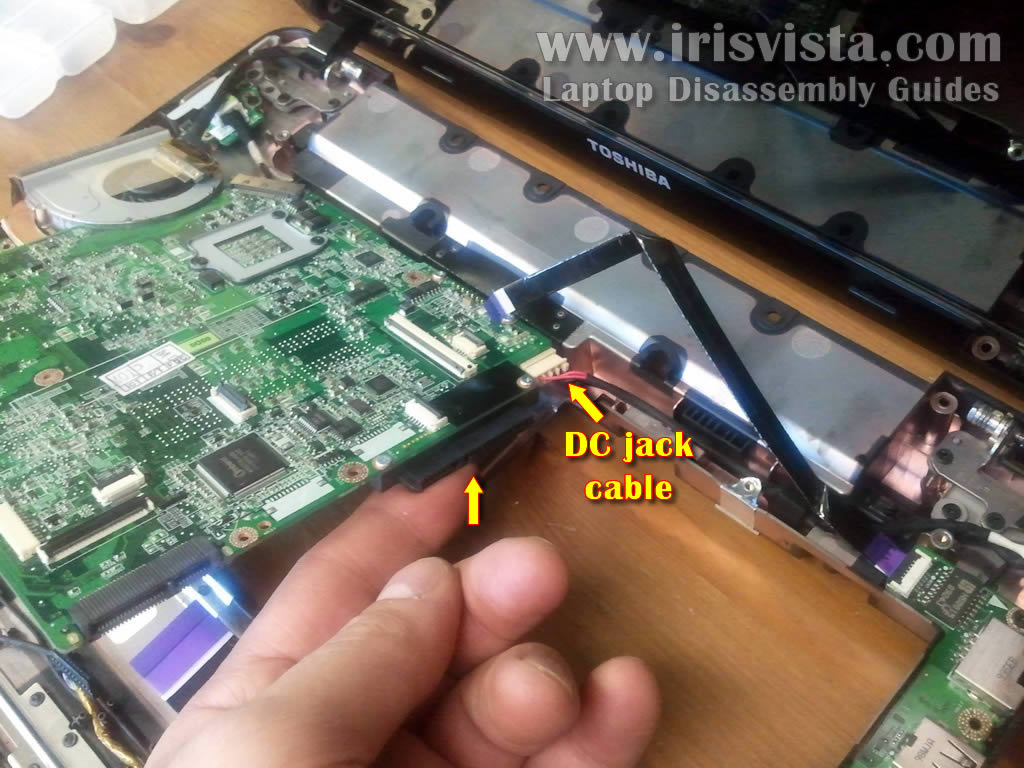
STEP 21
Carefully lift up the right side of the motherboard and disconnect the DC jack cable. |
| |
|
 |
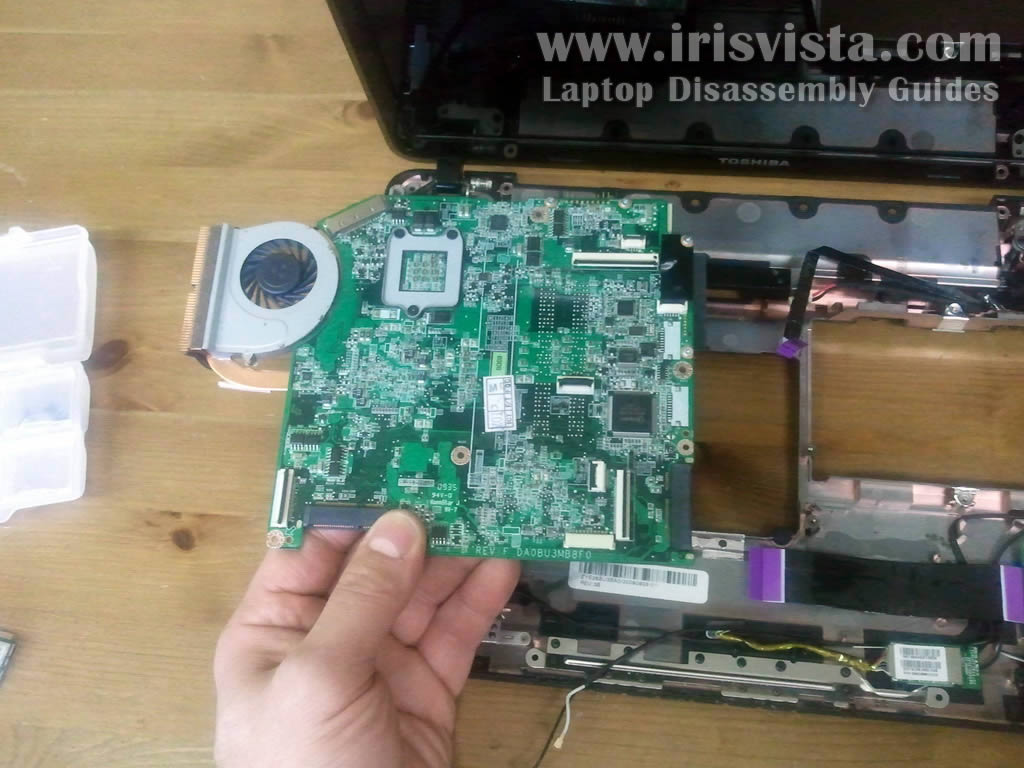
STEP 22
Remove the motherboard as it shown on the picture and turn it over.
Disconnect the VGA board connector on the bottom side of the motherboard. |
| |
|
 |
STEP 23
The motherboard has been removed. |
| |
|
 |
STEP 24
On the bottom side of the motherboard you can access the cooling fan assembly (fan and heatsink) and CMOS battery. |
| |
|
 |
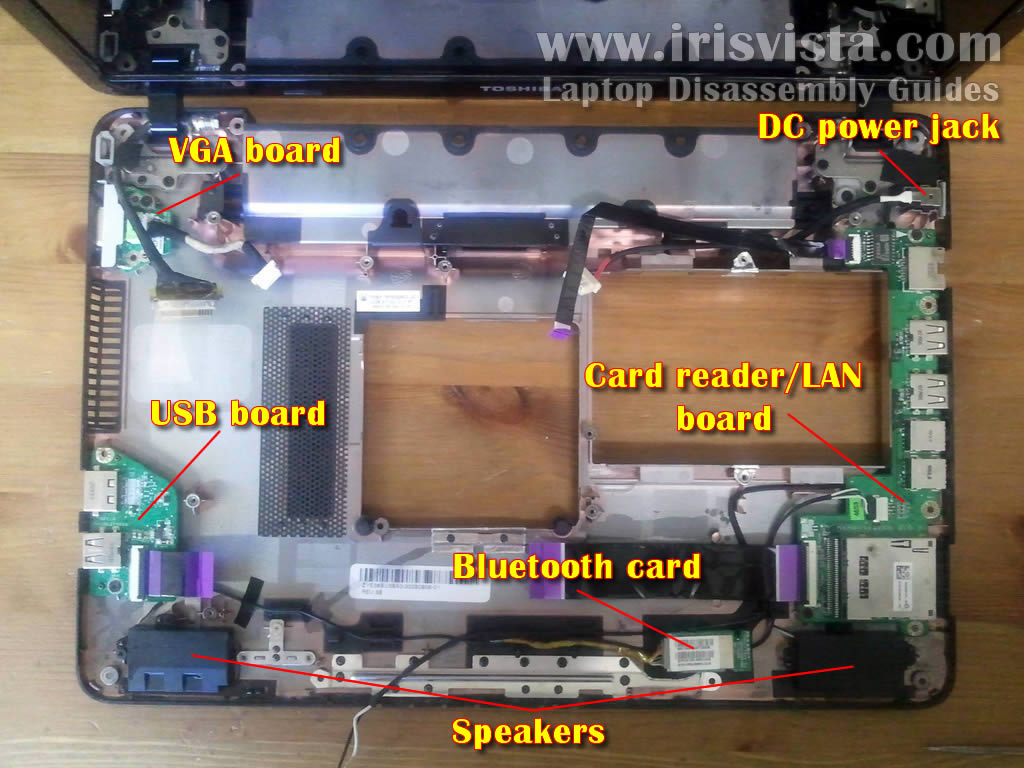
STEP 25
You'll find the following components mounting the laptop base:
- VGA board.
- USB board.
- Both speakers.
- Bluetooth module.
- Card reader/LAN board.
- DC power jack harness. |
| |
|
|
|