|
Toshiba Satellite U405, U405D, U400, U400D screen removal.
|
|
|
 |
STEP 1
Start disassembly with removing the battery.
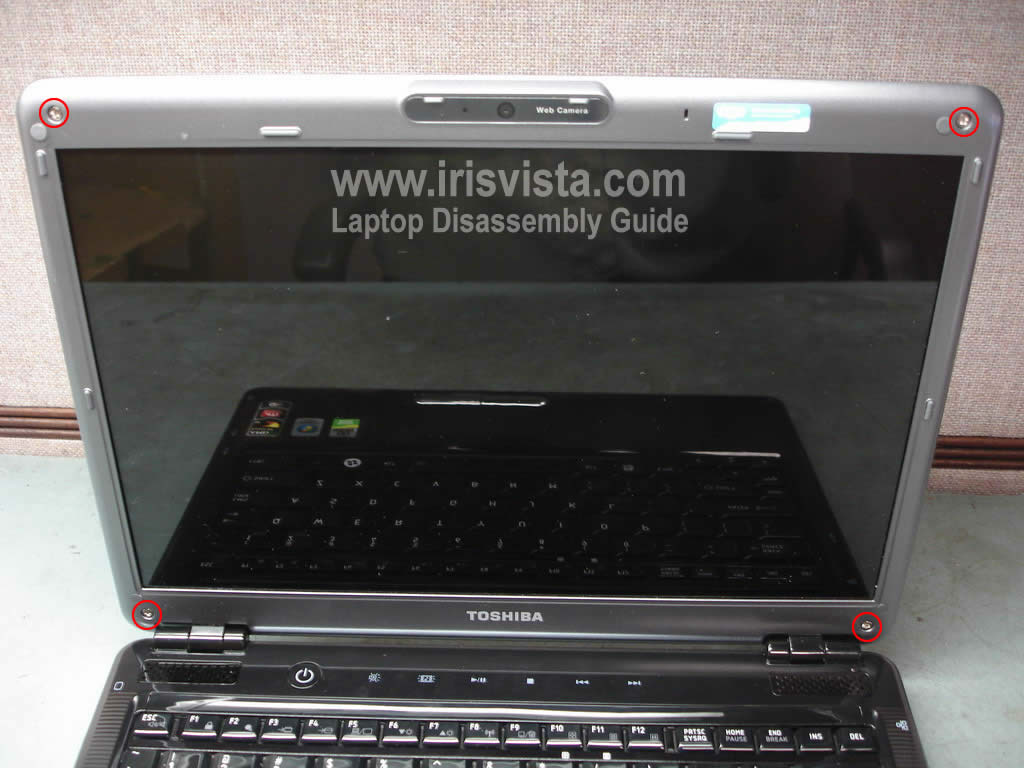
The LCD bezel ( LCD mask) has four rubber screw seals.
Remove all rubber seals and after that remove four screws securing the LCD bezel. |
| |
|
 |
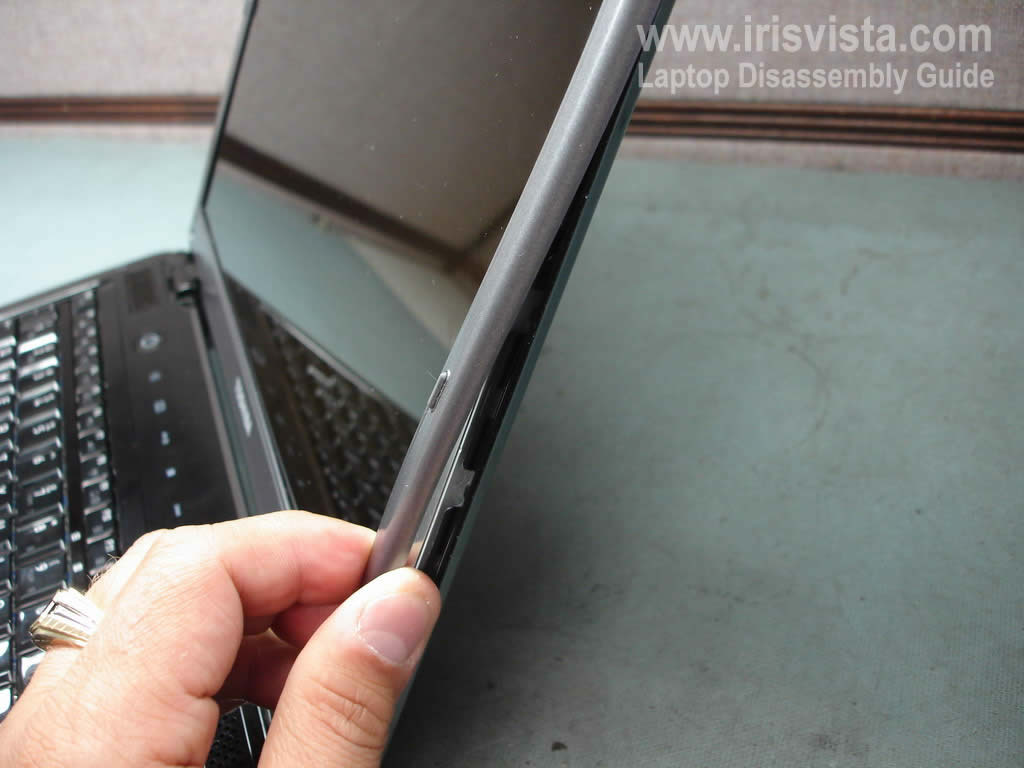
STEP 2
Start removing the LCD bezel on the side of the display.
|
| |
|
 |
STEP 3
Continue removing the LCD bezel on the top of the display.
|
| |
|
 |
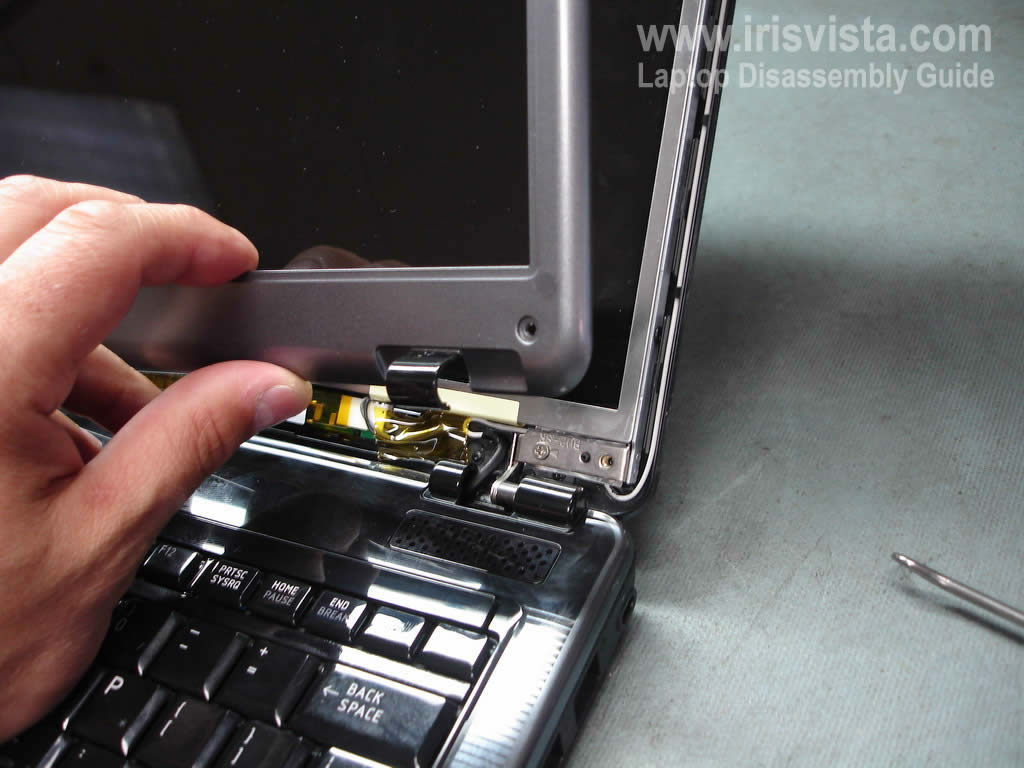
STEP 4
Finally, move to the bottom part of the bezel. |
| |
|
 |
STEP 5
The LCD screnn bezel has been removed. |
| |
|
 |
STEP 6
Remove two screws from the display hinges.
|
| |
|
 |
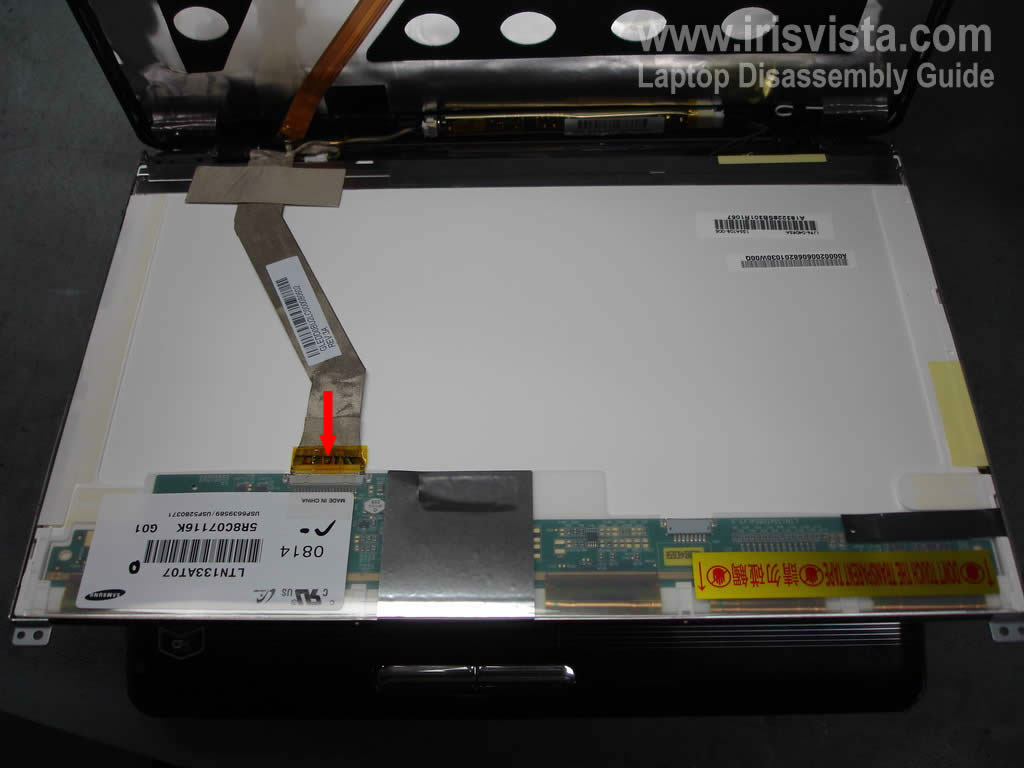
STEP 7
Now you can access the back side of the LCD screen.
Disconnect the video cable.
Carefully unglue the video cable from the screen. |
| |
|
 |
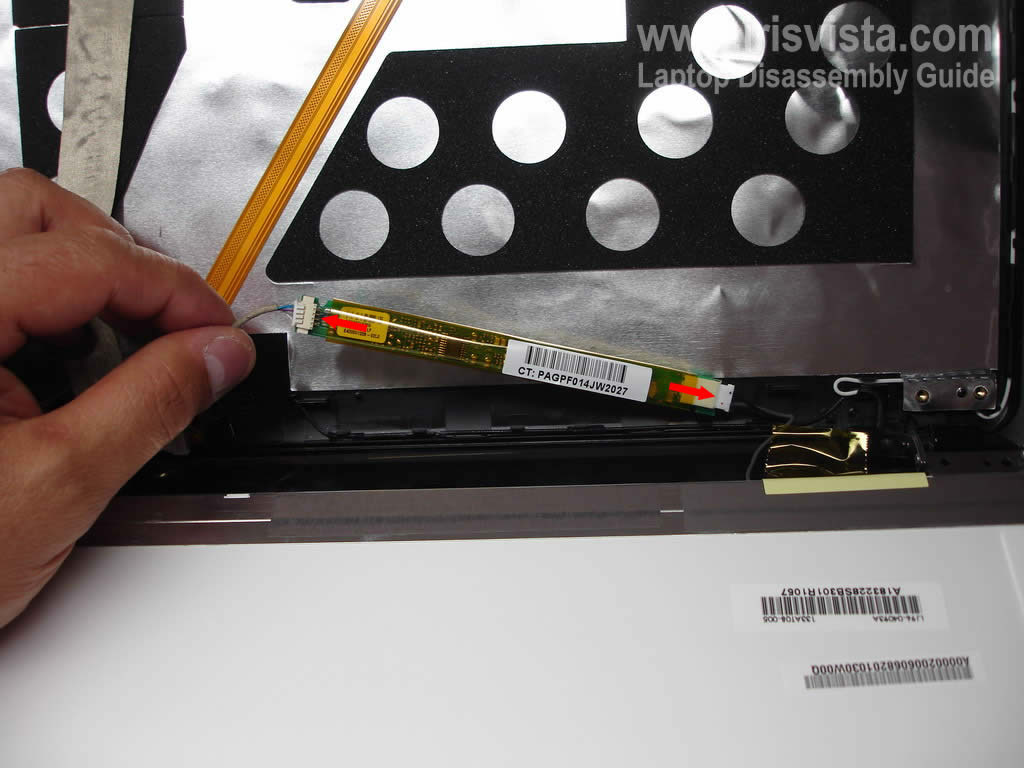
STEP 8
Disconnect cables from both sides of the screen inverter board.
|
| |
|
 |
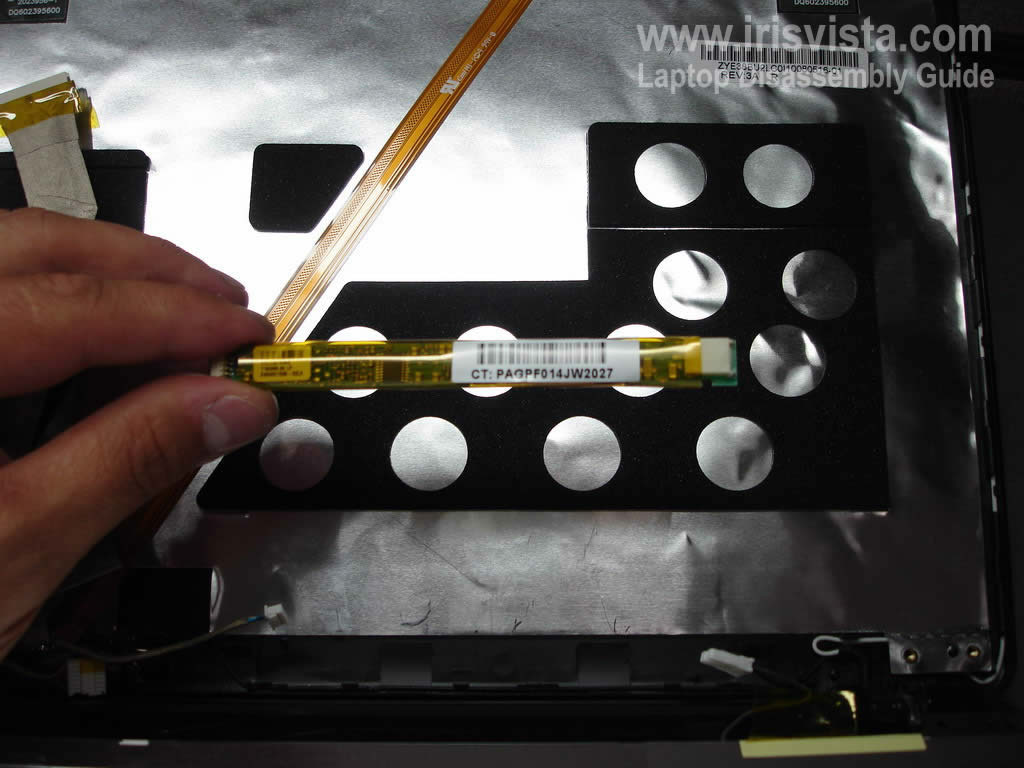
STEP 9
The LCD screen inverter board has been removed.
You can replace it with a new one if needed.
|
| |
|
 |
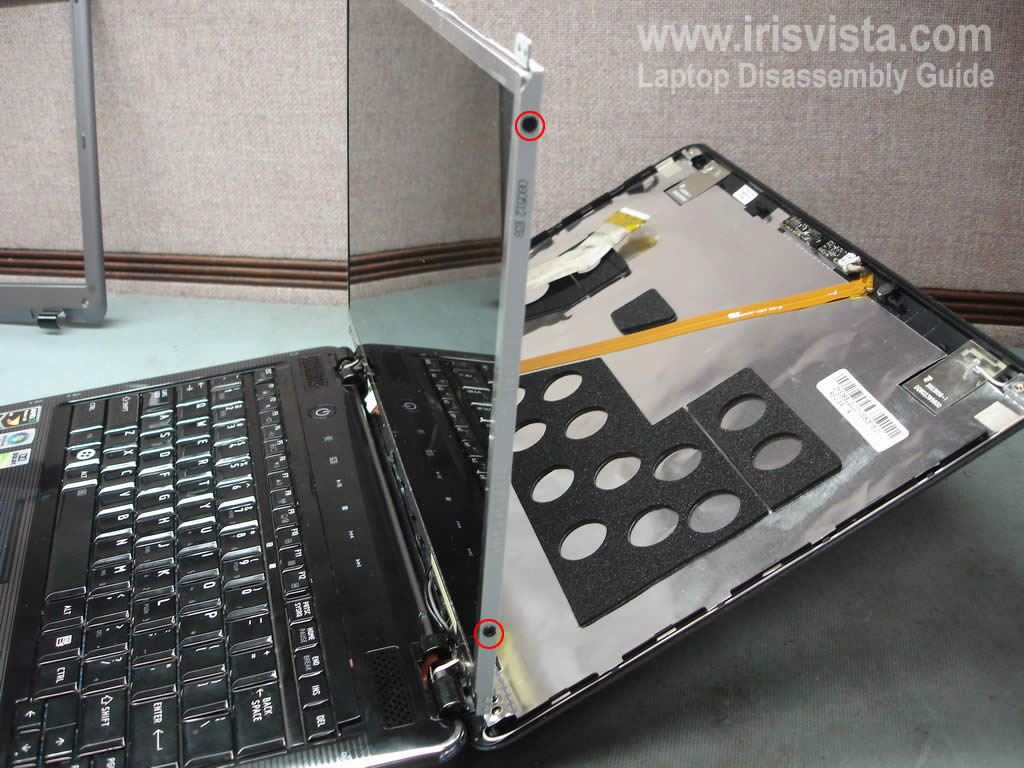
STEP 10
Remove two screws from each side of the display.
These screws securing the LCD screen to the display hinges. |
| |
|
 |
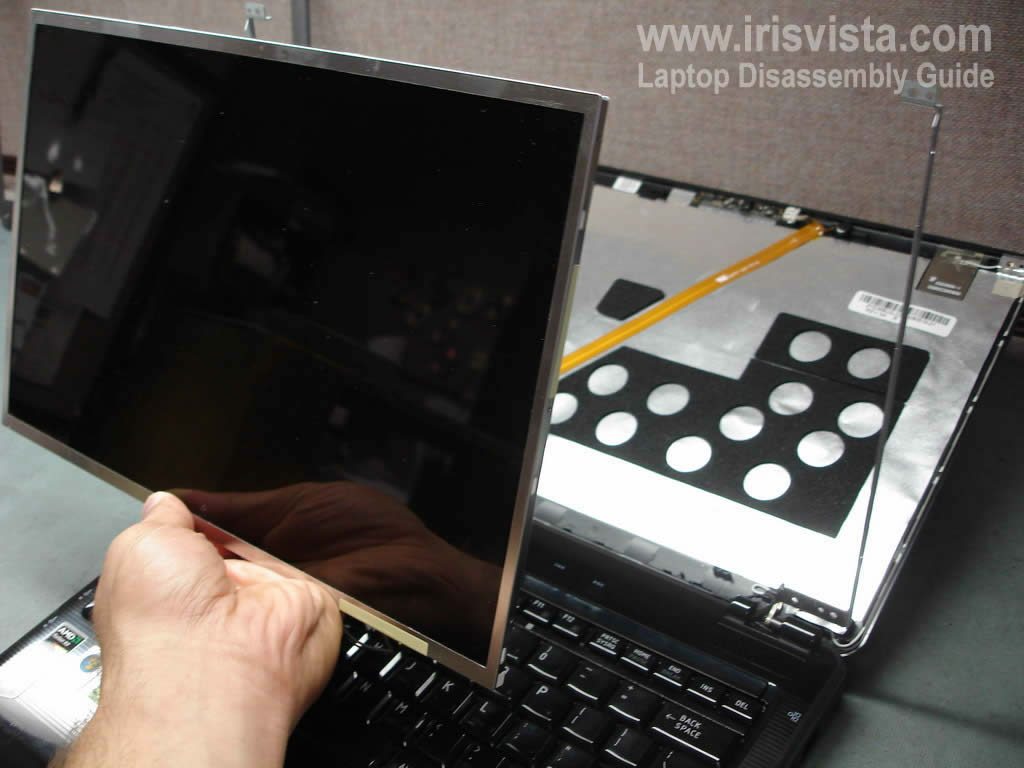
STEP 11
The LCD screen has been removed.
You can replace the screen with a new one if needed.
Check out this guide for laptop case disassembly instructions. |
| |
|
|
|