|
Toshiba Satellite U845W, U840W hinge repair.
In my case, the right side of the display started separated from the case.
After further investigation I found that the right hinge broke off of the display back cover.
|
|
|
 |
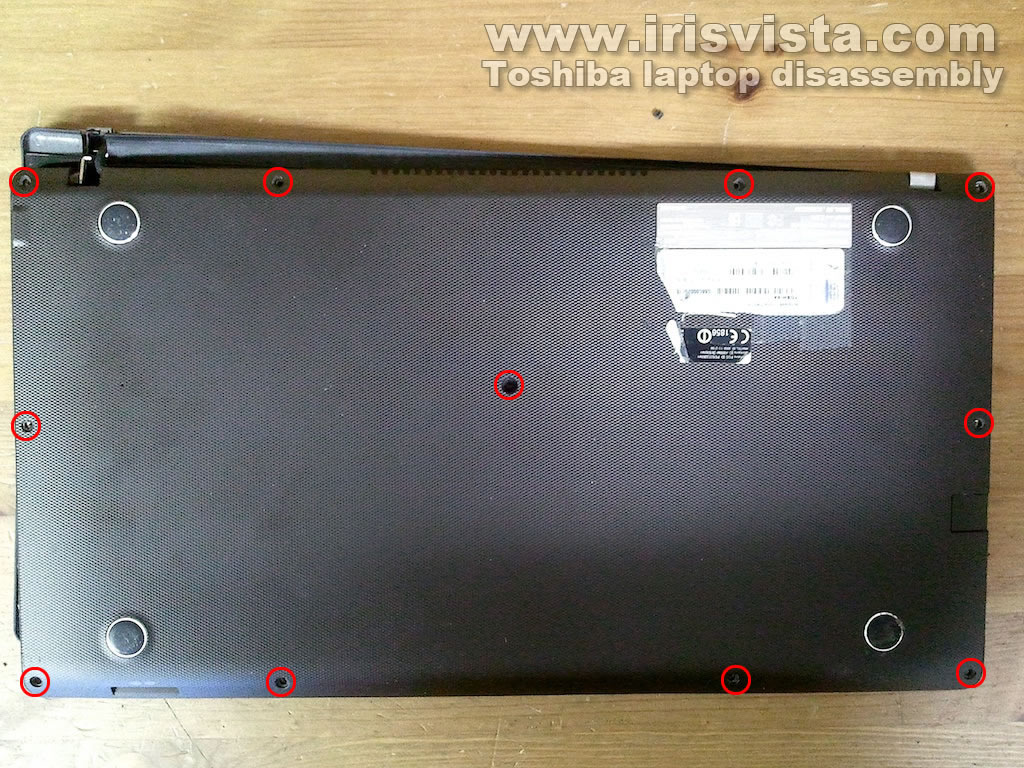
STEP 1
In order to disassemble the display we'll have to separate it from the bottom case.
Remove all screws from the bottom. |
| |
|
 |
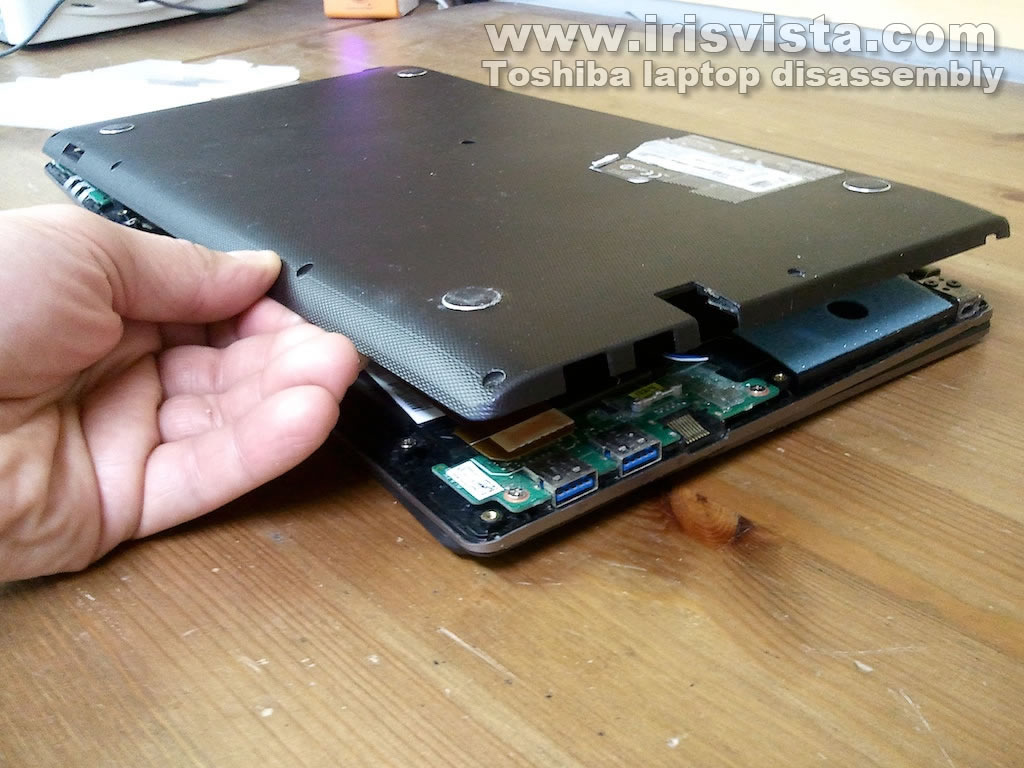
STEP 2
Separate the bottom cover from the rest of the laptop and lift it up. |
| |
|
 |
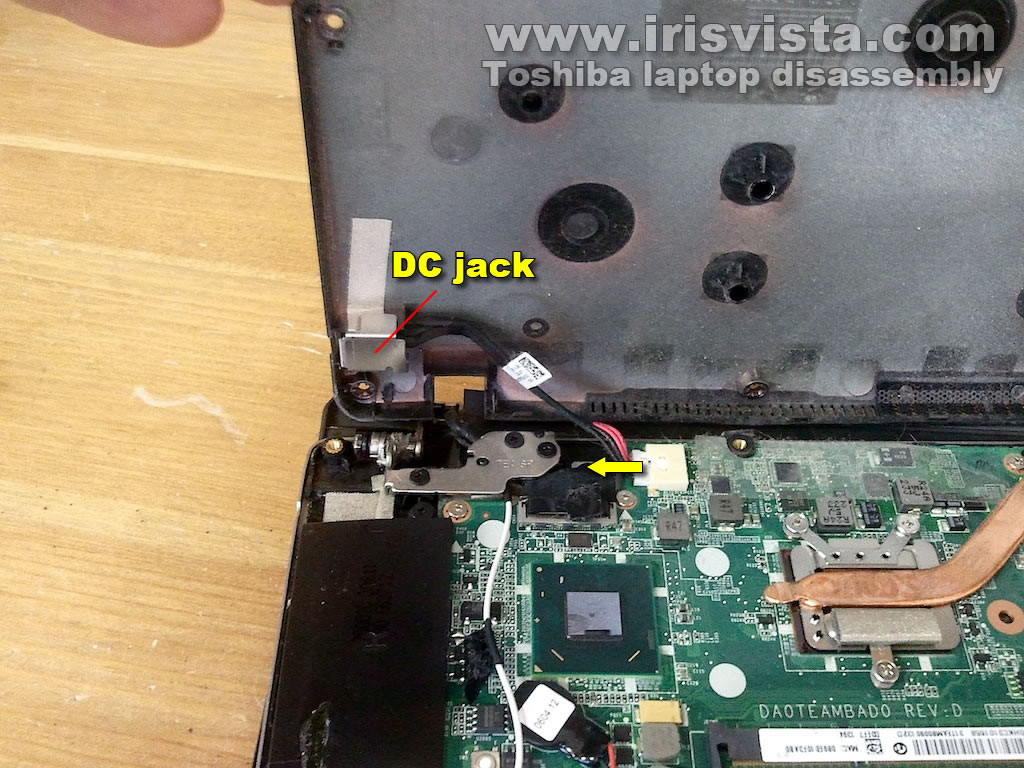
STEP 3
Be careful. The DC jack is attached to the bottom cover.
Disconnect the DC jack cable from the motherboard. |
| |
|
 |
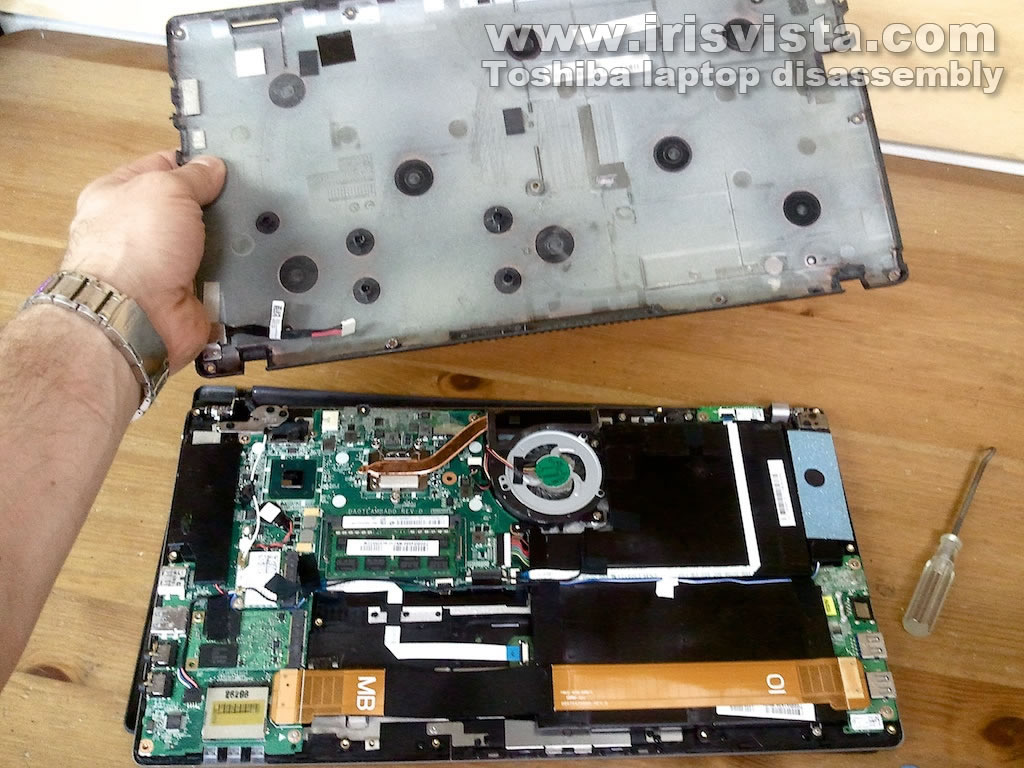
STEP 4
Now you can remove the bottom cover completely. |
| |
|
 |
STEP 5
Disconnect the battery connector from the motherboard. |
| |
|
 |
STEP 6
Disconnect both antenna cable from the wireless card.
Remove three screws securing the right hinge. |
| |
|
 |
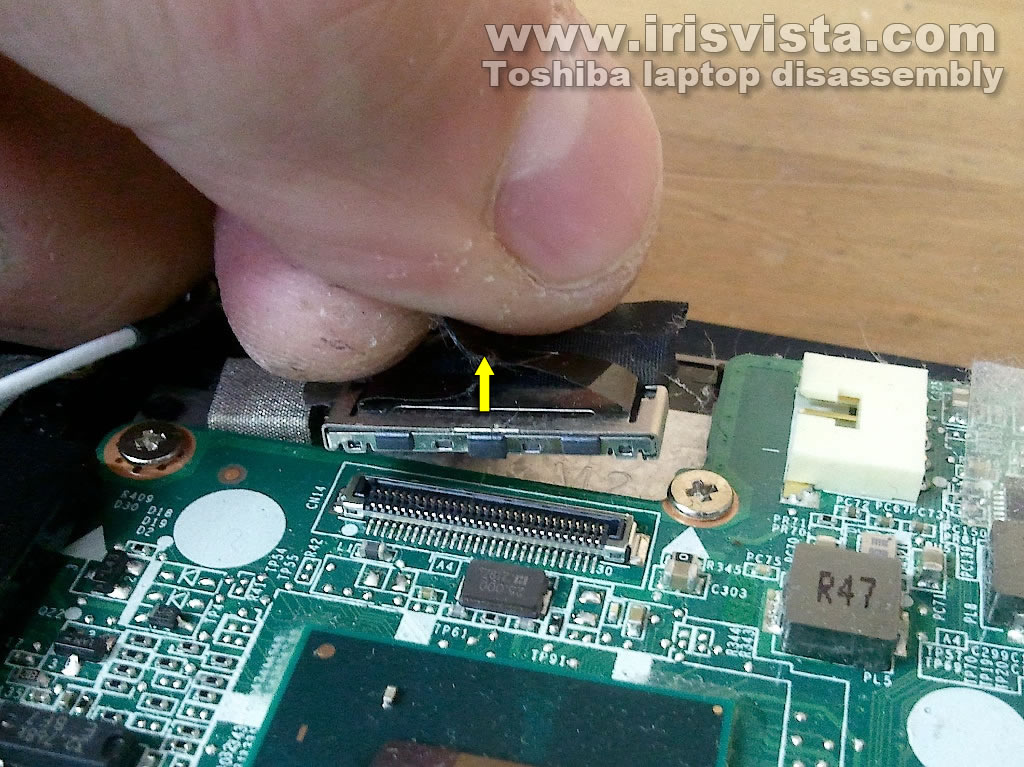
STEP 7
Disconnect the display cable from the motherboard. |
| |
|
 |
STEP 8
The black Wi-Fi antenna cable secured to the case by sticky tape.
Un-route the cable. |
| |
|
 |
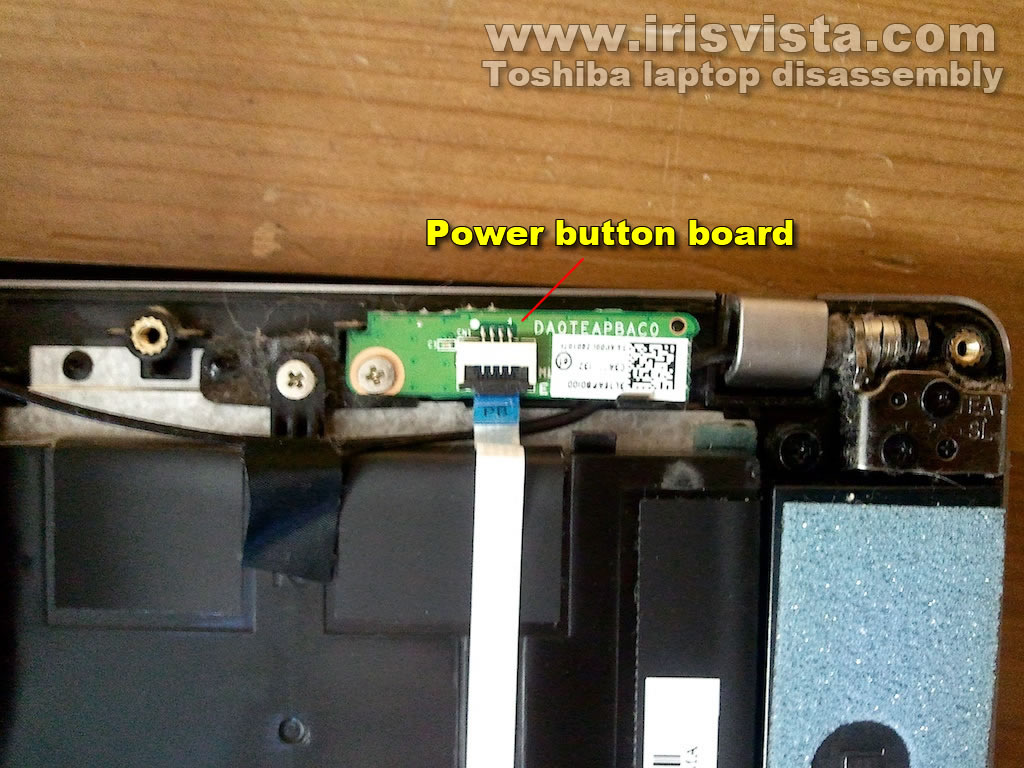
STEP 9
The antenna cable is routed under the power button board.
We'll have to remove this board in order to release the cable. |
| |
|
 |
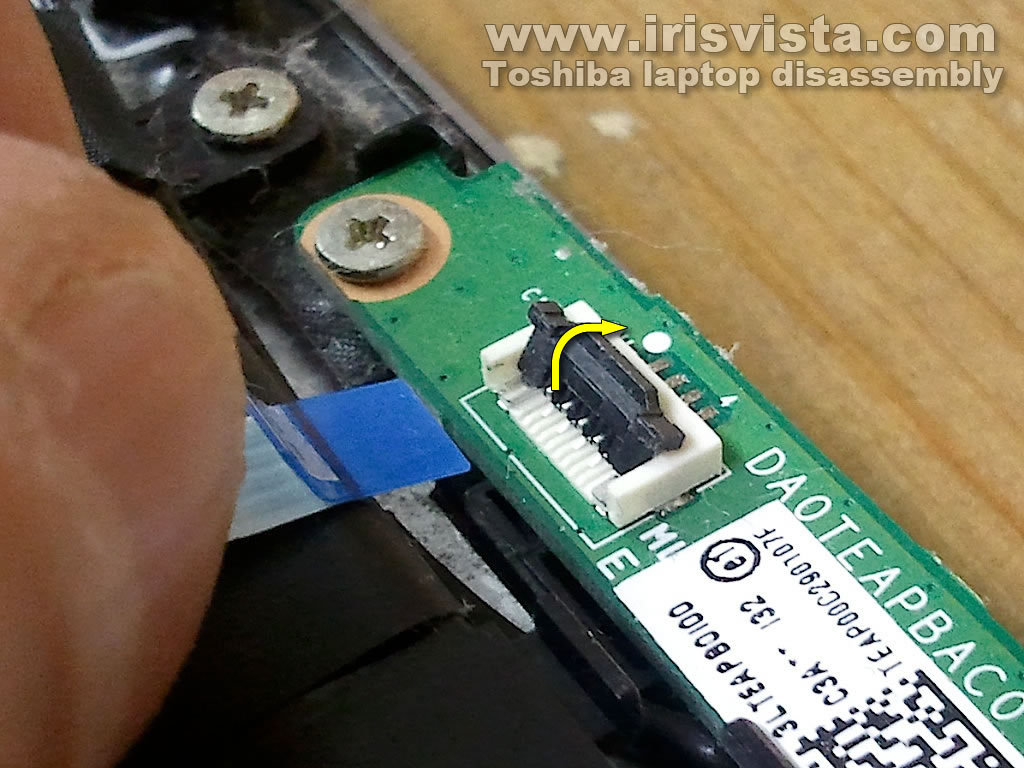
STEP 10
Unlock the power button cable connector.
Disconnect the cable.
Remove one screw securing the power button board and remove it. |
| |
|
 |
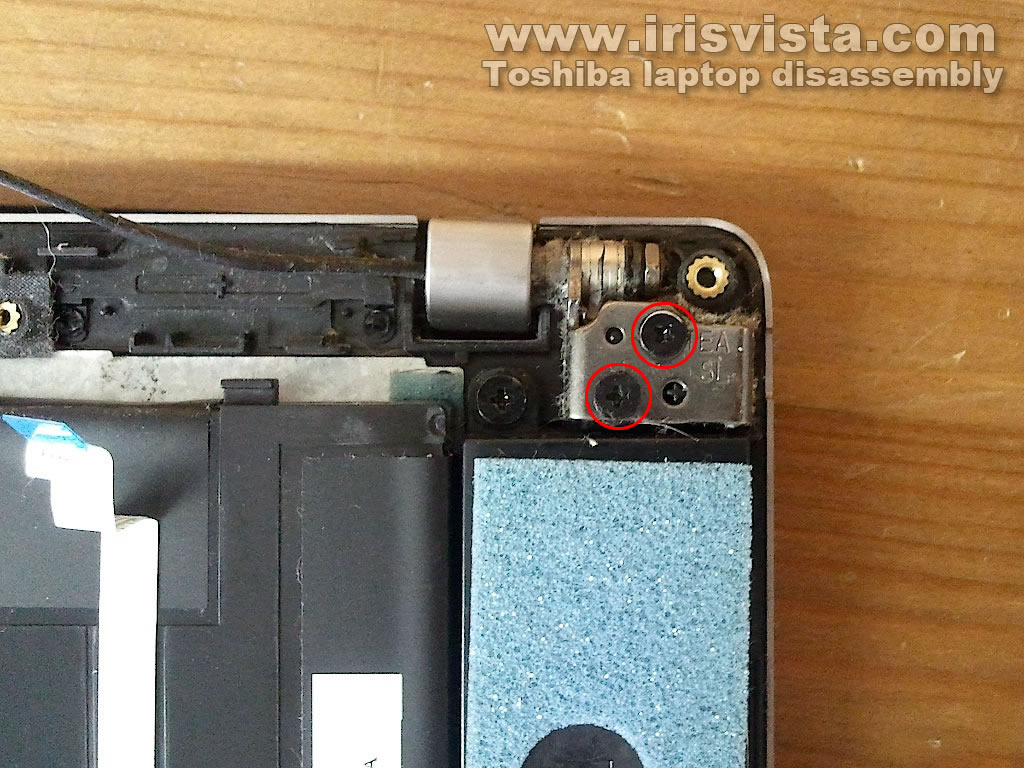
STEP 11
Remove two screws securing the left hinge. |
| |
|
 |
STEP 12
Carefully separate the case with the motherboard from the display assembly. |
| |
|
 |
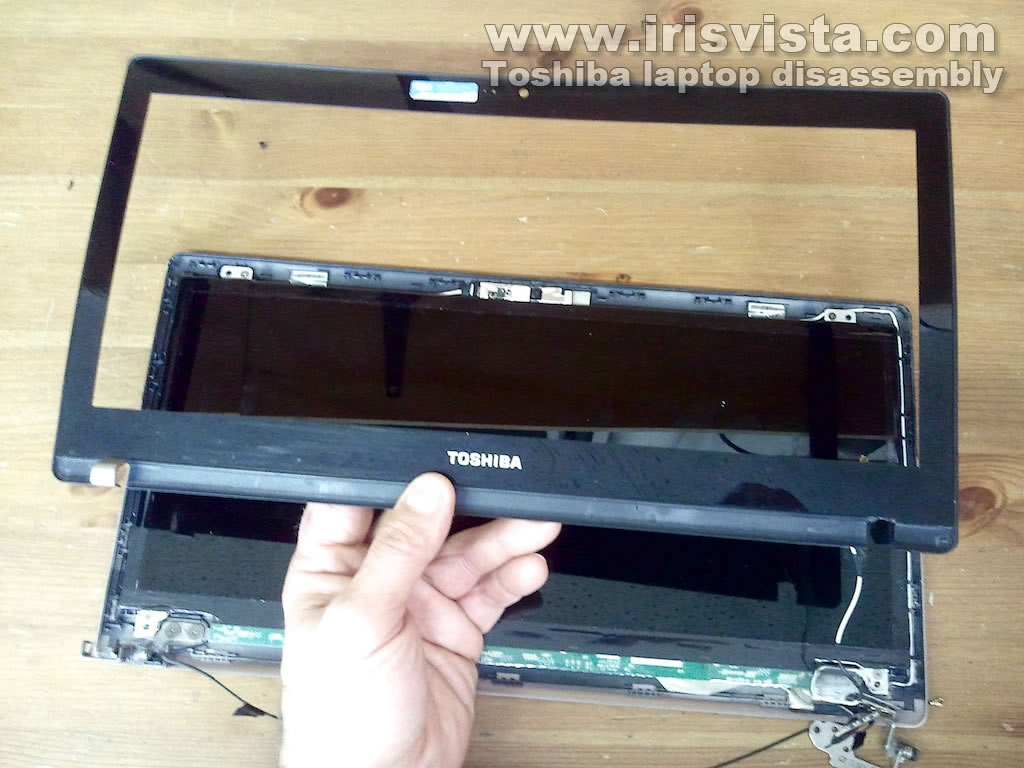
STEP 13
Now we can start taking apart the display.
Separate the screen bezel from the back cover using a guitar pick or any other piece of plastic.
Continue removing the bezel with fingers. You'll have to wiggle the bezel in order to unlock latches. |
| |
|
|
STEP 14
Continue separating the screen bezel from the display cover. |
| |
|
 |
STEP 15
Remove the bezel.
|
| |
|
 |
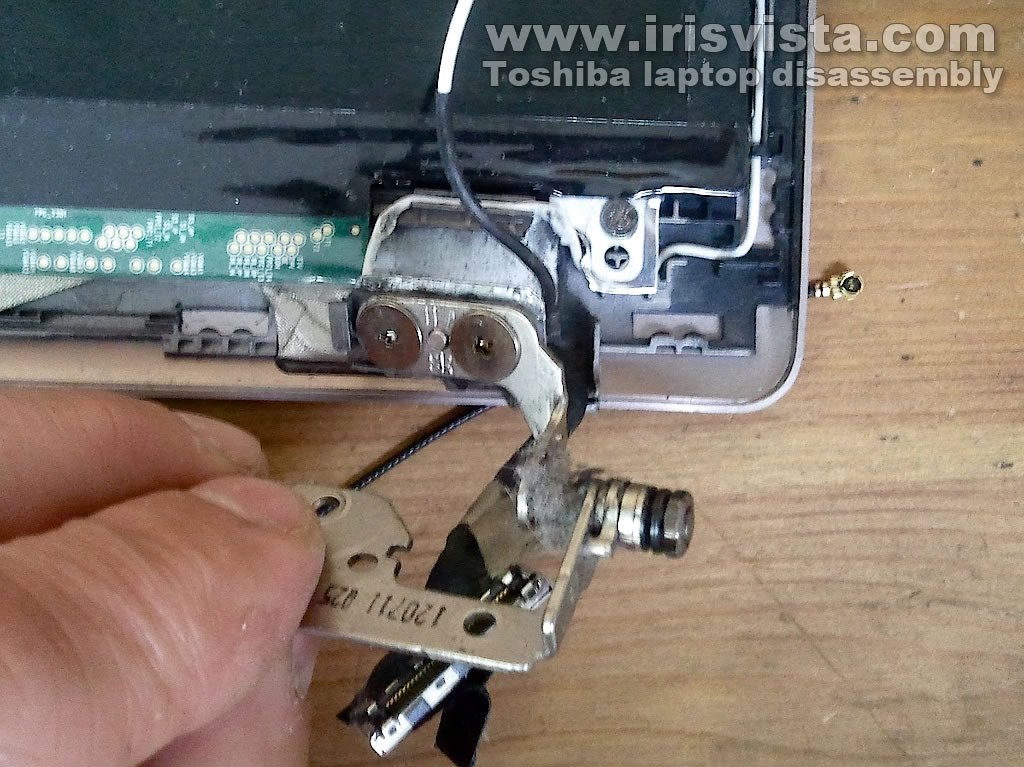
STEP 16
As soon as I removed the bezel, the right hinge fell off.
The hinge itself was OK, but mounting anchors on the cover were broken. |
| |
|
 |
STEP 17
Remove two screws securing the left hinge and remove the hinge. |
| |
|
 |
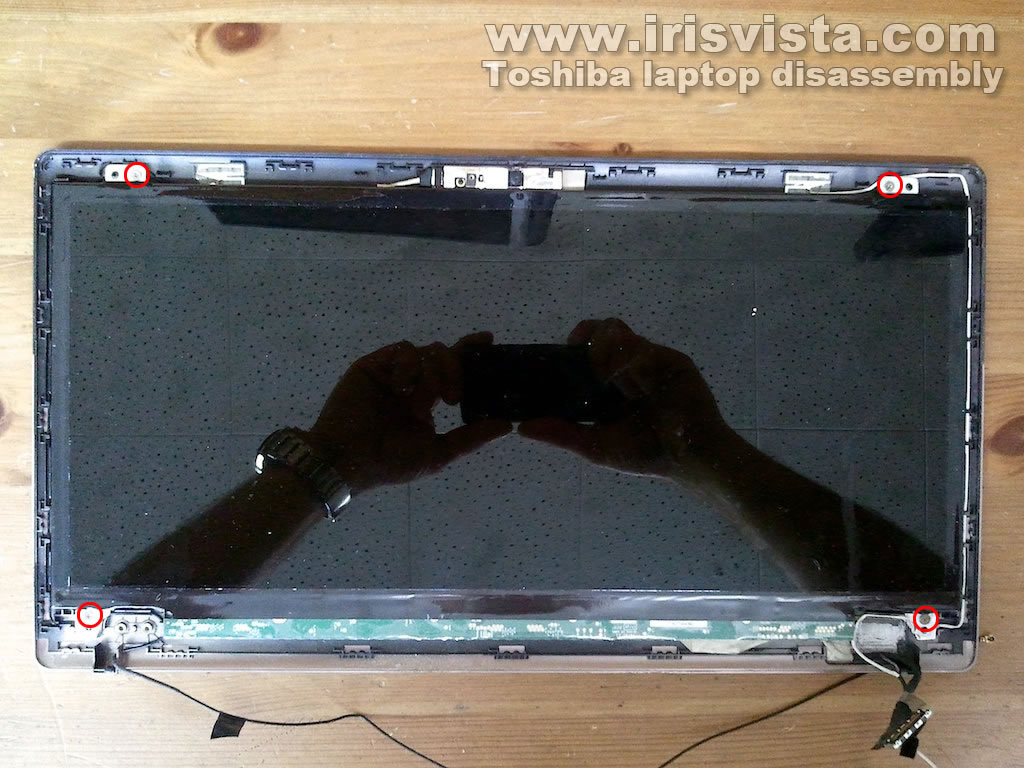
STEP 18
Remove four screws securing the LCD screen to the cover. |
| |
|
 |
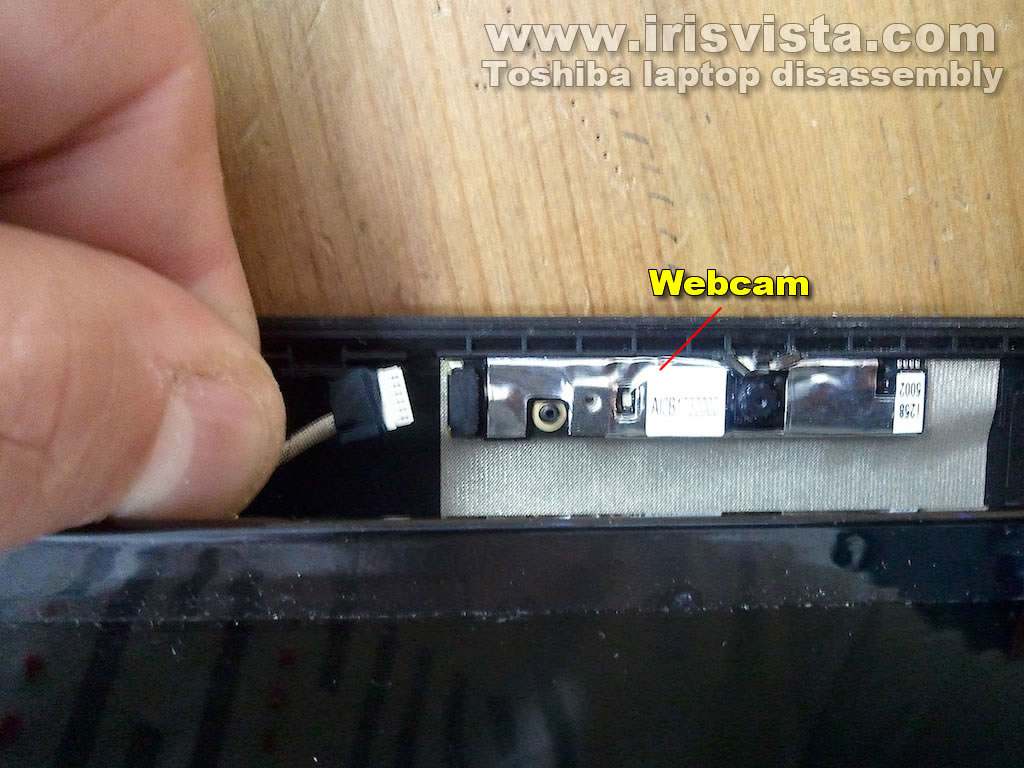
STEP 19
Carefully lift up the screen just enough to unplug the webcam cable. |
| |
|
 |
STEP 20
Remove the screen. |
| |
|
 |
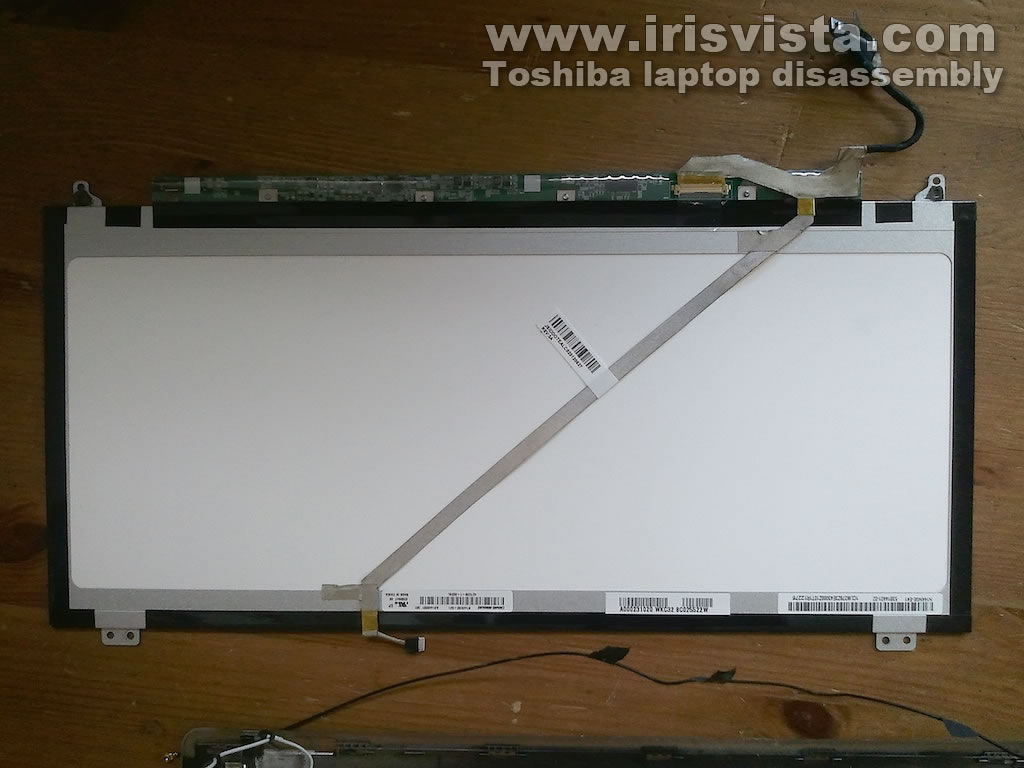
STEP 21
Here's the back side.
Here you can access the display cable. |
| |
|
 |
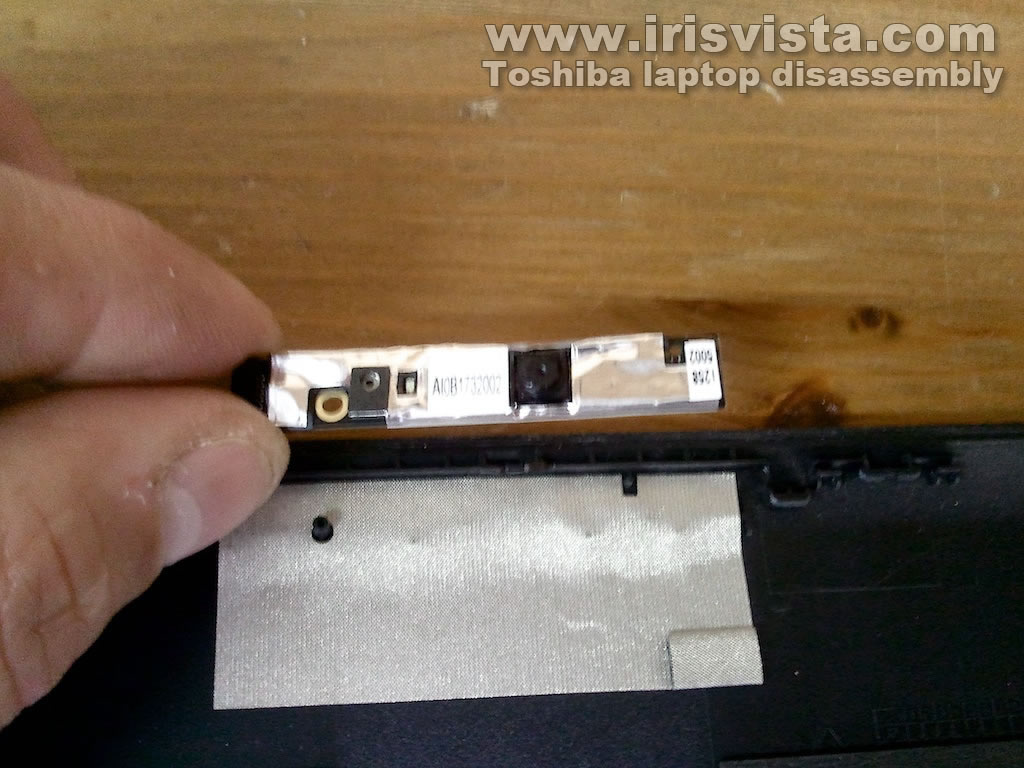
STEP 22
Finally, remove the webcam module from the cover.
|
| |
|
 |
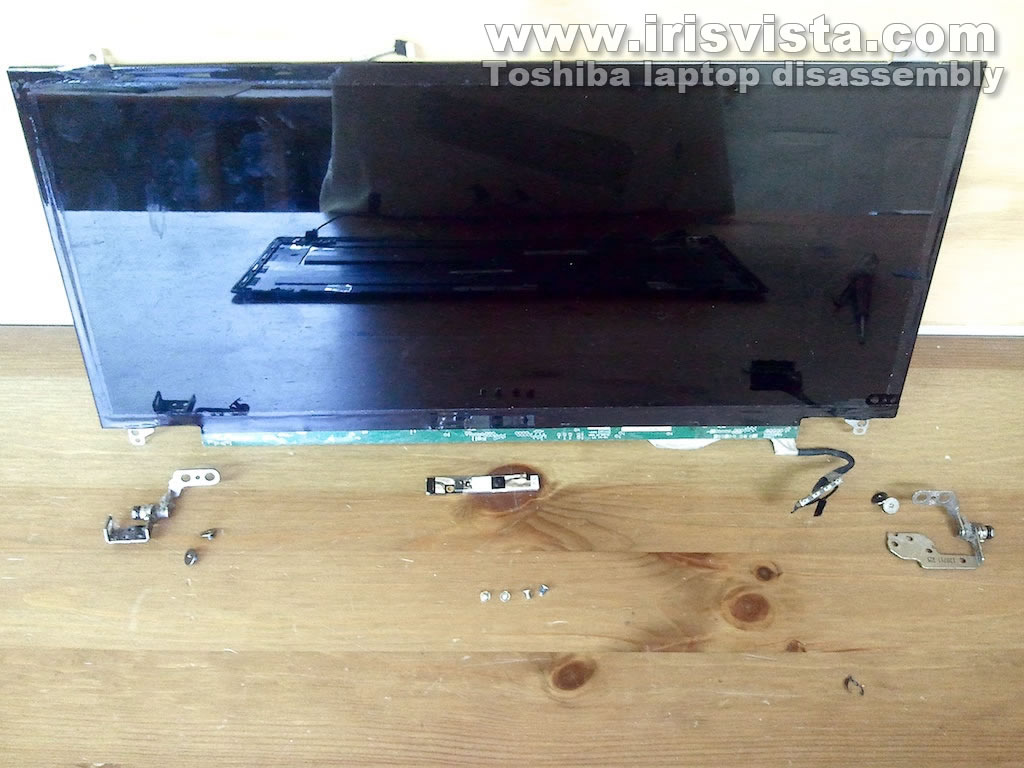
STEP 23
Now the damaged display cover is ready to be replaced.
|
| |
|
 |
STEP 24
I'll transfer all removed parts to the new cover.
|
| |
|
 |
STEP 25
When you assemble everything back together make sure the display cable and Wi-Fi antenna cable routed correctly.
|
| |
|
|
|