|
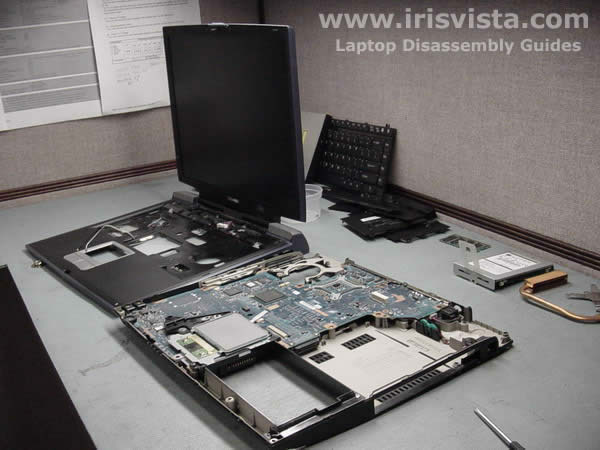
Toshiba Satellite A10, A15 disassembly.
|
|
|
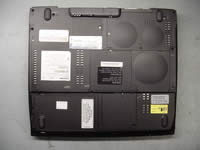 |
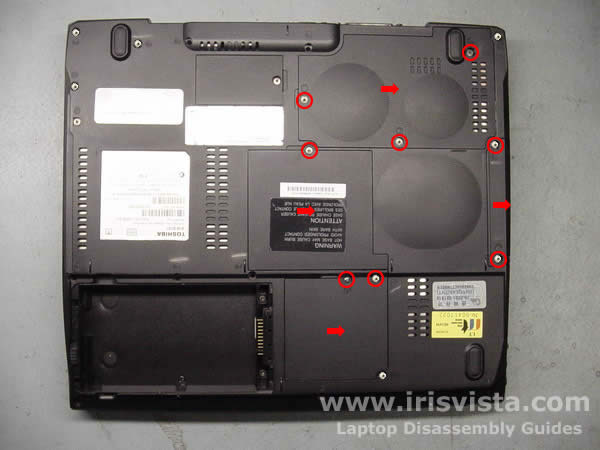
STEP 1
Place the notebook upside down, unlock the battery and remove it from the battery bay.
|
| |
|
 |
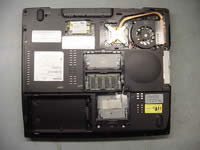
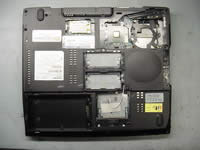
STEP 2
Remove three screws from the CPU cover, two screws from the hard drive cover, one screw from the memory cover, two screws from the wireless card cover.
Lift off and remove all the covers.
|
| |
|
 |
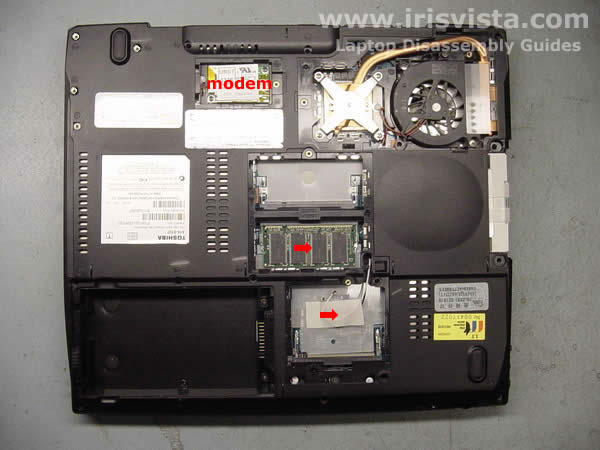
STEP 3
Remove the memory module.
Remove the wireless card, if you have any. If you do not have a Wi-Fi card, remove the tape securing cables.
You can disconnect and remove the modem card now or later (as I did). |
| |
|
 |
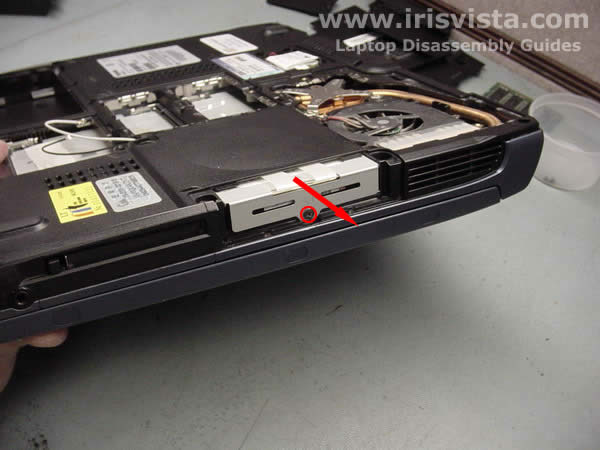
STEP 4
Remove one screw securing the hard drive on the side of the notebook.
Slide the hard drive out of the notebook. |
| |
|
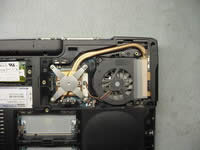 |
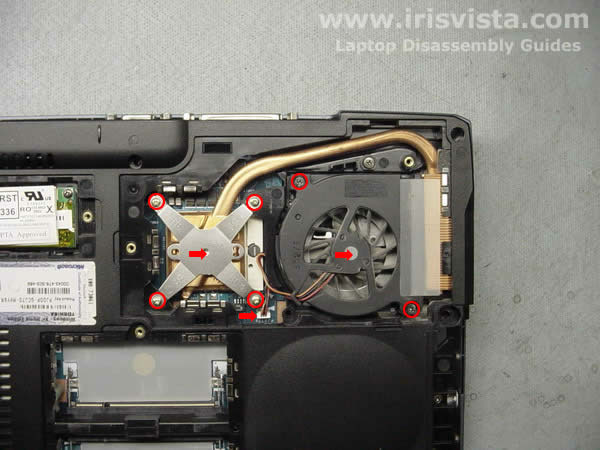
STEP 5
Remove two screws securing the cooling fan and disconnect the cable on the system board. Lift off the fan.
Remove four screws securing the heatsink. Carefully lift the heatsink off the CPU.
|
| |
|
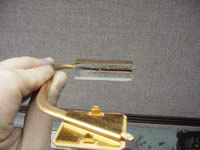 |
STEP 6
Check out the heatsink. It's 70% clogged with lint.
A clogged heatsink is the main culprit in laptop overheating.
If your laptop shuts down itself without any reason, most likely you have an overheating problem. |
| |
|
 |
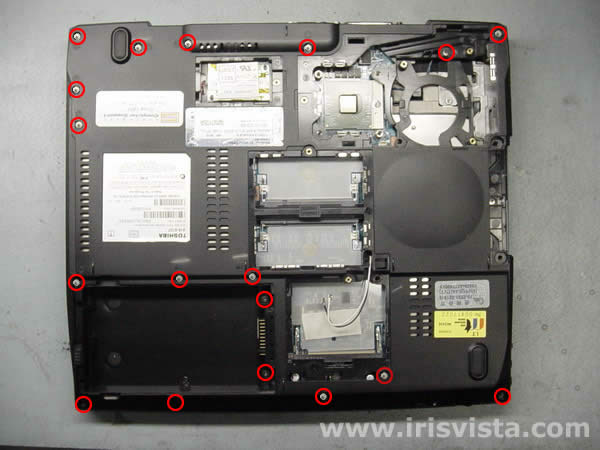
STEP 7
Remove all marked with red circles screws on the bottom of the notebook. |
| |
|
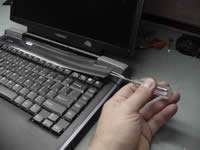 |
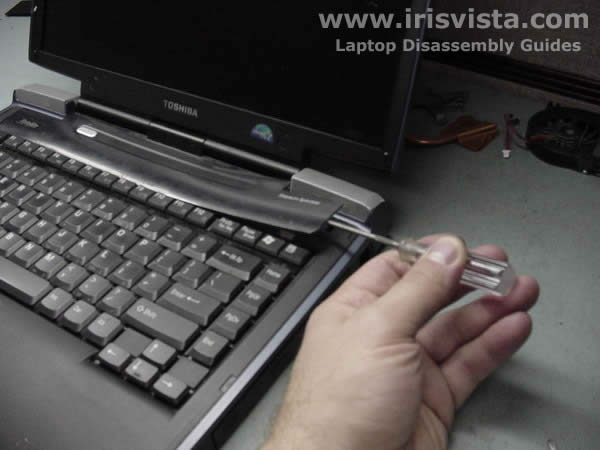
STEP 8
Start lifting up the keyboard securing strip with a thin object.
Continue to release plastic latches with your fingers. |
| |
|
|
STEP 9
Remove the keyboard securing strip.
|
| |
|
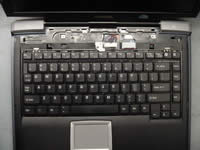 |
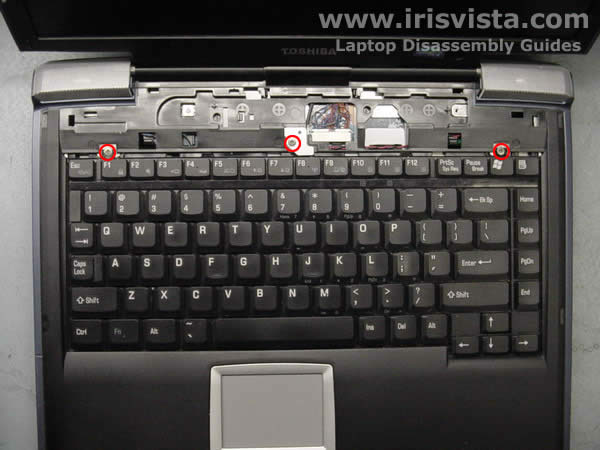
STEP 10
Remove two screws on the sides for the keyboard.
Remove one screw and the keyboard lock in the center.
Turn over the keyboard and put it on the palmrest.
|
| |
|
 |
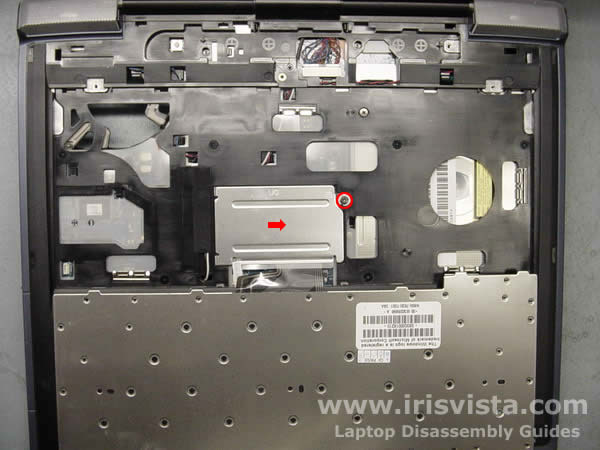
STEP 11
Remove one screw securing a metal plate over the keyboard connector.
|
| |
|
 |
STEP 12
Turn the keyboard over again and place it so you can access the cable.
Disconnect the flat keyboard cable on the system board.
|
| |
|
 |
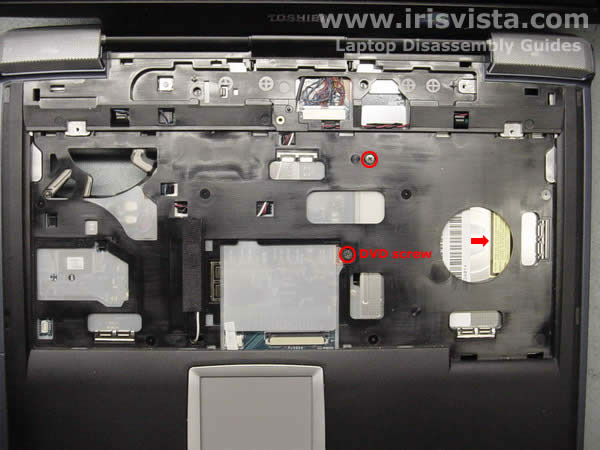
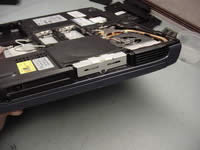
STEP 13
Remove two screws securing the top cover and the DVD drive to the base.
If you only want to remove the DVD drive, you have to remove only one screw.
Slide the DVD drive out of the notebook base.
|
| |
|
 |
STEP 14
Disconnect two speaker cables on the system board.
Disconnect the display video cable on the system board.
|
| |
|
 |
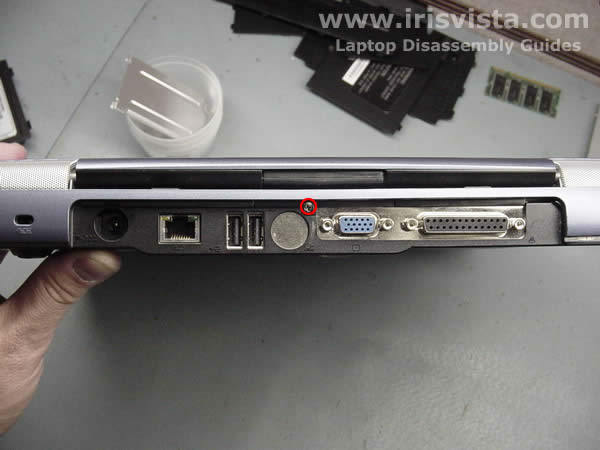
STEP 15
Close the laptop lid and remove one screw on the back of the computer. |
| |
|
 |
STEP 16
Place the notebook the right side up and open the lid.
Carefully pull the wireless antenna cables through the opening in the top cover.
|
| |
|
 |
STEP 17
Start lifting up the top cover and display assembly.
|
| |
|
|
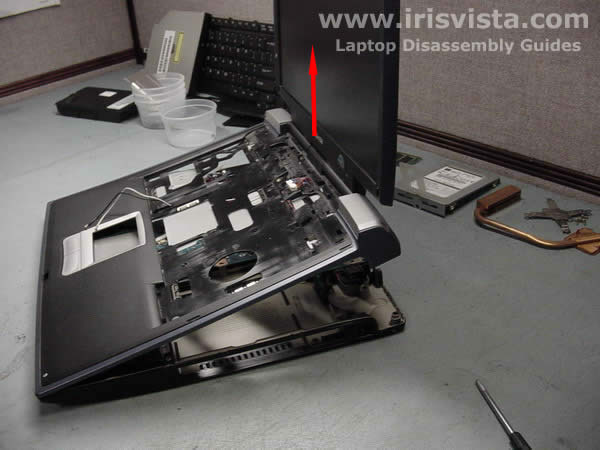
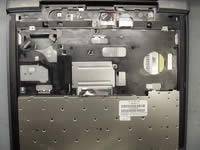
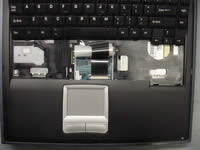
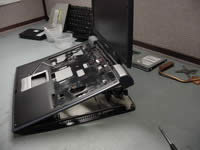
STEP 18
Remove the top cover and display assembly.
|
| |
|
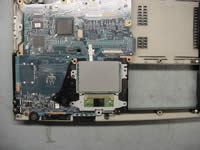 |
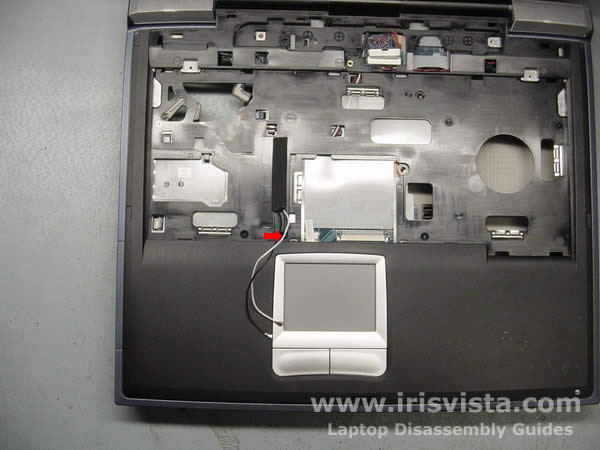
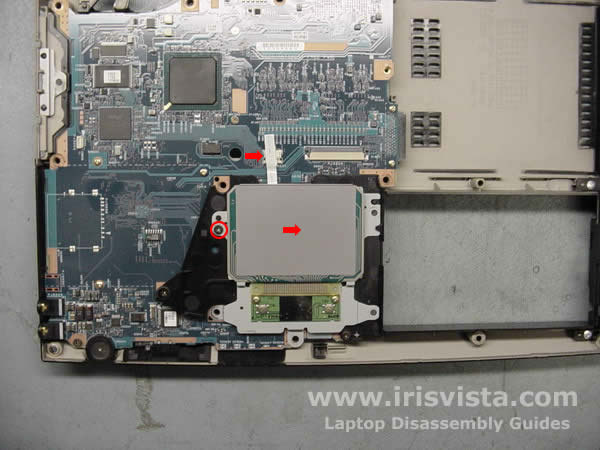
STEP 19
Remove one screw securing the notebook touchpad to the system board.
Disconnect the touchpad cable on the system board.
Lift off the touchpad.
|
| |
|
 |
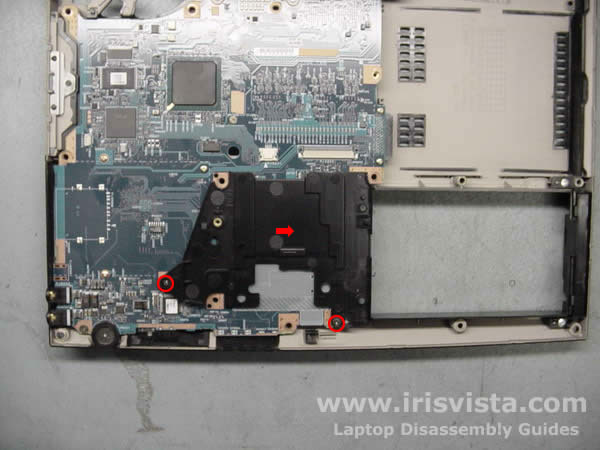
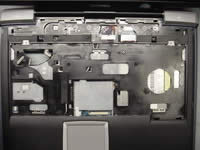
STEP 20
Remove two screws securing the touchpad holder to the system board and lift it off.
|
| |
|
 |
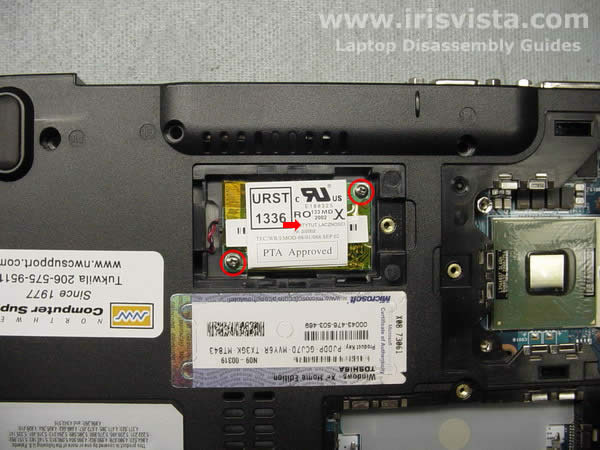
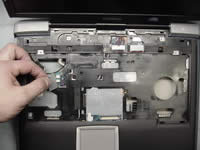
STEP 21
If you didn't remove the modem card in STEP 3, you can do it now.
Remove two screws securing the modem card, lift it up and disconnect the cable on the card. |
| |
|
 |
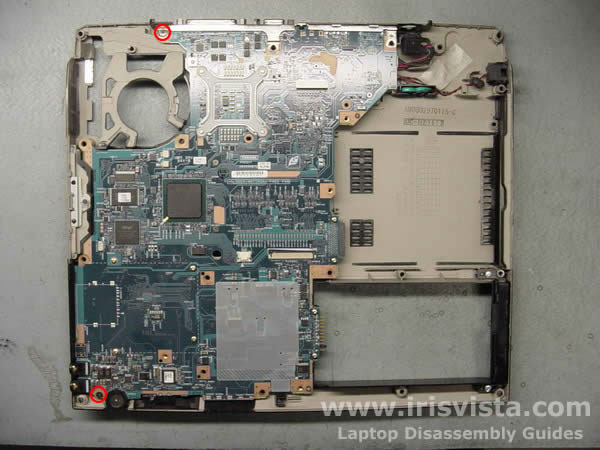
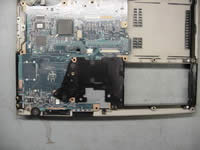
STEP 22
Remove two screws securing the main board. |
| |
|
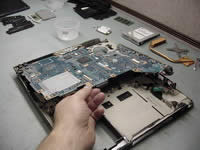 |
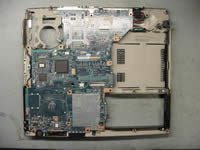
STEP 23
Lift up the right side and remove the system board from the laptop base. |
| |
|
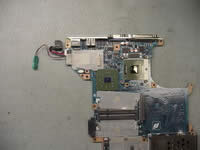 |
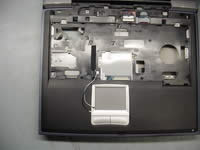
STEP 24
Remove the mylar cover.
Disconnect the DC-IN jack cable on the system board and remove it.
Disconnect the RTC battery cable on the system board and remove it. |
| |
|
 |
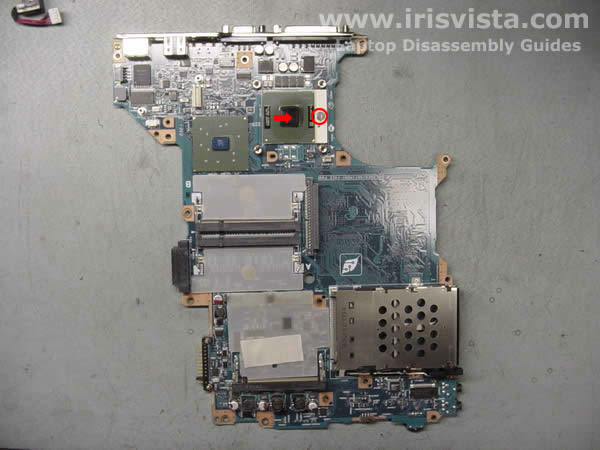
STEP 25
Turn the CPU lock into unlock position and carefully lift it off the system board.
|
| |
|
 |
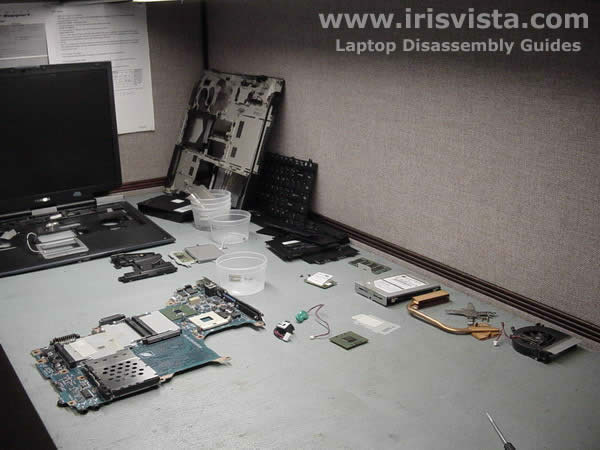
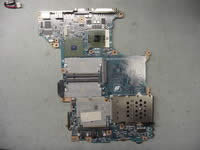
STEP 26
Toshiba Satellite A15 notebook disassembly done.
|
| |
|
|
|