|
Toshiba Satellite P15, P10 disassembly. |
|
|
 |
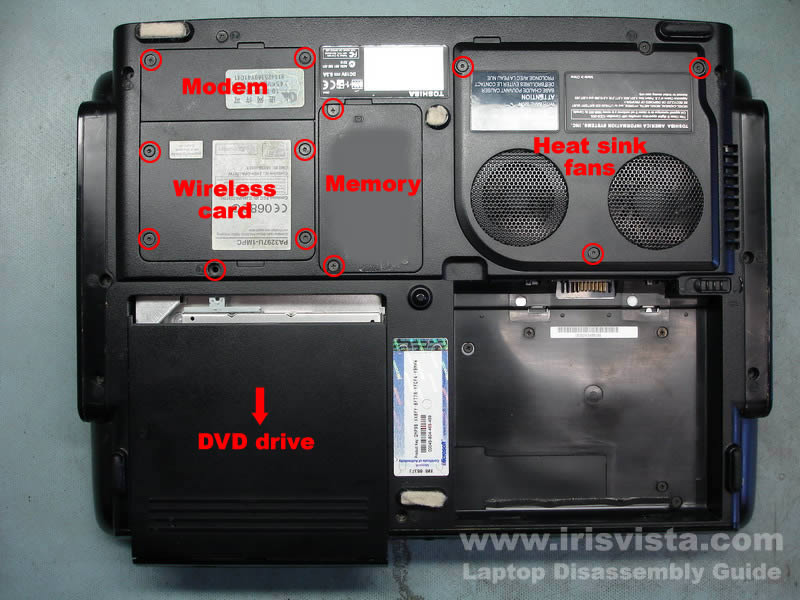
STEP 1
Remove the battery.
Remove modem cover, wireless card cover, memory cover and heat sink/cooling fan cover.
Remove one screw securing the DVD drive to the laptop. Slide the drive to the direction shown on the picture. Remove the DVD drive. |
| |
|
 |
STEP 2
Disconnect both wireless card antennas from the wireless card. Whit cable - main connector, black cable - auxiliary connector.
Remove the wireless card.
Remove two screws securing the laptop modem. Lift up the modem to disconnect it from the motherboard. Unplug the cable from the side of the modem.
Remove both memory modules. |
| |
|
 |
STEP 3
Remove three screws securing the cooling fans.
Unplug cooling fan cables from the motherboard.
Lift up and remove fans. |
| |
|
 |
STEP 4
Release four screws on the heat sink.
Carefully lift up the heat sink.
Be careful, most likely the CPU will come out attached to the bottom of the heat sink.
Here's another guide for cleaning the heat sink.
|
| |
|
 |
STEP 5
Separate the CPU from the heat sink with a flathead screwdriver.
I would recommend to install the CPU back into the socket on the motherboard, to keep it safe.
Before you install the CPU do not forget to unlock the socket (there is a screw on the side of the socket).
After the CPU is installed, lock the socket. |
| |
|
 |
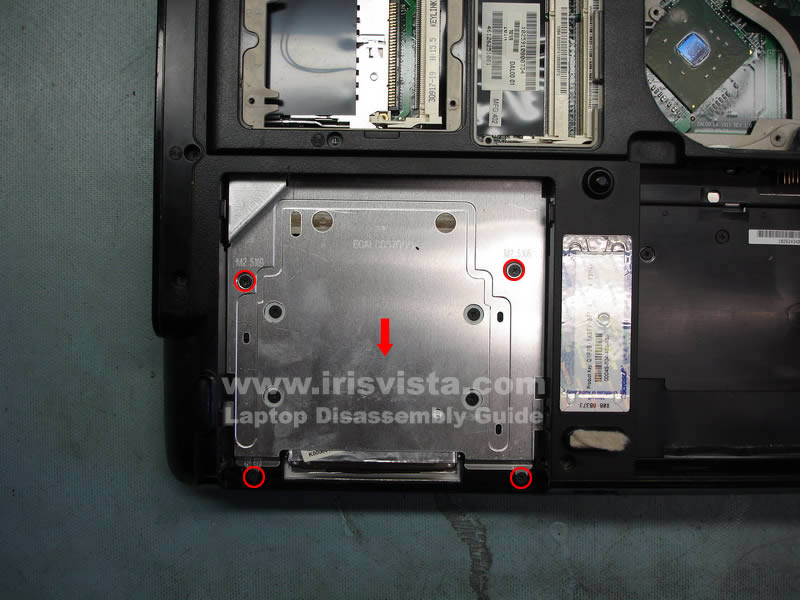
STEP 6
Remove four screw from the metal hard dive shield.
Slide the shield down and remove it from the laptop. |
| |
|
 |
STEP 7
Remove four screws securing the hard drive caddy.
Slide the hard drive down to disconnect it from the connector on the motherboard.
Lift up and remove the hard drive. |
| |
|
 |
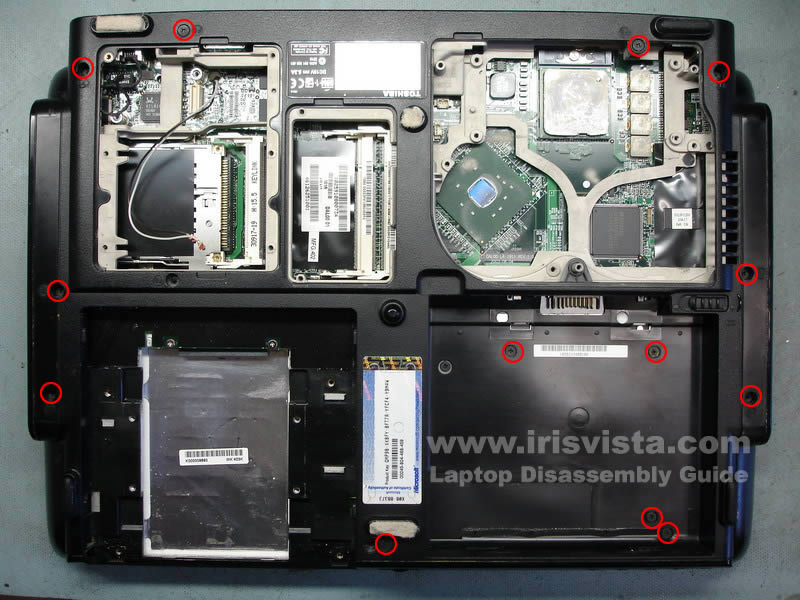
STEP 8
Remove all screws from the bottom of the laptop. |
| |
|
 |
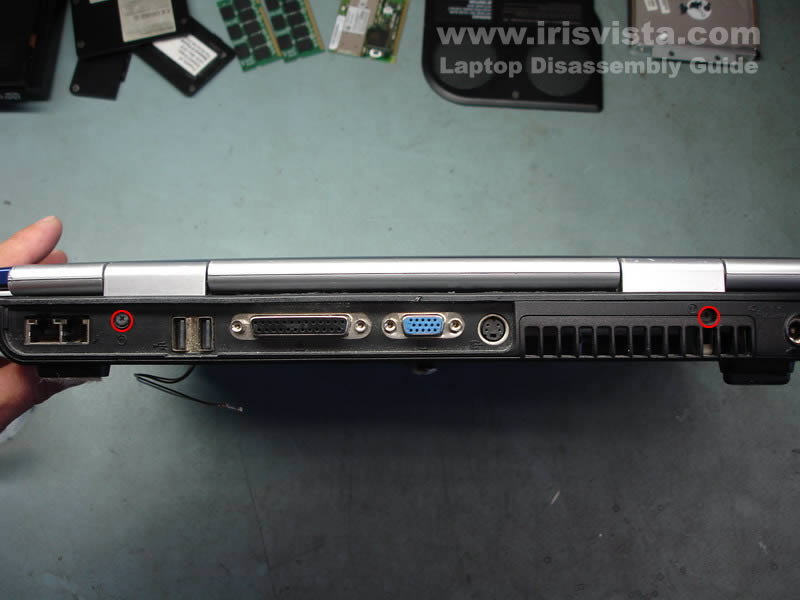
STEP 9
Remove two screws from the back side of the laptop. |
| |
|
 |
STEP 10
Remove the keyboard bezel with a sharp object.
You can use a small flathead screwdriver. |
| |
|
 |
STEP 11
Remove screws from both hinge covers. Remove hinge covers.
Remove two screws from the keyboard. |
| |
|
 |
STEP 12
Lift up the keyboard and access the cable connector located under the keyboard.
Unlock the connector and pull the cable.
Remove the keyboard. |
| |
|
 |
STEP 13
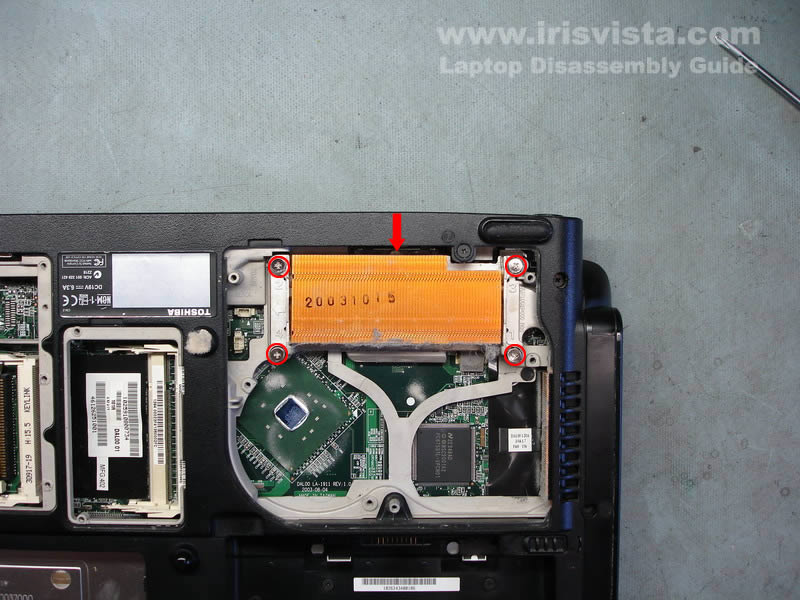
Remove one screw securing the video cable.
Unplug the video cable from the motherboard (two connectors).
Remove four screws from the laptop hinges. |
| |
|
 |
STEP 14
Lift up and remove the laptop display panel. |
| |
|
 |
STEP 15
Remove five screws securing the laptop top cover.
Unlock the connector and pull out the white ribbon cable. |
| |
|
 |
STEP 16
Lift up and remove the top cover assembly. |
| |
|
 |
STEP 17
Disconnect the audio board cable from the motherboard.
Remove one screw securing the audio board to the laptop base.
Remove the audio board with the cable. |
| |
|
 |
STEP 18
Remove two screws from the hard drive supporting bracket.
Slide the bracket to the direction shown by the red arrow. Remove the bracket. |
| |
|
 |
STEP 19
Remove five screws from the motherboard.
Unplug left and right speakers.
Unlock and pull out the LED board cable. |
| |
|
 |
STEP 20
Remove four hex studs from the ports on the back of the laptop. |
| |
|
 |
STEP 21
Carefully lift up and remove the motherboard. |
| |
|
 |
STEP 22
Carefully lift up and remove the motherboard. |
| |
|
|
|