|
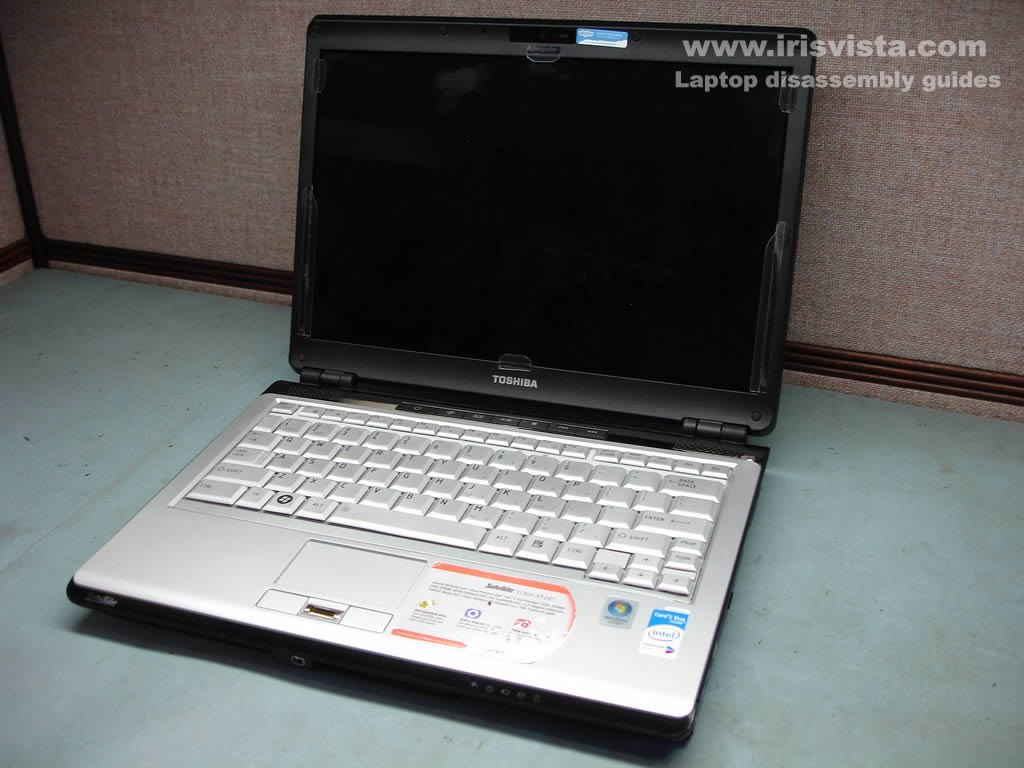
Toshiba Satellite U305, U300, Tecra M8 disassembly. |
|
|
 |
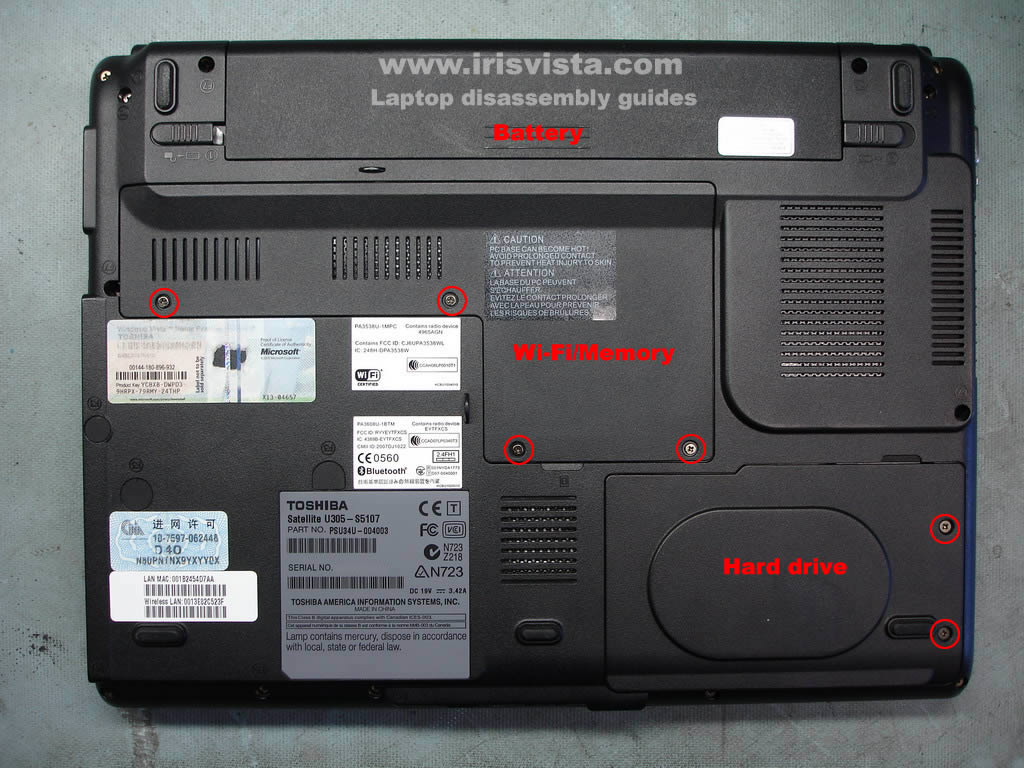
STEP 1
Remove laptop battery.
Six screws securing hard drive and memory covers.
Remove both covers.
|
| |
|
 |
STEP 2
Slide the hard drive to the right and remove it from the laptop.
Remove both memory modules.
|
| |
|
 |
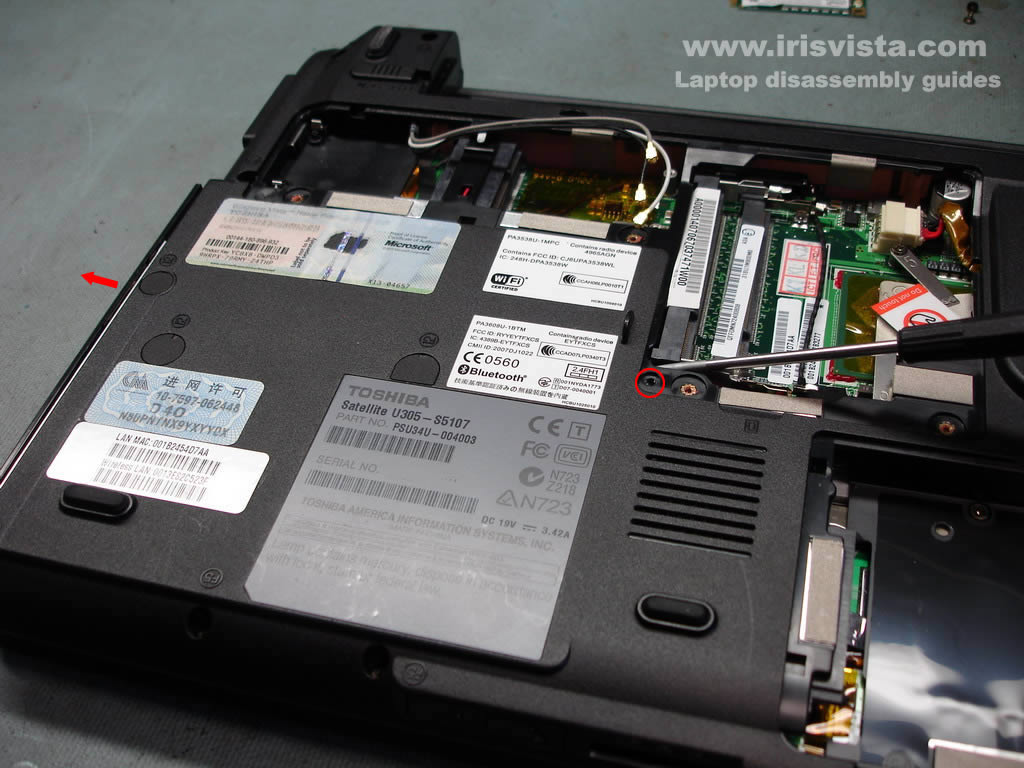
STEP 3
Unsnap three antenna cables from the wireless card.
Remove two screws securing the wireless card.
Remove the wireless card from the socket.
|
| |
|
 |
STEP 4
Remove one screw securing the DVD drive.
Push the DVD drive from the laptop with a screwdriver.
Remove the DVD drive.
|
| |
|
 |
STEP 5
Remove three screw seals. |
| |
|
 |
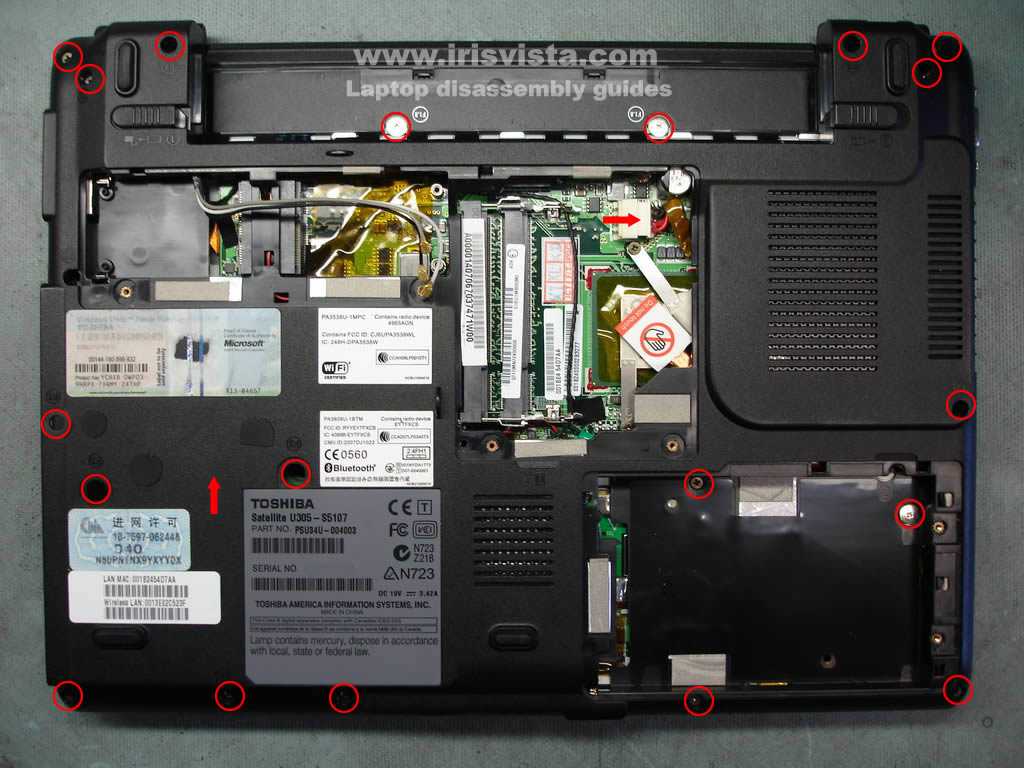
STEP 6
Remove all screws from the bottom of the laptop.
If you plan to remove the motherboard, then you'll have to disconnect the power cable pointed with the red arrow.
|
| |
|
 |
STEP 7
Start lifting up the keyboard bezel with a sharp object.
Continue removing the bezel with your fingers. |
| |
|
 |
STEP 8
Remove one screw securing the keyboard to the laptop base. |
| |
|
 |
STEP 9
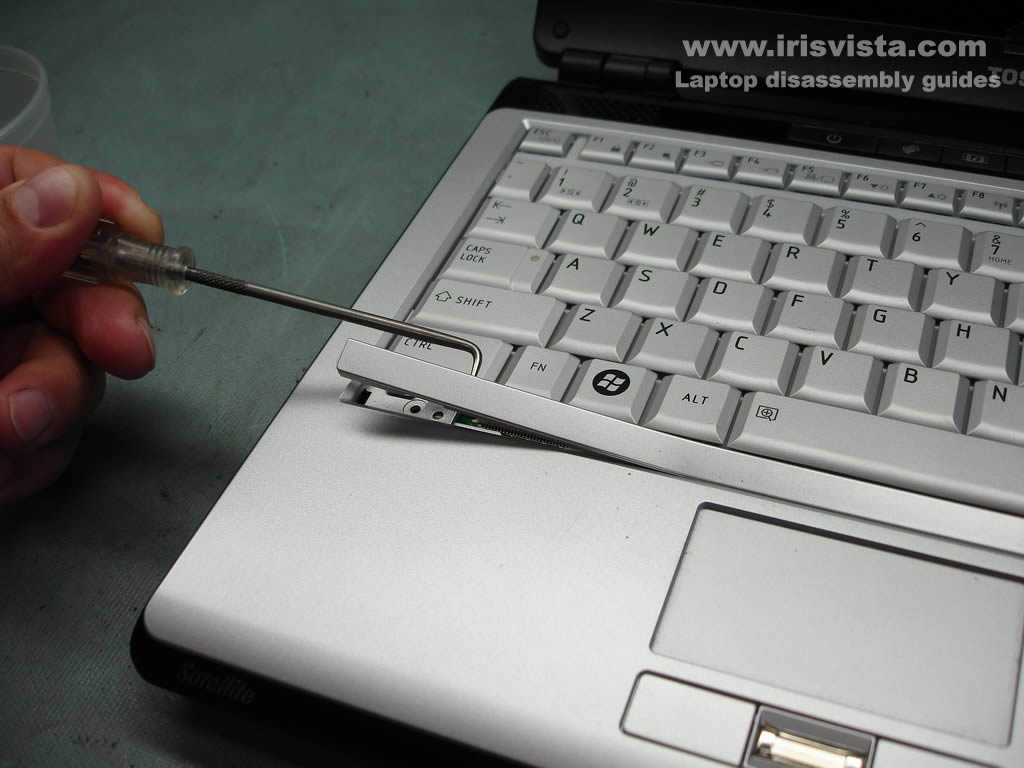
Carefully lift up the keyboard from the laptop.
Unlock the keyboard cable connector on the motherboard.
Pull the cable from the connector and remove the keyboard.
|
| |
|
 |
STEP 10
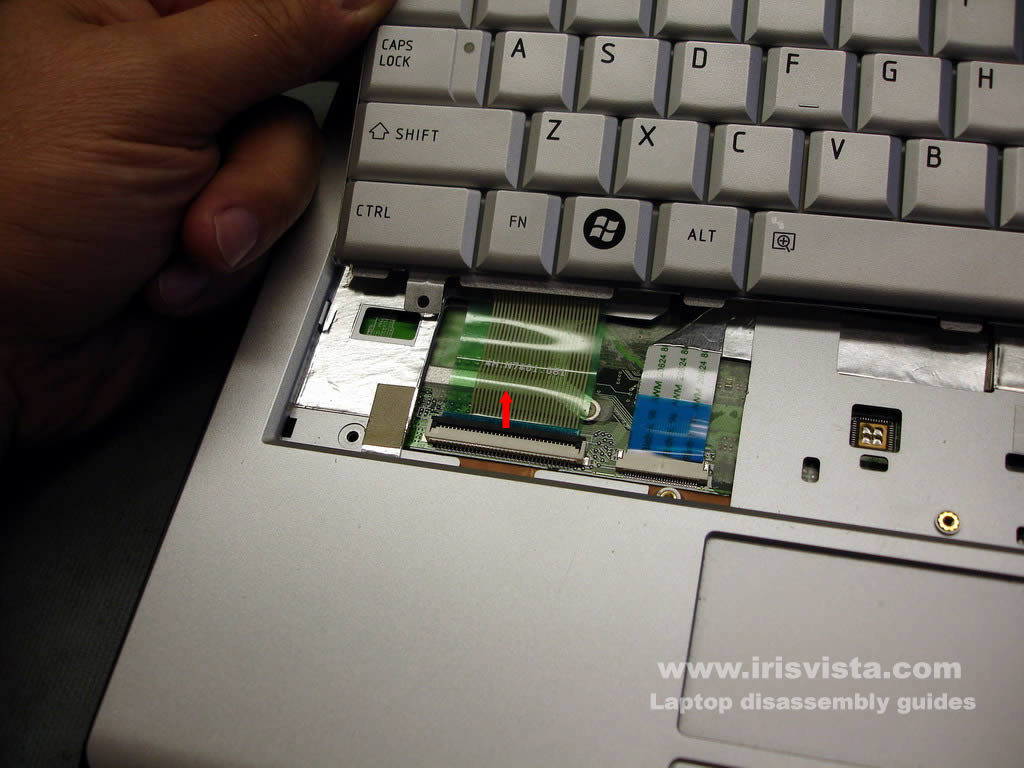
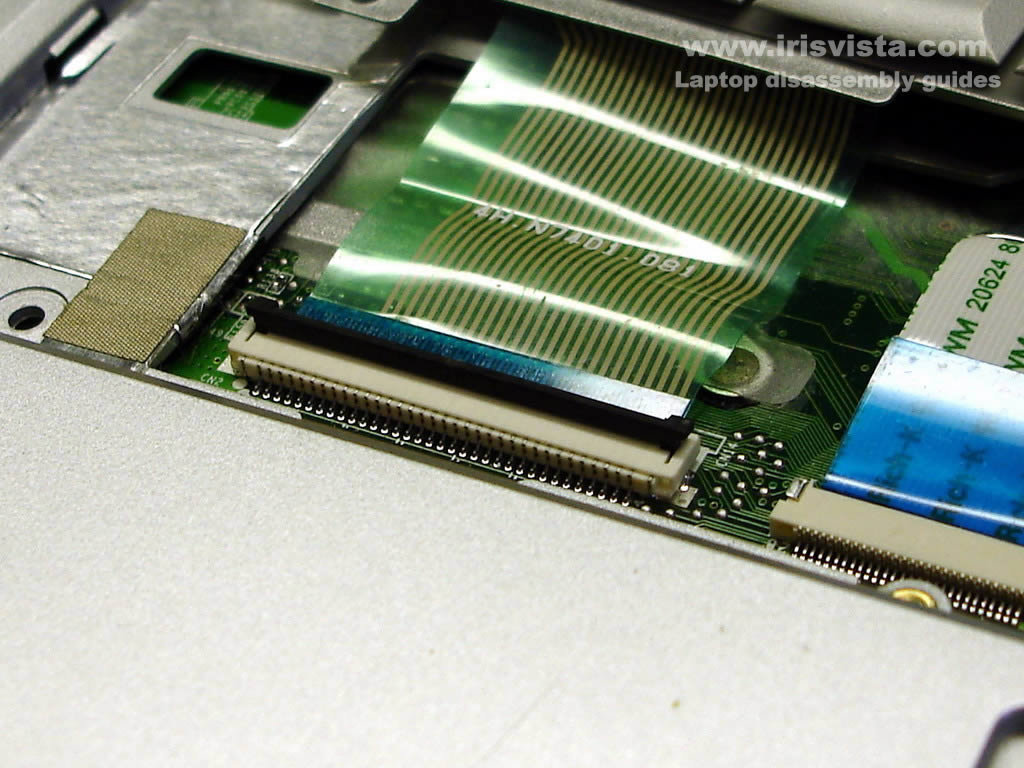
On this picture you see the keyboard cable connector unlocked.
Release the cable and remove the keyboard. |
| |
|
 |
STEP 11
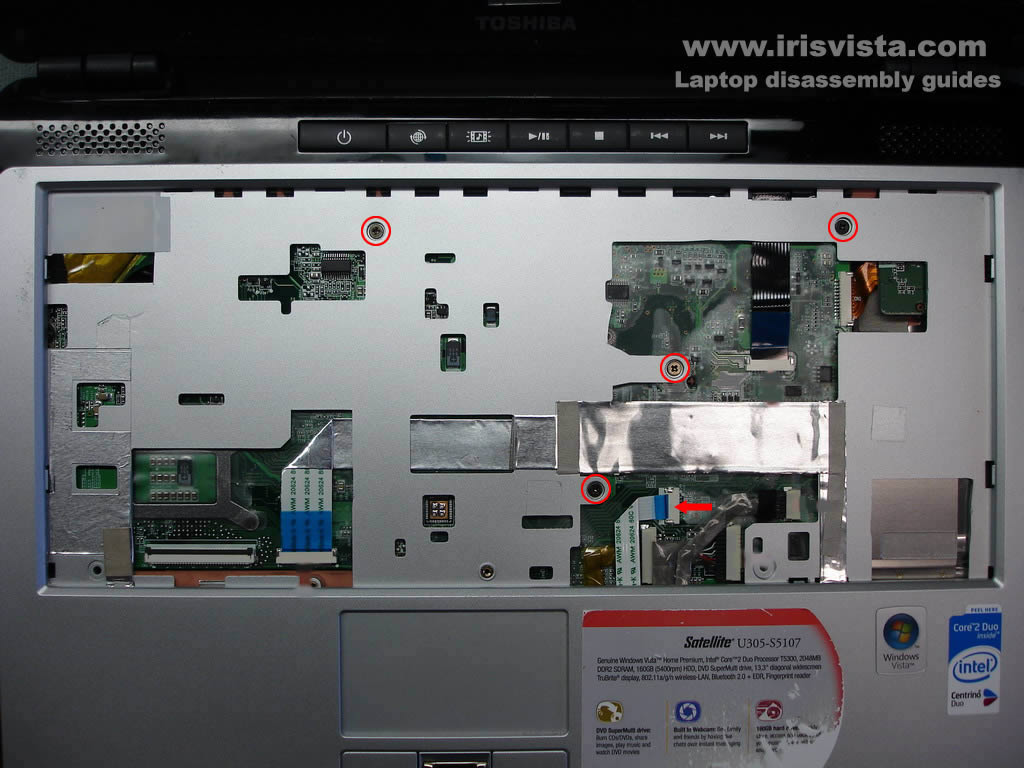
Remove four screws securing the top cover.
Unplug the touch pad cable from the connector on the motherboard.
You don't have to unlock the connector, simply pull the cable from the connector. |
| |
|
 |
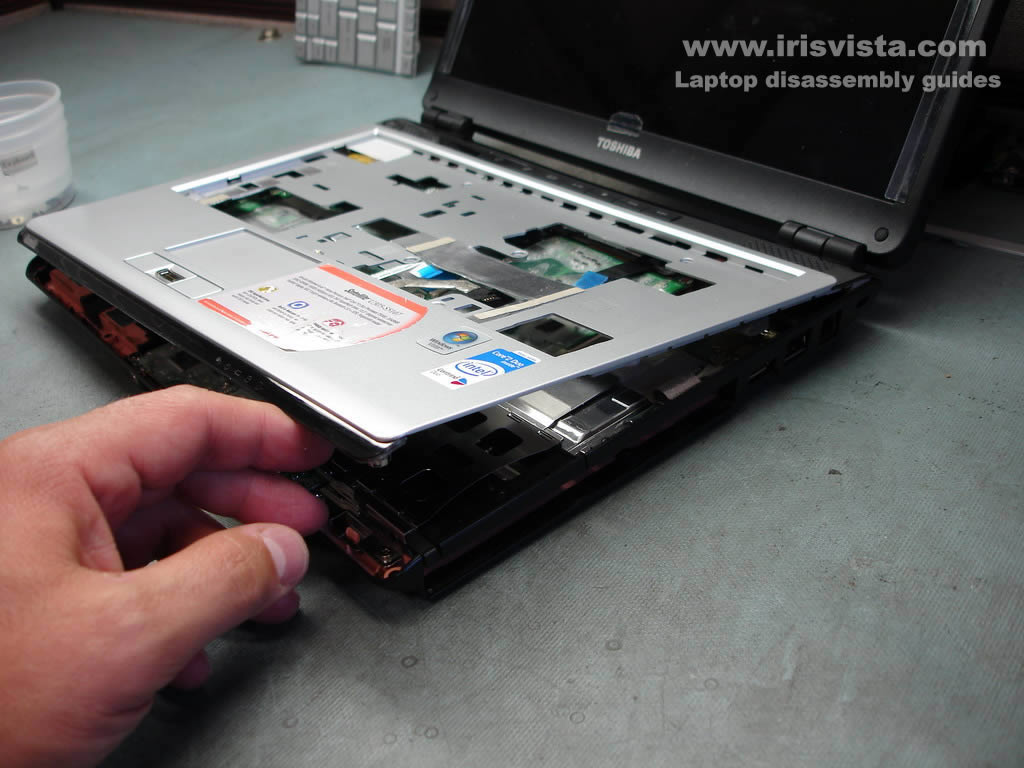
STEP 12
Lift up and remove the laptop top cover assembly. |
| |
|
 |
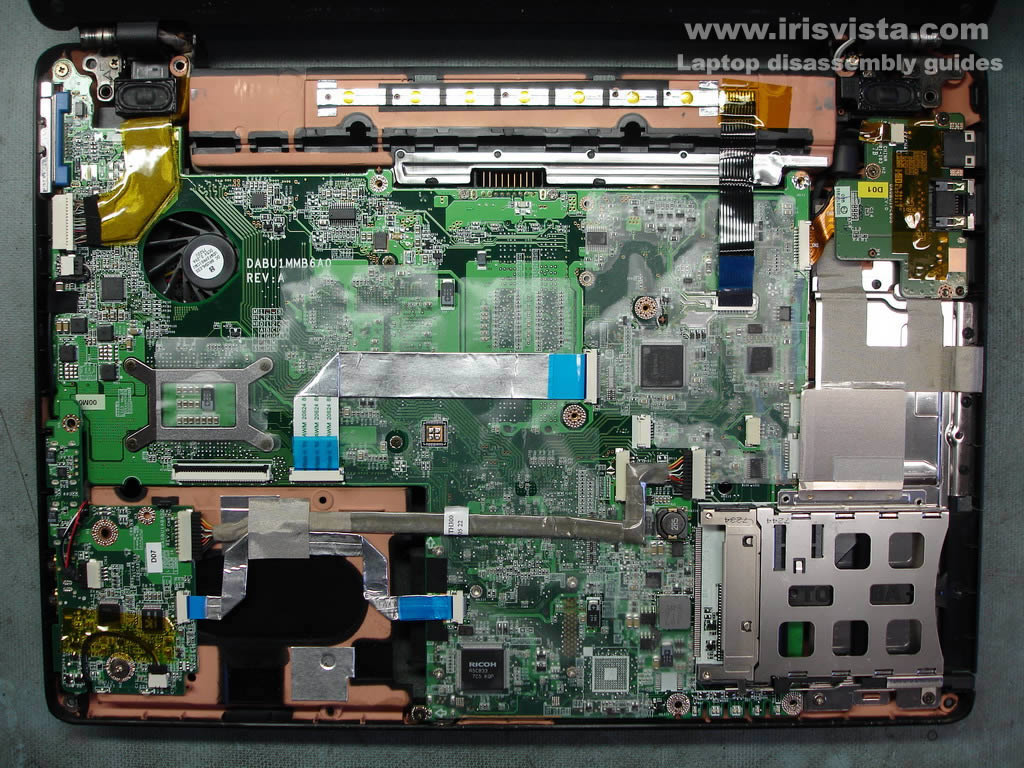
STEP 13
The top cover assembly had been removed.
|
| |
|
 |
STEP 14
Remove the yellow sticky tape securing the black cable.
Unplug four cables from the sound board.
Remove one screw securing the sound board.
|
| |
|
 |
STEP 15
When you are lifting up the sound board, you'll have to release one plastic latch on the side. |
| |
|
 |
STEP 16
Carefully lift up the sound board and remove it from the laptop.
|
| |
|
 |
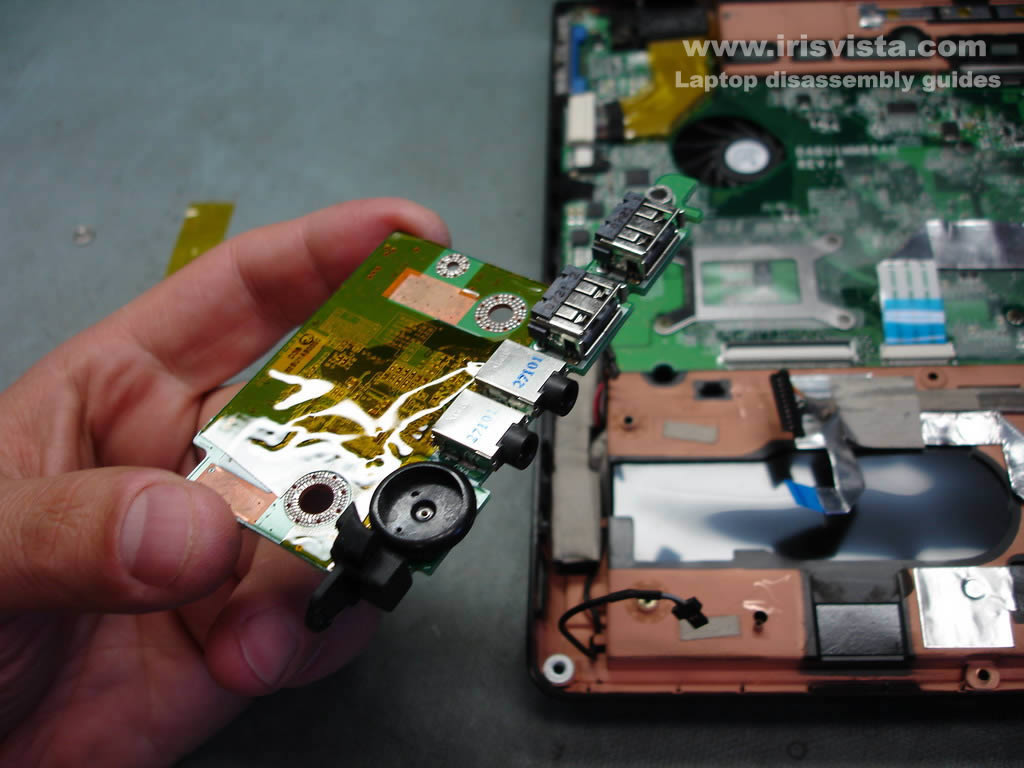
STEP 17
The sound board had been removed.
|
| |
|
 |
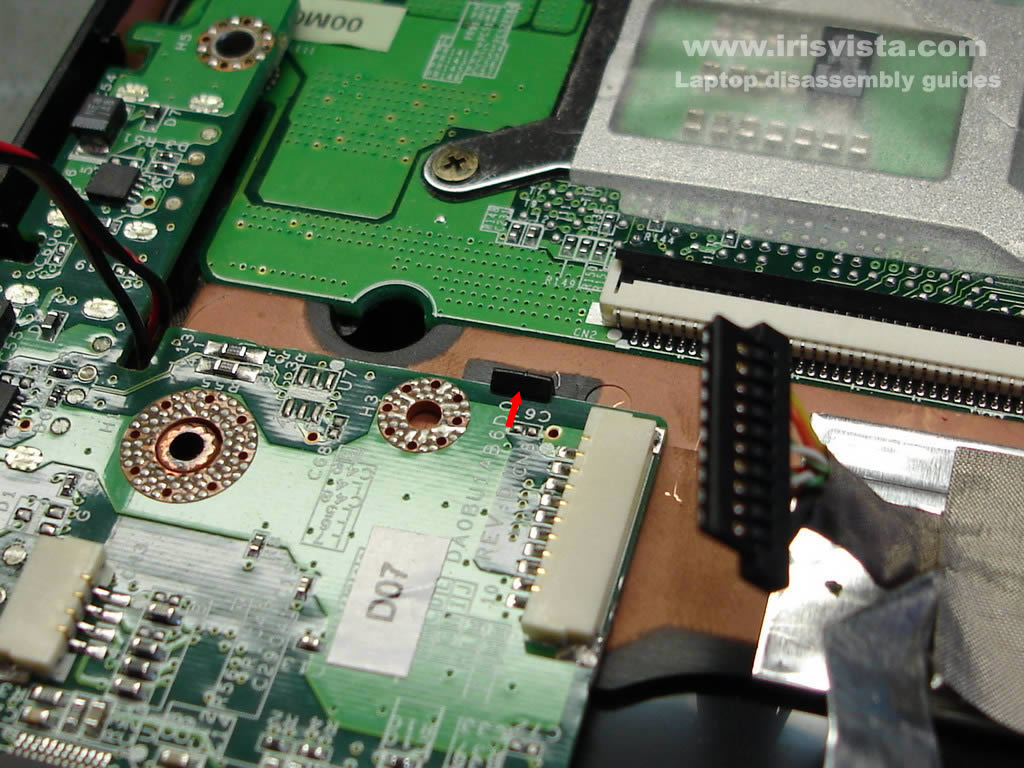
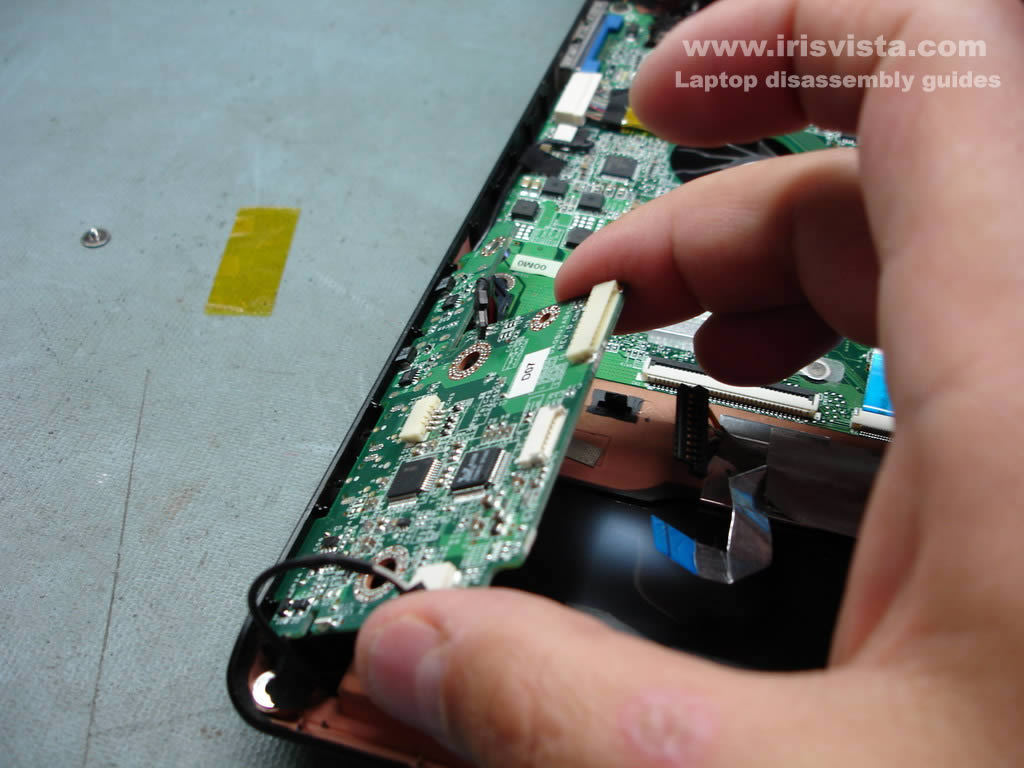
STEP 18
If you want to remove the laptop motherboard, you'll have to go through the following steps:
1. Remove two hex studs from the VGA port on the side. They are pointed with two yellow arrows.
2. Remove two screws securing the RJ45 board. Unplug the RJ45 board cable from the motherboard and remove the board.
3. Unplug all cables pointed with red arrows.
4. Remove four screws securing the motherboard to the laptop base.
5.
Start removing the motherboard from the right side. Lift it up and carefully remove from the base. |
| |
|
|
|