|
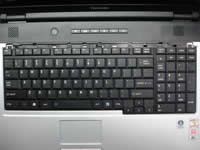
Toshiba Satellite L355, L355D, L350, L350D disassembly. |
|
|
 |
STEP 1
Remove laptop battery.
Remove two screws securing the hard drive cover. Remove the cover.
Remove one screw securing the memory cover. Remove the cover.
|
| |
|
 |
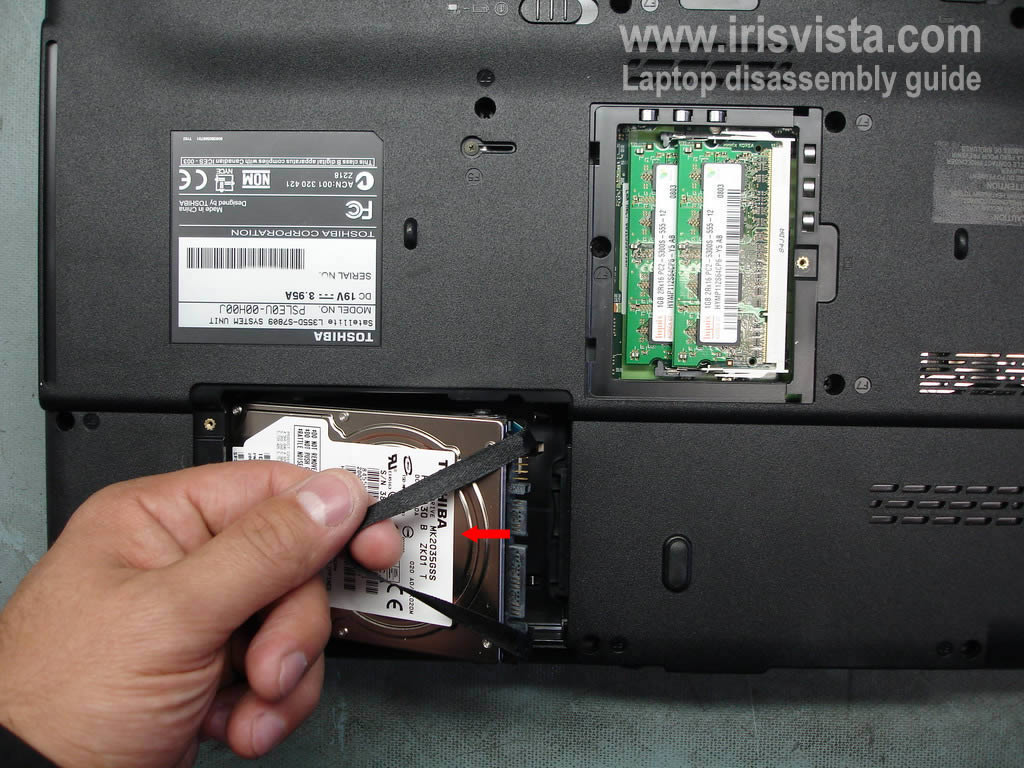
STEP 2
Pull the hard drive to the left. Disconnect it from the motherboard and remove.
Remove both memory modules.
|
| |
|
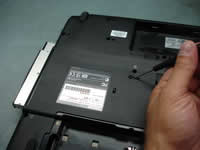 |
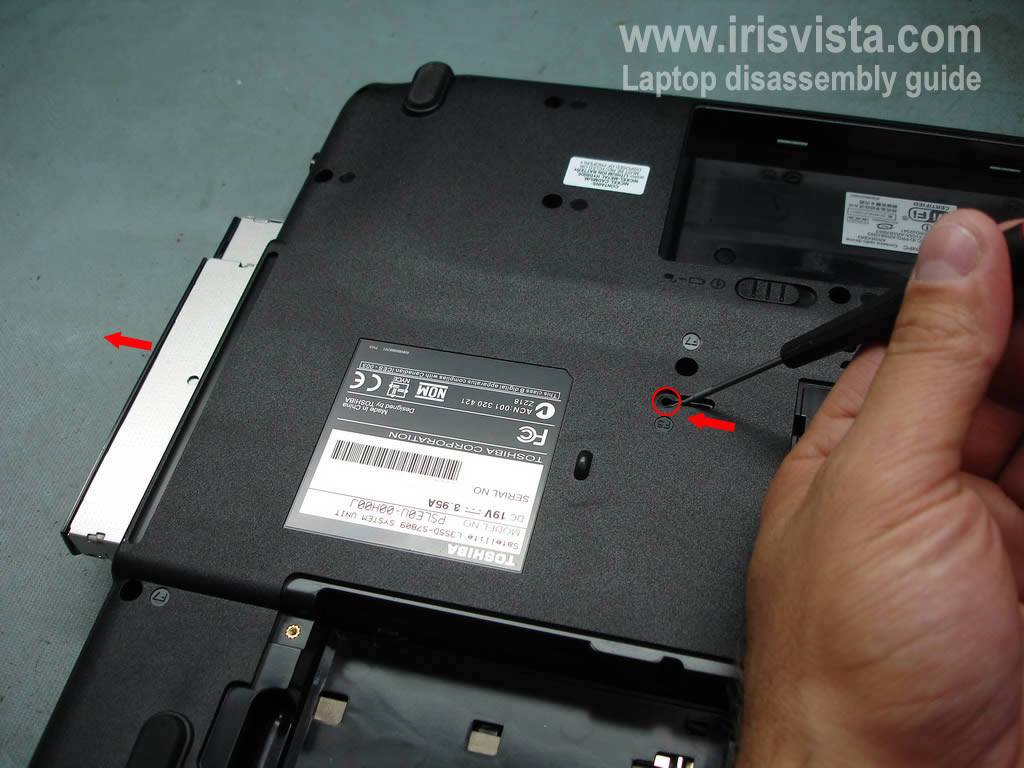
STEP 3
Remove one screw securing the DVD drive (red circle).
Push the DVD drive with a small scredriver.
Remove the DVD drive from the laptop. |
| |
|
 |
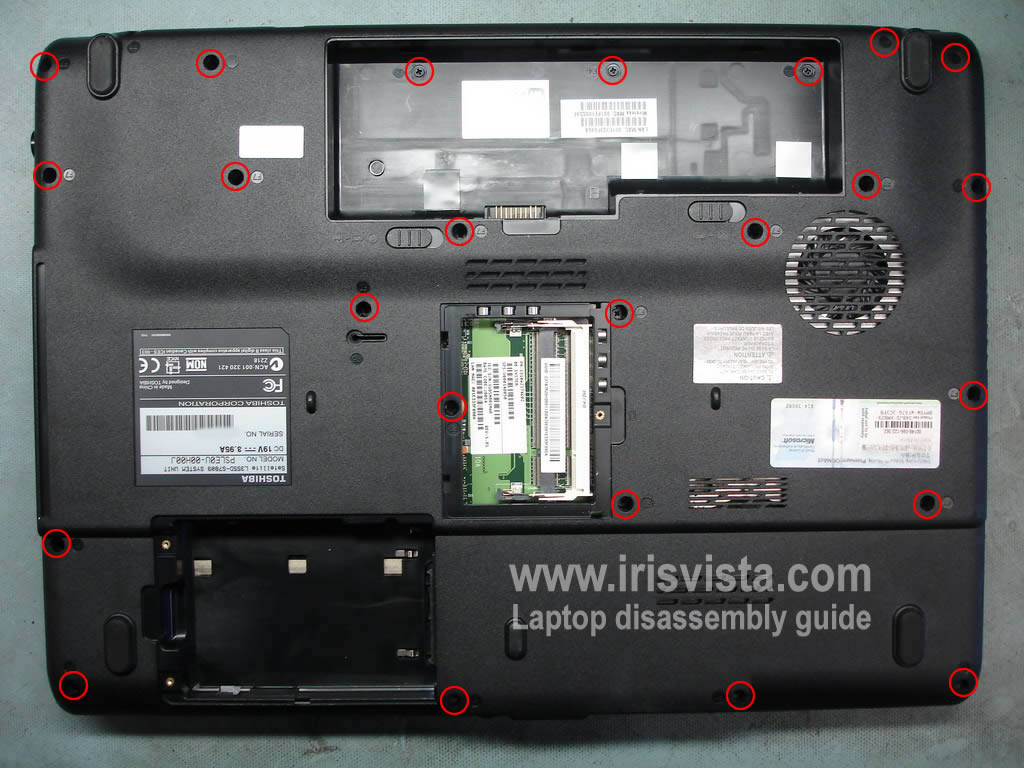
STEP 4
Remove all screws from the bottom of the laptop. |
| |
|
 |
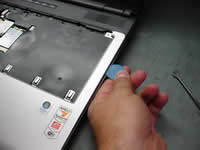
STEP 5
Remove the keyboard bezel using a smal flathead screwdriver.
Be careful, it's fragile.
|
| |
|
 |
STEP 6
Remove four screws securing the keyboard.
Press on the plastic lock (red arrow) and release the keyboard.
|
| |
|
 |
STEP 7
Lift up the keyboard.
Be careful, it's still attached to the motherboard.
|
| |
|
|
STEP 8
Unlock the keyboard connector on the motherboard.
Pull the keyboard cable from the connector.
Remove the keyboard. |
| |
|
 |
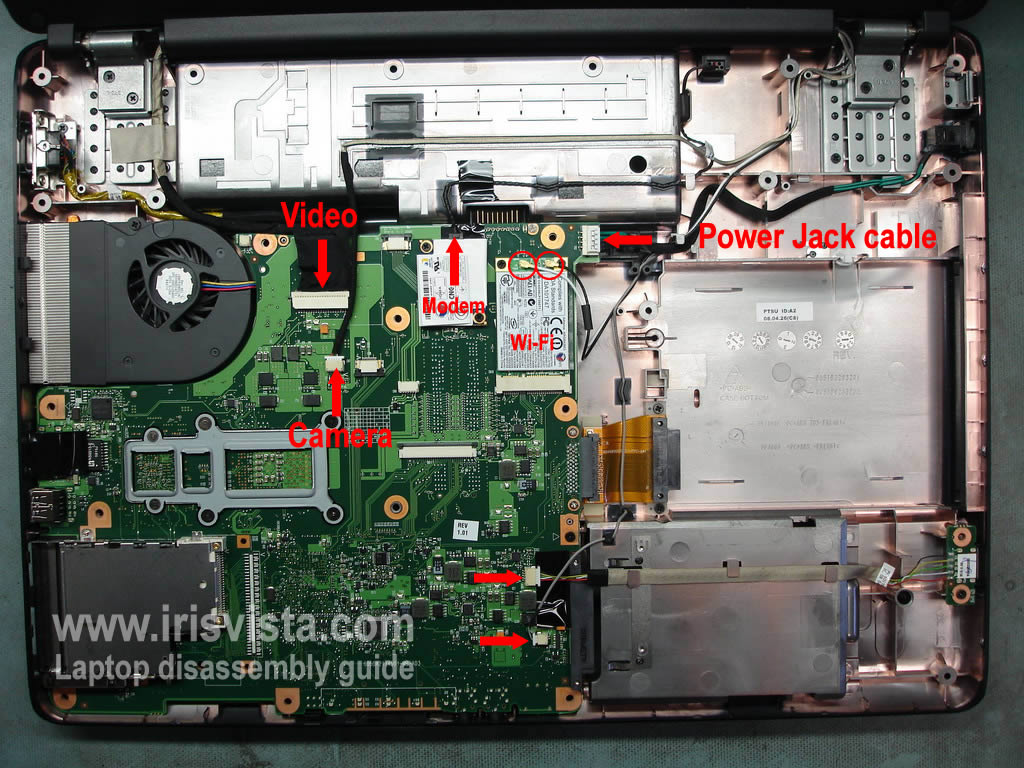
STEP 9
Disconnect cables pointed with red arrows.
|
| |
|
 |
STEP 10
Now we are going to separate the top cover from the base assembly. Usually I'm using a guitar pick.
Insert the guitar pick between the top cover and base assembly and carefully move it along the side.
|
| |
|
 |
STEP 11
Continue separating the top cover with your fingers. |
| |
|
 |
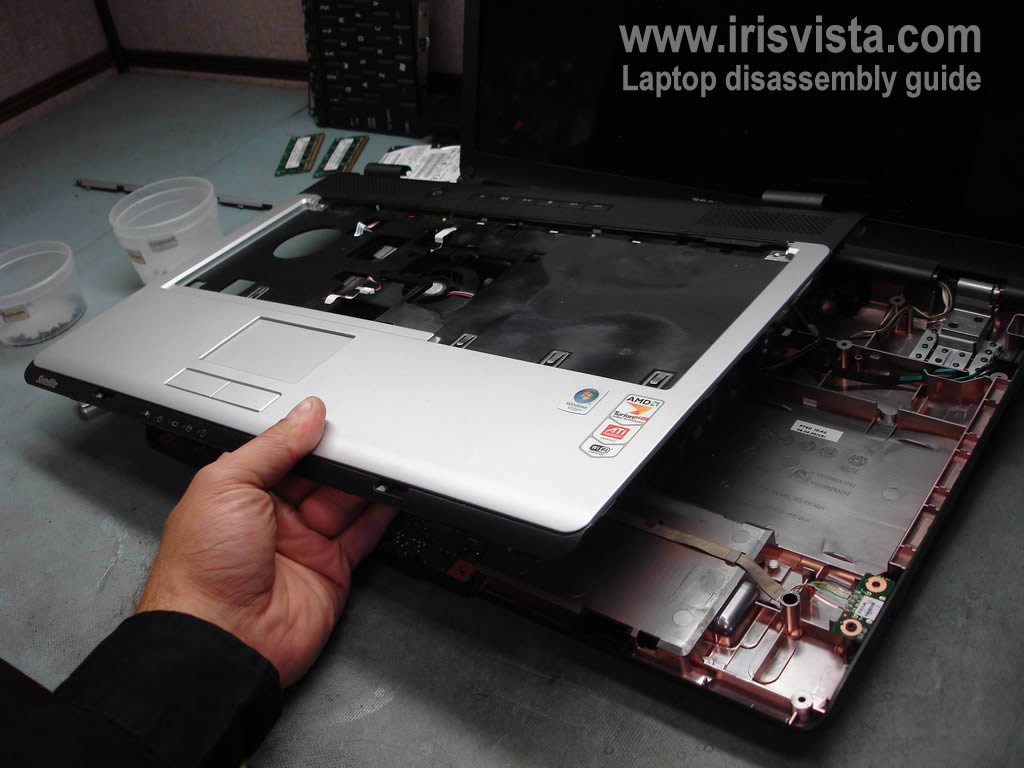
STEP 12
Lift up and remove the cover. |
| |
|
 |
STEP 13
The top cover has been removed.
On this picture you see the back side of the cover. |
| |
|
 |
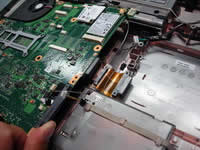
STEP 14
Now we are going to remove the motherboard.
Disconnect all cables pointed with red arrows.
Disconnect two antenna cables from the wireless card.
|
| |
|
 |
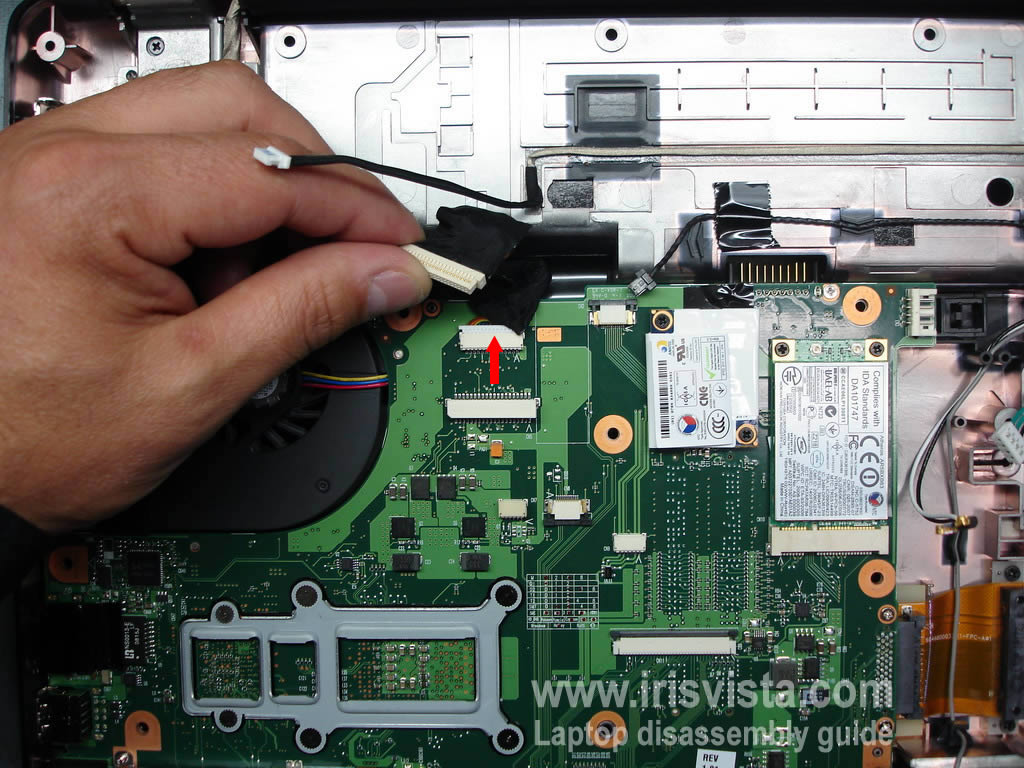
STEP 15
There is one more cable to disconnect. |
| |
|
|
STEP 16
Remove two screws securing the motherboard and the cooling fan. |
| |
|
 |
STEP 17
Disconnect the DVD drive cable from the right side of the motherboard. |
| |
|
 |
STEP 18
Lift up and remove the motherboard. |
| |
|
 |
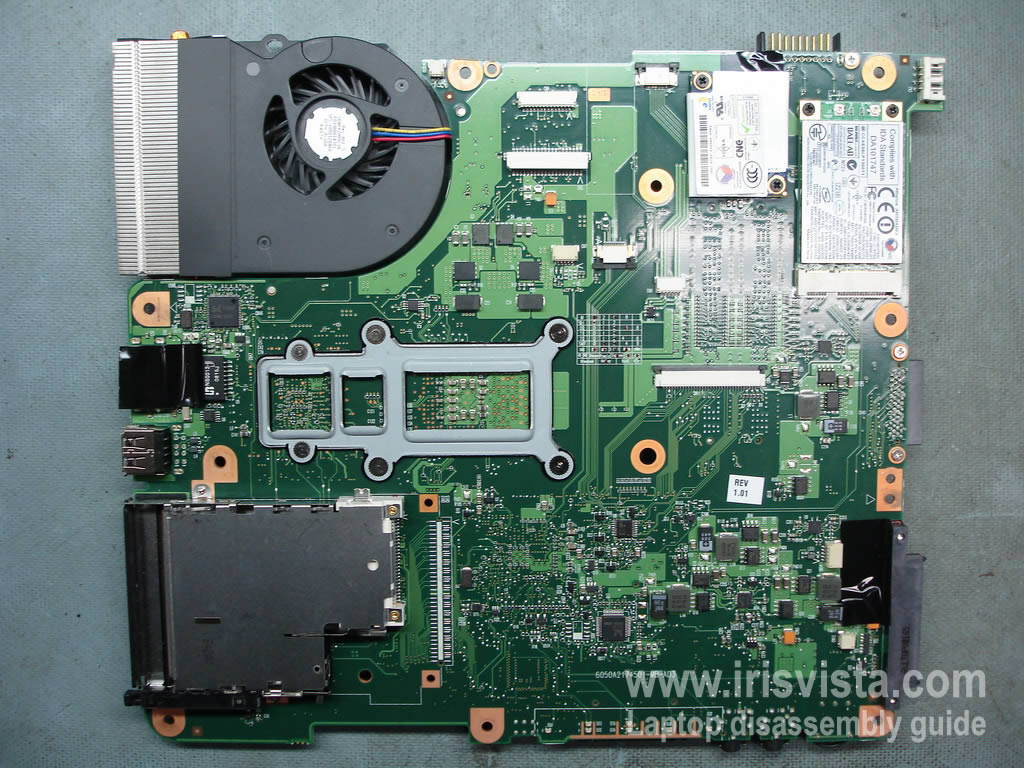
STEP 19
The laptop motherboard has been removed.
Turn it over. |
| |
|
 |
STEP 20
Now you can remove the heat sink, the cooling fan and the processor. |
| |
|
|
|