|
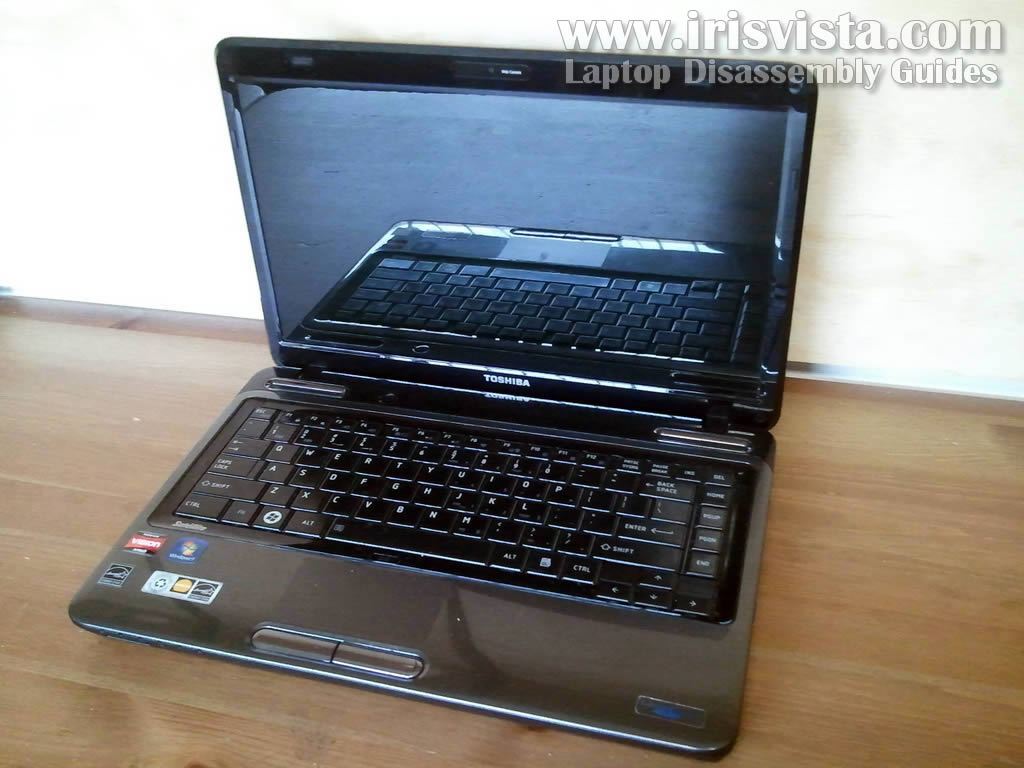
Toshiba Satellite L645, L645D, L640, L640D disassembly. |
|
|
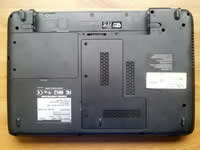 |
STEP 1
Before you start, make sure the laptop is turned off and battery removed.
Loosen five screws securing the hard drive and memory covers.
Remove both covers.
|
| |
|
 |
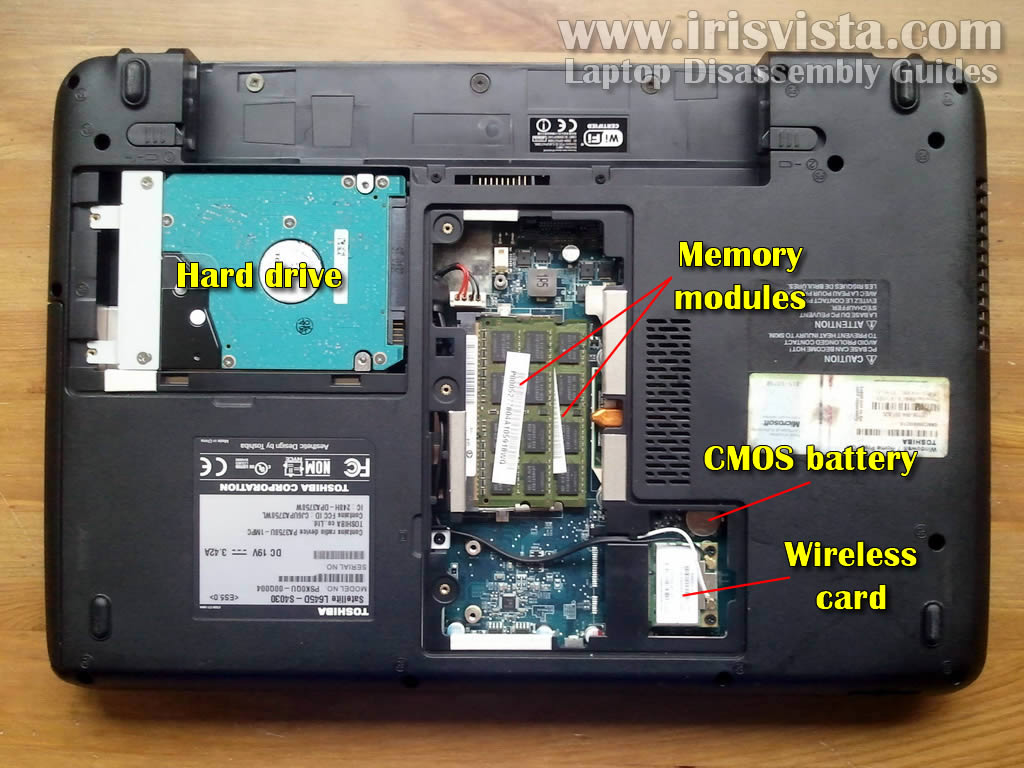
STEP 2
Under the covers you'll find the laptop hard drive, both memory modules, wireless card and CMOS battery.
|
| |
|
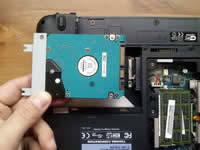 |
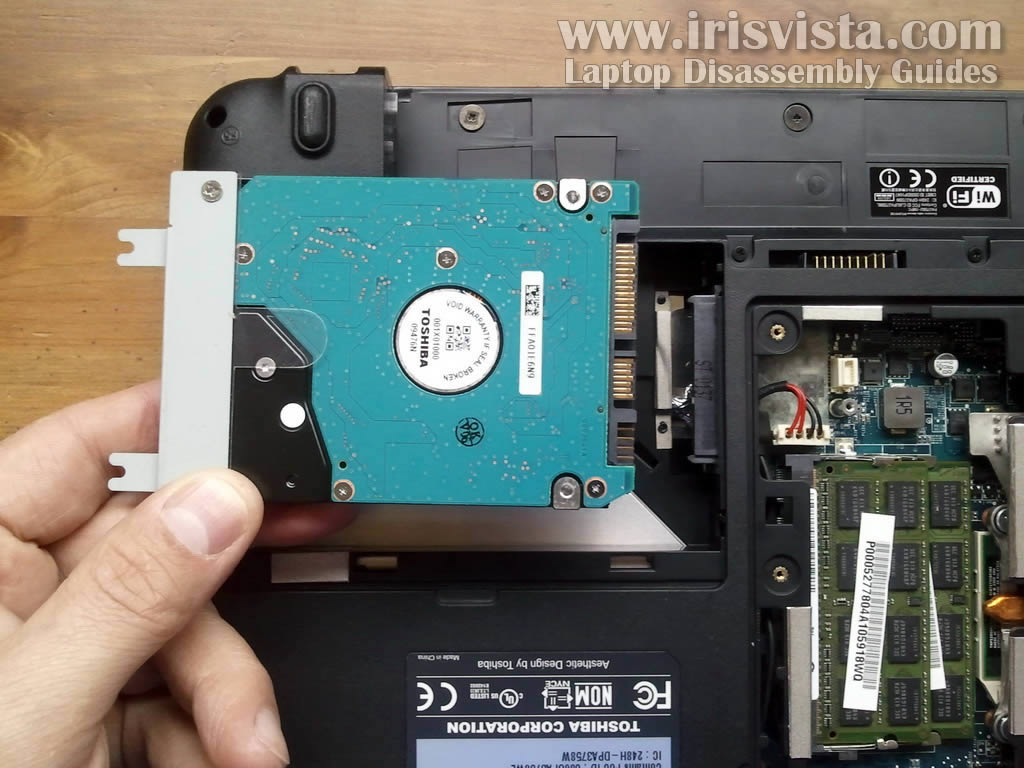
STEP 3
Slide the hard drive assembly to the left and disconnect it from the motherboard.
Lift up and remove the hard drive.
|
| |
|
 |
STEP 4
In order to remove the memory module, spread latches on both sides of the memory slot until the memory module pops up at a 30 degree angle.
Carefully pull the memory module from the slot.
Remove the second memory module using same technique.
|
| |
|
 |
STEP 5
Remove one screw securing the DVD drive.
Carefully pull the DVD drive from the laptop and remove it.
|
| |
|
 |
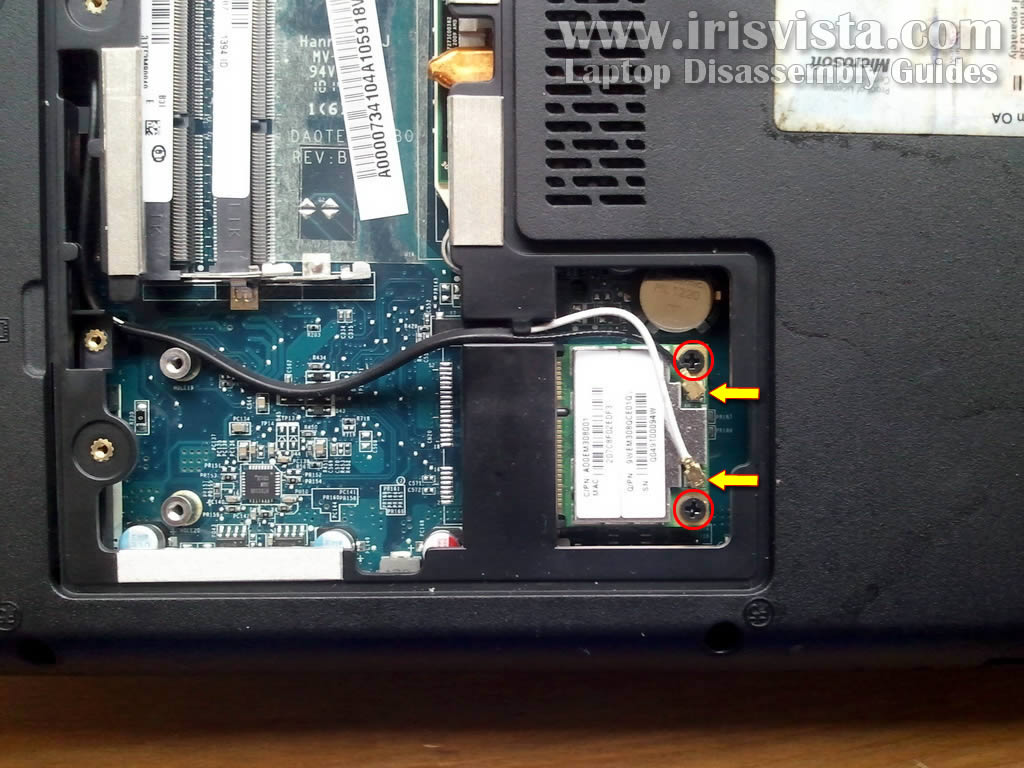
STEP 6
Disconnect both antenna cable from the wireless card.
Remove two screws securing the wireless card.
Pull the wireless card from the slot. |
| |
|
 |
STEP 7
Remove two screws securing the keyboard bezel. |
| |
|
 |
STEP 8
Carefully lift up the keyboard bezel and remove it from the laptop. |
| |
|
 |
STEP 9
Remove three screws securing the keyboard. |
| |
|
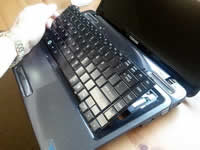 |
STEP 10
Lift up the top side of the keyboard.
Be careful, the keyboard still connected to the motherboard. |
| |
|
 |
STEP 11
Turn the keyboard upside down and place it on the palm rest.
|
| |
|
 |
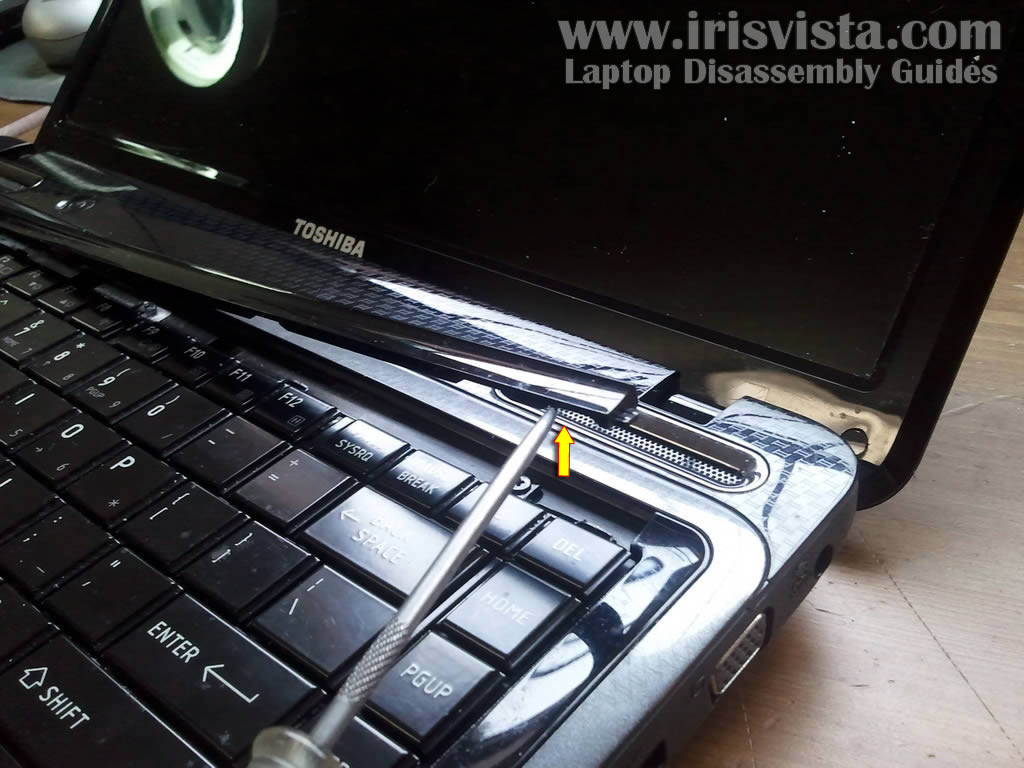
STEP 12
In order to remove the keyboard you'll have to unlock the connector and release the cable.
Lift up the right side of the locking tab so it opens up at a 90 degree angle. |
| |
|
 |
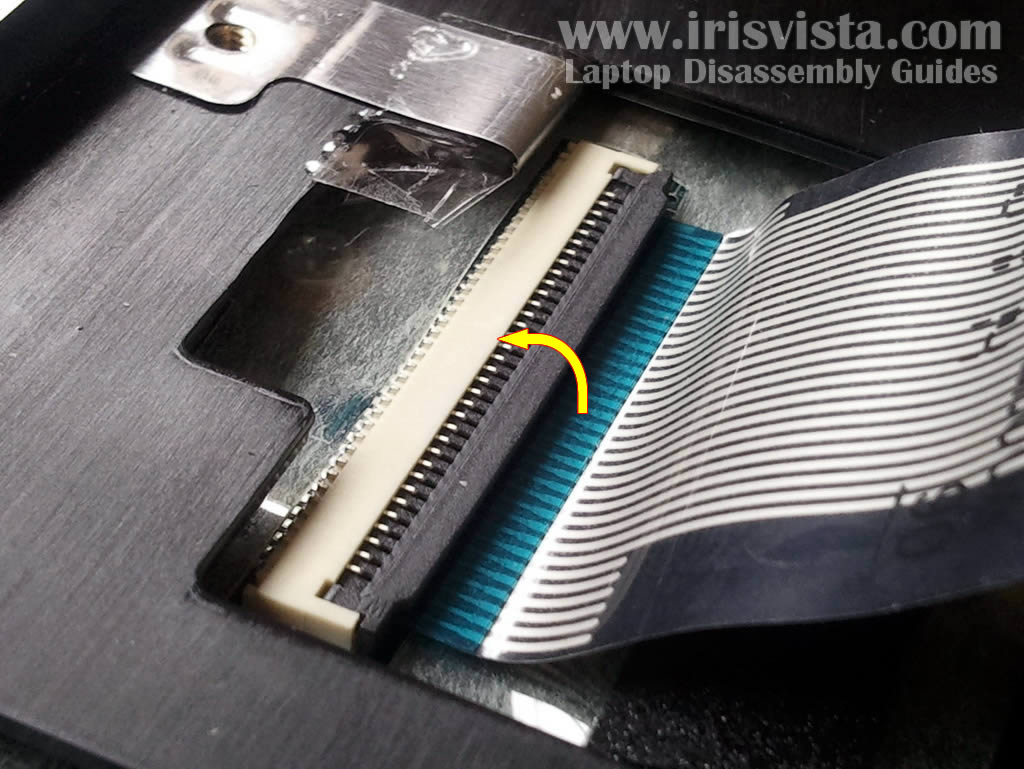
STEP 13
In this step the connector shown in the unlocked position.
Now you can pull the cable from the connector. |
| |
|
 |
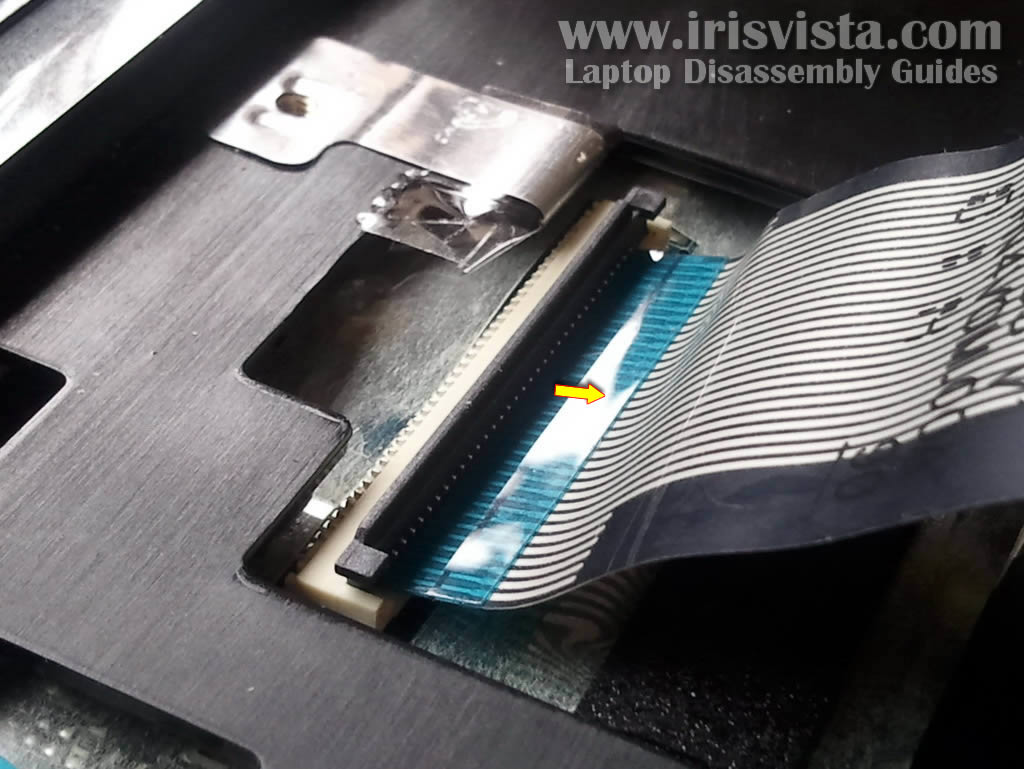
STEP 14
Remove the keyboard. |
| |
|
 |
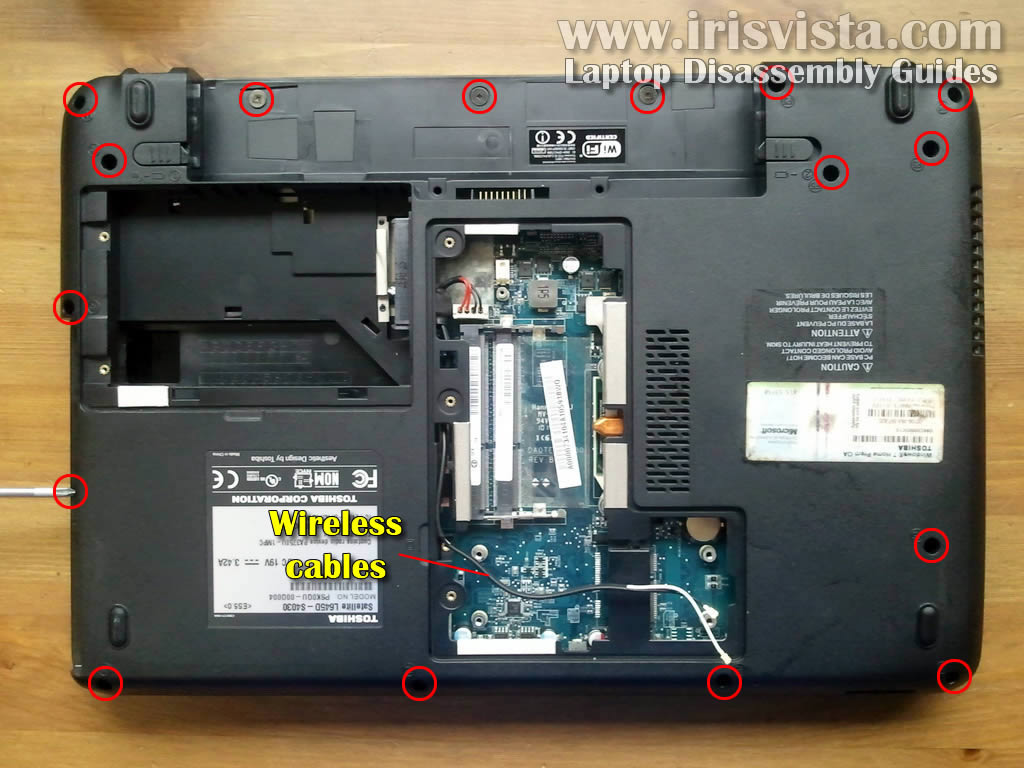
STEP 15
Remove all screws from the bottom of the laptop.
Unroute wireless card antenna cables. |
| |
|
 |
STEP 16
Remove all screws securing the top cover assembly.
Disconnect the touch pad cable. Do it same way you disconnected the keyboard cable.
Disconnect the speaker cable. Simply unplug the black connector from the white connector. |
| |
|
 |
STEP 17
Lift up and remove the top cover assembly. |
| |
|
 |
STEP 18
Unplug the video cable connector from the motherboard.
Pull wireless card antenna cables though the opening in the laptop base.
Remove four screws securing display hinges.
|
| |
|
 |
STEP 19
Lift up and remove the display panel assembly.
In the next guide I'll explain how to remove and replace the LCD screen. |
| |
|
 |
STEP 20
Disconnect the power button cable from the motherboard.
Unplug the VGA board cable from the motherboard.
Remove three screws securing the motherboard. |
| |
|
 |
STEP 21
Don't forget to unplug the DC jack cable from the motherboard.
This connector located in the memory compartment.
|
| |
|
 |
STEP 22
Start removing the motherboard as it shown on the picture.
|
| |
|
 |
STEP 23
Lift up and remove the motherboard. |
| |
|
 |
STEP 24
Here's the base assembly with the motherboard removed.
The power button board, VGA board and DC jack harness still attached to the laptop base. |
| |
|
 |
STEP 25
When the motherboard is removed, you can access and remove the cooling fan assembly.
Simply loosen four screws securing the heat sink and disconnect the cooling cable. |
| |
|
|
|