 |
Toshiba Satellite L755, L755D, L750, L750D screen replacement.
Make sure the laptop is turned off. Remove the battery before you start the disassembly process.
If you need to disassemble the base check out the body disassembly guide.
|
|
|
 |
STEP 1
There are four screw covers on the screen bezel. One cover in each bezel corner.
|
| |
|
 |
STEP 2
Remove all four covers with a sharp object.
Glue covers (they have sticky tape on the bottom) somewhere on the bezel so they don't get lost during the disassembly process.
|
| |
|
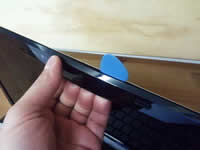 |
STEP 3
Start separating the screen bezel from the display back cover.
Here's how I do it:
- insert your fingers between the bezel and LCD screen on the top of the display assembly.
- insert the guitar pick (you can use any other piece os plastic) between the bezel and back cover and slowly move it along the side.
- at the same time wiggle the bezel to unlock hidden latches inside the display.
|
| |
|
 |
STEP 4
Continue separating the screen bezel from the display assembly. |
| |
|
 |
STEP 5
It was kind of difficult to separate the bezel from the display on the bottom.
Close the display and using the same guitar pick separate the screen bezel from the display on the bottom.
The picture shows the battery compartment area of the laptop. |
| |
|
 |
STEP 6
Now start separating the bezel from the display hinges.
Insert a small flathead screwdriver under the hinge cover (part of the screen bezel) and carefully lift it up.
Do the same with the hinge cover on the left side of the display. |
| |
|
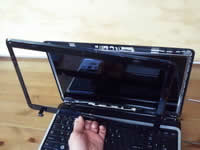 |
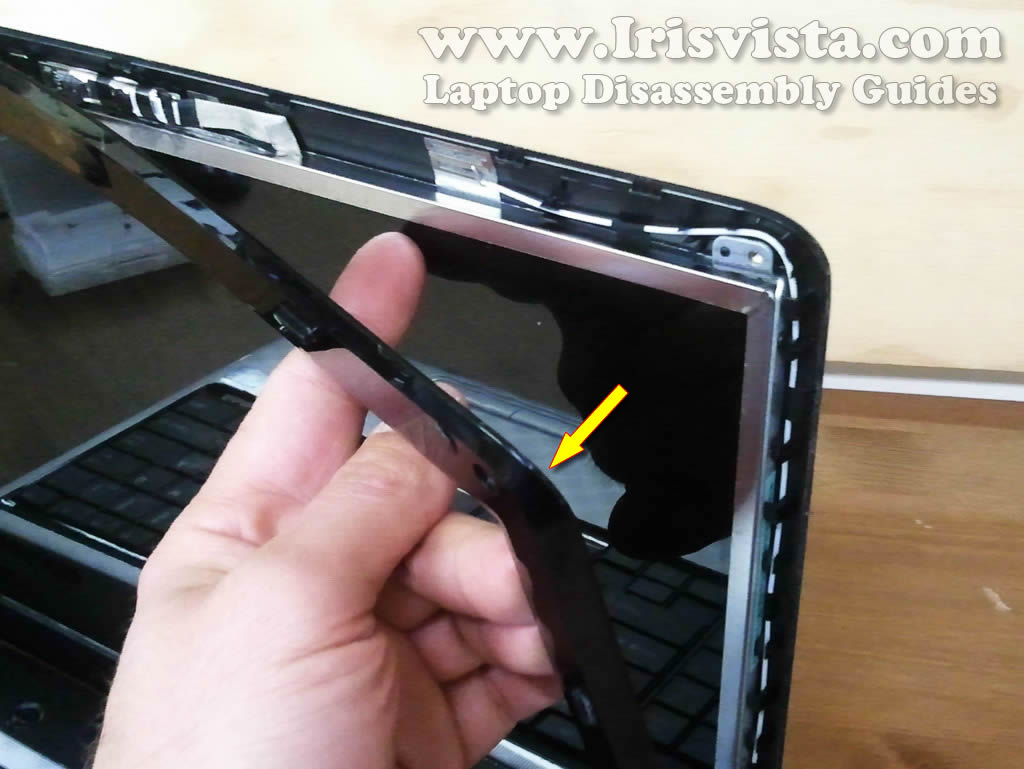
STEP 7
Remove the screen bezel. |
| |
|
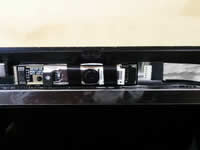 |
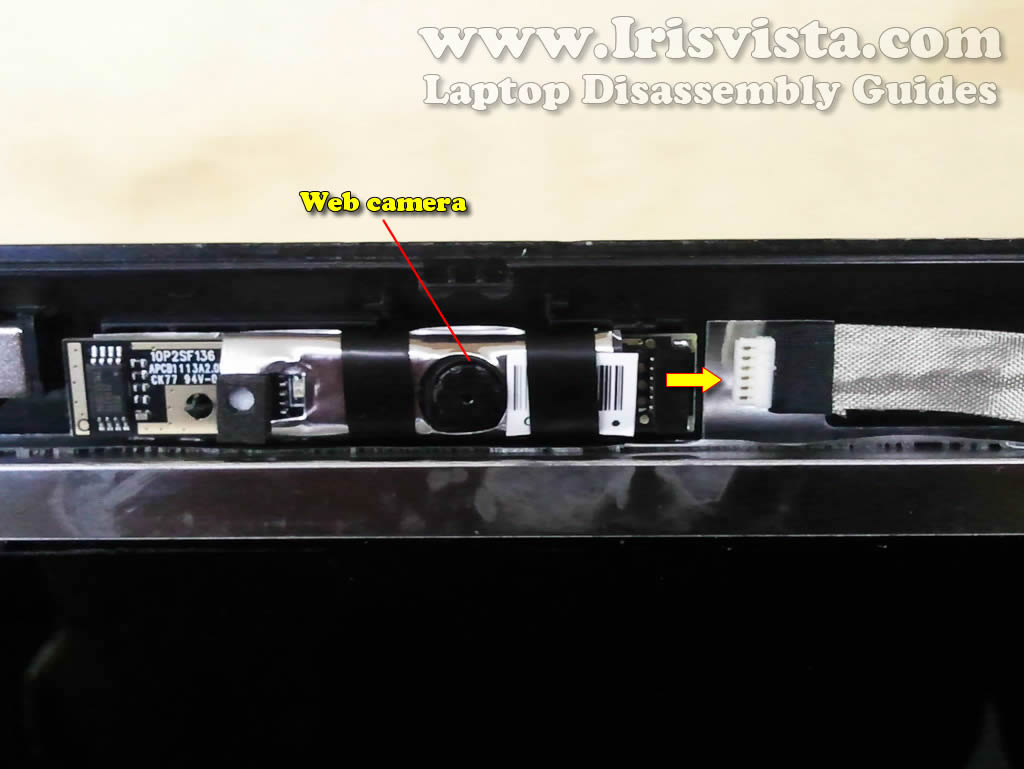
STEP 8
Disconnect the cable from the right side of the web camera module.
NOTE: the web camera is not part of the display. It's a separate module. |
| |
|
 |
STEP 9
Separate the LCD screen from the display back cover just enough to access screws on the side.
Remove two screws securing the LCD screen to the right hinge bracket. |
| |
|
 |
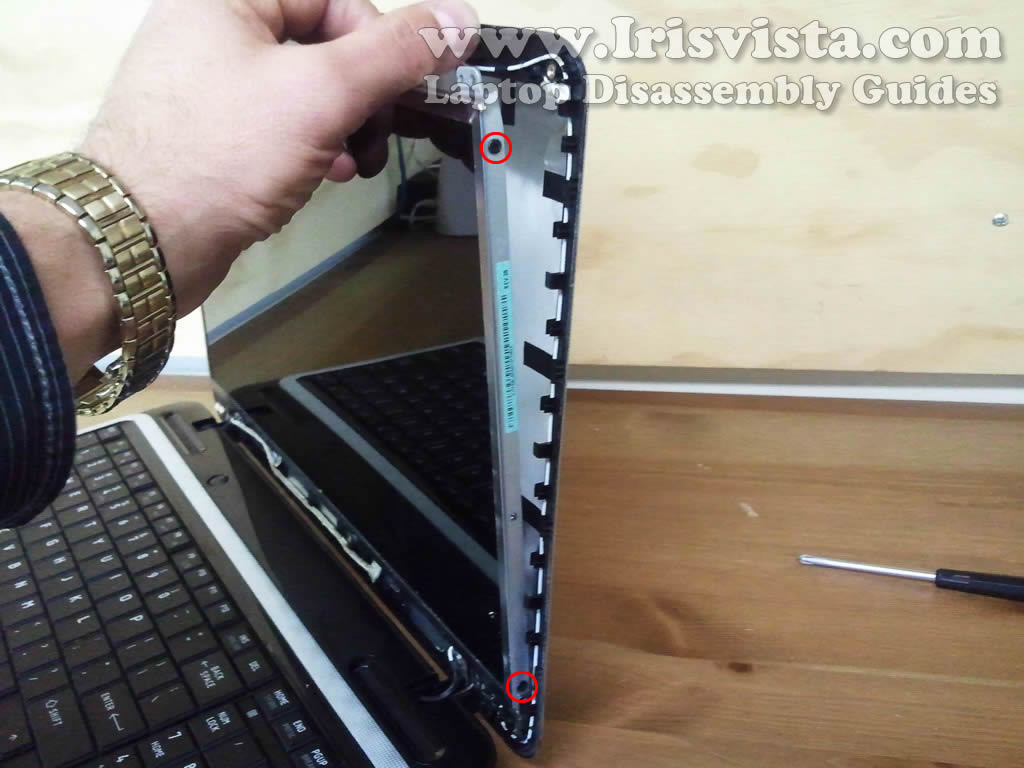
STEP 10
Remove two more screws securing the LCD screen to the left hinge bracket. |
| |
|
 |
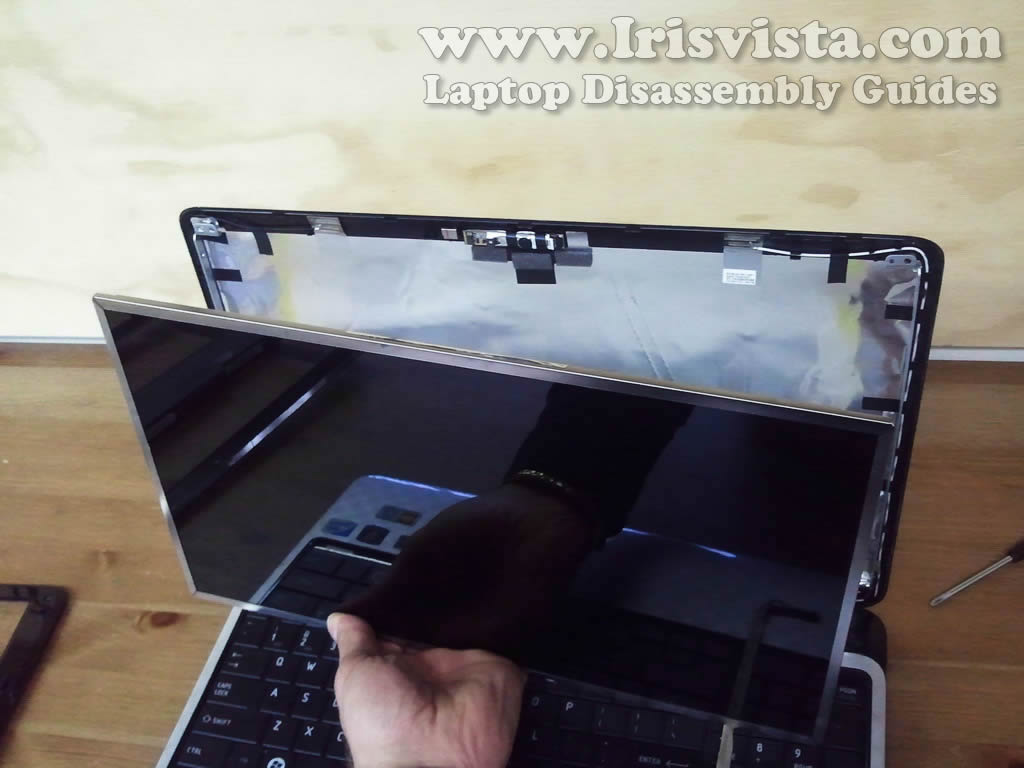
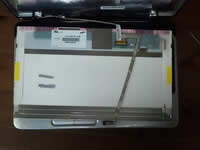
STEP 11
Now you can separate the LCD screen form the display back cover and place it face down on the palmrest.
|
| |
|
 |
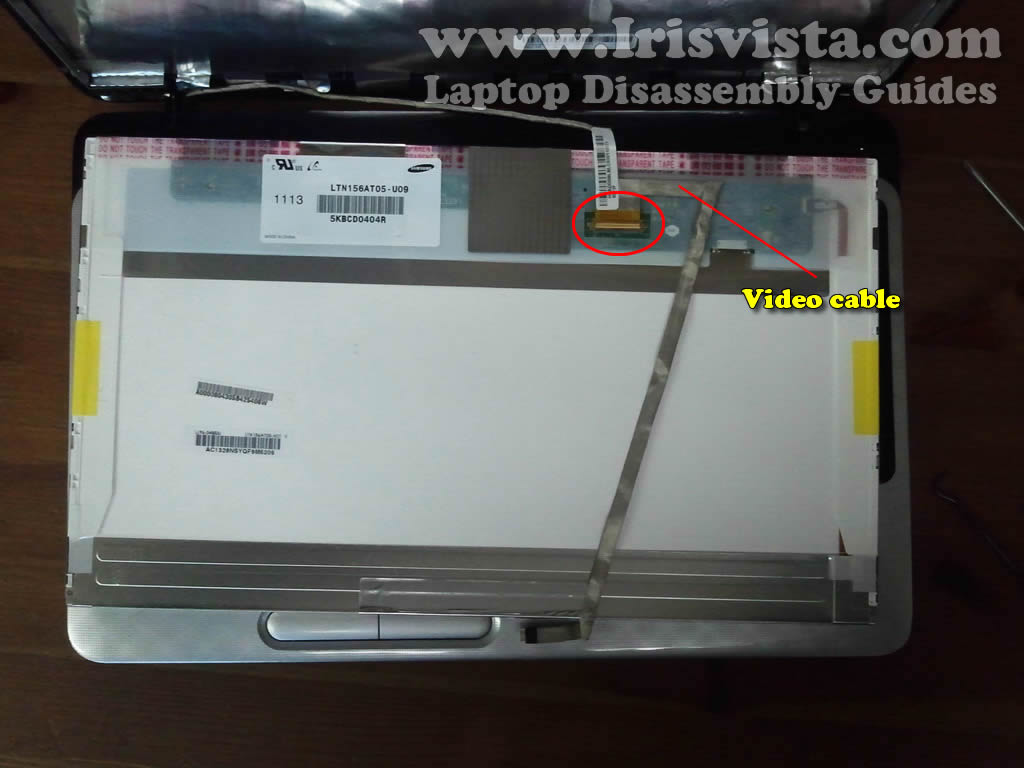
STEP 12
The video cable glued to the back of the screen with sticky tape.
As you see, the web camera cable is part of the video cable harness.
I circled the video cable connector.
|
| |
|
 |
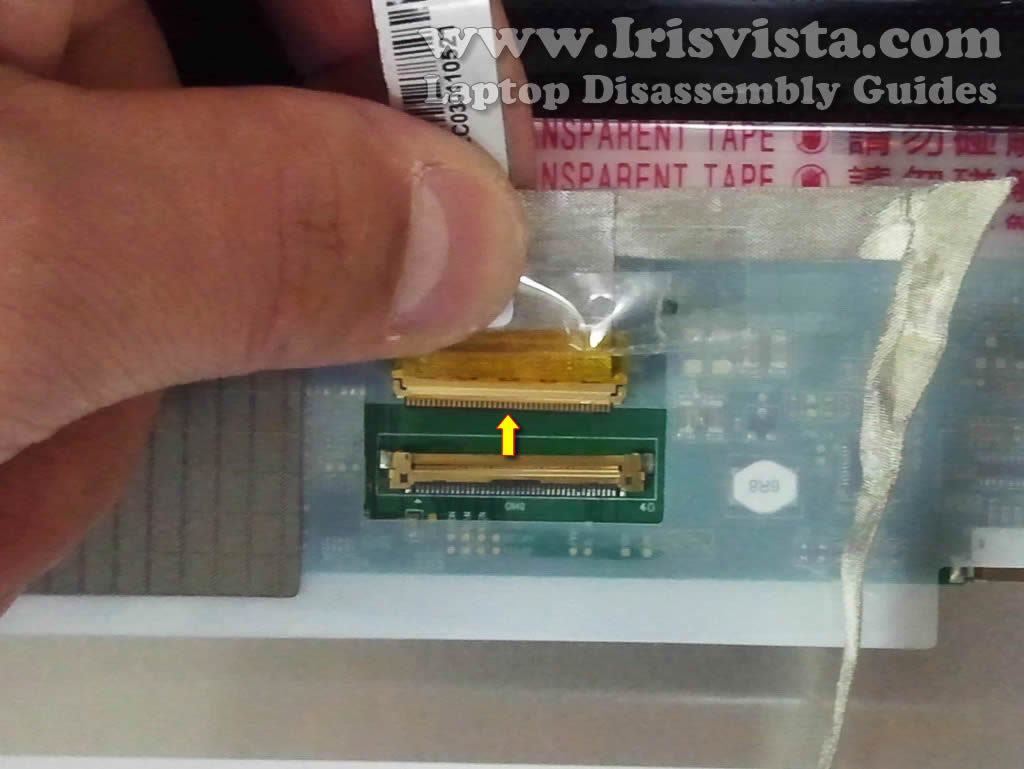
STEP 13
Unglue sticky tape securing the connection and unplug the video cable connector from the LCD screen.
|
| |
|
 |
STEP 14
Remove the LCD screen. It's ready for the replacement.
|
| |
|
 |
STEP 15
Also you can search for a new replacement screen using the model number from the original screen.
The model number printed on the back side of the screen.
In my Toshiba Satellite L755 laptop I had the following screen installed: LTN156AT05-U09
There could be more than one screen compatible with this laptop.
|
| |
|
|
|