|
Toshiba Satellite U405, U405D, U400, U400D disassembly.
|
|
|
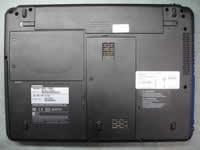 |
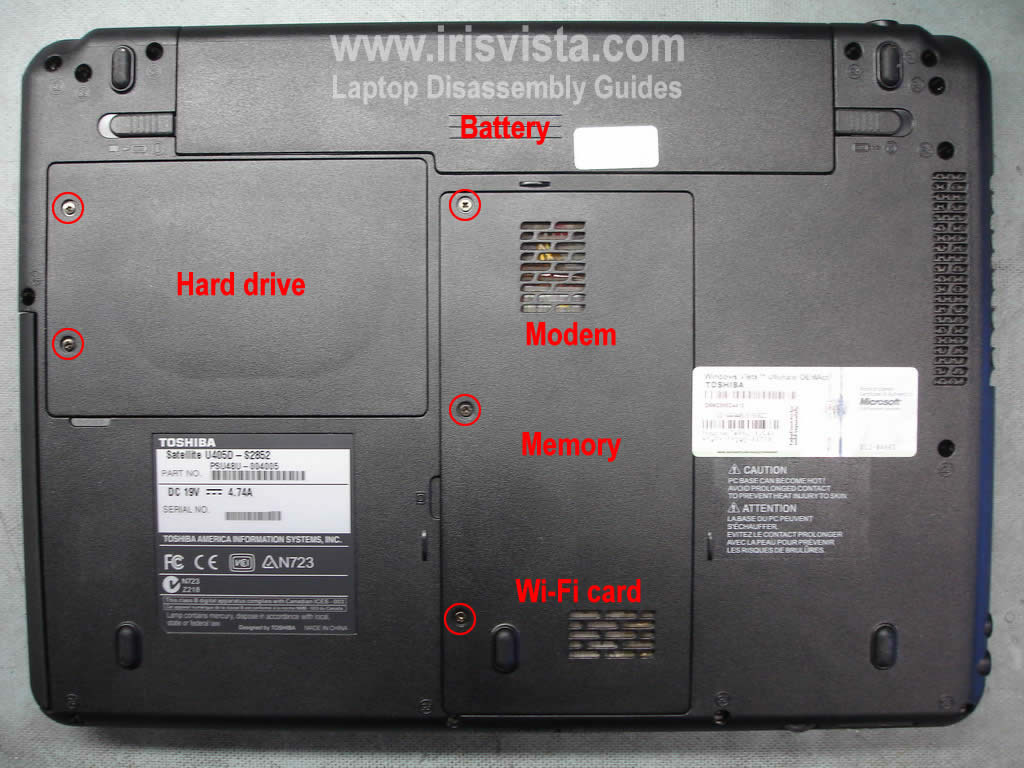
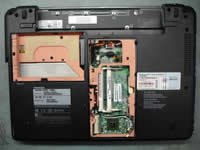
STEP 1
Before you start laptop disassembly, unplug AC adapter and remove the battery.
Remove two screws securing the hard drive cover. Remove the cover.
Remove three screws securing modem/memory/wi-fi card cover. Remove the cover.
|
| |
|
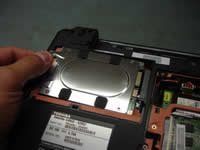 |
STEP 2
Pull the hard drive to the left side.
Disconnect hard drive from the motherboard and remove it from the laptop.
|
| |
|
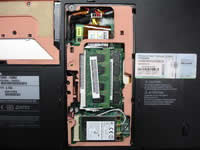 |
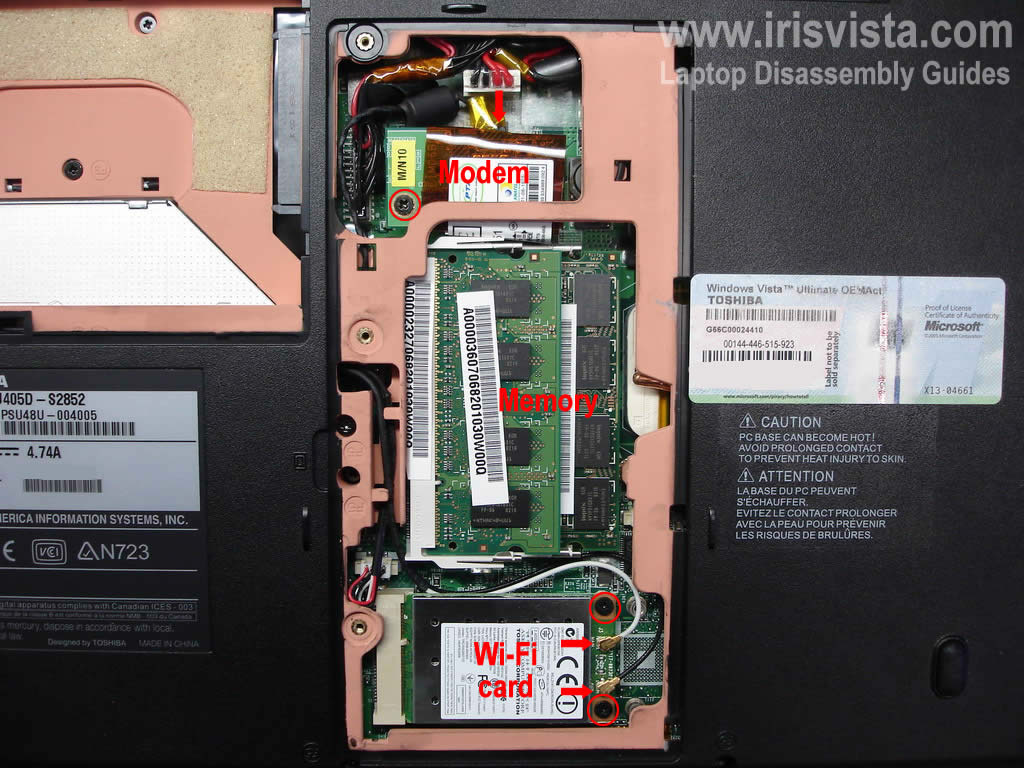
STEP 3
Remove both memory modules.
Remove one screw securing the modem card. Lift up the modem and disconnect the cable pointed with a red arrow.
Disconnect both antenna cables from the wireless card. Remove two screws securing the wireless card and remove it from the laptop.
|
| |
|
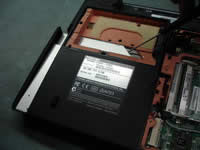 |
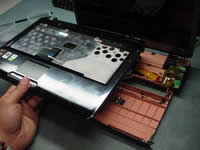
STEP 4
Remove one screw securing the CD/DVD optical drive.
Push the drive from the laptop with a flathead screwdriver.
Remove the CD/DVD drive.
|
| |
|
 |
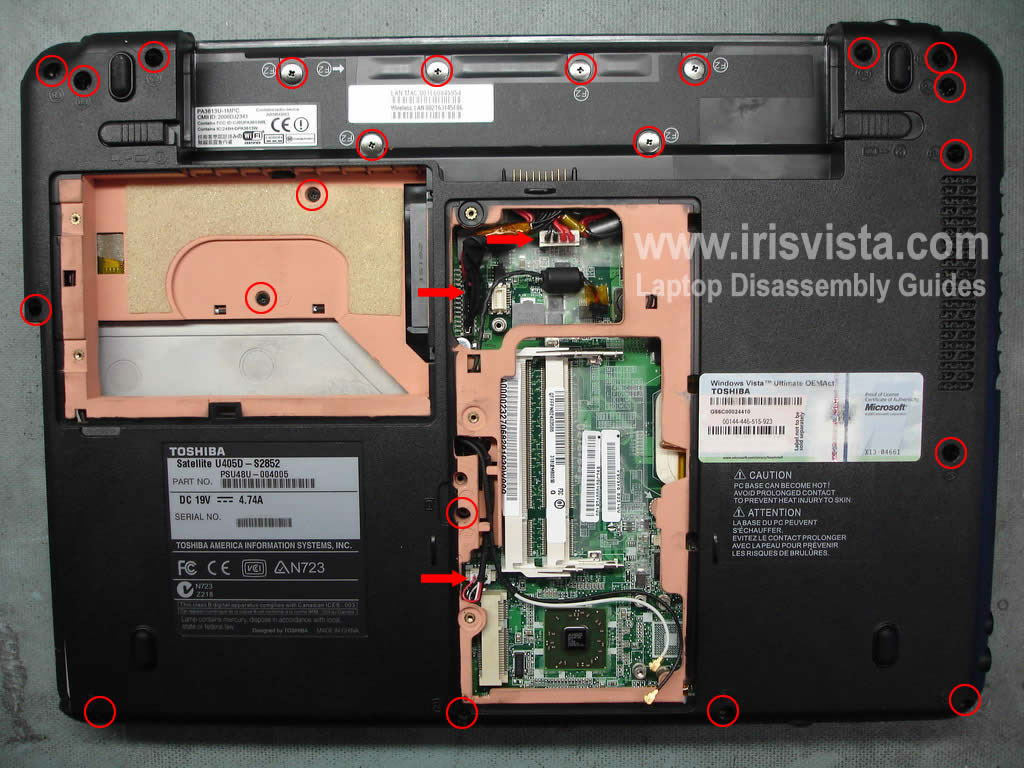
STEP 5
Remove all screws from the bottom.
Unplug cables pointed with red arrows and turn the laptop over.
|
| |
|
 |
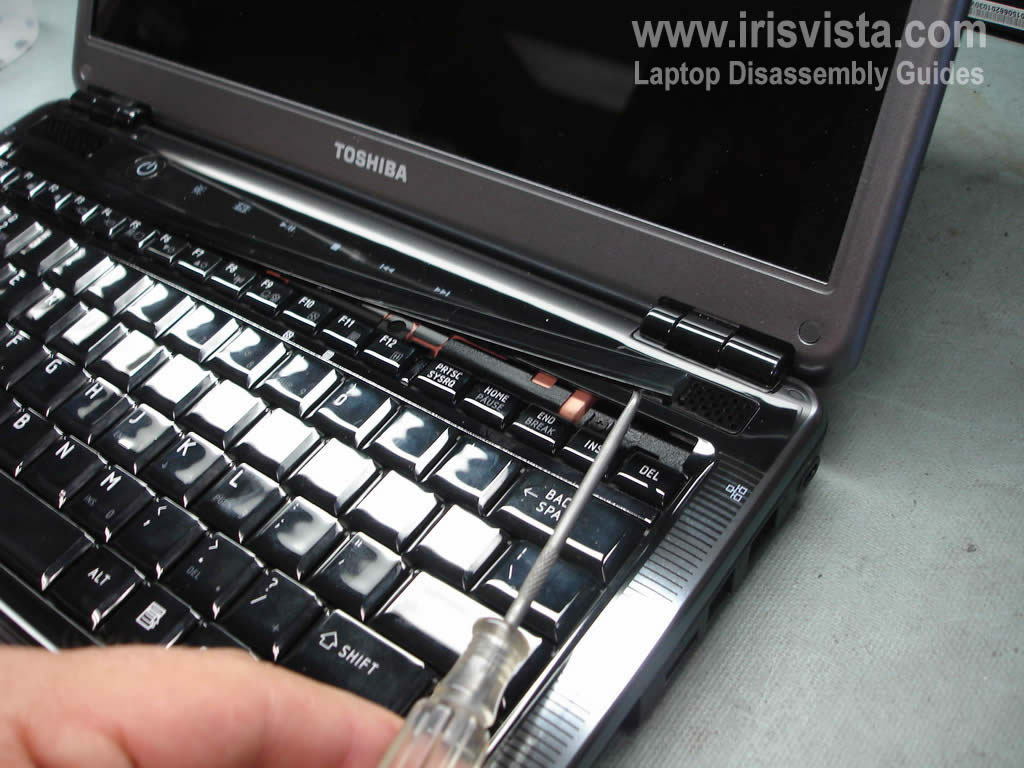
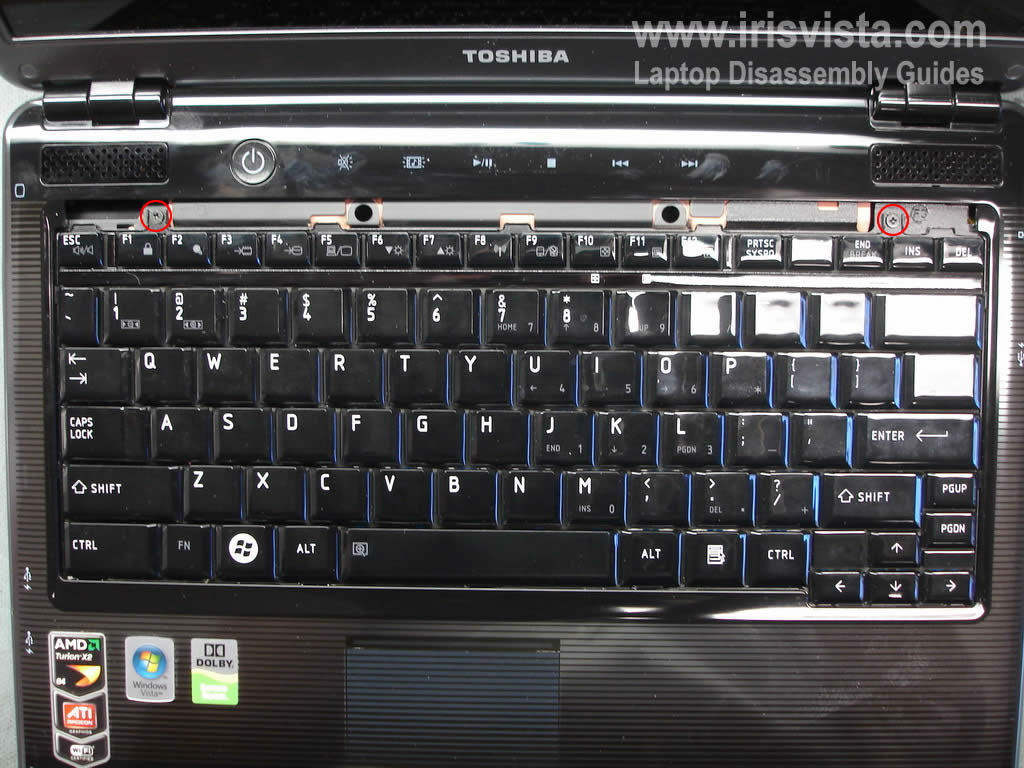
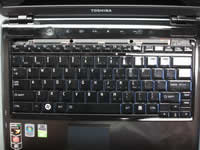
STEP 6
Using a small flathead screwdriver remove the keyboard bezel.
NOTE: if you are replacing the keyboard you don't have to go through steps 2-5.
You can remove the keyboard if you follow steps 6-9.
|
| |
|
 |
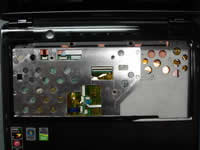
STEP 7
Remove two screws securing the keyboard.
|
| |
|
|
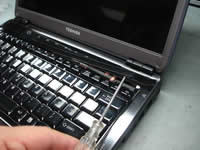
STEP 8
Lift up the keyboard as it shown on the picture and place it upside down on the laptop top cover. |
| |
|
 |
STEP 9
Open up the keyboard cable connector on the motherboard. Be careful, do not break the connector.
After the connector is unlocked you can pull the cable and remove the motherboard.
|
| |
|
 |
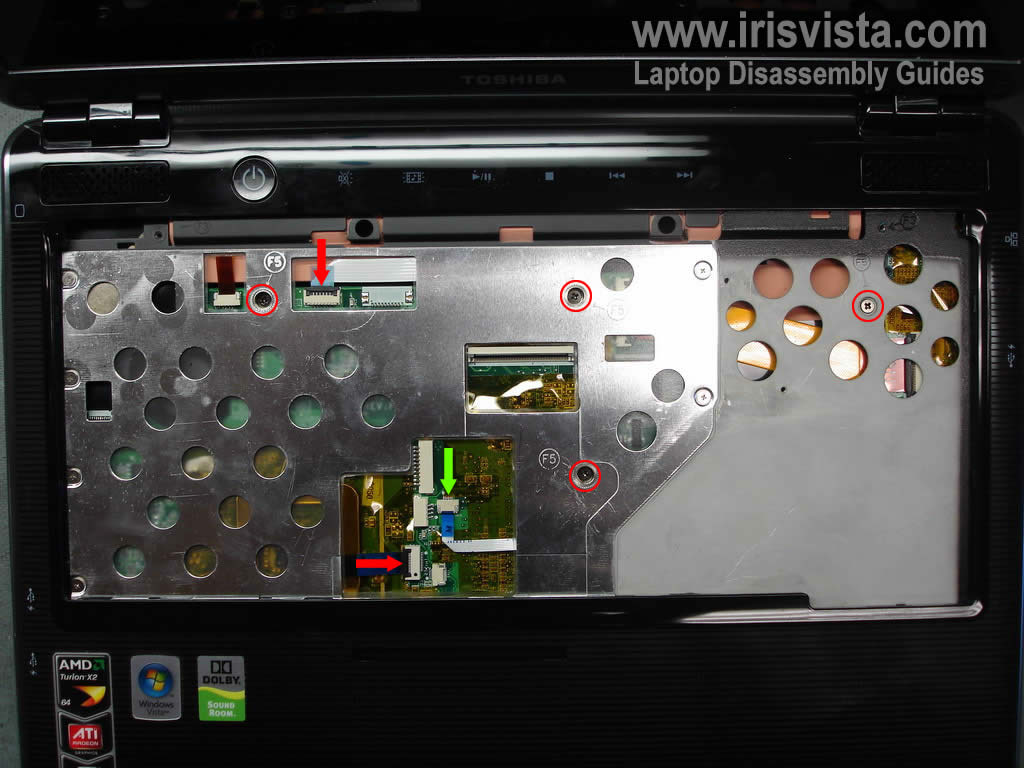
STEP 10
Remove four screws securing the top cover.
Disconnect three cables pointed with two red and one green arrow.
You'll have to unlock connector pointed with red arrows. You can disconnect both cables only after both connectors have been unlocked.
There is no lock on the connector pointed with a green arrow. Slowly and gently pull the cable from the connector.
|
| |
|
 |
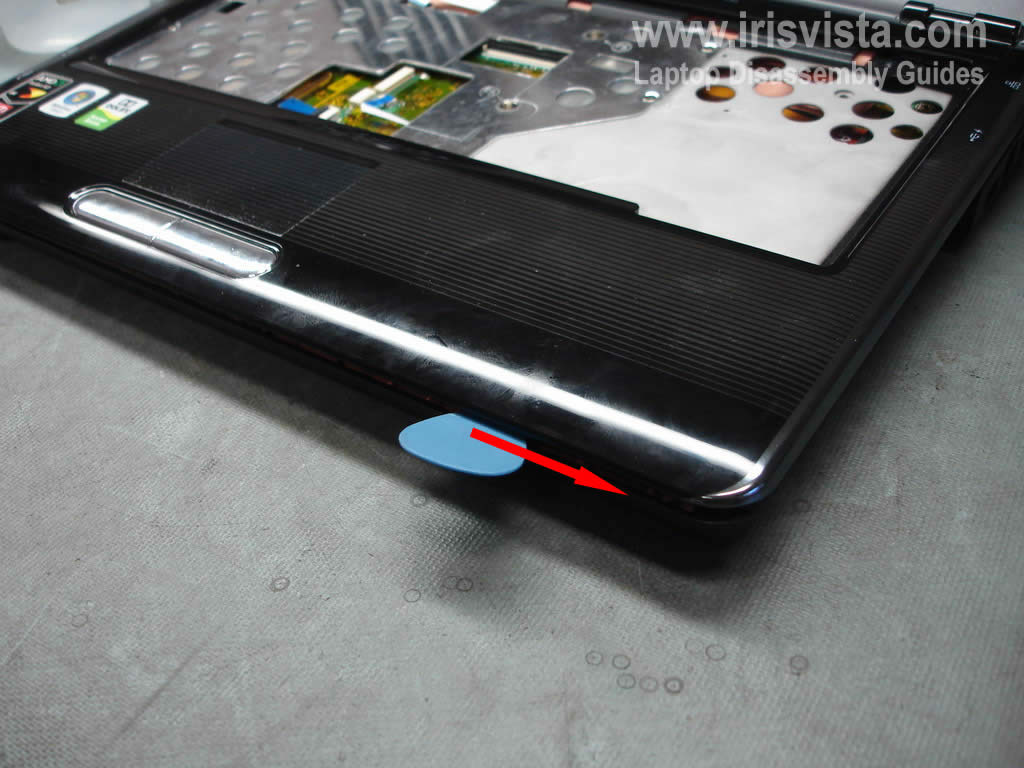
STEP 11
Now you'll have to separate the top cover assembly from the base assembly.
I usuallyuse a guitar pick. I insert it between the covers and slowly move alone the side until all plastic latches are disengaged. |
| |
|
 |
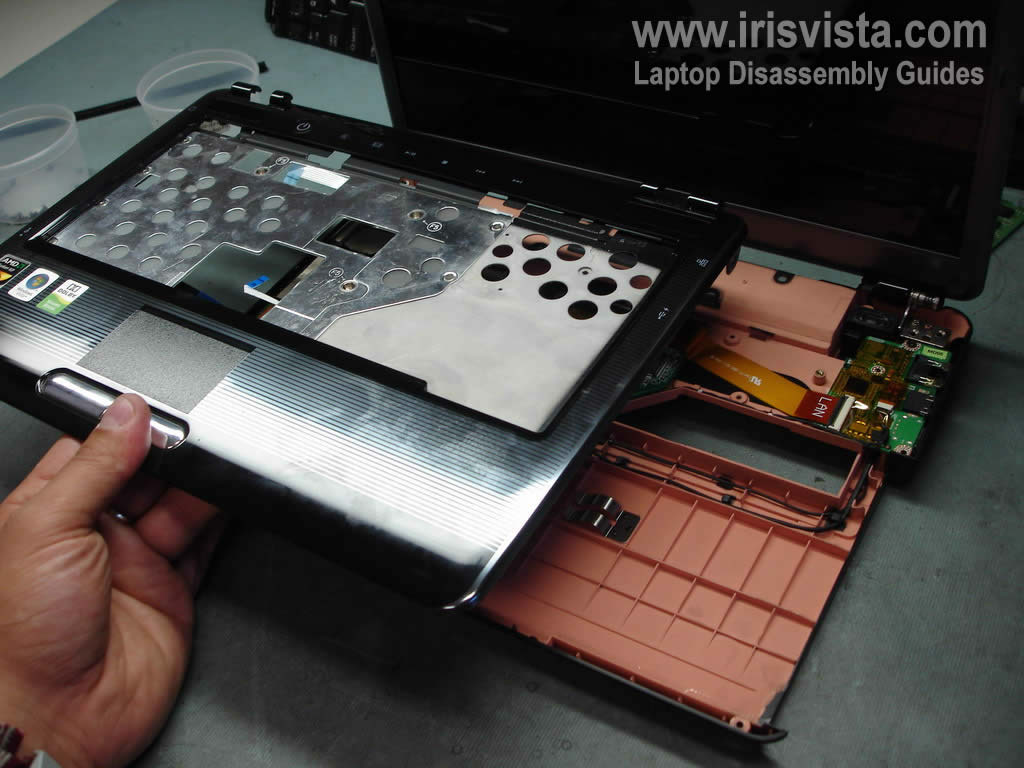
STEP 12
Remove the top cover assembly. |
| |
|
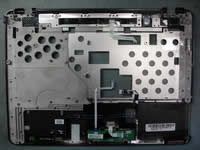 |
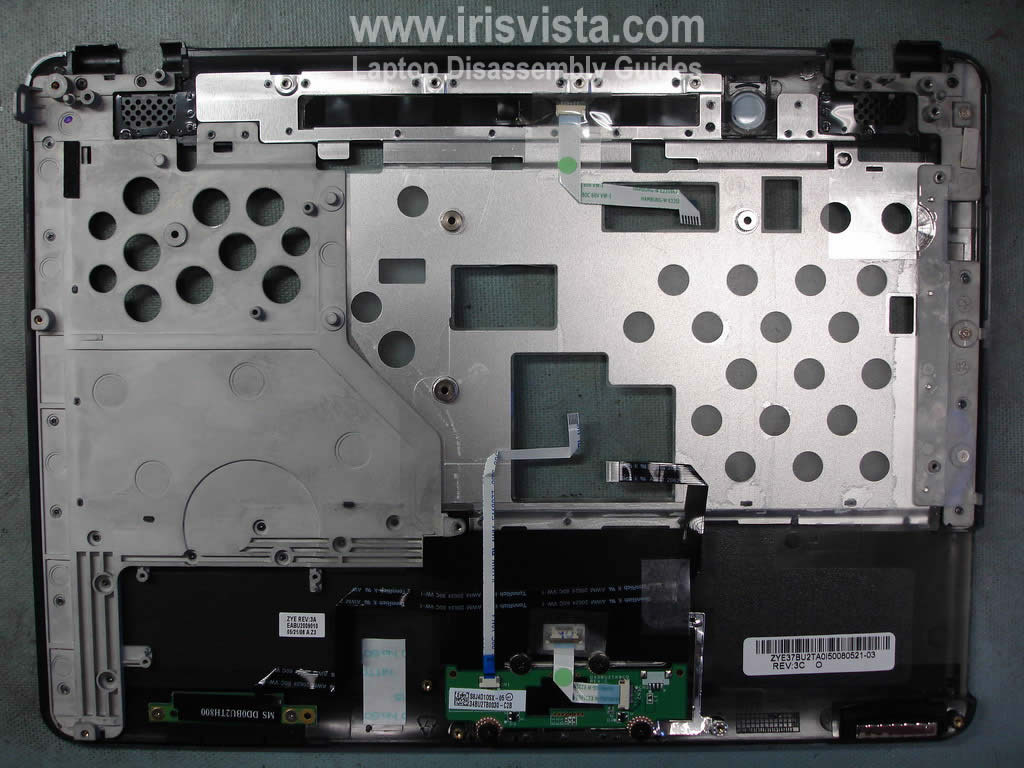
STEP 13
The opposite side of the top cover assembly. |
| |
|
 |
STEP 14
Remove two screws securing the laptop motherboard.
Unplug the video cable.
Unlock the connector securing the LAN ribbon cable. Remove the cable from the connector.
Carefully pull the power button cable (green arrow) from the connector.
|
| |
|
 |
STEP 15
Start removing the motherboard from the right side. |
| |
|
|
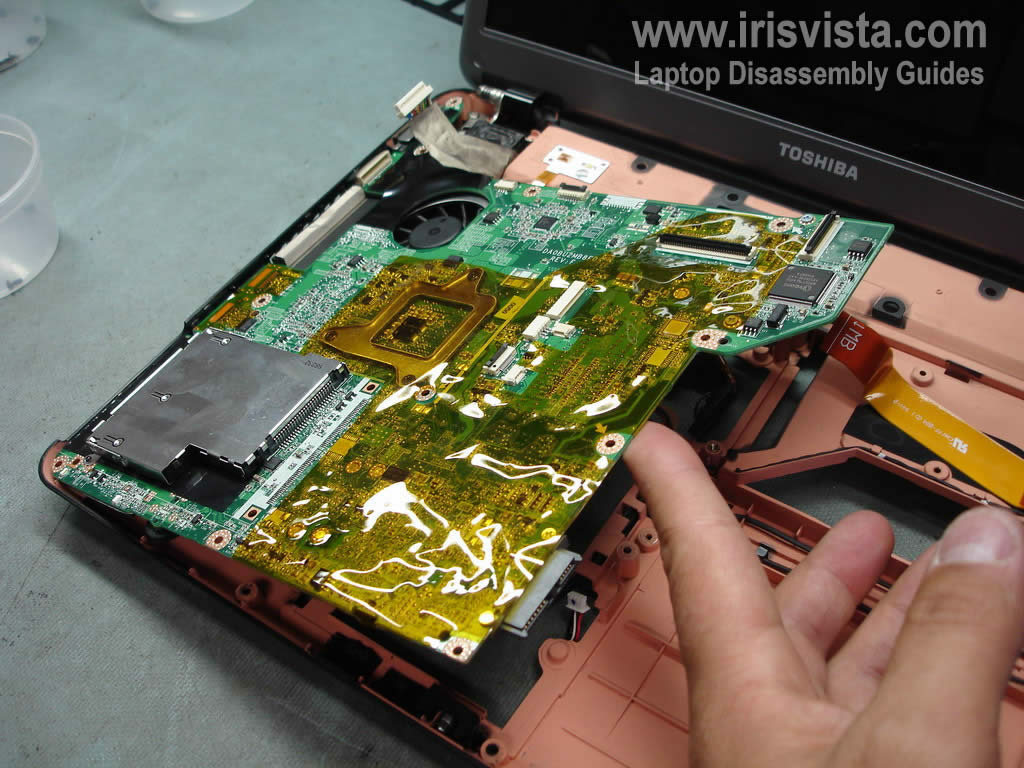
STEP 16
Lift up and remove the motherboard. |
| |
|
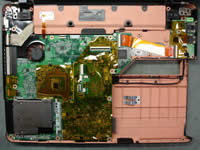
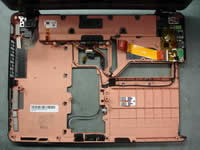 |
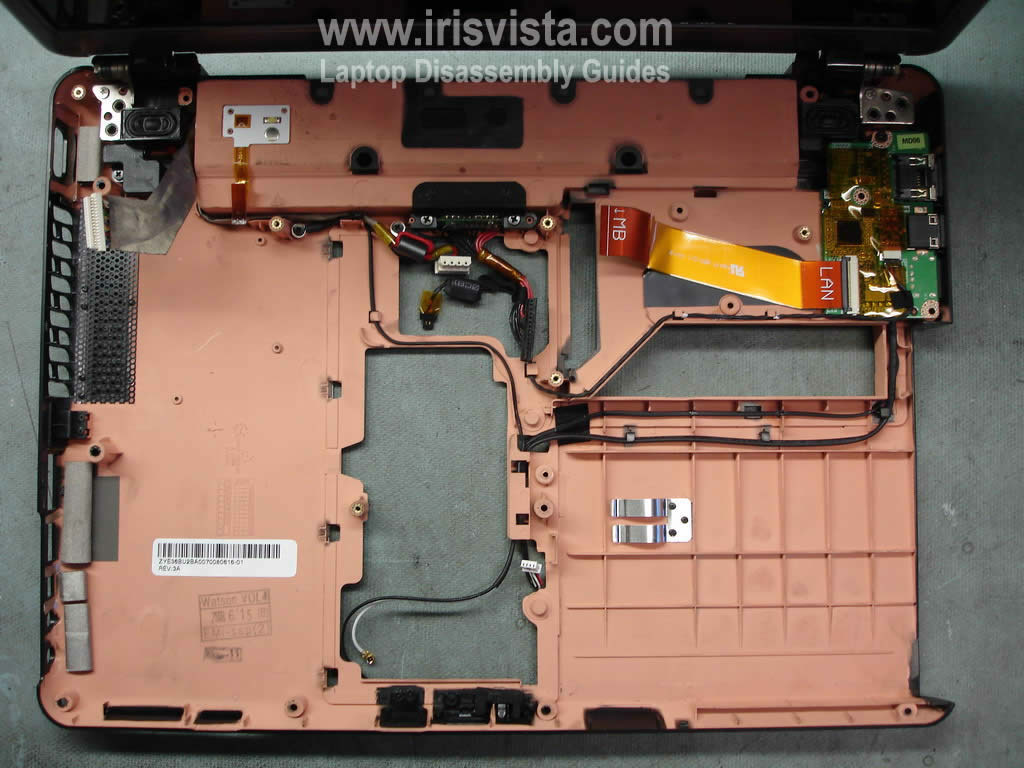
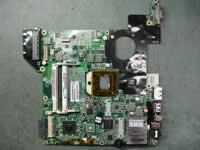
STEP 17
The laptop motherboard has been removed. |
| |
|
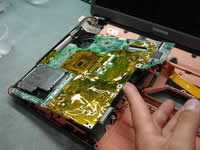
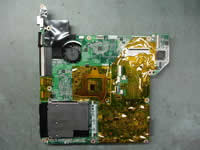 |
STEP 18
There is nothing to be disconnected on this side of the motherboard. Turn it over. |
| |
|
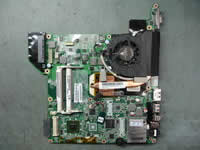 |
STEP 19
Remove three screws securing the cooling module assembly (heatsink and cooling fan).
Unplug the fan cable from the motherboard. |
| |
|
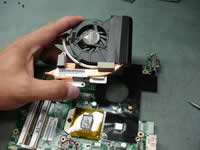 |
STEP 20
Carefully lift up the fan assembly and remove it. |
| |
|
 |
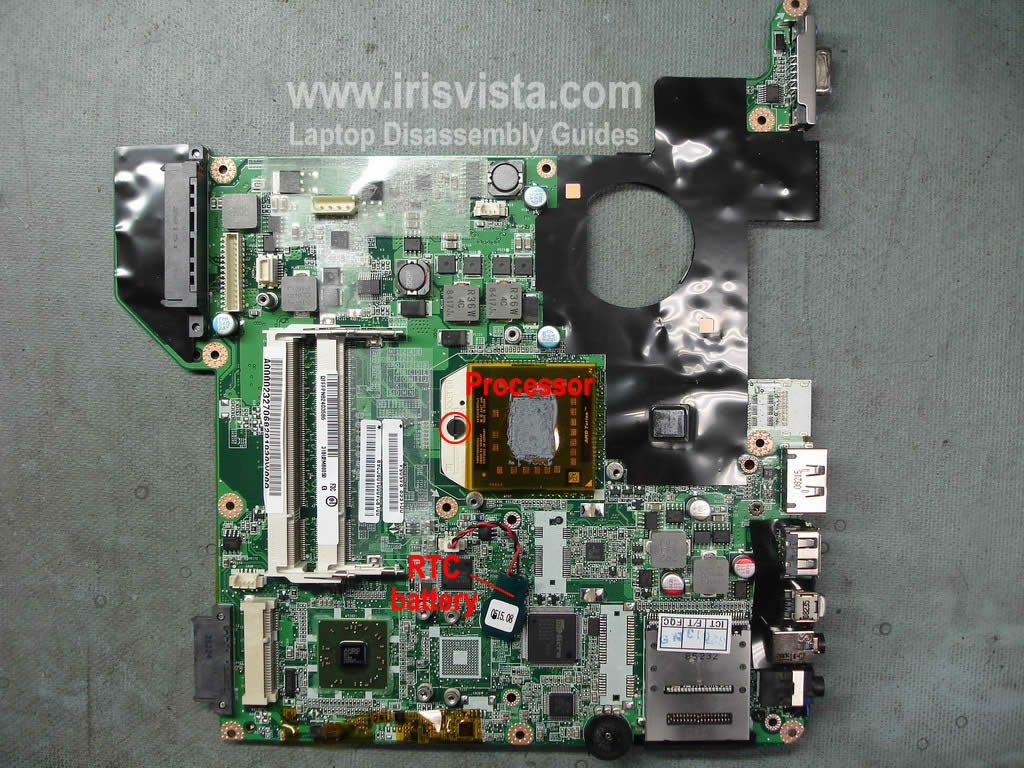
STEP 21
In order to remove the processor you'll have to unlock the socket first.
Turn the securing screw into the "Open" position.
Carefully lift up the processor from the socket.
In the next guide I show how to remove the screen. |
| |
|
|
|