|
Toshiba Qosmio G25 and G20. Replacing cooling fans. |
|
|
 |
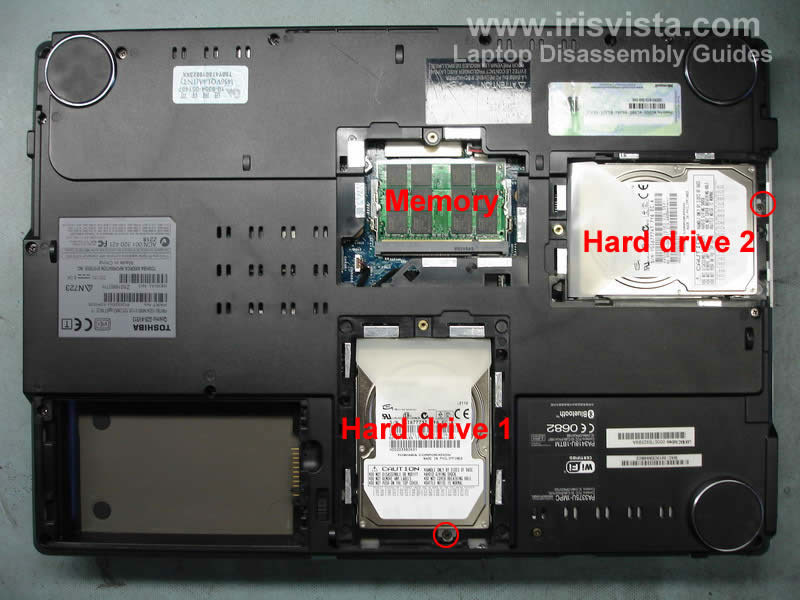
STEP 1
Place the notebook upside down and remove the battery.
Remove both hard drive covers and the memory cover. |
| |
|
 |
STEP 2
Remove both memory modules.
This model has two hard drives. Hard drive #1 in located closer to the battery.
Remove one screw securing the hard drive and slide it out.
Both hard drives are similar so it's a good idea to mark them somehow. If you accidentally install the hard drive #2 instead the hard drive #1 the notebook will not boot into Windows.
|
| |
|
 |
STEP 3
Remove all screws on the bottom of the notebook and disconnect the cable marked with a red arrow. |
| |
|
 |
STEP 4
Unplug two cables located on the left side from the modem card.
Remove two screws securing the modem to the motherboard.
Carefully lift up the modem to disconnect it from the motherboard (the connector is located under the modem).
After that disconnect the cable from the modem (top arrow).Turn |
| |
|
 |
STEP 5
Turn the laptop the right side up.
Using a flathead screwdriver lift up the keyboard bezel. Remove it from the laptop using fingers. There will be a few latches you'll have to unsnap. |
| |
|
 |
STEP 6
Remove three screws securing the keyboard. |
| |
|
 |
STEP 7
Lift up the keyboard and flip it over. Place the keyboard upside down on the palm rest.
Remove two screws securing the keyboard connector cover. Remove the cover.
|
| |
|
 |
STEP 8
Turn over the keyboard again so you can access the connector on the motherboard.
Unlock the connector and pull the cable. Remove the keyboard.
Be very careful with the cable connector on the motherboard. If you break the connector you are in big trouble. |
| |
|
 |
STEP 9
Remove two screws from the video connector cover. To remove the cover slide it down and lift up.
Remove remaining four screws from the top cover. |
| |
|
 |
STEP 10
Unplug the cable with whit connector. |
| |
|
 |
STEP 11
Close the display and turn the notebook upside down.
Open up the notebook case - lift up the bottom part and remove it. Work with your fingers to unlock latches on the base sides. |
| |
|
 |
STEP 12
Now you have an access to the laptop guts and replace both notebook fans.
You also get access to the wireless card, TV tuner and DVD drive. |
| |
|
|
|