|
Toshiba Satellite A210 or A215 disassembly. |
|
|
 |
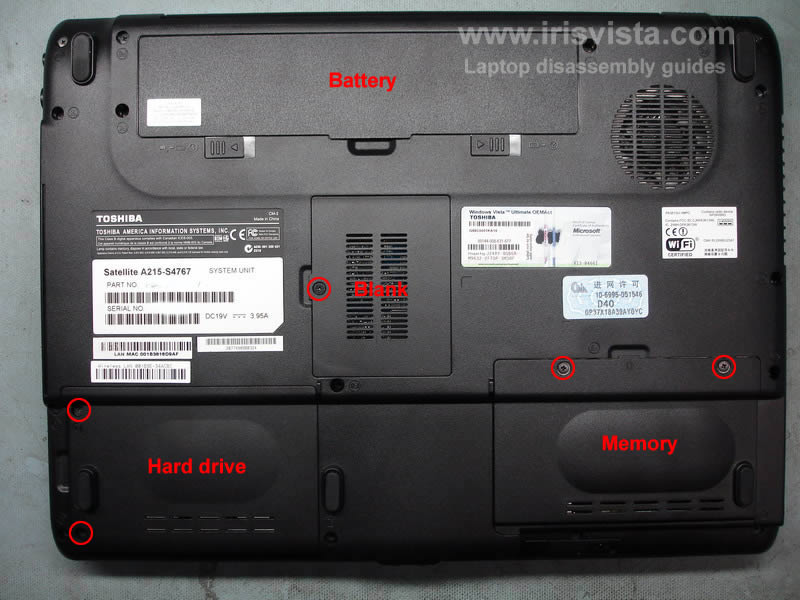
STEP 1
Remove notebook battery, the hard drive cover, the memory cover.
There is one more cover right in the middle. On my notebook there were no parts under this cover. I removed it just to complete the disassembly process.
|
| |
|
 |
STEP 2
Remove the hard drive and both memory moudles.
NOTE: In order get inside the display panel on this notebook it is not necessary to remove the hard drive and memory modules.
|
| |
|
 |
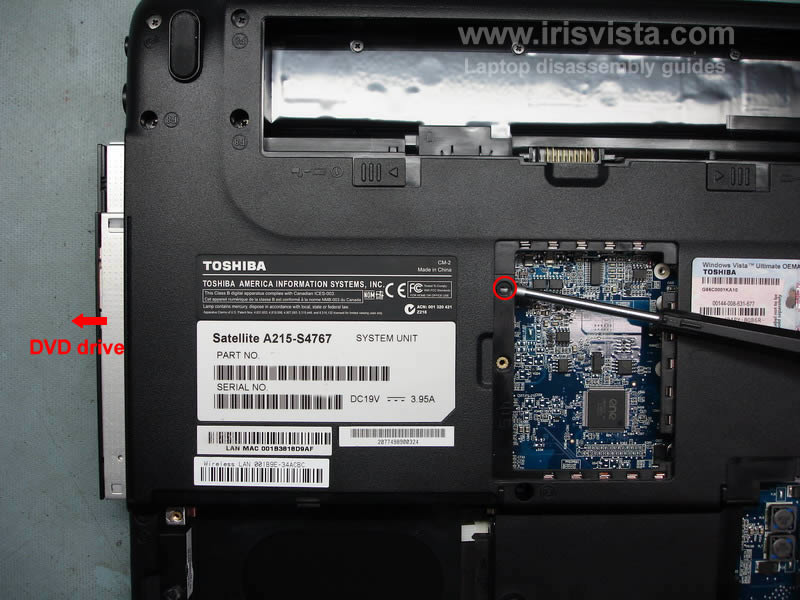
STEP 3
Remove one screw securing the DVD drive and push the DVD drive from the notebook with a screwdriver. |
| |
|
 |
STEP 4
Remove all screws from the bottom of the notebook. |
| |
|
 |
STEP 5
In order to remove the keyboard, you'll have to remove the keyboard bezel first.
Insert a sharp object under the keyboard bezel and carefully lift it up.
Continue removing the keyboard bezel with your fingers.
|
| |
|
 |
STEP 6
Remove two screws securing the keyboard.
Release the plastic latch in the middle.
Lift up the keyboard. |
| |
|
 |
STEP 7
Lift up the keyboard.
Unlock the keyboard connector on the motherboard and remove the keyboard. |
| |
|
 |
STEP 8
Disconnect the wireless card antenna cable from the wireless card.
Remove two screws securing the wireless card and remove the card.
Remove two screws securing the modem card.
Disconnect and remove the modem card. |
| |
|
 |
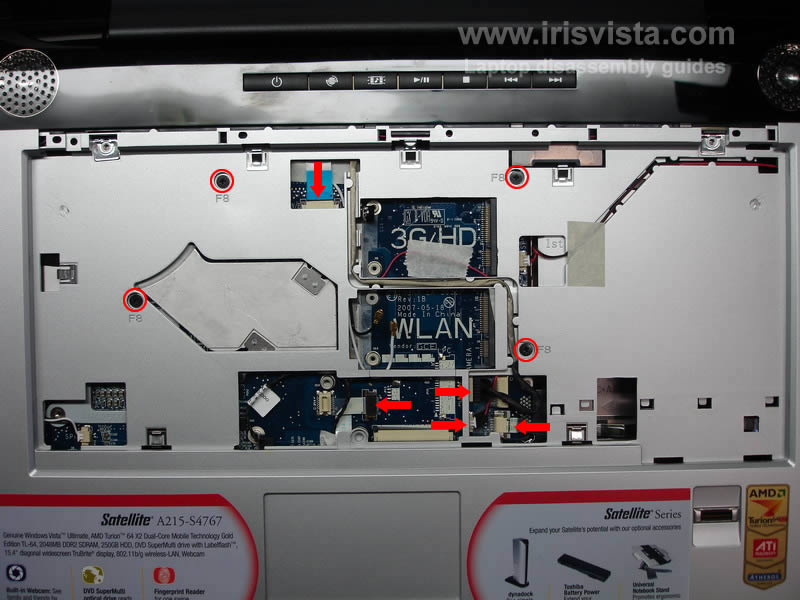
STEP 9
Remove four screws marked with red circles.
Unplug cables pointed with red arrows.
|
| |
|
 |
STEP 10
Start splitting the laptop case.
You can use a guitar pick, insert it between the top cover and the base and move along the side. |
| |
|
 |
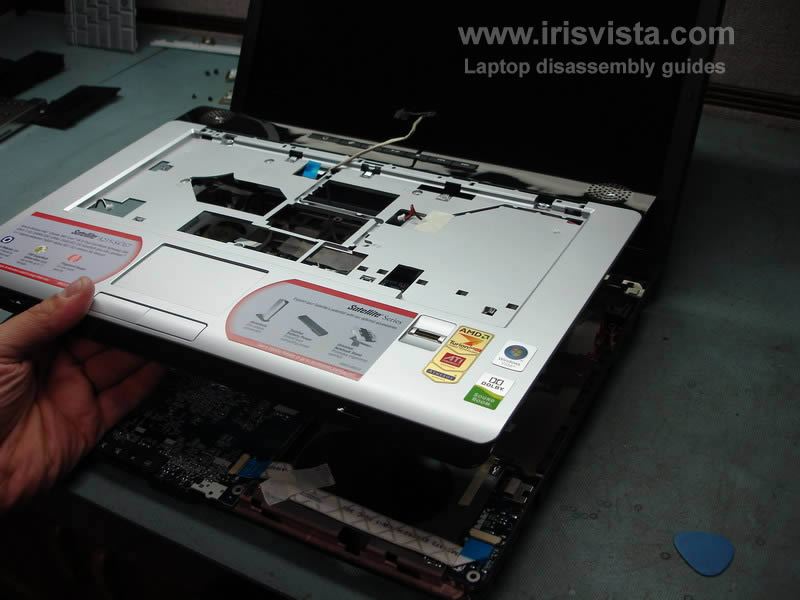
STEP 11
Lift up and remove the top cover assembly. |
| |
|
 |
STEP 12
Laptop with the top cover removed. |
| |
|
 |
STEP 13
Remove four screw covers. |
| |
|
 |
STEP 14
Remove four screws located under the rubber covers. |
| |
|
 |
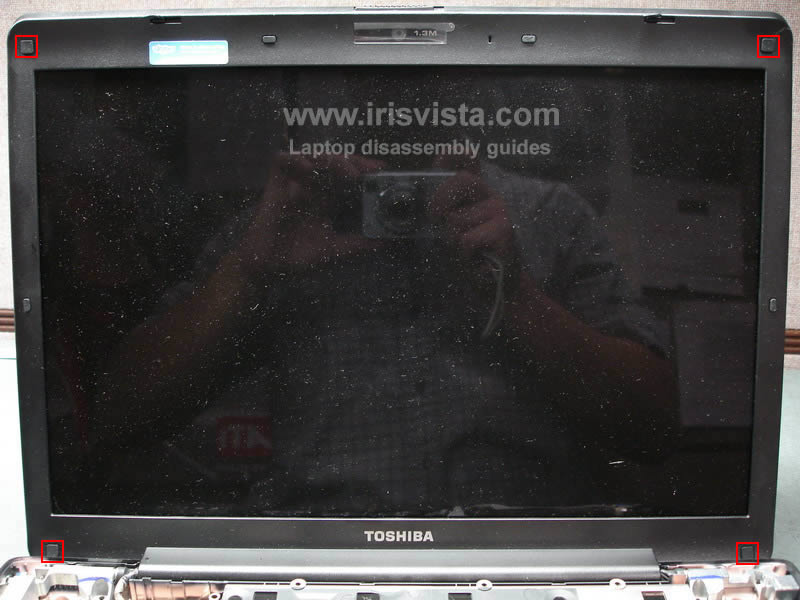
STEP 15
Start removing the LCD screen bezel. |
| |
|
 |
STEP 16
Continue removing the LCD bezel with your fingers. |
| |
|
 |
STEP 17
You can release the bezel latches with the guitar pick. |
| |
|
 |
STEP 18
This was my first time taking this model apart, so we'll go through some extra steps. :)
Even after the bezel was separated from the display panel, I wasn't able to remove the bezel. |
| |
|
 |
STEP 19
Remove three screws securing display hinges. |
| |
|
 |
STEP 20
Lift up the right side of the display panel and release the screen bezel. |
| |
|
 |
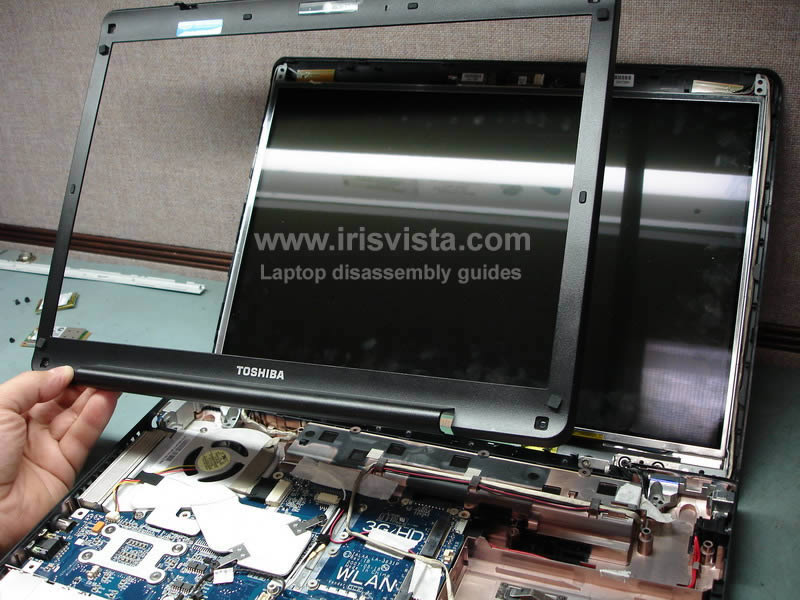
STEP 21
Remove two hex studs from the VGA port on the left side of the notebook. |
| |
|
 |
STEP 22
Lift up the right side of the display panel and remove the bezel. |
| |
|
 |
STEP 23
If you are taking this notebook apart in order to replace the screen inverter, then you don't have to go any further.
The screen bezel is removed and you can replace the inverter.
If you are removing the LCD screen or replacing the video cable, you'll have continue the disassembly.
Unplug connectors and release cables pointed with red arrows. |
| |
|
 |
STEP 24
Remove the display assembly. |
| |
|
 |
STEP 25
Remove three screws on each side of the display. |
| |
|
 |
STEP 26
Carefully lift up the LCD screen and unplug the video cable from the back of the screen. |
| |
|
 |
STEP 27
Remove one screw from the inverter board.
Unplug cable from both sides of the inverter board.
Remove the LCD screen and the inverter board.
|
| |
|
|
|