|
Taking apart Toshiba Satellite L35 and L30.
|
|
|
 |
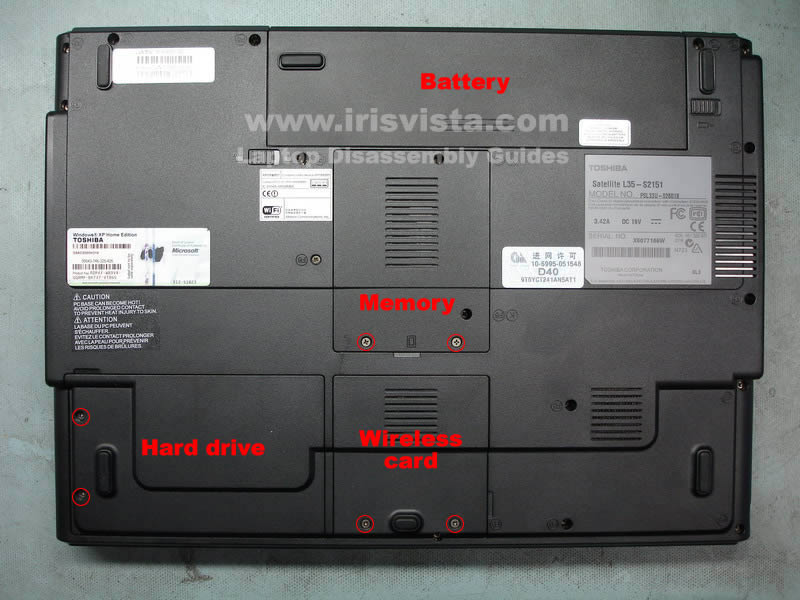
STEP 1
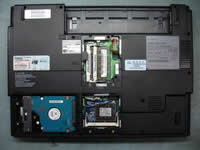
Place the laptop upside down.
Remove battery, hard drive, cover, memory cover and wireless card cover. |
| |
|
 |
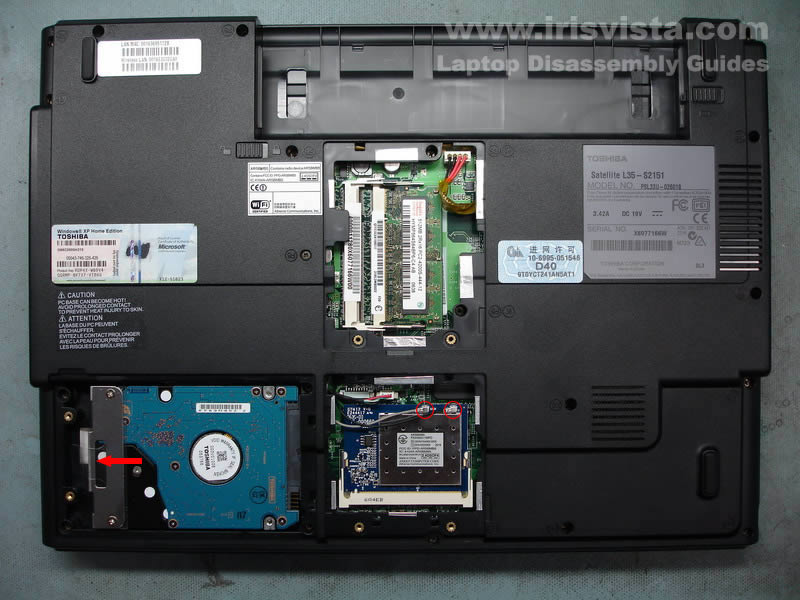
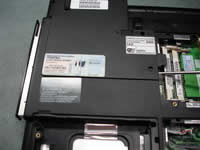
STEP 2
Slide the hard drive to the left to unplug it from the motherboard. Remove the hard drive.
Remove both memory modules.
Unclip wireless antenna cables from the wireless card. White cable- main. Black cable - auxiliary.
Remove the wireless card.
|
| |
|
 |
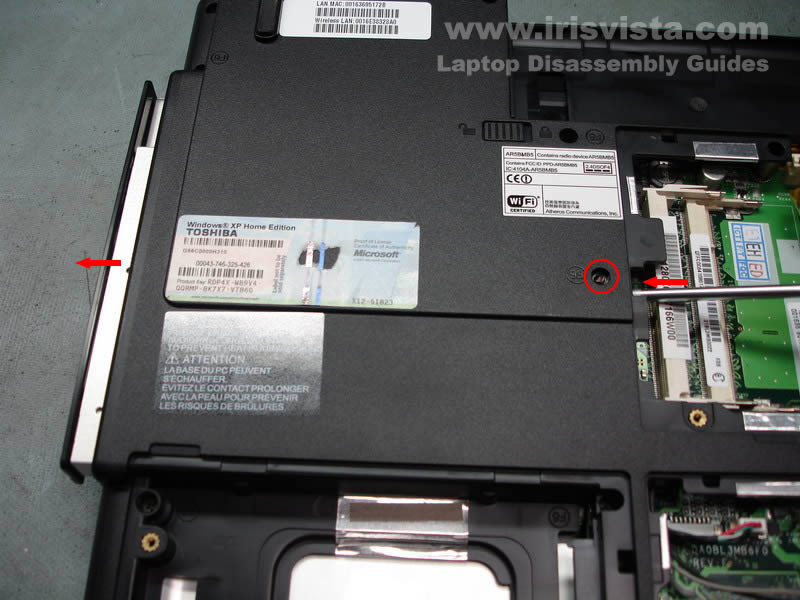
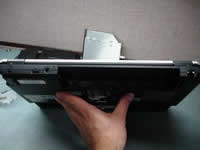
STEP 3
Remove one screw securing the DVD drive.
Push the DVD drive with a screwdriver. Remove the drive. |
| |
|
 |
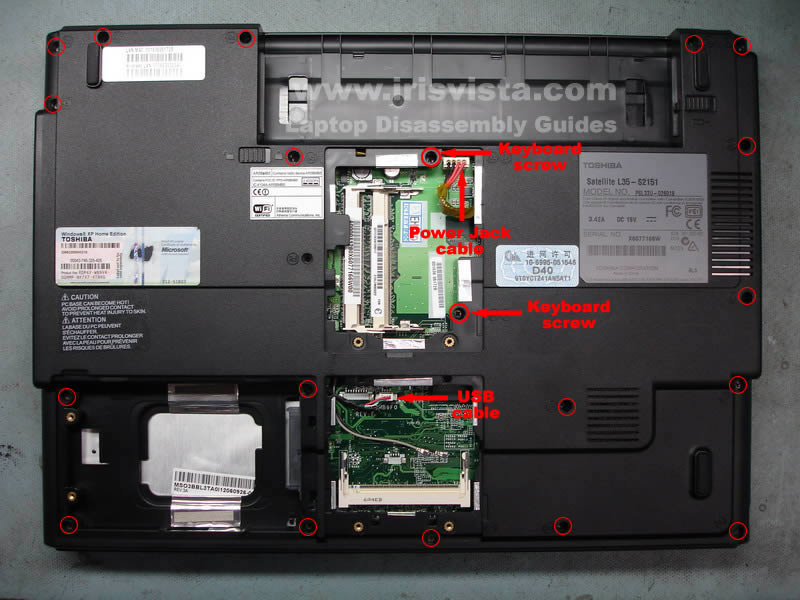
STEP 4
Remove all screws from the bottom of the laptop.
Unplug the power jack cable and the USB cable. |
| |
|
 |
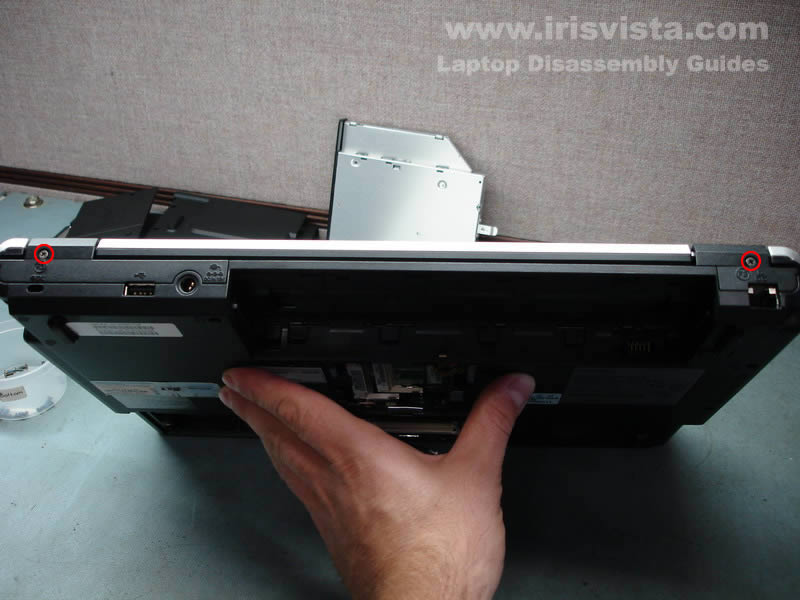
STEP 5
Remove two screws from the hinge cover. |
| |
|
 |
STEP 6
You can remove the keyboard cover with a flat head screwdriver.
Carefully lift up one side of the cover and then continue removing with fingers.
|
| |
|
|
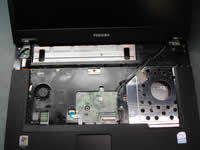
STEP 7
Remove the keyboard cover. |
| |
|
 |
STEP 8
Lift up the keyboard and carefully move it up, so you can access the keyboard cable connector on the motherboard.
|
| |
|
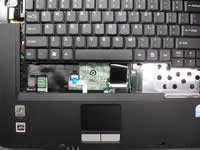 |
STEP 9
Unlock the connector and pull the cable. Remove the keyboard. |
| |
|
 |
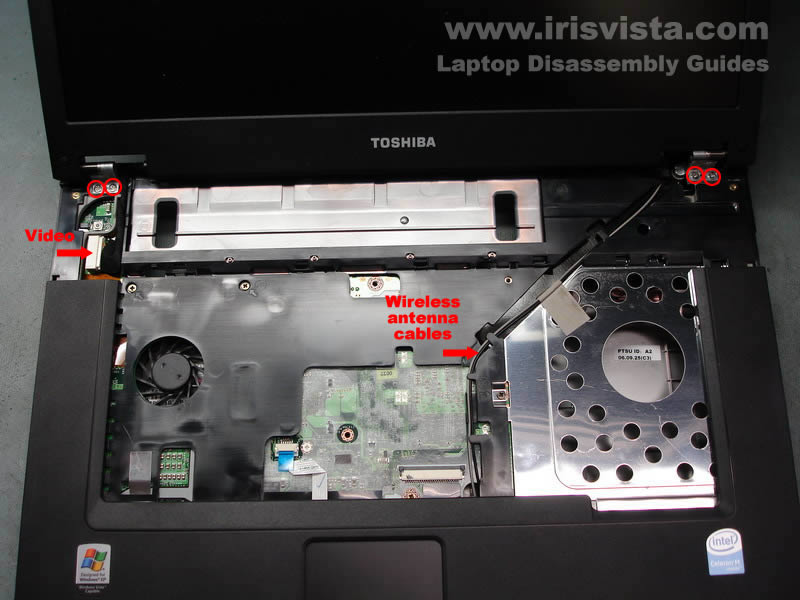
STEP 10
Unplug the video cable from the connector on the motherboard.
Release both wireless card antenna cables.
Remove four screws securing display hinges. |
| |
|
 |
STEP 11
Lift up and remove the display assembly.
Here you'll find isntructions for taking apar the display assembly. |
| |
|
 |
STEP 12
Remove five screws securing the top cover assembly.
Unlock the touch pad cable connector on the motherboard.
Pull the cable from the connector. |
| |
|
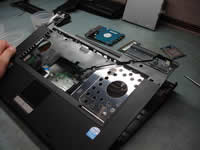 |
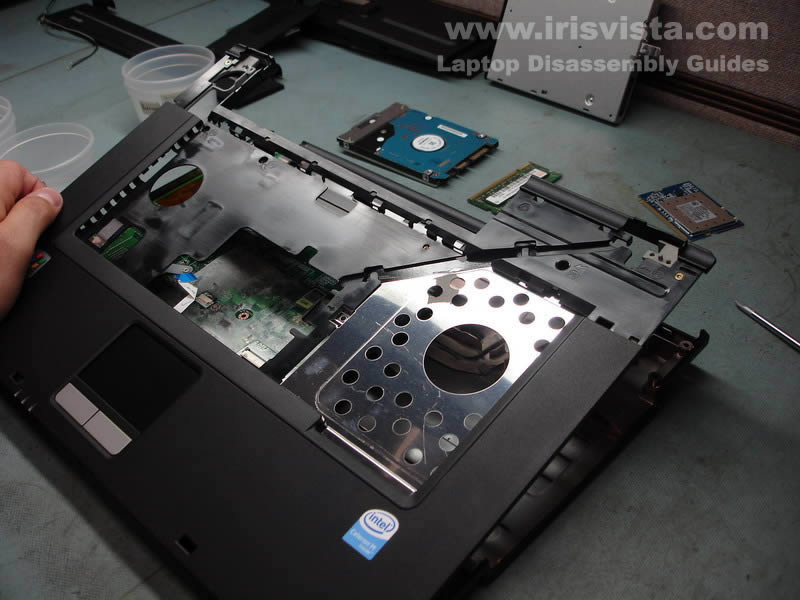
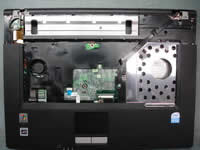
STEP 13
Lift up and remove the top cover assembly. |
| |
|
|
STEP 14
Remove two hex studs from the VGA port on the side of the laptop. |
| |
|
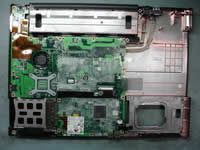 |
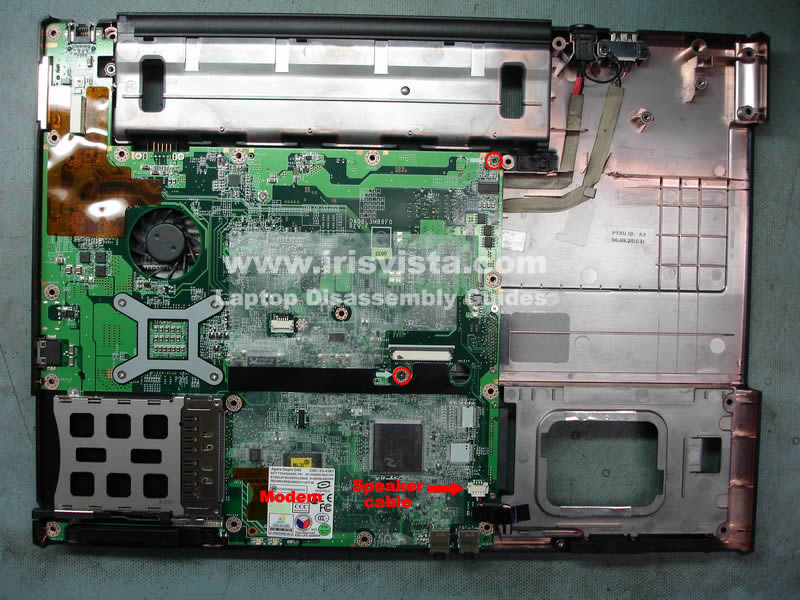
STEP 15
Remove two screws securing the motherboard to the laptop base.
Unplug the speaker cable.
By the way, in this model the dial-up modem is integrated into the motherboard. You cannot remove the modem. |
| |
|
 |
STEP 16
Start removing the motherboard on the right side.
Lift up and remove the motherboard. |
| |
|
 |
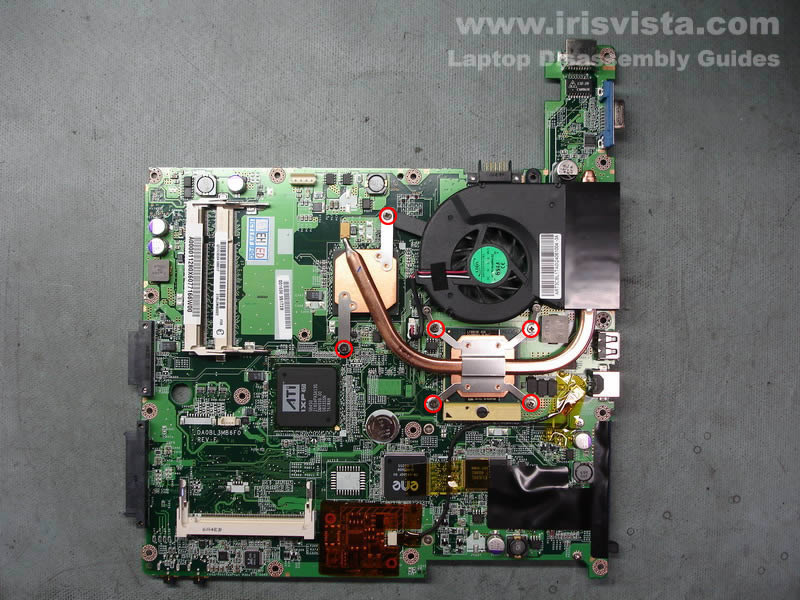
STEP 17
Remove screws securing the cooling module to the motherboard.
Lift up and remove the cooling module. |
| |
|
 |
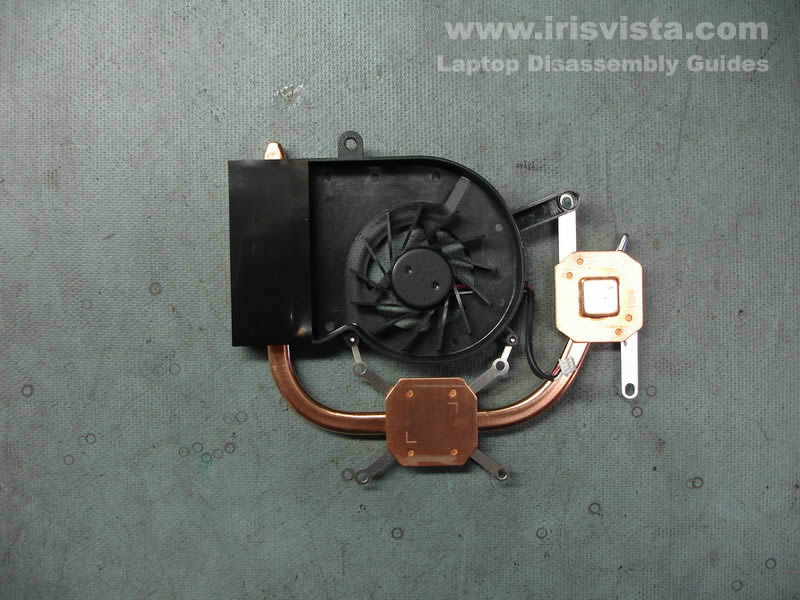
STEP 18
As you see on the picture, the fan is a part of the heat sink.
If the fan is bad, you'll have to replace the whole cooling module. |
| |
|
 |
STEP 19
Unlock the CPU socket. Remove the CPU. |
| |
|
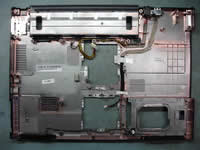 |
STEP 20
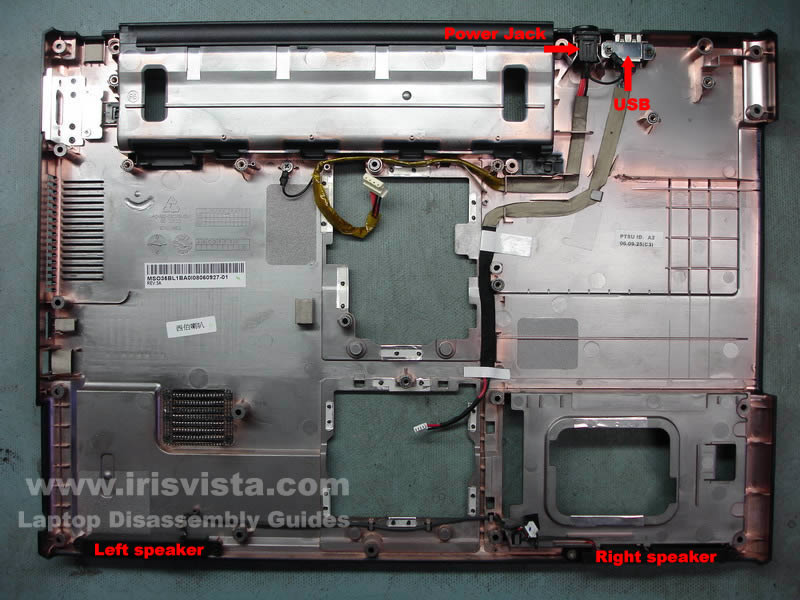
Here's the laptop base without motherboard installed.
|
| |
|
|
|