|
Toshiba Satellite L555, L555D, L550, L550D screen replacement. |
|
|
 |
STEP 1
Before you start disassembly make sure the laptop is turned off and battery removed.
There are six screw seals on the screen bezel.
|
| |
|
 |
STEP 2
Remove screws seals with a sharp object. The bottom part of the screw seal is sticky. Glue the seal somewhere on the screen bezel so it doesn't get lost.
Remove all six screws found under screw seals.
|
| |
|
 |
STEP 3
Start separating the screen bezel from the display back cover using your fingers.
The screen bezel secured by hidden plastic latches. Wiggle the bezel to disengage those latches. |
| |
|
 |
STEP 4
After the upper side of the screen bezel separated from the back cover move to the lower part. |
| |
|
 |
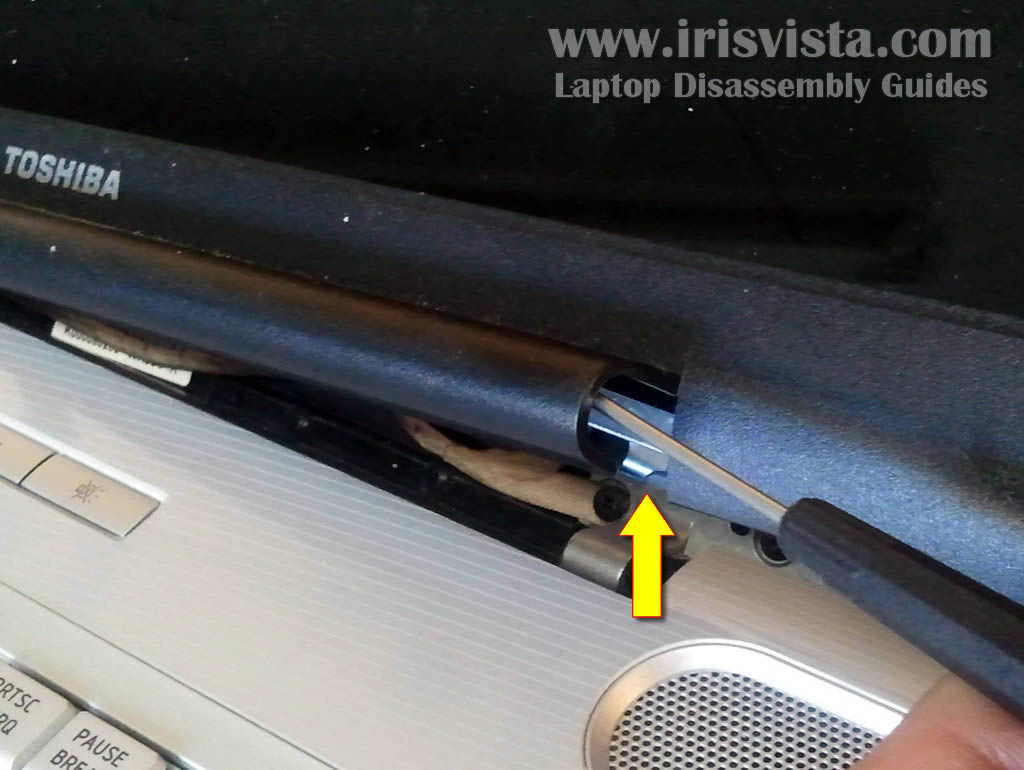
STEP 5
Insert a small flathead screwdriver under the hinge cover and lift it up. |
| |
|
 |
STEP 6
The screen bezel removed. |
| |
|
 |
STEP 7
The web camera module is not a part of the LCD screen.
The web camera mounted above the screen. Disconnect web camera cable on the right side of the module. |
| |
|
 |
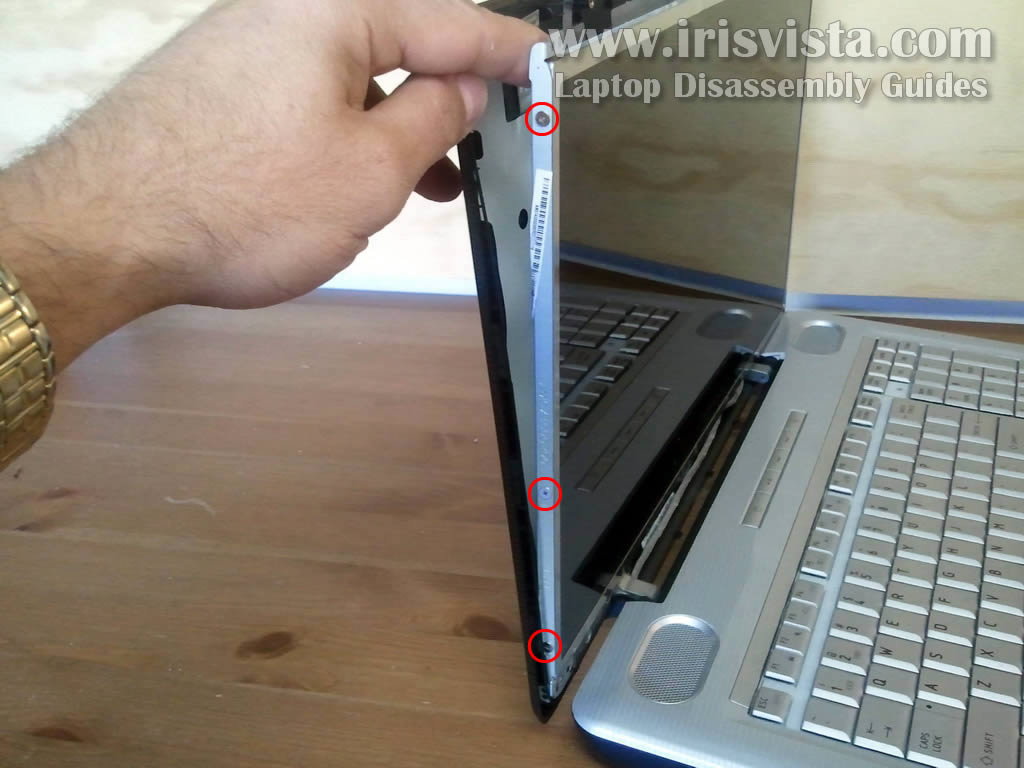
STEP 8
Carefully separate the display cover from the LCD screen just enough to access screws on the side.
Remove three screws on the right side of the screen. |
| |
|
 |
STEP 9
Remove three more screws on the left side. |
| |
|
 |
STEP 10
Now you can separate the screen from the cover and place it face down on the keyboard. |
| |
|
 |
STEP 11
On the back side of the LCD screen you can access the video cable which is connected to the screen.
Carefully separate the web camera cable (part of the video harness) from the screen.
|
| |
|
 |
STEP 12
Remove clear tape securing the video cable connector.
Unplug video cable from the LCD screen.
|
| |
|
 |
STEP 13
Now you are ready to remove and replace the broken LCD screen.
In one of the previous guides I explained how to disassemble the laptop base on above mentioned Toshiba laptops.
|
| |
|
|
|