|
Toshiba Satellite M35X, M30X disassembly. |
|
|
 |
STEP 1
Turn the unit upside down.
Loosen the screw securing the memory cover and remove the cover.
Remove the screw securing the hard drive.
|
| |
|
 |
STEP 2
Pull the hard drive firmly to disengage from the connector.
Remove the battery.
Remove the memory modules.
Remove the "dummy" PC card.
Remove all screws on the bottom.
Do not forget to remove 3 screw under the battery. |
| |
|
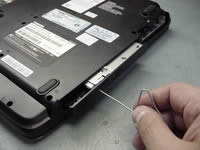 |
STEP 3
Open the DVD drive with a paper clip. |
| |
|
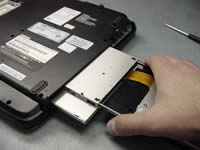 |
STEP 4
Carefully remove it from the computer. |
| |
|
 |
STEP 5
Turn the computer right side up.
Insert a thin object under the securing strip and lift it up.
Be careful, it may be very tight.
|
| |
|
 |
STEP 6
Remove the securing strip. |
| |
|
 |
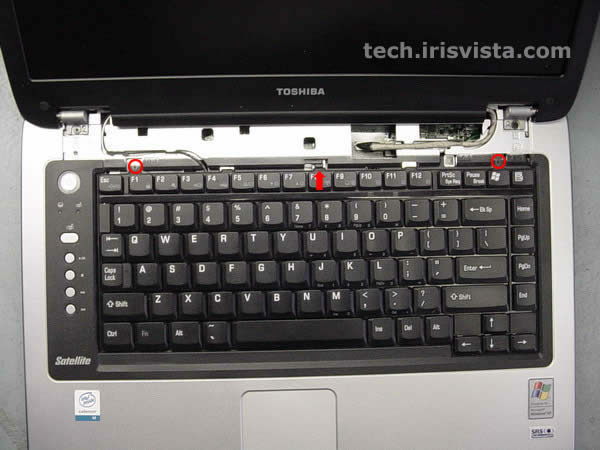
STEP 7
Remove two screws securing the keyboard.
Press on the lock in the center to release the keyboard. |
| |
|
 |
STEP 8
Turn the keyboard upside down.
Loosen one screw securing the modem cover. Remove the cover.
Loosen one screw securing the Fi-Fi card cover.Remove the cover.
Remove one more screw.
|
| |
|
|
STEP 9
Disconnect the wireless card cables. Remove the Wi-Fi card.
Disconnect the keyboard cable from the system board and remove the keyboard.
|
| |
|
 |
STEP 10
Remove two screws securing the hinges on the back of the laptop. |
| |
|
 |
STEP 11
Disconnect the LCD data cable from the system board.
Pull the wireless cables out of the rout.
Remove two screws securing the hinges.
Disconnect the flat LED cable from the system board.
Disconnect
the flat touchpad cable from the system board.
|
| |
|
 |
STEP 12
Lift the display assembly off the base. |
| |
|
 |
STEP 13
Use a guitar pick to separate the top cover from the base assembly.
Remove the top cover assembly. |
| |
|
 |
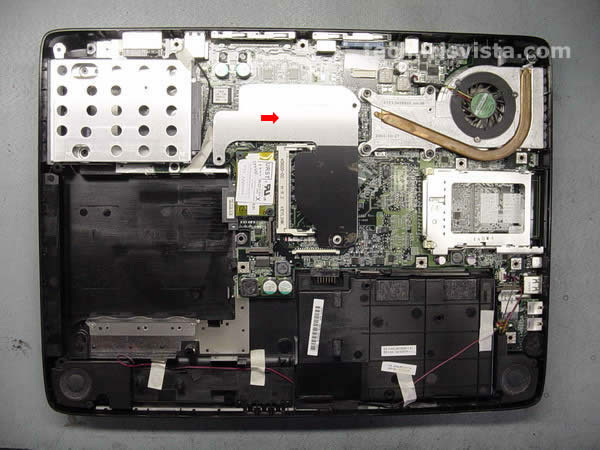
STEP 14
Remove a metal plate covering the video control chip. |
| |
|
 |
STEP 15
Remove two screws securing the modem card. Carefully lift the modem card of the system board.
Disconnect the modem cable.
Remove four screws securing the hard drive housing.
Remove the housing.
|
| |
|
 |
STEP 16
Disconnect the fan cable from the system board.
Remove four screws with springs securing the heatsink assembly.
Carefully lift the heatsink assembly off the CPU. |
| |
|
 |
STEP 17
Remove two hex srews on the back of the base.
|
| |
|
|
STEP 18
Disconnect the flat sound board cable from the system board.
Disconnect the speaker cables from the system board.
Carefully remove the system board from the base.
|
| |
|
 |
STEP 19
Turn the CPU locking screw to unlock position.
Carefully lift the CPU off the system board.
|
| |
|
 |
STEP 20
DONE!
For laptop screen removal instrucitons please visit this guide. |
|
|