 |
Toshiba Satellite P105, P100 disassembly. |
|
|
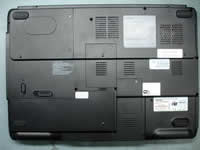 |
STEP 1
Unplug the AC adapter and turn the laptop upside down. Unlock and remove the battery.
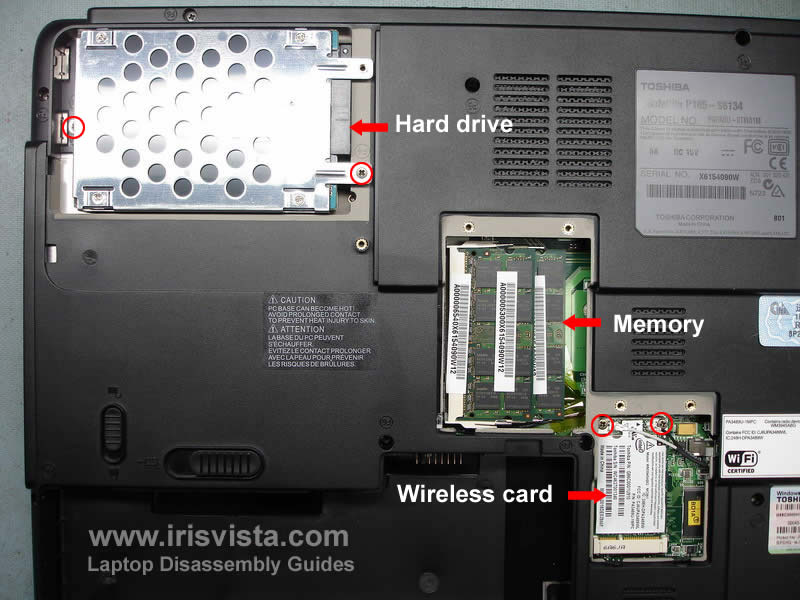
Remove covers for hard drive, memory and wireless card. Each cover is secured in place by two screws. |
| |
|
 |
STEP 2
Remove two screws securing the hard drive to the notebook base. Slide the hard drive to the left to disconnect it from the connector on the motherboard. Remove the hard drive.
Remove both memory modules.
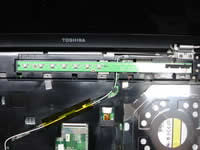
Remove two screws securing the wireless card. After the card pops up pull it from the socket on the motherboard and unplug the antenna cables.
The white cable connects to the main connector on the card and the black on to the auxiliary connector.
|
| |
|
 |
STEP 3
Remove all screws marked with a red circle. |
| |
|
 |
STEP 4
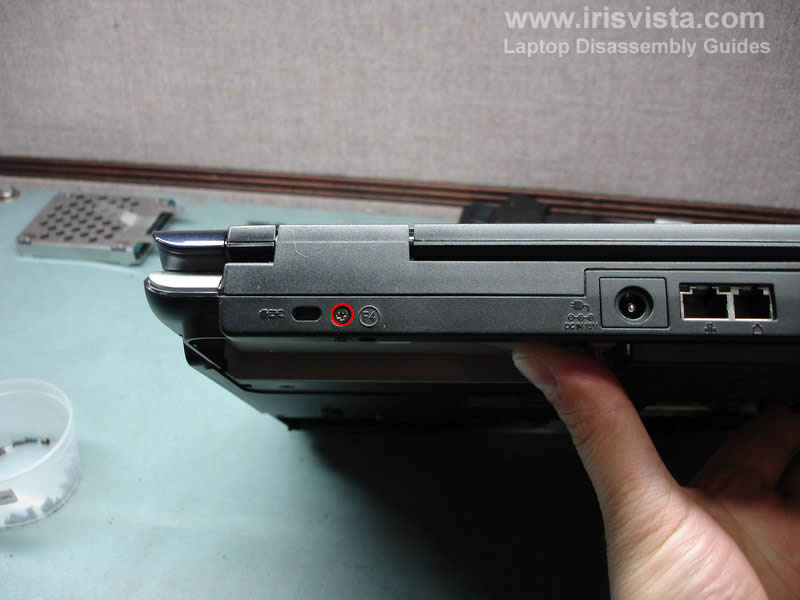
Remove one screw on the back of the right hinge. |
| |
|
 |
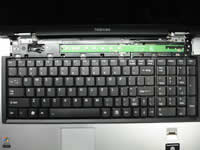
STEP 5
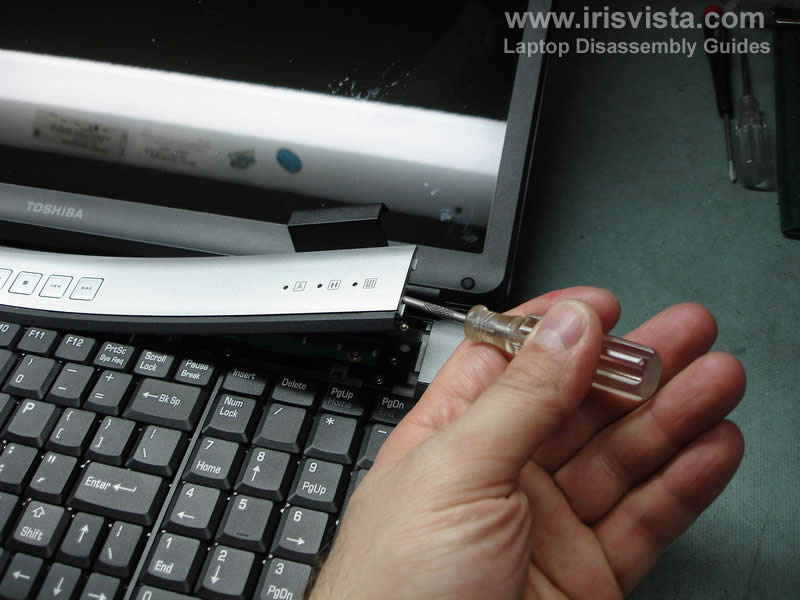
To get an access to the keyboard screws you'll have to remove the keyboard bezel first. Lift up one side of the keyboard bezel with a flathead screwdriver and then continue removing it with your fingers. Unsnap plastic latches securing the bezel and remove it. |
| |
|
 |
STEP 6
Remove six small silver screws located above the keyboard. |
| |
|
 |
STEP 7
Lift up the keyboard and carefully turn it over. Place the keyboard upside down on the palm rest. Now you can access the keyboard cable connector.
Remove the yellow tape securing the cable, unlock the connector and carefully pull cable.
Remove the keyboard.
|
| |
|
 |
STEP 8
Remove three silver screws securing the switch board. |
| |
|
 |
STEP 9
Lift up the switch board and turn it over. Be careful, the board is still attached to the motherboard.
Unlock the connector on the motherboard and remove the switch board. |
| |
|
 |
STEP 10
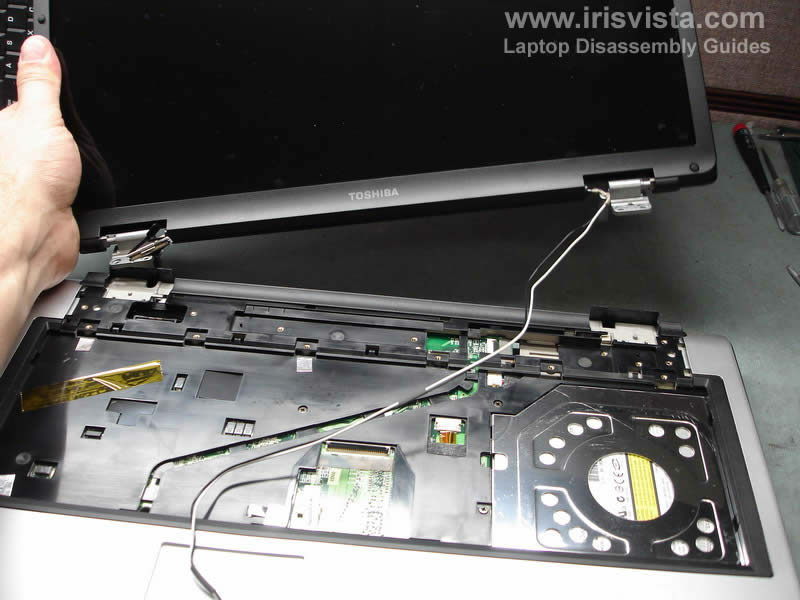
Remove four screws securing the display hinges (two screws from each hinge).
To disconnect the video cable just pull it up.
Remove the yellow tape securing the wireless card antenna cables to the top cover and carefully pull the cable through the hole in the top cover. |
| |
|
 |
STEP 11
After all screws are removed and the wireless cables released you can remove the display assembly. |
| |
|
 |
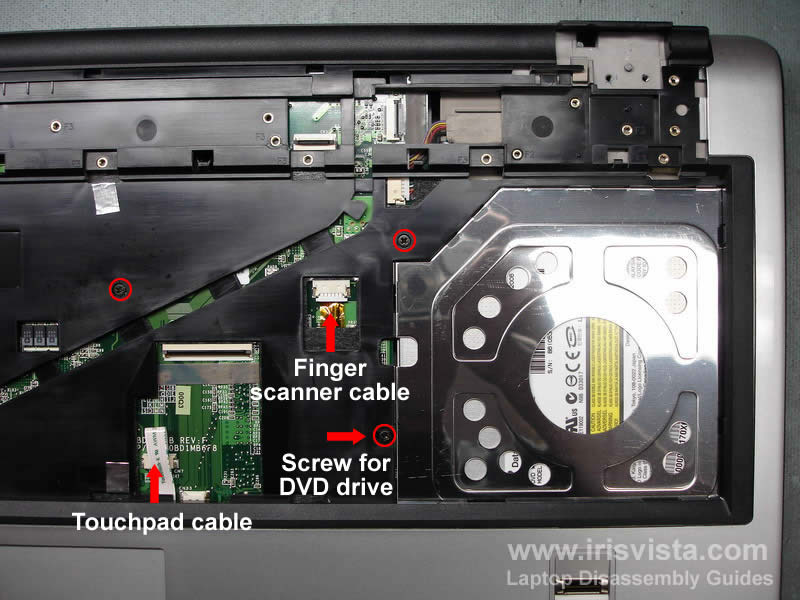
STEP 12
Unplug the touch pad cable.
Unplug the finger scanner device cable.
Remove three screws marked with a red circle.
NOTE: if you want to remove the DVD drive, you'll have to remove only one screw. |
| |
|
 |
STEP 13
Carefully push the DVD drive with a screwdriver. Remove the DVD drive. |
| |
|
 |
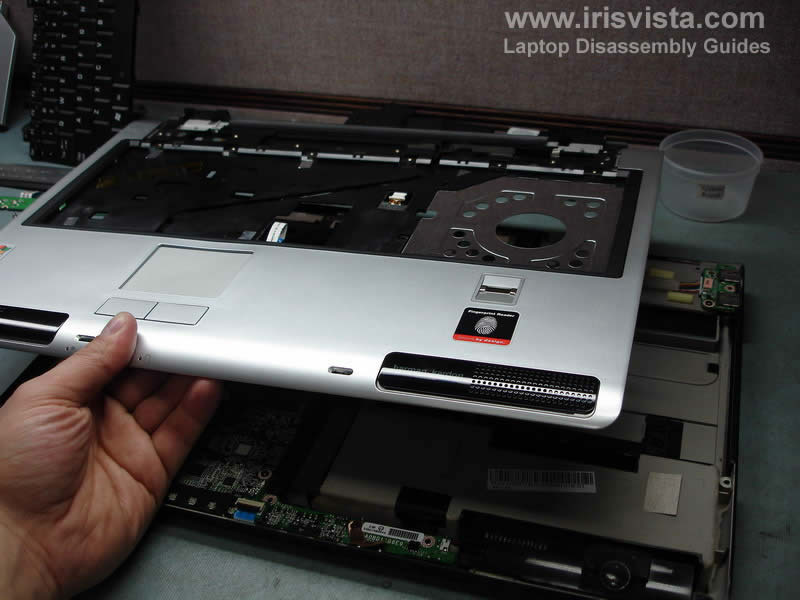
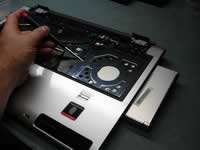
STEP 14
Remove the top cover assembly.Re |
| |
|
 |
STEP 15
Before you can lift up and remove the motherboard you'll have to disconnect the speakers cable, disconnect the audio board cable, disconnect the USB board cable (top arrow) and remove three screws. |
| |
|
 |
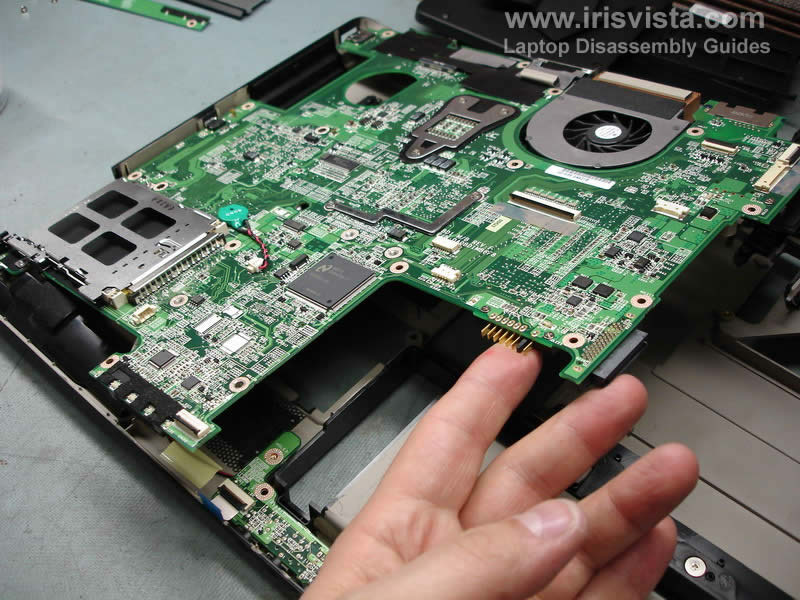
STEP 16
Lift up the right side of the motherboard and remove it from the notebook base. |
| |
|
 |
STEP 17
Unplug and remove the DC-IN jack.
Unplug the modem card from the motherboard (top arrow).
Remove two screws securing the modem card to the motherboard. Carefully lift up the modem to disconnect it from the motherboard.
Remove the modem card with the cable. |
| |
|
 |
STEP 18
Disconnect the cooling fan cable from the motherboard.
Remove five screws securing the CPU heat sink and cooling fan. |
| |
|
 |
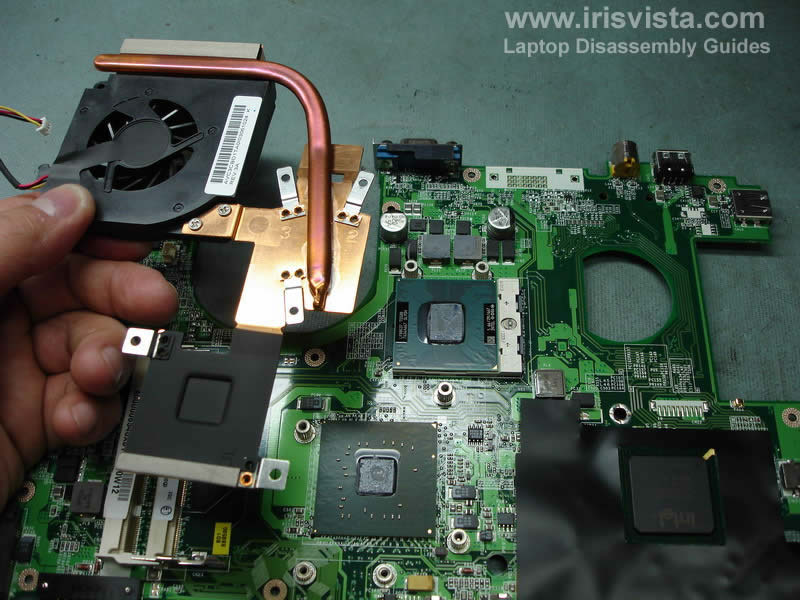
STEP 19
Lift up and remove the heat sink.
Remove old thermal grease from the chips.
NOTE: do not forger to apply new thermal grease when you assemble the laptop. |
| |
|
 |
STEP 20
Unlock the CPU socket and lift up the CPU. |
| |
|
 |
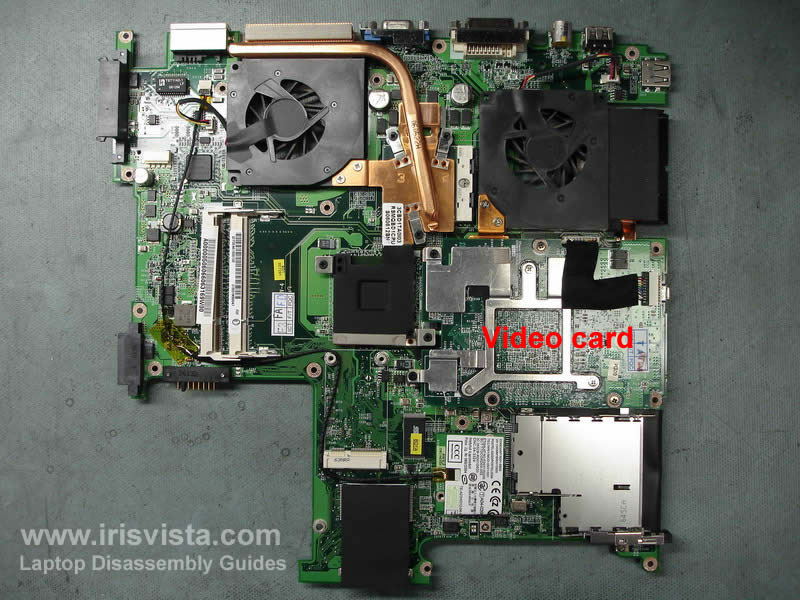
STEP 21
This motherboard I removed from a Toshiba Satellite P100 notebook. This model has a discrete video card (Satellite P105 has integrated video).
Also, check out screen removal guide. |
| |
|
|
|