 |
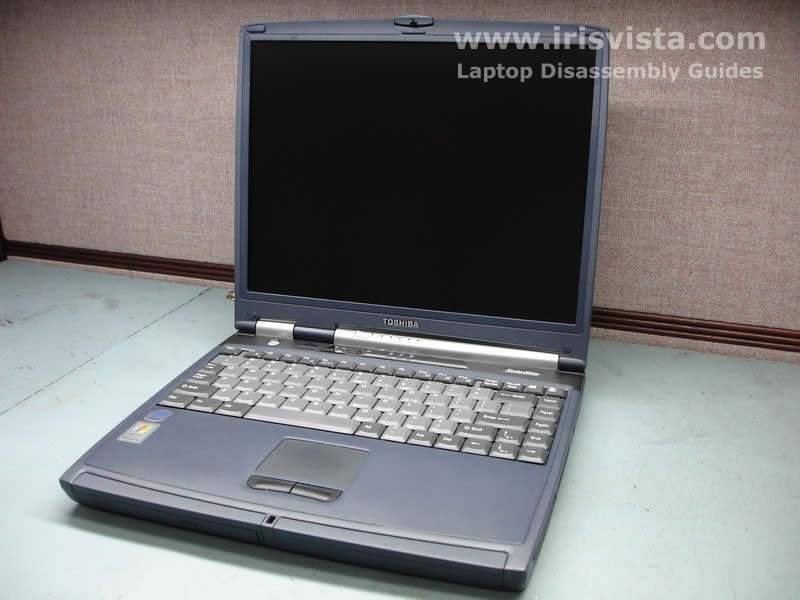
Toshiba Satellite M115, M110 disassembly.
|
|
|
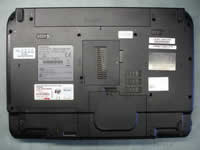 |
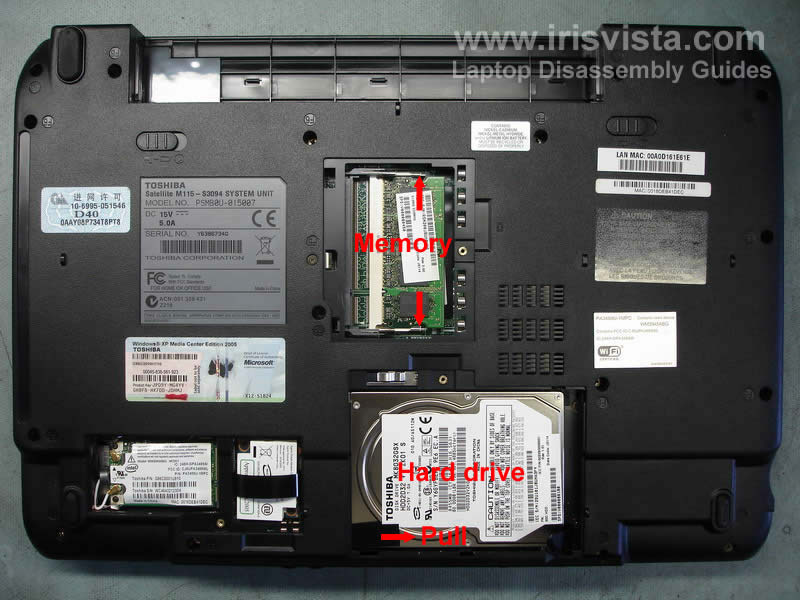
STEP 1
Open the battery locks and remove the battery.
Remove the memory module cover, the hard drive cover, the modem and wireless card covers.
Each cover is secured with one screw.
|
| |
|
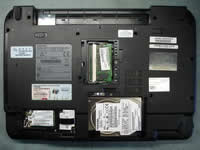 |
STEP 2
To remove the memory module, carefully spread latches on both sides of the memory slot.
After the memory module pops up at 30 degrees angle carefully pull it from the socket by the edges.
In order to remove the hard drive, pull the black tape shown on the picture to the right. The hard drive will disconnect from the motherboard.
After the hard drive is disconnected, remove it. |
| |
|
 |
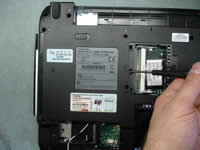
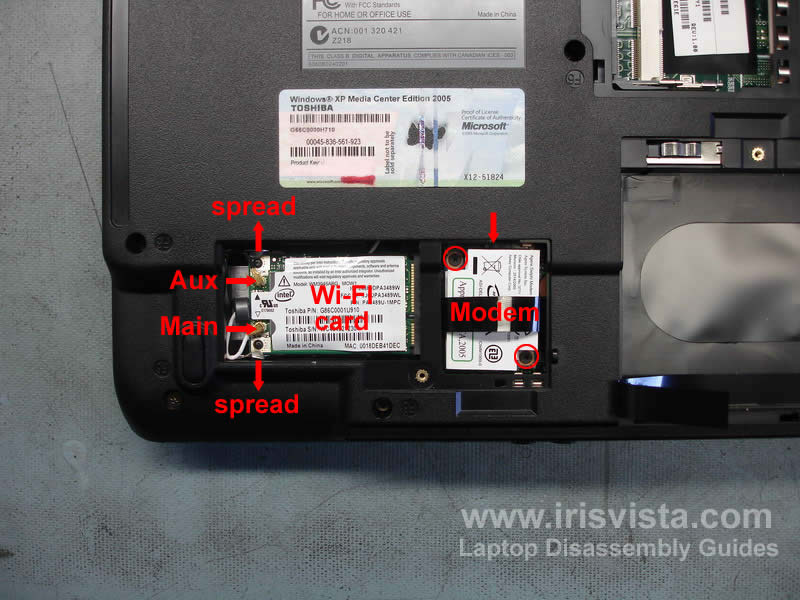
STEP 3
Removing the wireless card. Unplug the wireless antennas from the card. Spread latches on both sides of the wireless card and carefully pull it from the slot.
Removing the modem. Remove two screws securing the modem card to the motherboard. Pull the modem card up using the black tape around it. After the modem is disconnected from the motherboard, unplug the cable pointed with a red arrow.
|
| |
|
 |
STEP 4
Remove one screw and push the DVD drive from the laptop using a screwdriver.
Pull the DVD drive from the laptop. |
| |
|
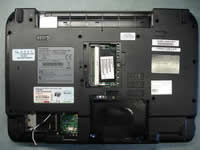 |
STEP 5
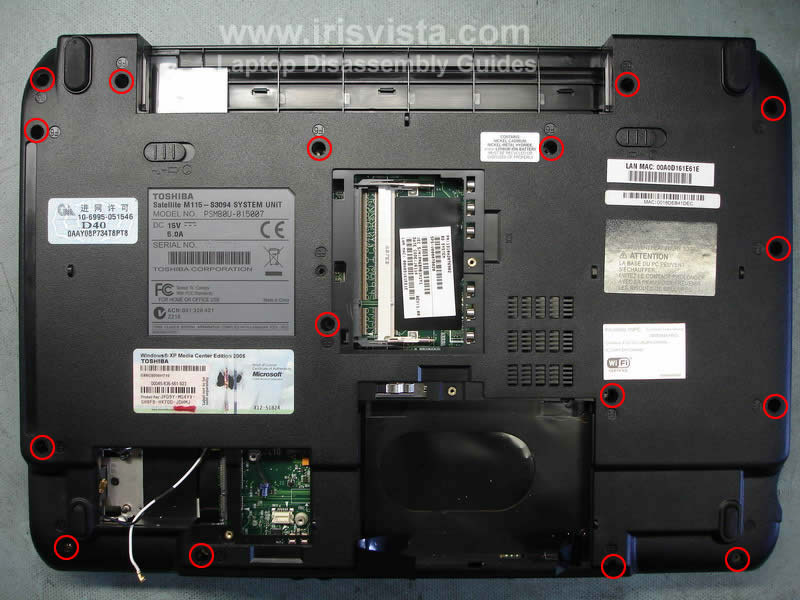
Remove all screws from the bottom case. |
| |
|
 |
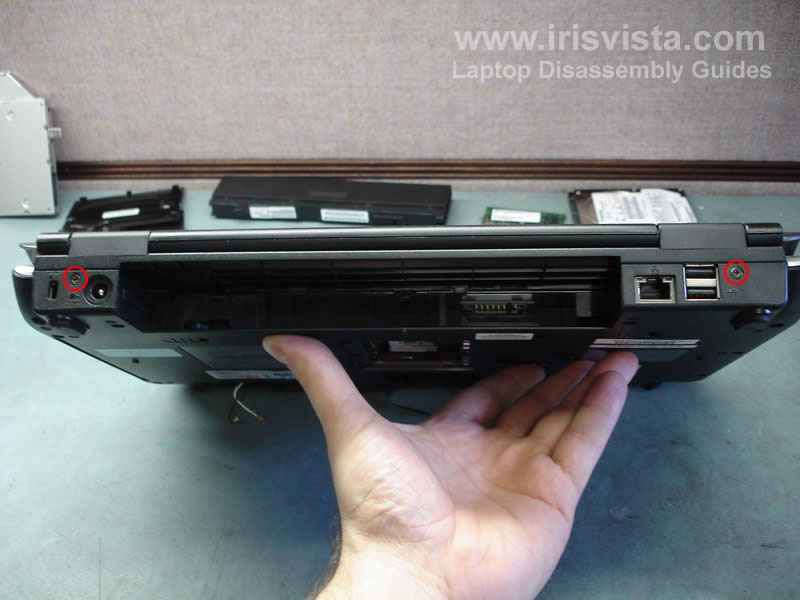
STEP 6
Remove two screws from the back of the laptop. These screws secure the display assembly hinges to the laptop base. |
| |
|
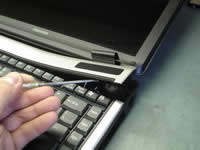 |
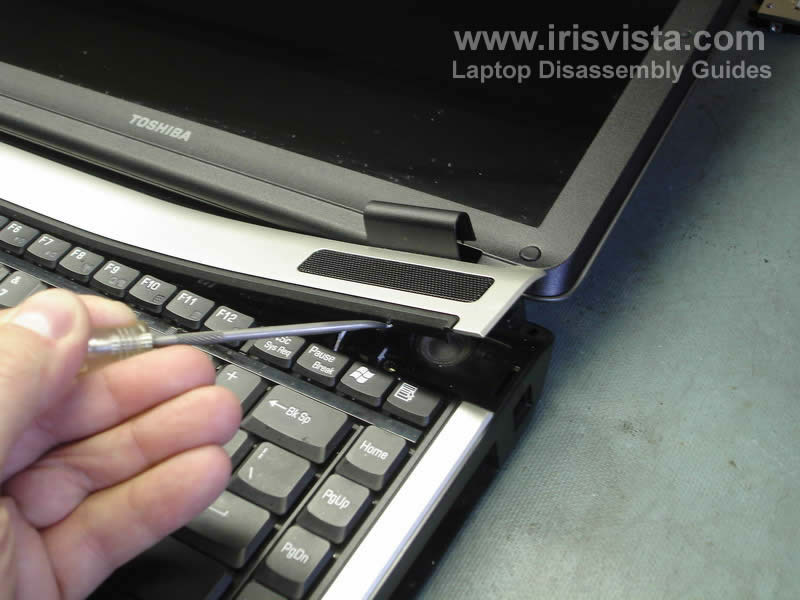
STEP 7
Lift up one side of the keyboard cover with a flathead screwdriver and start removing it with your fingers. |
| |
|
 |
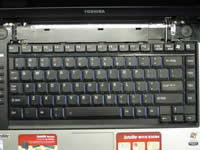
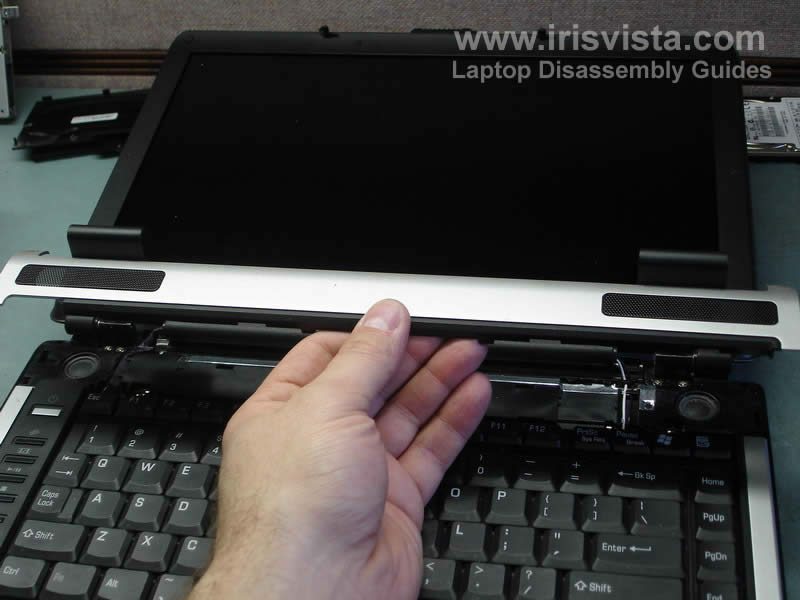
STEP 8
After all latches are unlocked you can remove the keyboard cover. |
| |
|
 |
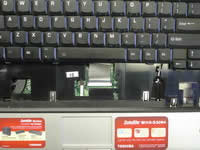
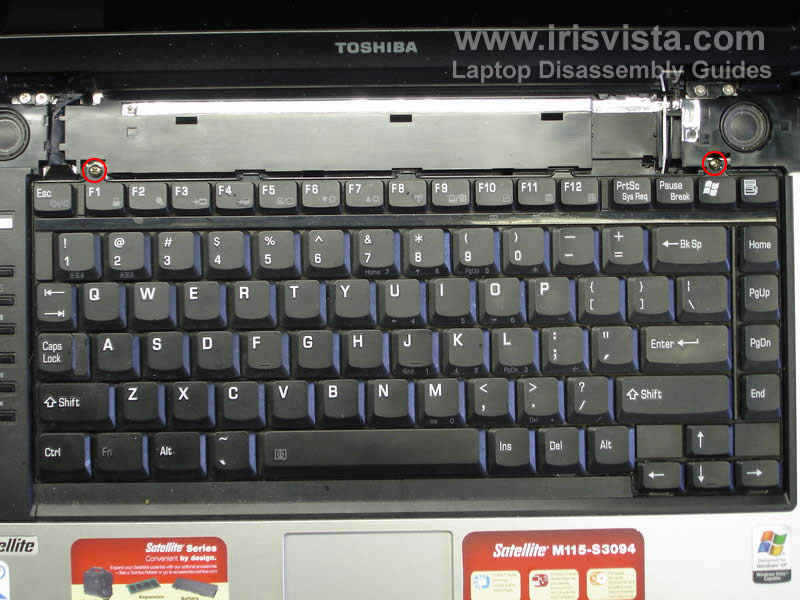
STEP 9
The keyboard is secured to the laptop with two screws. Remove them. |
| |
|
 |
STEP 10
Lift up the keyboard so you can access the connector located under the keyboard.
Unlock the keyboard cable connector on the motherboard and pull the cable. Remove the keyboard. |
| |
|
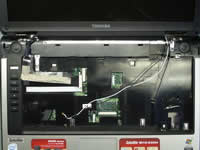 |
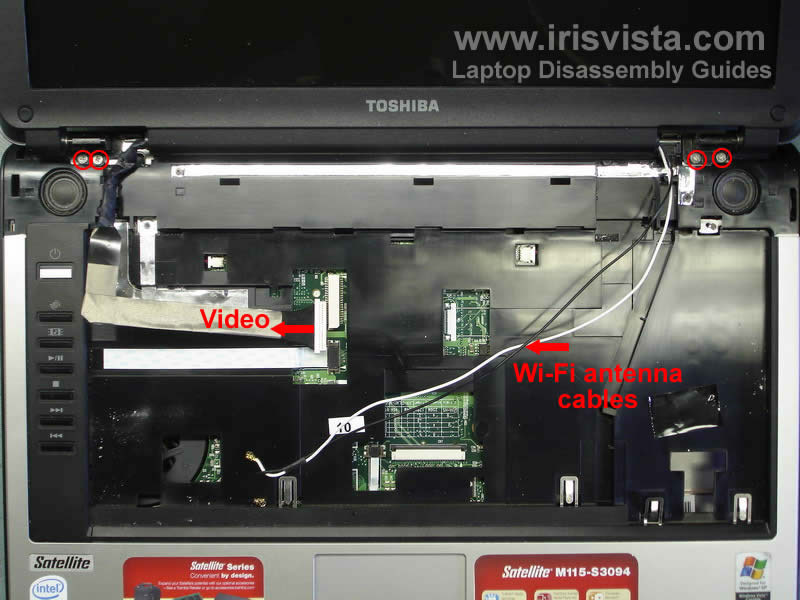
STEP 11
Pull both wireless antenna cables through the hole in the top cover.
Pull the video cable from the connector on the motherboard.
Remove four screws securing both hinges. |
| |
|
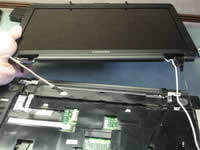 |
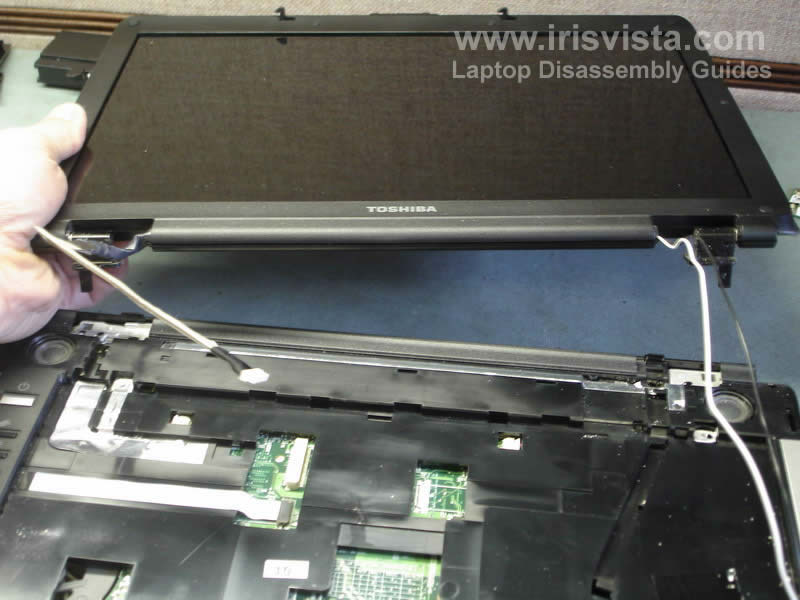
STEP 12
Now you can lift up and remove the LCD panel. |
| |
|
 |
STEP 13
Unplug the power switch board cable from the motherboard (upper arrow).
Unplug the touch pad cable from the motherboard. |
| |
|
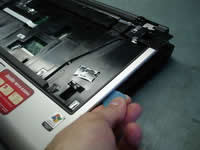 |
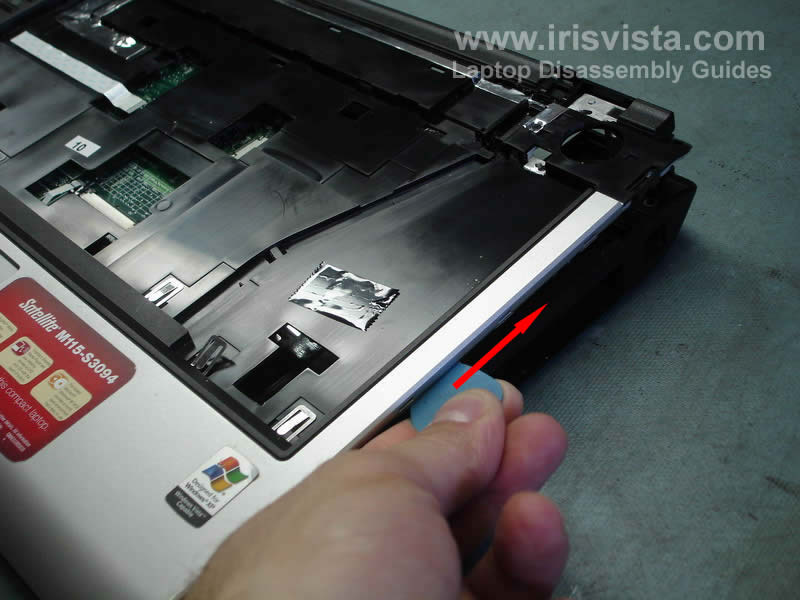
STEP 14
To separate the top cover from the base cover you can use a guitar pick.
Insert the guitar pick between covers and slowly move it alone the edge until all latches are unlocked. |
| |
|
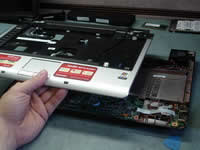 |
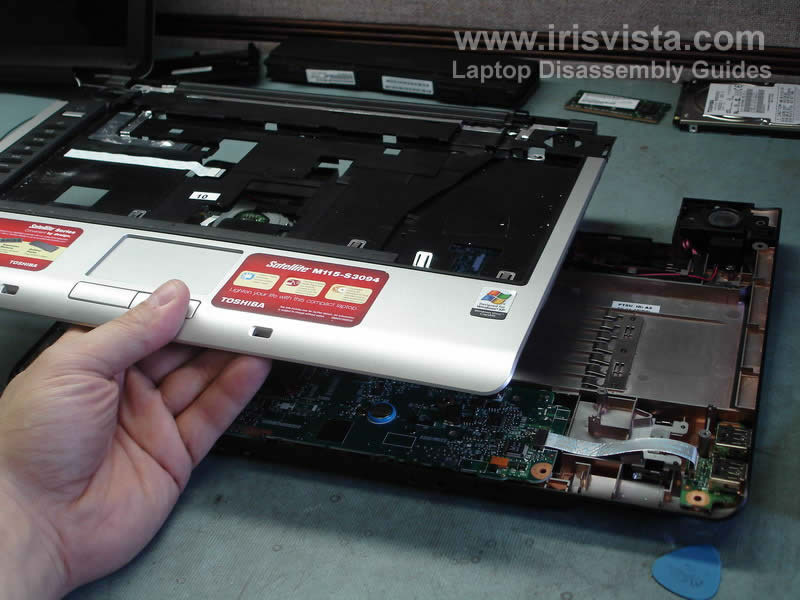
STEP 15
Lift up and remove the top cover assembly. |
| |
|
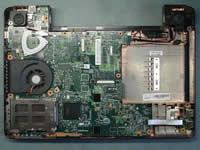 |
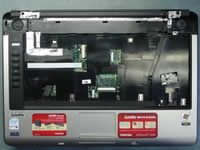
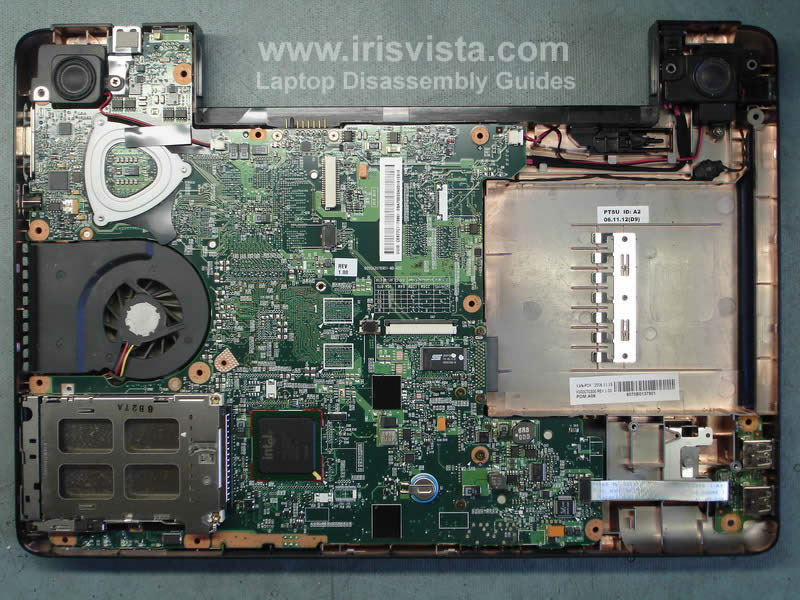
STEP 16
The top cover assembly is removed.
Take a look at this guid for motherboard removal instrucitons. |
| |
|
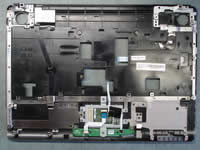 |
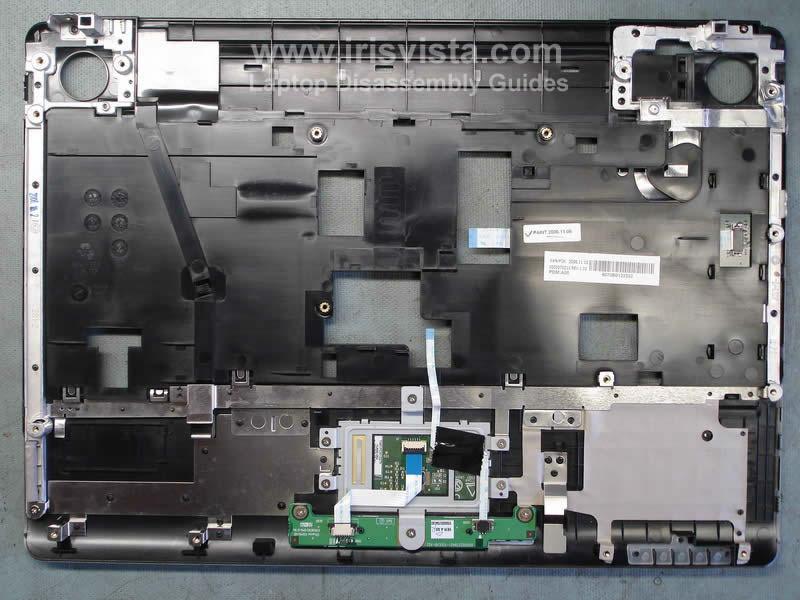
STEP 17
Here's a view on the opposite side of the top cover assembly.
In the next guide I explain how to remove the screen. |
| |
|
|
|


